Table of Contents >> Show >> Hide
- What You’ll Make
- Before You Pour: A 5-Minute Setup That Saves Your Sanity
- 1) Botanical “Frozen Garden” Coasters
- 2) Geode Coasters That Look Like Rock Candy
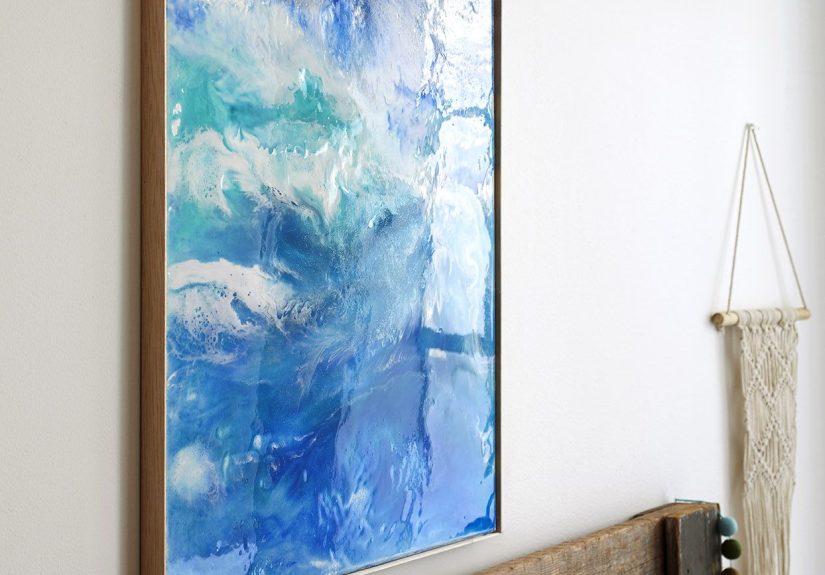
- 3) Ocean-Wave Wall Art (Yes, the Foamy Kind)
- 4) Personalized Letter Keychains (Gift Gold)
- 5) Dried-Flower Jewelry That Never Wilts
- 6) Bookmarks So Pretty You’ll “Accidentally” Read More
- 7) Photo Keepsake Paperweights (Tiny Time Capsules)
- 8) Terrazzo-Style Trinket Trays
- 9) Agate-Inspired Bookends
- 10) Resin Hair Clips With Main-Character Energy
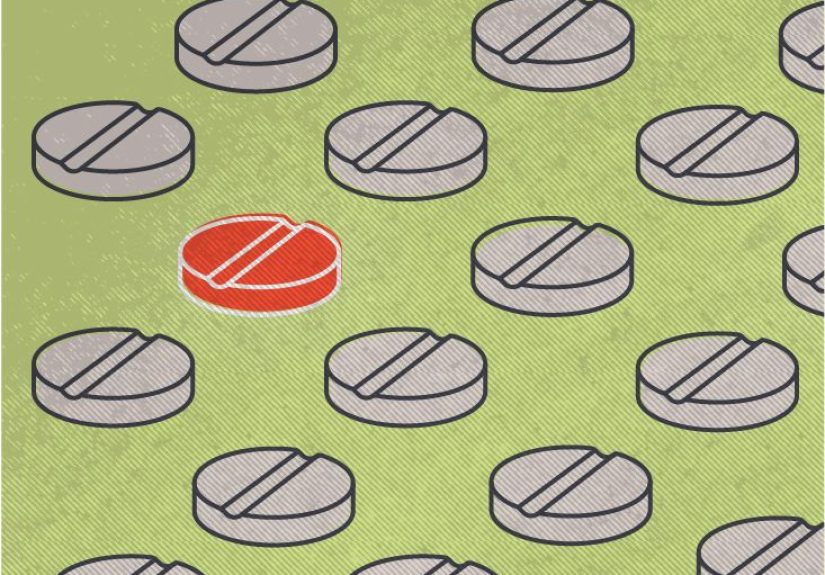
- 11) Custom Dice That Make Game Night Jealous
- 12) Resin-Shined Drawer Pulls & Knobs
- 13) Mini “River” Boards (Wood + Resin = Drama)
- 14) Embedded Nature Blocks (The Fancy Cube)
- 15) Confetti-In-Resin Napkin Rings
- Bubble-Free, Glassy Results: Quick Troubleshooting
- Conclusion
- Extended Maker Notes: The “Experience” Part People Don’t Put on the Supply List (Extra )
- SEO Tags
If you’ve ever seen a glossy resin coaster and thought, “Sure… a wizard made that,” welcome to your new favorite rabbit hole.
Resin crafts look outrageously expensive, but most of them are totally DIY-able with a few supplies, a little patience,
and the willingness to accept that your first pour might look like a science fair volcano (character-building!).
In this guide, you’ll find 15 homemade resin crafts that range from “beginner-friendly weekend win” to
“wait, you made that in your kitchen?”plus practical tips for cleaner pours, fewer bubbles, and that glassy, boutique finish.
We’ll cover epoxy resin crafts, quick UV resin projects, embedding tricks, and ways to make your pieces look
professionally polished without needing a professional-anything.
Before You Pour: A 5-Minute Setup That Saves Your Sanity
Resin is forgiving… until dust, tilt, or impatience walks into the room wearing muddy shoes. A tiny bit of prep turns
“sticky tragedy” into “how is this homemade?”
Set up your space (so resin behaves)
- Cover everything: Table, floor, and your optimism. Use plastic sheeting or a silicone mat.
- Level matters: If your surface is tilted, your coaster becomes a resin ski slope.
- Keep it calm: A clean, low-dust spot with a stable room temperature helps the cure look smoother.
- Plan a dust cover: A big plastic tub or box flipped upside down keeps lint from landing in your fresh pour like it pays rent.
Safety basics you shouldn’t skip
Resin is a chemical reaction, not a scented candle. Wear gloves, protect your eyes, and work with solid ventilation.
Sensitization (allergic reaction) is real, and it’s not a fun hobby upgrade.
- Nitrile gloves, eye protection, and clothes you don’t love.
- Ventilation: open windows, fan moving air out, or work in a garage with airflow.
- If you sand cured resin, use a dust mask/respirator and keep dust under control.
Resin types in one sentence each
- Epoxy resin: Great clarity and finish; usually a longer cure; ideal for molds and coating.
- UV resin: Cures fast under UV light; awesome for small pieces and quick layers.
- Deep pour epoxy: Designed for thicker casts; useful when you’re making chunky blocks or “river” effects.
1) Botanical “Frozen Garden” Coasters
Pressed flowers in resin are basically nature’s way of saying, “I can be fancy too.” These are beginner-friendly and
make ridiculously good giftsespecially if you match the flowers to someone’s wedding bouquet or favorite color palette.
Make it look pro
- Use fully dried flowers (moisture is resin’s sworn enemy).
- Pour in two layers: a thin base to “park” the flowers, then a top coat for a smooth finish.
- Finish with felt pads so your coasters don’t sound like tap shoes on a coffee table.
2) Geode Coasters That Look Like Rock Candy
Geode coasters are the craft equivalent of a mic drop: bold edges, sparkly center, and colors that blend like
they had a team meeting first. You’ll tint resin in a few shades and pour in rings so they swirl naturally.
Design trick
Build drama with contrast: one dark color, one light, one metallic, and one “clear with shimmer.” Then
lightly hit the surface with warm air to encourage blending and release bubbles.
3) Ocean-Wave Wall Art (Yes, the Foamy Kind)
This is for anyone who wants beach vibes without the sand in their shoes. Layer clear, blues, and white resin in sweeping bands
and use gentle heat to tease out that wavey gradient. The “foam” effect comes from thin white layers pulled across the surface.
Best-use example
A large canvas in ocean colors looks expensive over a bed, in an entryway, or anywhere you want guests to say,
“Where did you buy that?” and you get to say, “Oh this? I made it.” (Pause for reaction.)
4) Personalized Letter Keychains (Gift Gold)
Resin letter molds were invented specifically for last-minute gifting. You can personalize with glitter, tiny confetti,
alcohol ink swirls, mini shells, or a single dried bloom for a clean minimalist vibe.
Hardware tip
Drill a tiny hole after curing (or use a built-in hole mold), then attach a jump ring and keychain clasp.
It’s five minutes of work for a “custom boutique” result.
5) Dried-Flower Jewelry That Never Wilts
Pendants and earrings are resin’s natural habitat. Use bezels (metal frames) for a polished look or silicone molds for easy shapes.
The magic is in the layering: a base pour, place your flower, then cap it so the top is smooth.
Style ideas
- Minimal: one pressed petal, clear resin, gold bezel.
- Maximal: glitter base + tiny blooms + metallic flakes (sparkle responsibly).
- Modern: terrazzo speckles in a geometric mold.
6) Bookmarks So Pretty You’ll “Accidentally” Read More
Thin resin bookmarks are a crowd-pleaser because they feel like a luxury item but take surprisingly little material.
Use long, narrow molds and keep embellishments flat (pressed flowers, foil, or confetti) so the bookmark still slides between pages.
Finishing move
Add a tassel or ribbon through a small holesuddenly it’s “gift-shop chic,” and nobody needs to know it cured next to your cereal boxes.
7) Photo Keepsake Paperweights (Tiny Time Capsules)
Resin can preserve photos in a way that feels more modern than a frame. The key is to seal the photo first
(so ink doesn’t bleed or bubble) and then embed it under a clear top layer.
Where it shines
Great for desk setups, memorial keepsakes, or “here’s the dog you should’ve met earlier” moments.
Keep the edges crisp by sanding lightly after curing, then sealing with a thin final coat.
8) Terrazzo-Style Trinket Trays
Terrazzo is basically “artfully scattered crumbs,” but in a sophisticated way. Mix tiny chips of cured colored resin
into a clear or tinted pour. When it cures, you’ll get that iconic speckled stone lookwithout the stone budget.
Upgrade option
Add metallic flakes in one corner only. It looks intentional, modern, and suspiciously expensive.
9) Agate-Inspired Bookends
Bookends are secretly the perfect resin flex: functional, heavy enough to feel “real,” and visually dramatic.
You can pour into thick molds, add swirly pigments, and finish edges with metallic paint for that gemstone slice look.
Placement strategy
Put them on a shelf with neutral books and one bold object. Your shelf will look curated even if your life is not.
10) Resin Hair Clips With Main-Character Energy
Hair clips are small, fast, and shockingly satisfying. Pour into barrette molds, embed glitter or foil, then attach
clip hardware with a strong craft adhesive once fully cured.
Design ideas
- Clear with gold flakes for a “rich aunt” vibe.
- Opaque pastel with tiny daisies for spring.
- Black base with holographic flecks for night-out sparkle.
11) Custom Dice That Make Game Night Jealous
Resin dice are a whole subculture for a reason: they’re small sculptures you can roll. Use silicone dice molds,
pour in tinted resin, and take your time. Clear dice need extra bubble control, but the payoff is enormous.
Bubble control without tears
- Mix slowly to reduce whipping air into the resin.
- Warm the bottles slightly (never overheat) so the resin flows and releases bubbles more easily.
- Pour in a thin stream and let the resin “climb” into corners.
12) Resin-Shined Drawer Pulls & Knobs
Want a high-impact upgrade that doesn’t require power tools or emotional stability? Add resin to the recessed top of knobs,
or dome a flat pull with a tinted pour. It’s like giving your furniture a tiny glass crown.
Pro tip
Tape off any areas you don’t want resin to touch, and check level twice. A tilted knob dome looks like it’s meltingunless that’s the vibe.
13) Mini “River” Boards (Wood + Resin = Drama)
The river-table look can be scaled down into a small board or decorative slab. Use a piece of wood with a natural split,
tape and seal the underside carefully, then pour tinted resin into the “river” channel.
Reality check (in a friendly way)
If you plan to use it for food, verify the resin’s intended use and curing requirements with the manufacturer.
Otherwise, keep it decorative or use it as a serving board with food on plates or parchment.
14) Embedded Nature Blocks (The Fancy Cube)
Clear resin blocks with embedded florals, leaves, shells, or faux greenery look like museum shop decor.
Use a deep mold, pour in stages, and place items strategically so they don’t float to the top like they’re trying to escape.
Design idea
A single fern frond in a tall rectangular block looks minimalist and high-endlike a sculpture that also moonlights as a paperweight.
15) Confetti-In-Resin Napkin Rings
Napkin rings are where “extra” becomes “festive.” Fill small molds with sprinkles, glitter, or micro-confetti and top with resin.
They’re perfect for birthdays, weddings, holidays, or any dinner party where you want the table to look like it has a publicist.
Best part
They’re tiny, so cure times feel faster, and you get a big visual payoff with minimal material.
Bubble-Free, Glassy Results: Quick Troubleshooting
Problem: Bubbles everywhere
Mix more slowly, scrape the sides and bottom thoroughly, and let the cup sit for a minute before pouring.
A gentle pass of warm air over the surface helps pop top bubblesjust don’t scorch the resin or your mold.
Problem: Sticky spots
Sticky resin is usually an off-ratio mix or incomplete mixing. Measure carefully, mix longer than you think you need to,
and don’t “eyeball it” unless you enjoy chaos.
Problem: Dust nibs and lint freckles
Cover your piece while it cures. Resin is basically a lint magnet with a glow-up. A simple upside-down tub or box can save your finish.
Problem: Cloudy or yellowed look
Use a resin known for clarity and UV resistance, keep pigments compatible, and avoid overheating the mixture.
Also, store finished pieces out of direct sun when possible.
Extended Maker Notes: The “Experience” Part People Don’t Put on the Supply List (Extra )
Here’s the honest truth about resin crafts: the supplies are easy to buy, but the learning curve is sneaky. It’s not hardjust specific.
The first “aha” moment most makers have is that resin rewards calm energy. If you’re rushing, your resin will absolutely sense it
and respond by producing bubbles like it’s auditioning for a soda commercial.
One of the most common experience-based lessons is the difference between “mixed” and “mixed enough.”
Plenty of projects fail not because the ratio was wrong, but because the stirring was lazy. The sides and bottom of the cup are where
unmixed resin likes to hide, like a toddler avoiding bedtime. Scrape, stir, pause, scrape again. Then stir a little more.
You’ll feel dramatic. You’ll also be right.
Next: dust. You think your workspace is clean until resin proves you wrong. Suddenly you’re seeing microscopic lint you’ve never met before.
The experience hack is a simple coveran upside-down tote or box that becomes your “curing dome.” It’s low-tech, cheap, and shockingly effective.
Bonus points if you stop pets from “helping.” Cats in particular treat curing resin like a VIP lounge.
Then there’s the timing game. Resin has a “sweet spot” during curing when it’s flexiblegreat for trimming thin flash edges or correcting
a tiny overflow. Wait too long and you’re sanding for what feels like the length of a historical novel. Wait too early and you’ll fingerprint
the surface and invent new words. Most makers get good by doing small projects repeatedly: keychains, mini trays, bookmarks. Repetition trains
your timing instincts faster than any tutorial.
Pigments teach another lesson: more color isn’t always better. Too much pigment can affect curing, clarity, and the final look.
The experience move is to build color slowly. Add a drop, mix, check, then add more if you need it. This is especially true with opaque whites
used for “wave” effectswhite is powerful, like a spotlight. A tiny amount can dominate the whole pour.
And finally: finishing. The difference between “nice DIY” and “wait, you made this?” is often the last 10%.
Sanding edges smooth, adding felt pads to coasters, cleaning drips, polishing surfaces, and using quality hardwarethose are the little things
that scream “professional.” Makers with experience don’t necessarily pour better every time; they finish better every time.
If you take one experience-based rule with you, make it this: resin punishes shortcuts but rewards small habits.
Set up properly, measure carefully, cover while curing, and give yourself permission to learn. The glossy, bubble-free results come
usually right after you stop angrily staring at the cup like it owes you money.