Table of Contents >> Show >> Hide
- Before You Install a Hook: Know Your Wall and Your Hook
- Tools You May Need
- Method 1: Install a Hook Directly Into a Wall Stud
- Method 2: Install a Hook With a Drywall Anchor
- Method 3: Install an Adhesive Hook Without Drilling
- How to Choose the Best Method
- Common Mistakes to Avoid
- Final Thoughts
- Experience and Real-Life Lessons From Installing Wall Hooks
- SEO Tags
Note: This guide is for general home use. Always check the hook and anchor packaging for wall-type compatibility and weight limits before hanging anything heavier than basic décor.
Installing a hook in the wall sounds like one of those five-minute home projects that turns into a 45-minute scavenger hunt for a drill bit, a stud finder, and your patience. But the good news is that it does not have to be dramatic. Once you know what kind of wall you are working with and how much weight the hook needs to hold, the job becomes a lot more straightforward.
This guide breaks down three practical ways to install a hook in the wall: mounting directly into a stud, using a drywall anchor, or sticking up an adhesive hook when you do not want to drill at all. Each method has its own sweet spot. One is strongest, one is most versatile, and one is perfect for renters or commitment-phobes who are not emotionally prepared to make a hole in their wall.
If you have ever wondered how to hang a coat hook, plant hook, key hook, or decorative wall hook without making a mess of your drywall, you are in the right place. Below, you will find step-by-step instructions, tips for choosing the right hardware, and real-world advice on what usually goes wrong and how to avoid it.
Before You Install a Hook: Know Your Wall and Your Hook
Before you grab a drill and start channeling your inner contractor, pause for a second. The right installation method depends on two things: the wall material and the weight of the item.
Common wall situations
Most interior walls in American homes are drywall over wood studs. That means you may be drilling into hollow drywall, or you may be able to fasten into a stud hidden behind it. The difference matters. A screw driven into a stud has solid wood backing. A screw driven into plain drywall does not. That is why drywall anchors exist in the first place.
Questions to ask before you start
- Is the hook just for something light, like keys or a small wreath?
- Will it hold medium-weight items, such as a bag, towel, or framed décor?
- Is it supporting something heavier, like a large mirror, loaded coat hook, or wall organizer?
- Do you want a permanent installation, or would you rather avoid drilling?
As a general rule, the safest option for heavier loads is fastening into framing. When that is not possible, the next best move is using the correct wall anchor for drywall. Adhesive hooks are handy, but they are best for light-duty jobs on suitable, smooth surfaces.
Tools You May Need
- Hook and screws or included hardware
- Drill or screwdriver
- Stud finder
- Pencil
- Tape measure
- Level
- Drywall anchors, if needed
- Drill bits or driver bits
- Rubbing alcohol and a clean cloth for adhesive hooks
Not every method requires every tool, but having them nearby saves you from the classic home-improvement cardio workout known as “walking back and forth to the garage.”
Method 1: Install a Hook Directly Into a Wall Stud
If you want the strongest and most secure installation, this is the gold-standard approach. A wall stud gives the screw solid wood to bite into, which is why this method is ideal for hooks that may hold coats, bags, heavier décor, or anything you do not want crashing to the floor at 2 a.m.
When to use this method
- For heavier-duty wall hooks
- For entryway coat hooks or utility hooks
- When the hook location lines up with a stud
- When you want long-term holding strength
How to do it
- Find the stud. Use a stud finder and mark both edges if possible. The center of the stud is your target.
- Mark the hook location. Hold the hook against the wall, use a level if needed, and mark the screw hole positions with a pencil.
- Drill a pilot hole. Use a bit slightly smaller than the screw diameter. This helps prevent splitting the stud and makes driving the screw easier.
- Attach the hook. Line up the hook and drive the screw into the pilot hole until snug.
- Test it gently. Give it a light tug before loading it up with anything heavy.
Why this works so well
Wood framing provides structural support that drywall alone simply cannot match. If you are hanging something that will be used every day, such as a wall-mounted hook for backpacks, robes, or jackets, mounting into a stud is usually the smartest choice.
Best tip for success
Do not over-tighten the screw. You want it secure, not aggressively buried like it owes you money. Over-tightening can strip the hole or distort the hook plate.
Method 2: Install a Hook With a Drywall Anchor
This is the method most homeowners end up using, because life does not always arrange wall studs exactly where your décor vision wants them. When the hook needs to go between studs, a drywall anchor gives the screw something to grip so the wall can handle more than a bare screw alone.
When to use this method
- When there is no stud behind the desired location
- For medium-duty hooks and décor
- For towel hooks, key hooks, small shelves, and decorative hardware
- When the hook packaging specifies anchor use
Common drywall anchor types
There are a few popular styles, and each has its place:
- Plastic expansion anchors: Good for lighter-duty applications.
- Self-drilling threaded anchors: Convenient and easy to install in drywall.
- Toggle or hollow-wall anchors: Better for heavier medium-duty loads when installed correctly.
The right choice depends on what you are hanging and what the manufacturer says the anchor can support. This is not the moment to freestyle.
How to do it
- Mark the location. Use a pencil to mark where the hook will go.
- Drill a pilot hole if required. Many anchors need one. Self-drilling anchors often do not.
- Insert the anchor. Tap in a plastic anchor gently or screw in a threaded anchor until it sits flush with the wall.
- Position the hook. Line up the hook over the anchor.
- Drive the screw. Tighten until the hook feels secure, but stop before crushing the drywall or stripping the anchor.
- Check stability. Tug lightly before hanging the final item.
What people get wrong
The biggest mistake is choosing an anchor that is too weak for the job. The second biggest mistake is making the hole too large. Once the hole is oversized, the anchor may spin, loosen, or hold about as confidently as a folding chair on ice.
Best uses for this method
This is often the best way to install a hook for wall art, small hanging baskets, decorative metal hooks, hand towels, or lightweight organizers. It gives you more freedom with placement and works well when you want the hook exactly where it looks best, not wherever the stud happens to be hiding.
Method 3: Install an Adhesive Hook Without Drilling
Sometimes the best drill is no drill at all. Adhesive wall hooks are great for renters, dorm rooms, tiled surfaces, painted walls in good condition, and anyone who wants a simpler, less permanent option. They are especially useful for light items and places where making holes would be inconvenient or not allowed.
When to use this method
- For light-duty hanging needs
- For seasonal décor, keys, lightweight kitchen tools, or small bathroom items
- When you want a removable hook
- When drilling is not practical
How to do it
- Choose the right surface. Adhesive hooks work best on smooth, clean, finished surfaces.
- Clean the wall. Wipe the area with rubbing alcohol and let it dry fully. Skip household cleaners, which can leave residue behind.
- Apply the adhesive strip. Follow the manufacturer’s instructions exactly.
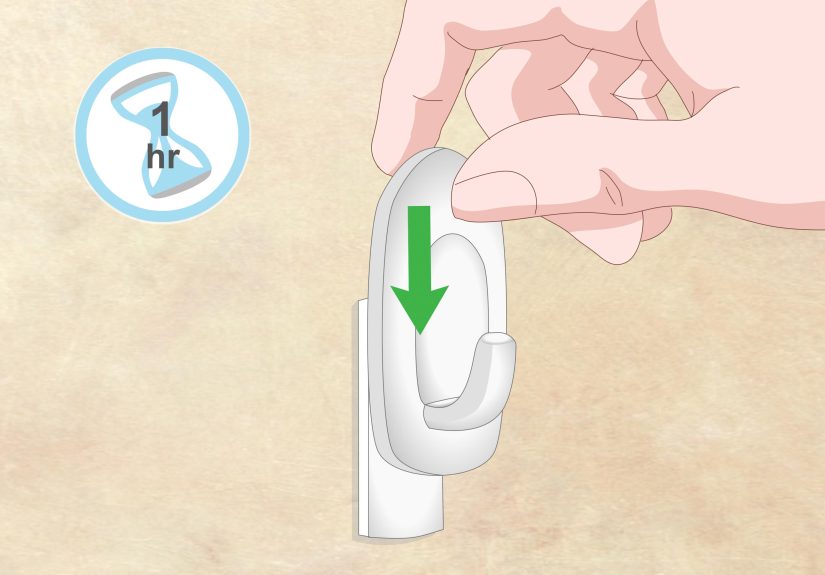
- Press firmly. Hold the hook in place for the recommended amount of time.
- Wait before hanging. Give the adhesive time to bond before putting weight on it.
- Hang only what it is rated to hold. No cheating. Your wall knows.
Pros and cons
The biggest advantage is convenience. No tools, no dust, no patching later. The biggest downside is limited holding power and stricter surface requirements. If the wall is textured, dirty, freshly painted, humid, or uneven, adhesive hooks may not perform as expected.
Removal tip
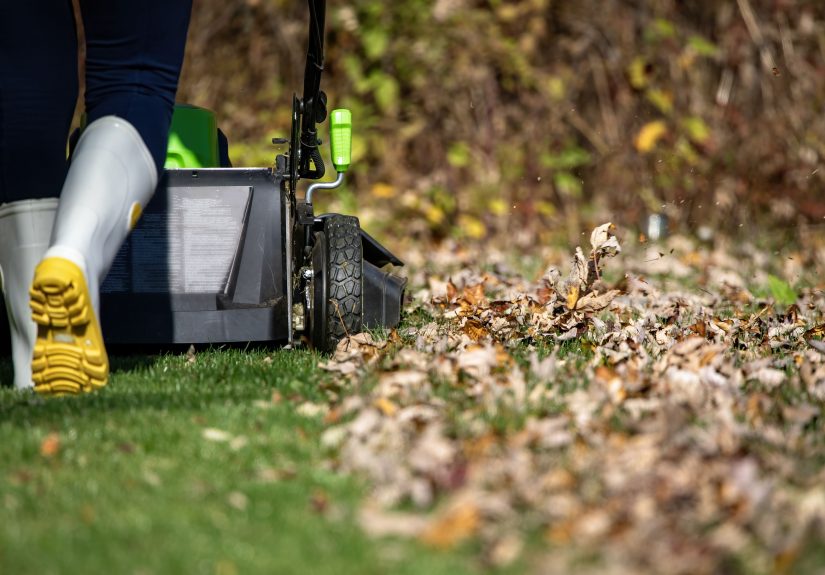
When removing an adhesive hook, do not yank it outward like you are starting a lawn mower. Most removable systems are designed to release when the strip is stretched straight down slowly. That technique matters.
How to Choose the Best Method
If you are still deciding which approach to use, here is the easiest way to think about it:
Choose stud mounting if:
- You need the strongest installation
- The hook will hold weight regularly
- You found a stud where you want the hook
Choose a drywall anchor if:
- You cannot hit a stud
- The item is too heavy for adhesive
- You want a clean, secure, standard wall-hook installation
Choose an adhesive hook if:
- The item is light
- You want to avoid drilling
- You need a removable solution
Common Mistakes to Avoid
- Ignoring weight ratings: The hook and anchor both matter.
- Using drywall alone for heavier items: A bare screw in drywall is not a long-term plan.
- Skipping a pilot hole when needed: This can crack drywall or split wood.
- Making the pilot hole too big: That ruins anchor grip.
- Installing into damaged drywall: Weak wall material means weak holding power.
- Using adhesive on dirty or fresh paint: That is basically asking for gravity to get involved.
Final Thoughts
Learning how to install a hook in the wall is one of those small DIY skills that pays off over and over again. Once you understand the difference between mounting into a stud, using drywall anchors, and applying adhesive hooks, you can choose the right option without guesswork.
If the hook needs serious strength, go straight into a stud. If the perfect placement lands between studs, use the correct drywall anchor. If you just need a quick, renter-friendly fix for something light, adhesive hooks are a simple win. The real trick is matching the hardware to the job instead of hoping your wall will somehow “figure it out.” Walls are supportive, but not that supportive.
Experience and Real-Life Lessons From Installing Wall Hooks
The funny thing about wall hooks is that they look small and harmless in the package, but they have a way of exposing every bad assumption you have ever made about your walls. Many people start with total confidence. You pick a nice spot, hold up the hook, squint at it artistically, and think, “This will take two minutes.” Then the screw spins, the anchor slips, or the adhesive hook gives up in the middle of the night and drops your wreath with the drama of a haunted house soundtrack.
One of the most common real-life experiences is discovering that the best-looking spot is not always the best structural spot. You may want a hook centered perfectly in a hallway or lined up beautifully in an entryway, but if that location lands away from a stud, you have to switch strategies. That is where people usually learn the difference between a decorative plan and an installation plan. They are not always the same thing, and your wall does not care about symmetry as much as you do.
Another lesson homeowners learn quickly is that drywall is more delicate than it seems. It looks solid, but a screw pushed into bare drywall without proper support is often just a temporary arrangement between you and disappointment. A lot of DIY frustration comes from using the wrong anchor or rushing through the setup. The better experience usually happens when people slow down, read the packaging, and use the exact drill bit or screw size recommended. Boring advice? Yes. Helpful advice? Also yes.
Adhesive hooks come with their own life lessons. People love them because they seem wonderfully easy, and to be fair, they often are. But they are also a little like baking: if you skip one small instruction, the result can get weird fast. Not cleaning the wall properly, sticking them to dusty paint, or loading them too soon can turn a convenient no-drill solution into a sudden floor event. The people who have the best results are usually the ones who actually wait the full recommended bonding time instead of saying, “Eh, ten minutes is basically an hour.” It is not.
There is also a practical design lesson hidden inside this project. Hooks are not just hardware; they shape how a room works. A single well-placed wall hook near the front door can keep bags off the floor. A row of hooks in a mudroom can make a family look dramatically more organized than it really is. A hook in the kitchen can free up drawer space. A hook beside a vanity can keep jewelry or towels accessible. In other words, a five-dollar piece of hardware can quietly improve the rhythm of daily life, which is pretty impressive for something made of metal and attitude.
Over time, many DIYers also get better at judging when a project is simple and when it deserves a bit more caution. Hanging a lightweight key hook on drywall with the right anchor is one thing. Mounting a loaded coat rack or utility hook is another. Experience teaches you that wall hardware is not the place for wishful thinking. If something will be tugged, bumped, overloaded, or used by children who treat every hanging object like gym equipment, stronger backing is the smarter move.
In the end, installing a hook in the wall becomes easier every time you do it. The first one may involve hesitation, a few extra pencil marks, and some light muttering. The second goes faster. By the third, you start feeling suspiciously competent. That is the beauty of small DIY jobs: they build confidence in a very practical way. And once you know what you are doing, you stop seeing wall hooks as tiny chores and start seeing them as easy upgrades that make a home more useful, more organized, and a little less chaotic.