Table of Contents >> Show >> Hide
- Before You Start: The “Not-All-Bookmarks-Are-The-Same-Size” Truth
- Quick Supply List (Mix-and-Match)
- Way #1: The Origami Corner Bookmark (No Glue, All Attitude)
- Way #2: The Sturdy Layered Cardstock Bookmark (With Ribbon or Tassel Upgrade)
- Way #3: The Crayon-Resist Watercolor Bookmark (Messy in the Best Way)
- FAQ: Paper Bookmark Questions People Actually Ask
- Conclusion
- Extra: Real-Life Bookmark Experiences (About )
You could fold down the corner of your page… and somewhere, a librarian would feel a disturbance in the Force.
The good news: making paper bookmarks is ridiculously easy, surprisingly satisfying, and a solid excuse to use
all those “I’ll craft someday” supplies you definitely didn’t buy at 11:47 p.m. online.
In this guide, you’ll learn three practical, good-looking ways to make paper bookmarksfrom a
no-glue origami corner bookmark to a sturdy laminated-style cardstock bookmark, plus a colorful crayon-resist
watercolor option that looks like you paid money at a fancy stationery shop. Each method includes clear steps,
customization ideas, and the little “oops-prevention” tips that save your sanity.
Before You Start: The “Not-All-Bookmarks-Are-The-Same-Size” Truth
A bookmark should be tall enough to peek out of your book without flopping around like a sad noodle.
Most DIY paper bookmarks land nicely in the neighborhood of 2–2.5 inches wide and
5–7 inches long. If you’re making bookmarks for kids, go a hair wider so little hands can grab it.
If you’re making bookmarks for a planner or textbook, go longer so it doesn’t vanish into the void.
Quick Supply List (Mix-and-Match)
- Paper: origami paper, construction paper, scrapbook paper, cardstock, or even a page from an old magazine
- Scissors (safety scissors for kids)
- Glue stick or craft glue (for non-origami methods)
- Markers, colored pencils, crayons
- Watercolors + brush (optional, but fun)
- Hole punch + ribbon, yarn, or embroidery floss (optional “fancy top” upgrade)
- Clear packing tape or laminating sheets (optional durability boost)
Way #1: The Origami Corner Bookmark (No Glue, All Attitude)
This is the classic origami corner bookmarka tidy little pocket that hugs the corner of your page.
It’s quick, it’s practical, and it makes you look like you know things about geometry.
Best for
- Readers who hate bulky bookmarks
- Classrooms and craft time (minimal supplies)
- Giftsbecause tiny paper crafts somehow feel thoughtful
Materials
- 1 square sheet of paper (try 6″ x 6″ to start)
- Optional: stickers, markers, googly eyes (yes, really)
Step-by-step
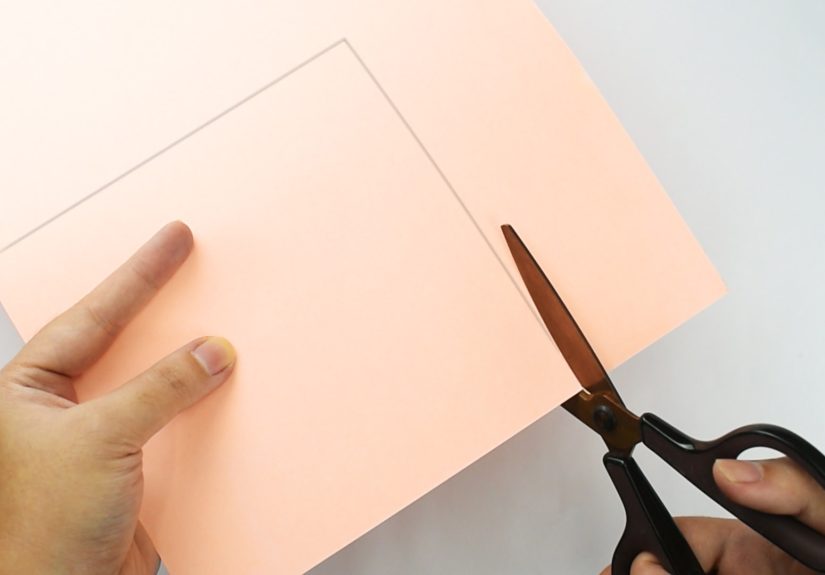
- Start with a square. If your paper is rectangular, trim it into a perfect square.
- Fold diagonally to make a triangle. Crease well.
- Fold the two bottom corners up so they meet the top point. You’ll get a diamond/square shape.
- Fold one flap down (the top layer only) to create the pocket opening.
- Tuck the side corners into the pocket. This locks the shape. Press the creases firmly.
- Test-fit it on a page corner. If it slides off, your tucks aren’t deep enoughredo the last step tighter.
Make it fun (without making it bulky)
- Animal faces: Add ears, teeth, or a little tongue peeking out. Monsters are forgiving if you mess up. Monsters love mistakes.
- Book-theme designs: Turn it into a tiny “bookworm,” a coffee cup, or a slice of pizzabecause reading snacks are a lifestyle.
- Minimalist look: Use solid-color paper, then add one clean stripe or a small stamped icon.
Common mistakes (and how to avoid them)
- It won’t stay on the page: Use slightly thicker paper, and crease sharply. A ruler edge helps if you don’t have a bone folder.
- It looks lopsided: Start with a true square and line up corners carefully before creasing.
- It rips: Don’t overwork thin paper. Make the folds confidently and stop “fixing” it 97 times.
Way #2: The Sturdy Layered Cardstock Bookmark (With Ribbon or Tassel Upgrade)
If you want a durable homemade bookmark that feels store-bought, this is your move.
You’ll sandwich decorative paper between cardstock layers, then add a ribbon loop or a tassel.
It’s simple, but it reads as “I have my life together,” which is a powerful illusion.
Best for
- Teachers, students, and daily readers
- Gift toppers (slip one inside a book)
- Using up scrapbook paper, old book pages, or magazine art
Materials
- Cardstock (2 pieces) or one thick piece folded
- Decorative paper (scrapbook paper, magazine page, old map print, etc.)
- Glue stick or craft glue
- Scissors or paper trimmer
- Hole punch
- Ribbon, yarn, or embroidery floss
- Optional: clear packing tape or laminating sheets for extra durability
Step-by-step
- Cut your base. Start with roughly 2″ x 6″ (adjust to your book size).
- Decorate the center layer. Glue decorative paper onto one cardstock piece. Smooth it down so it doesn’t wrinkle.
- Sandwich it. Glue the second cardstock piece on the back, aligning edges carefully.
- Trim for clean edges. A tiny trim (like 1–2 mm) makes it look professionally finished.
- Punch a hole about 1/2″ from the top.
- Add ribbon or a tassel. Thread ribbon through the hole and loop-knot it (fold ribbon in half, pull ends through the loop).
Durability options (choose your level of “indestructible”)
- Budget “lamination”: Cover both sides with clear packing tape, leaving a small margin so tape can seal around edges. Trim neatly.
- Self-laminating sheets: Great if you want a glossy, sturdy finish without a machine.
- Laminator + pouch: Most durable and clean-looking if you’re making many bookmarks (like for a class or book club).
Tassel mini-guide (because tassels = instant fancy)
- Wrap embroidery floss around two fingers 20–35 times (more wraps = fuller tassel).
- Slide it off and tie a knot at the top, leaving a long tail.
- Wrap another piece of floss around the tassel “neck” and secure (a tiny dot of glue helps).
- Cut the bottom loops and trim straight.
- Thread the tail through the bookmark hole and knot it.
Design ideas that look high-effort (but aren’t)
- Window punch: Punch shapes out of the front layer so the decorative paper peeks through.
- Quote strip: Add a short reading quote near the bottom (keep it short so it stays readable).
- Theme packs: Make a matching setmystery (black/white), fantasy (stars), romance (hearts), nonfiction (maps).
Way #3: The Crayon-Resist Watercolor Bookmark (Messy in the Best Way)
This is the artsy one. You’ll draw with crayon (or colored pencil) and paint over it with watercolor.
The waxy crayon resists the paint, so your design pops through like magicexcept it’s just science.
Delicious, painty science.
Best for
- Kids crafts and rainy-day projects
- Personalized bookmarks with big color payoff
- Anyone who enjoys controlled chaos
Materials
- Construction paper or heavyweight paper (watercolor paper is great if you have it)
- Crayons (or colored pencils pressed firmly)
- Watercolor paints + brush
- Paper towel
- Hole punch + ribbon (optional)
Step-by-step
- Cut your bookmark. Try ~2.5″ x 6″ for a classic shape.
- Draw hard. Use crayon and press firmly to build a thick layer. Patterns work best: waves, stars, doodles, zigzags.
- Paint over it. Brush watercolor across the surface. Darker paint makes the resist effect more dramatic.
- Blot and reveal. Pat gently with a paper towel. Your crayon lines should stand out.
- Let it dry completely. Wet bookmarks are basically just sad paper noodles.
- Optional finishing touch: Punch a hole and add ribbon or yarn.
Pro tips for better results
- Use contrast: Light crayon + dark watercolor creates the biggest “wow.”
- Keep it flat: Paint lightly and let it dry on a flat surface to reduce curling.
- Upgrade the paper: Watercolor paper gives smoother paint and less warping.
Bonus variation: “Stained Glass” Wax Paper Bookmark (Adult help recommended)
Want something that glows when held up to light? Sprinkle crayon shavings between two sheets of wax paper and
melt them with low heat (an iron on the lowest setting worksuse a towel barrier and supervise kids).
Once cooled, trim into bookmark strips and add a ribbon loop. This version is colorful and surprisingly tough.
FAQ: Paper Bookmark Questions People Actually Ask
What paper is best for DIY bookmarks?
For everyday use, cardstock is the sweet spot: sturdy, easy to cut, and it doesn’t crumple instantly.
For origami bookmarks, use origami paper or any thin paper that folds cleanly.
For watercolor bookmarks, heavier paper helps prevent warping.
How do I make paper bookmarks last longer?
Use thicker paper, seal it with clear packing tape or self-laminating sheets, and avoid glopping on wet glue.
If you add ribbon, make sure the hole is far enough from the edge so it won’t tear.
Are paper bookmarks good gifts?
Absolutely. A handmade bookmark tucked into a book gift says, “I thought of you,” without requiring you to
knit a sweater. (No offense to sweaters. Sweaters are brave.)
Conclusion
If you can fold a napkin and operate scissors without drama, you can make paper bookmarks.
Start with the origami corner bookmark for quick wins, level up to a layered cardstock bookmark
when you want durability, and break out the paint for a crayon-resist watercolor bookmark that looks like art.
Your books stay pristine, your pages stay marked, and you get the smug satisfaction of saying, “Yeah, I made that.”
Extra: Real-Life Bookmark Experiences (About )
Here’s the funny thing about DIY paper bookmarks: you start out thinking you’ll make “one quick bookmark,” and
twenty minutes later you’re surrounded by paper scraps, ribbon bits, and a sudden, unreasonable confidence that you
could run a small stationery boutique. This is normal. Craft confidence is famously unlicensed.
If you’re making bookmarks with kids (or with adults who act like kids when glitter appears), the
origami corner bookmark is the best opener. It’s fast, it doesn’t require drying time, and it delivers that
immediate “I MADE A THING” dopamine hit. The most common speed bump is alignmentcorners drifting off-center and turning
the final pocket into a crooked little hat. The fix is boring but effective: slow down on the first fold, match corners
carefully, and crease like you mean it. A firm crease is basically the difference between “bookmark” and “mysterious paper
triangle that lives in your desk.”
The layered cardstock bookmark is where people discover the secret power of trimming. You can glue everything
perfectly and still end up with a bookmark that looks slightly… homemade (and not in the charming way). A tiny final trim
on all sides instantly makes it look crisp. Also: glue choice matters. Glue sticks are cleaner for flat coverage; liquid glue
is fine, but too much turns paper into a wrinkly swamp. If you’ve ever tried to smooth a bubble out of paper and accidentally
stretched it like pizza dough, you already understand.
Then there’s ribbon. Ribbon is adorable, but it’s also a sneaky chaos agent. If you punch the hole too close to the edge,
the ribbon will eventually tear throughusually right when you’re feeling proud of yourself. Keep the hole about a half inch
down, and if the paper is thin, reinforce the hole area with a small piece of clear tape before punching. It’s a tiny step
that saves the bookmark from a tragic early retirement.
The crayon-resist watercolor bookmark is the most “wow per minute,” but it comes with two classic surprises:
curling and over-painting. Paper curls when one side gets wetshocking, right? The easy workaround is to paint lightly,
let it dry flat, and if it still curls, place it under a heavy book overnight (the bookmark paying tribute to its elders).
Over-painting happens when excitement wins and you keep brushing until the crayon resist effect gets muddy. One confident
wash is better than twelve nervous ones.
Finally, the most underrated “experience tip” is to match the bookmark style to the reader. A student or textbook reader
benefits from sturdier laminated-style cardstock. A fiction reader who wants minimal bulk might love the corner bookmark.
A creative kid will happily paint twenty crayon-resist bookmarks and hand them out like business cards. And honestly?
That’s the point. Bookmarks aren’t just page holdersthey’re little signals that reading matters enough to accessorize.