Table of Contents >> Show >> Hide
- Why Recipes Ask You to Separate Eggs
- Before You Start: 5 Smart Prep Tips
- Method 1: Separate an Egg with the Shell Halves
- Method 2: Separate an Egg with Your Hands
- Method 3: Use an Egg Separator
- Method 4: Use a Slotted Spoon
- Which Egg-Separating Method Is Best?
- Common Mistakes When Separating Eggs
- What to Make with Separated Eggs
- Kitchen Experience Notes: What Separating Eggs Is Really Like
- Conclusion
If you bake even a little, sooner or later a recipe will look you dead in the eye and say, “Separate 4 eggs.” At that moment, many home cooks experience a brief internal crisis. Suddenly, one egg feels less like breakfast and more like a tiny, delicate chemistry experiment with feelings.
The good news: learning how to separate an egg is not hard. The even better news: there is more than one way to do it, so you can choose the method that matches your comfort level, your kitchen tools, and your tolerance for getting a little egg white on your fingers.
Whether you are making meringue, angel food cake, homemade mayonnaise, lemon curd, custard, chiffon cake, or a rich Hollandaise sauce, separating eggs is one of those basic kitchen skills that pays off forever. In this guide, you will learn four easy ways to separate an egg, how to avoid common mistakes, and which method works best for different recipes.
Why Recipes Ask You to Separate Eggs
Recipes usually call for separated eggs because the white and yolk do very different jobs. Egg whites are mostly protein and water, which makes them excellent for whipping into foam. That is why they are the star of meringues, soufflés, macarons, pavlovas, and angel food cake. Egg yolks, on the other hand, are rich in fat and emulsifiers, which makes them great for creamy sauces, custards, pastry cream, ice cream bases, and mayonnaise.
In plain English: whites bring lift, yolks bring richness. One is the aerobics instructor, the other is the butter-loving luxury consultant.
That is also why careful separation matters. If yolk gets into your whites, the fat can make it harder for them to whip to full volume. If you are making something airy and dramatic, like a cloud-like meringue, a little yolk contamination can throw off the whole show.
Before You Start: 5 Smart Prep Tips
1. Use cold eggs
Cold eggs are generally easier to separate because the yolks are firmer and less likely to break. If your recipe later needs room-temperature whites for whipping, you can separate them while cold and let the whites sit briefly afterward.
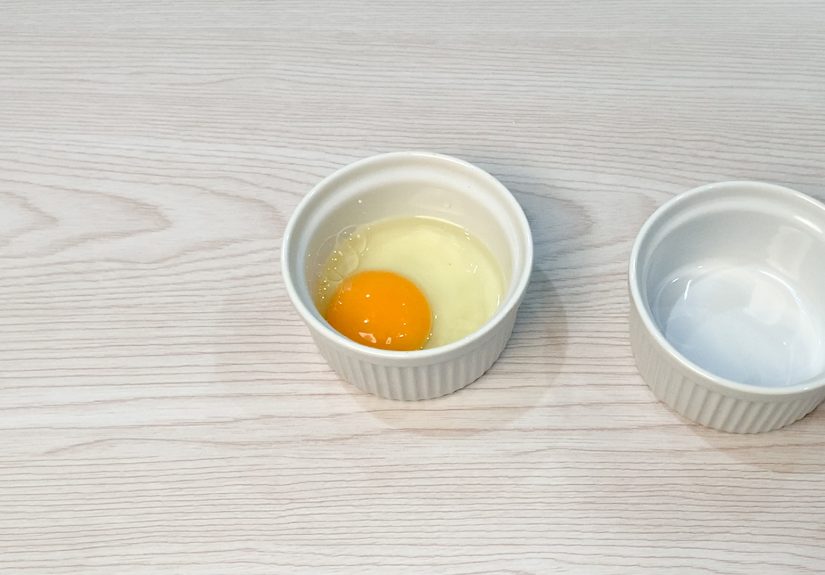
2. Set up three bowls, not two
This is the sneaky-smart move that saves bakers from heartbreak. Use one bowl for the egg you are currently separating, one for finished whites, and one for finished yolks. That way, if one yolk breaks, you only sacrifice a single egg instead of ruining a whole bowl of whites.
3. Crack on a flat surface
Tap the egg on the counter or a cutting board rather than the rim of a bowl. A flat surface tends to create a cleaner crack and helps reduce jagged shell bits. Fewer shell shards means fewer surprise treasure hunts in raw egg.
4. Keep everything clean
If you plan to whip the whites, make sure your bowl and tools are very clean and dry. Grease, butter, or stray yolk can interfere with whipping.
5. Decide whether safety or speed matters most
Shells and hands are common home-cook methods, but if you are especially concerned about hygiene, a dedicated egg separator can be a smart choice. And if the eggs will be served raw or lightly cooked, use pasteurized eggs or pasteurized egg products.
Method 1: Separate an Egg with the Shell Halves
This is the classic technique most people learn first. It is simple, effective, and requires no special tools beyond the egg and a little confidence.
How to do it
- Crack the egg on a flat surface.
- Hold the egg over your “working” bowl.
- Gently pull the shell apart into two roughly even halves.
- Let the yolk rest in one half while the white drips into the bowl.
- Carefully pass the yolk back and forth between the shell halves until most of the white has fallen away.
- Place the yolk in its bowl and pour the white into the whites bowl.
Why it works
The shell acts like a tiny cradle, holding the yolk while gravity pulls the white down. It is elegant in a very old-school kitchen way.
Best for
Anyone who wants a quick, no-tool method and already has decent control with delicate ingredients.
Watch out for
The edges of the shell can puncture the yolk if you are too rough. If you keep jostling the yolk like it owes you money, it may burst.
Verdict
This is the traditional method for a reason. It is fast, familiar, and effective. Still, it does take a gentle touch, and it is not always the easiest option for beginners.
Method 2: Separate an Egg with Your Hands
If the shell method feels fussy, your hands may be the easiest route. Many experienced cooks prefer this technique because it gives you more control and removes the risk of shell edges slicing into the yolk.
How to do it
- Wash and dry your hands thoroughly.
- Crack the egg on a flat surface.
- Open the egg and pour the whole contents into your palm over a bowl.
- Gently spread your fingers just enough for the white to slip through.
- Let the yolk remain in your hand.
- Transfer the yolk to its bowl and move the white to the whites bowl.
Why it works
Your fingers naturally act like a soft strainer. The egg white flows through the gaps, while the yolk stays behind. No sharp shell edges, no juggling act, no tiny yellow disaster waiting to happen.
Best for
Beginners, visual learners, and anyone who wants the least amount of yolk breakage.
Watch out for
Some people simply do not enjoy the feeling of raw egg sliding over their fingers. Others find it oddly satisfying. This is a deeply personal kitchen journey.
Verdict
For many home cooks, this is the easiest way to separate an egg. It is quick, surprisingly neat, and very forgiving.
Method 3: Use an Egg Separator
If you love kitchen gadgets, this one is for you. An egg separator is a small tool designed to catch the yolk while the white drains through slots or holes into a bowl below.
How to do it
- Place the separator over a bowl or on the bowl rim, depending on the design.
- Crack the egg on a flat surface.
- Open the egg and pour it into the separator.
- Let the white drip into the bowl.
- Transfer the yolk to a separate bowl.
Why it works
The tool does the sorting for you. It is especially helpful if you are separating several eggs and want a more consistent process.
Best for
People who do not want to touch raw egg, beginners who want extra reassurance, and cooks who prioritize a cleaner workflow.
Watch out for
Some separators are wonderfully efficient. Others are cheap plastic drama queens that cling to egg white like it is their emotional support protein. Buy one that is easy to clean.
Verdict
This method is simple, practical, and one of the better options if food safety is top of mind. It may not feel glamorous, but it gets the job done.
Method 4: Use a Slotted Spoon
This is the underrated trick hiding in your utensil drawer. If you do not own an egg separator, a slotted spoon can do a similar job.
How to do it
- Hold a slotted spoon over a bowl.
- Crack the egg on a flat surface.
- Pour the egg into the spoon.
- Let the white fall through the slots into the bowl.
- Gently tilt the spoon as needed.
- Place the yolk in its own bowl.
Why it works
The spoon acts as a makeshift separator. It is not quite as precise as a dedicated tool, but it is handy when you need a quick solution with something you already own.
Best for
Resourceful cooks, minimalist kitchens, and anyone who refuses to buy a single-use gadget.
Watch out for
Slot sizes vary. Some spoons are ideal; others behave like they were designed by someone who has never met an egg. Test gently before committing to a dozen whites for macarons.
Verdict
It is clever, convenient, and good in a pinch. Not always the neatest method, but definitely worth knowing.
Which Egg-Separating Method Is Best?
- Best for beginners: hands
- Best traditional method: shell halves
- Best for hygiene and consistency: egg separator
- Best no-gadget backup: slotted spoon
If you only learn one method, the hand method is probably the most forgiving. If you bake often, it is worth knowing both the shell and hand methods so you can switch depending on the recipe and your mood.
Common Mistakes When Separating Eggs
Breaking the yolk
This usually happens when the egg is warm, the shell crack is jagged, or the yolk is passed around too roughly. Start with cold eggs and use a lighter touch.
Getting yolk in the whites
If you are making meringue or another whipped egg white recipe, even a tiny smear of yolk can cause trouble. Use the three-bowl system and separate one egg at a time.
Fishing shell fragments out with your fingers
A small piece of shell is often easier to scoop out with a larger shell fragment than with your fingertip. The shell almost acts like a little shovel.
Separating directly into the main mixing bowl
This is how one broken yolk turns into a baking monologue about betrayal. Always use a separate working bowl first.
Ignoring recipe goals
If the whites will be whipped, precision matters. If you are just separating yolks for a custard, you have a little more wiggle room. Match your method to the recipe.
What to Make with Separated Eggs
Use the whites for:
- Meringue cookies
- Angel food cake
- Soufflés
- Royal icing
- Macarons
- Egg white omelets
Use the yolks for:
- Custard
- Lemon curd
- Pastry cream
- Mayonnaise
- Hollandaise sauce
- Ice cream base
This is the part where egg separation stops feeling like a chore and starts feeling like a superpower.
Kitchen Experience Notes: What Separating Eggs Is Really Like
On paper, separating an egg sounds hilariously easy. Crack egg. Move yolk. Done. In real kitchens, though, the experience has a little more personality. There is always that first moment of commitment, when the shell cracks and you realize the next five seconds will determine whether you are making pavlova or pivoting emotionally into scrambled eggs.
For most people, the first few attempts are clumsy. The shell method feels elegant in theory, but in practice it can feel like passing a water balloon between two tiny ceramic hammocks. The yolk wobbles. The white clings. Your hands suddenly forget what “gentle” means. Then, somehow, after three or four eggs, your brain catches up and the whole thing becomes oddly natural.
The hand method tends to surprise people the most. It sounds messy, maybe even a little gross, right up until you try it and realize it is actually calm, quick, and strangely satisfying. The white slips away, the yolk stays put, and for one shining second you feel like the kind of person who casually makes soufflés on a Tuesday.
There is also a huge difference between separating one egg and separating a dozen. One egg is a task. Twelve eggs is a project. That is when rhythm matters. Cold eggs, lined-up bowls, a clean counter, and a repeatable method suddenly feel less like overkill and more like a survival strategy. Bakers know this well. The faster and steadier your setup, the less likely you are to ruin a bowl of whites with one rogue burst yolk.
Experience also teaches you that recipes change how careful you need to be. If you are making custard with yolks, a tiny trace of white is usually no big deal. If you are chasing glossy peaks for meringue, though, you become a detective, a scientist, and a bodyguard all at once. You inspect bowls. You question every speck. You develop trust issues with gravity.
Another real-world lesson: not every egg behaves the same way. Some yolks are tight and sturdy. Others break if you look at them too confidently. Fresher, colder eggs usually feel easier to manage, which is one reason experienced bakers often separate them straight from the fridge. It is not kitchen superstition. It is damage control with protein.
Over time, separating eggs becomes one of those small skills that makes a cook feel more capable. It is not flashy. Nobody applauds when you successfully isolate a yolk. But it quietly opens the door to better baking, silkier sauces, loftier cakes, and desserts that feel a little bit magical. And that is the charm of it. A tiny skill, learned once, keeps showing up everywhere.
So if your first try is messy, welcome to the club. Egg separation is not about looking graceful from day one. It is about learning a process, finding the method that suits you, and getting comfortable enough that the next recipe with “separate the eggs” does not send you into a spiral. Eventually, it becomes just another kitchen move. A useful one. A satisfying one. And, on good days, even a slightly heroic one.
Conclusion
Knowing how to separate an egg is one of those foundational kitchen skills that looks small but delivers big results. Once you understand the basics, you can choose the method that feels easiest for you: shell halves, hands, a dedicated egg separator, or even a slotted spoon. The key is to start with cold eggs, work one at a time, and keep your whites clean if you plan to whip them.
In other words, you do not need chef-level flair. You just need a bowl, an egg, and a little patience. After that, meringue, custard, mayo, and every other egg-powered masterpiece get a whole lot less intimidating.