Table of Contents >> Show >> Hide
- Quick Prep: The Paper “Pantry” That Makes Everything Easier
- 1) Make a Boutique-Style 3D Paper Pumpkin (Two Ways)
- 2) Create Watercolor Coffee-Filter Leaves (Then Turn Them Into a Garland)
- 3) Upcycle Brown Paper Bags Into “Leather-Look” Fall Leaves
- 4) Craft a Paper Statement Wreath (Origami-Inspired, No Floral Foam Required)
- 5) Make Paper Acorns for a Garland, Bowl Filler, or Place Settings
- How to Make Paper Fall Decor Look “Real” (Not Like a School Project)
- Conclusion: Paper Is the Secret Weapon of Cozy Fall Decorating
- Extra: of Real-World Crafting Experiences (So Your Decor Actually Survives Fall)
Fall décor has a funny habit of pretending it’s expensive. Suddenly a “handcrafted autumn accent” costs the same as a small used car,
and you’re standing in a store holding a $49.99 wreath thinking, “Is it woven from the hair of angels?”
Good news: your cutest fall decorating moments can come from the most humble supply in your homepaper.
With the right folds, cuts, and a little glue (okay… sometimes a lot of glue), paper can become pumpkins, leaves, acorns,
garlands, and centerpieces that look surprisingly boutique. Even better, paper crafts are easy to personalize for your space:
cozy cottage, modern neutral, maximalist pumpkin-paloozapaper doesn’t judge.
In this guide, you’ll get five creative paper DIY fall décor ideas that look “store-bought,” feel satisfyingly handmade, and can be done
with basic tools. Each project includes practical steps, styling tips, and smart shortcuts so you can decorate without turning your home
into a glitter crime scene.
Quick Prep: The Paper “Pantry” That Makes Everything Easier
Before we dive into the five projects, here’s a simple truth: paper crafts go from flimsy to fabulous when you match the
right paper to the job.
- Cardstock (65–110 lb): Great for sturdy garlands, 3D pumpkins, tags, and place cards.
- Scrapbook paper: Patterns + fall colors = instant “designer” look.
- Old book pages: Vintage, cozy, and perfect for rustic pumpkins and neutral décor.
- Coffee filters: A secret weaponeasy to dye, translucent, and naturally “leafy.”
- Brown paper bags: The MVP of “looks like real fall leaves from three feet away.”
- Tissue/crepe paper: For texture, ruffles, and soft, crinkly dimension.
Tools you’ll use again and again: scissors, a pencil, a ruler, glue stick, tacky glue, tape, and optional hot glue (fast, strong,
slightly dramatic). If kids are crafting too, keep hot glue adult-only and use school glue or glue dots for safer assembly.
1) Make a Boutique-Style 3D Paper Pumpkin (Two Ways)
Paper pumpkins are the fall craft equivalent of a little black dress: classic, flattering, and you can make five in different “outfits”
without learning a new skill.
Option A: The “Book-Page Pumpkin” for Cozy Vintage Vibes
This one looks like it belongs on a farmhouse mantel next to a cinnamon candle and a suspiciously aesthetic loaf of bread.
You’ll use an old paperback or thrifted book (not your favorite novelsave that for reading).
Materials
- Old paperback book (or a stack of book pages)
- Scissors or craft knife (adult-only)
- Hot glue or tacky glue
- Cardboard or thick cardstock (optional base)
- Stem: cinnamon stick, twig, rolled brown paper, or a cork
- Optional: ink pad/tea stain for “antique” edges
How to Make It
- Create a pumpkin template: Draw a pumpkin half-shape on cardstock (like a fat teardrop). Cut it out.
- Trace + cut: Trace the template on a few pages at once and cut. Repeat until you have a thick stack.
- Glue in sections: Glue small groups of pages together, then connect the groups into a circle.
- Add structure: If needed, glue the bottom to a cardboard circle so it sits flat.
- Finish the top: Glue in your stem and add a paper “vine” (thin strip curled with scissors) if you want extra charm.
Make It Yours
- Modern neutral: Use cream cardstock and lightly ink the edges for soft dimension.
- Moody library: Use darker pages (old textbooks, sheet music) and add a black velvet ribbon.
- Glam harvest: Brush the edges with metallic paint or gold leaf for subtle shine.
Option B: The “Strip Pumpkin” That’s Fast and Kid-Friendly
This version uses paper strips to create a round, ribbed pumpkin. It’s quick, forgiving, and perfect for batch-making.
Materials
- Orange cardstock or patterned fall scrapbook paper
- Brads (paper fasteners) or strong glue
- Hole punch
- Green paper (leaf) + brown paper (stem) or a pipe cleaner
How to Make It
- Cut 8–12 strips (about 1 inch wide, 8–10 inches long).
- Punch holes at both ends of each strip.
- Stack one end and secure with a brad.
- Curve strips outward and bring the other ends together; secure with a second brad.
- Add a stem and leaf at the top brad to finish.
Styling tip: Group three pumpkins in different heights. Add one tiny pumpkin as the “baby” of the set.
Every décor moment improves by 12% when there’s a baby version.
2) Create Watercolor Coffee-Filter Leaves (Then Turn Them Into a Garland)
Coffee filters are one of the most underrated craft supplies on Earth. They absorb color beautifully, dry lightweight, and look
surprisingly leaf-likeespecially when you add fall tones and a little veining.
Materials
- Coffee filters (basket style or flat)
- Washable markers or watercolor paint
- Water + small cup (or spray bottle)
- Scissors
- Leaf templates (optional) or real leaves to trace
- String/twine + tape or needle and thread
How to Make It
- Flatten the filters and trace leaf shapes (maple, oak, oval). Cut them out.
- Add color: Scribble marker color in patches (yellow, orange, red, brown). Leave some white space.
- Activate the watercolor effect: Mist with water or dab with a wet brush. Watch the colors blend.
- Dry flat on parchment or paper towels.
- Shape: Gently crinkle the center and pinch the stem area to create a natural curve.
- Assemble: Tape the leaves along a string, or stitch through the top for a clean look.
Make It Look Extra Real
- Draw light veins with a brown marker after the leaves dry.
- Layer colors (yellow first, then orange, then a tiny touch of red at edges).
- Mix sizes: real leaf garlands aren’t uniform, and neither should yours be.
Where it looks best: Mantels, stair railings, a dining-room hutch, or draped across a mirror. The slight translucency
looks especially pretty near window light.
3) Upcycle Brown Paper Bags Into “Leather-Look” Fall Leaves
Brown paper bags can transform into gorgeous rustic leaves with a soft, leathery texture once crumpled and smoothed.
This project is perfect if you love neutral fall décor (or if orange makes you feel personally attacked).
Materials
- Brown paper grocery bags or lunch bags
- Scissors
- Pencil + leaf template (oak leaves are especially forgiving)
- Optional: acrylic paint (cream, tan, muted green) or metallic paint for highlights
- Twine, branch, or ribbon
- Glue (tacky glue or hot glue)
How to Make It
- Open the bags and cut them into flat sheets.
- Crumple each sheet into a ball, then smooth it out. (This is oddly therapeutic.)
- Trace and cut leaf shapes. Vary sizes so it feels natural.
- Add dimension: Fold a soft crease down the center and pinch the “stem.”
- Optional paint: Dry-brush light paint on edges or add metallic touches for a fancy finish.
- Hang by gluing leaves to twine, tying them to a branch, or layering them into a wreath shape.
Design Variations
- Minimalist: All brown, all texture, zero chaos.
- Soft autumn: Add muted colors (sage, cream, dusty orange) with dry-brushing.
- Modern glam: Metallic edges (gold or copper) to catch the light.
Shortcut: Cut 3–4 sheets at once. Paper bags are thin enough to stack, and your hands will thank you.
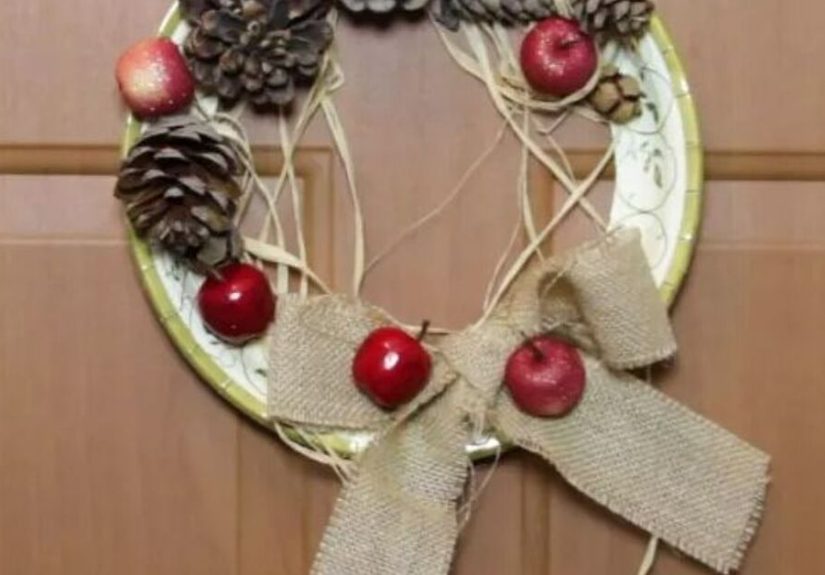
4) Craft a Paper Statement Wreath (Origami-Inspired, No Floral Foam Required)
Want a door wreath that doesn’t look like everyone else’s? Paper can do modern shapes beautifullyespecially triangles, cones, and folded
forms that create bold dimension. The result is crisp, graphic, and unexpectedly sophisticated.
Materials
- 12×12 scrapbook paper or cardstock (mix solids + patterns)
- Wreath form (cardboard ring you cut yourself works great)
- Glue or double-sided tape
- Optional: mini paper pumpkins, paper leaves, or a bow for the bottom
How to Make It
- Make your base: Cut a ring from cardboard (like a giant donut). Paint it if it shows.
- Create folded pieces: Fold paper into cones or triangles (think: geometric “petals”).
- Layer: Start on the outer edge and glue pieces overlapping around the ring.
- Build depth: Add a second inner row with slightly smaller pieces for dimension.
- Finish the center: Add a rosette, a mini pumpkin cutout, or a simple paper bow.
Make It Fall-Specific Without Going Full Pumpkin Patch
- Use a palette: cream + kraft brown + deep olive + a small pop of rust.
- Add a small “thankful” tag in the center (handwritten looks best).
- Mix matte and slightly shiny paper so it looks intentional, not accidental.
Display tip: Paper wreaths love indoor doors (pantry, hallway, bedroom). If you want it outside, keep it covered
and away from rain and direct sun.
5) Make Paper Acorns for a Garland, Bowl Filler, or Place Settings
Acorns are tiny fall icons that make everything feel woodland-cozy. Paper acorns are lightweight and versatile:
string them into a garland, toss them in a bowl as table décor, or use them as place-setting “treat pods.”
Materials
- Cardstock or scrapbook paper (brown, copper, gold, plaidgo wild)
- Scissors
- Glue (tacky glue or hot glue)
- Twine or ribbon
- Optional: small circle punch, glitter, or metallic paint
How to Make It
- Cut the pieces: Make an oval/egg shape for the acorn body and a cap shape (like a rounded triangle).
- Shape the body: Curl the body paper into a cone-like form and glue the seam.
- Add the cap: Glue the cap on top, overlapping slightly.
- Add a hanger: Glue a loop of twine under the cap or punch a small hole and thread it through.
- Optional texture: Add a dotted pattern on the cap with a marker or paint for a realistic “acorn top.”
Where Paper Acorns Shine
- Garland: Alternate acorns with paper leaves for a layered look.
- Centerpiece: Fill a shallow bowl with paper acorns and mix in a few mini pinecones.
- Place cards: Write names on tiny tags tied to each acorn loop.
Pro move: Make the caps from textured paper (kraft, embossed, or even corrugated cardstock) so they look less flat.
How to Make Paper Fall Decor Look “Real” (Not Like a School Project)
Nothing against school projectsthey’re adorable. But if you want your paper DIY fall décor to look polished, here are the details that matter:
- Repeat shapes, vary sizes: Consistency reads “designed.” Variation reads “natural.” You want both.
- Use a tight color palette: Pick 3–5 colors and stick to them across pieces.
- Add texture on purpose: Crumple, ink edges, dry-brush paint, or layer papers for depth.
- Hide the mechanics: Conceal tape with overlapping layers; keep glue strings under control.
- Cluster décor: One pumpkin is cute. Three pumpkins + a garland + a candle = a “moment.”
Conclusion: Paper Is the Secret Weapon of Cozy Fall Decorating
If you take one thing from this: paper is not “just paper.” It’s pumpkins, leaves, acorns, wreaths, and garlands waiting to happen.
You can keep it rustic with book pages and kraft bags, go bright with scrapbook patterns, or stay modern with clean shapes and neutrals.
And when you inevitably make “one more” because it turned out too cute? Congratulationsyou’re officially doing fall correctly.
Extra: of Real-World Crafting Experiences (So Your Decor Actually Survives Fall)
People usually start paper crafting with one of two moods: “I want this to look like a magazine” or “I just need something cute by tonight.”
In real craft sessionsat kitchen tables, in classrooms, and during last-minute pre-guest panicpaper décor wins because it’s flexible.
If a leaf shape looks a little weird, you can trim it. If the color is too bright, you can tone it down with a light wash of brown marker or
a quick dry-brush of paint. The biggest “aha” moment for most crafters is realizing that paper looks more realistic when it’s not perfectly flat.
A gentle crumple-and-smooth technique on brown bags instantly gives you that worn, leathery look that feels like fall.
Another common discovery: glue choice changes everything. Glue sticks are clean and quick, but they struggle with curved 3D forms over time.
Tacky glue is stronger, but it needs drying time and a little patience (which is rude, honestly). Hot glue is the speed champion, especially for
garlands and wreaths, but it can create thick bumps if you use too much. A practical trick is to use tiny dots of hot glue and
press the paper for a few seconds so it bonds without warping. For kid-friendly crafting, glue dots can be a game changerless mess, fewer tears,
and dramatically reduced chances of your project becoming permanently attached to the table.
Coffee filter leaves teach a fun lesson about color: the prettiest results come from layering, not soaking. When people flood the whole filter,
the colors can blend into a single muddy tone. But when you dab water slowly and let the pigments travel on their own, you get those gorgeous
fall transitionsyellow into orange, orange into redwith little blooms of color that look surprisingly natural. If you’re crafting with kids,
letting them “paint” the filters with markers first is easy and satisfying; then the water step feels like magic. The only downside is that once
you see how good coffee filters look, you’ll start side-eyeing your entire kitchen for “craft potential.”
The most practical experience-based tip: plan for storage. Paper décor can last for years if you keep it dry and flat-ish.
Garlands store beautifully in a shallow box with tissue paper between layers. Wreaths do best in a large bag or a box where nothing heavy
squishes them. For 3D pumpkins, a simple trick is to stash them in a box with crumpled kraft paper around themlike a tiny paper pumpkin spa day.
And if you’re decorating for Thanksgiving, paper place cards and acorns are perfect because they’re lightweight, customizable, and easy to make
match your table. Bonus: guests love anything with their name on it. It’s the adult version of a gold star sticker, and we all deserve one.