Table of Contents >> Show >> Hide
- Before You Start: The “Don’t Skip This” Basics
- 1) Toilet Paper Rolls (and Paper Towel Tubes)
- 2) Eggshell Halves
- 3) Citrus Rinds (Orange, Lemon, Grapefruit)
- 4) Yogurt Cups, Sour Cream Tubs, and Cottage Cheese Containers
- 5) Clear Plastic Clamshells (Salad Greens, Berries, Takeout Lids)
- 6) Egg Cartons (Cardboard or Paper Pulp)
- 7) Plastic Milk or Juice Jugs (The DIY Mini-Greenhouse Hack)
- Pro Tips for Better Germination (Even with Recycled Containers)
- Common Mistakes (So You Don’t Raise Seedlings in a Swamp)
- FAQ
- Conclusion: Your Recycling Bin Is a Seed-Starting Gold Mine
- Extra: Real-World Experiences (The Stuff No One Mentions Until You’ve Made the Mistakes)
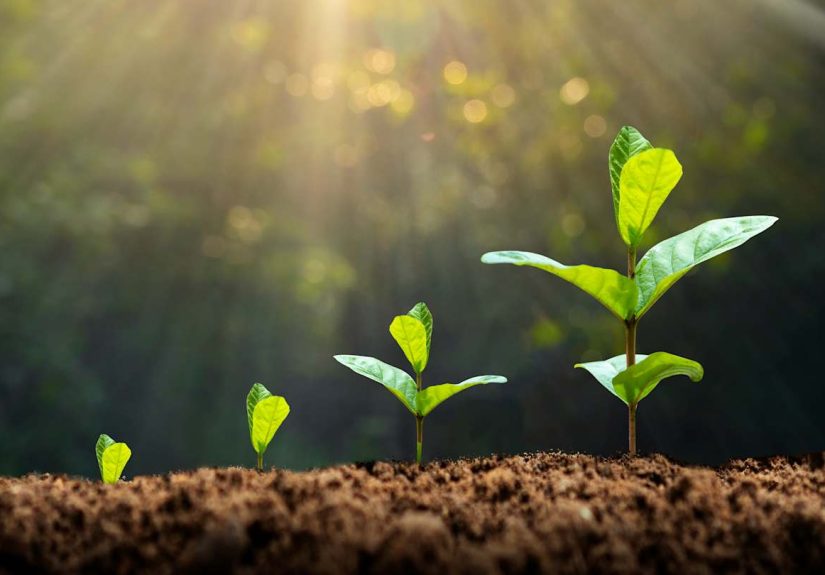
Seed starting has a reputation for being a “serious gardener” activitylike you need a grow room, a lab coat, and a small mortgage.
In reality, you can start a lot of seeds with stuff already living in your kitchen, recycling bin, and “random drawer” that holds three
rubber bands, a dead pen, and the key to… something.
The trick is simple: seeds don’t demand luxury. They want warmth, moisture, oxygen, and (after sprouting) bright light. Give them those basics,
and they’ll happily germinate in containers that used to hold yogurt, salad, or last night’s takeoutassuming you prep them properly.
This guide walks you through seven surprisingly useful household items for seed starting, plus exactly how to use each one without creating a
sad little swamp of mold.
Before You Start: The “Don’t Skip This” Basics
1) Drainage is non-negotiable
If your container can’t drain, you’re basically building a tiny bathtuband seedlings hate baths. Excess water limits oxygen around roots and can
invite rot and disease. Any recycled container you use should have drainage holes (or a plan for them), and it should sit on a tray to catch drips.
2) Clean containers = fewer problems
Reused containers can carry leftover residue or pathogens. Wash them with hot, soapy water and rinse well. If you want to level up, sanitize
(especially if you’ve had damping-off issues before). Think of it as giving your seedlings a decent start in life instead of tossing them into a
germy college dorm.
3) Use the right growing medium
Seed-starting mixes are designed to be light and well-aerated so delicate roots can breathe and spread. Many soilless seed-starting mixes have
little fertility, which is normalyour seedlings will need a diluted fertilizer once they’re up and growing (usually after they develop their first
true leaves). Avoid heavy garden soil indoors; it compacts and can cause drainage issues.
4) Label everything
You will absolutely forget what’s what. Everyone does. Label your containers with plant variety and date. Your future self will thank you.
1) Toilet Paper Rolls (and Paper Towel Tubes)
Toilet paper rolls are basically pre-made biodegradable seedling “cells.” They’re tall enough for roots, easy to arrange in a tray,
and they let you transplant with less root disturbance.
How to use them
- Cut to size: Use whole TP rolls or cut paper towel tubes into 3–4 inch sections.
- Make a bottom: Cut 4 slits on one end and fold the flaps inward like closing a cardboard box.
- Set in a tray: Pack them snugly together so they don’t tip.
- Fill + sow: Add moistened seed-starting mix, plant seeds at the correct depth, and mist or bottom-water.
Best for
Seeds that don’t love having their roots messed with: peas, beans, cucumbers, squash, and some flowers. They’re also great for seedlings you’ll
transplant fairly soon.
Watch-outs
Cardboard can get soggy if it stays too wet. Water consistently but don’t drown them, and make sure there’s airflow.
If the roll grows fuzzy (harmless mold), reduce moisture, increase light, and add gentle air circulation.
2) Eggshell Halves
If you’ve never looked at an eggshell and thought “tiny seed pot,” congratulations on having a peaceful brain. Eggshells work surprisingly well
for starting very small seedlingsplus they look adorable lined up in an egg carton like a plant nursery for elves.
How to use them
- Crack carefully: Aim for a half shell (or a slightly larger “cup” if possible).
- Rinse + dry: Remove egg residue to reduce odor and bacterial growth.
- Add a drainage hole: Use a pin or thumbtack to make a small hole in the bottom.
- Fill + sow: Add seed-starting mix, sow seeds, and keep evenly moist.
Best for
Slow-growing herbs and flowers that start tinythink basil, thyme, alyssum, and similar small-seeded crops.
Watch-outs
Eggshells dry out faster than larger pots. Check moisture daily. When transplanting, gently crack the shell to help roots escapedon’t rely on the
shell breaking down quickly in cool spring soil.
3) Citrus Rinds (Orange, Lemon, Grapefruit)
Citrus rinds are nature’s little compostable cups. Scoop out the fruit, poke a drainage hole, add mix, and you’ve got a biodegradable starter that
smells like you’re making a fancy cocktail instead of gardening in sweatpants.
How to use them
- Hollow the rind: Eat the fruit first. This is an important step. (For morale.)
- Drainage hole: Poke one small hole in the bottom.
- Stabilize: Set rinds in a tray so they don’t wobble.
- Fill + sow: Add seed-starting mix and plant seeds appropriate for small pots.
Best for
Small herb seedlings or flowers that you’ll transplant once they’re sturdy. They’re also a fun project for kids or anyone who needs gardening to
feel like a whimsical craft.
Watch-outs
Like any small container, rinds can dry quickly. Also, don’t assume the rind will vanish overnight in the gardenat transplant time, cut or tear it
slightly to help roots expand.
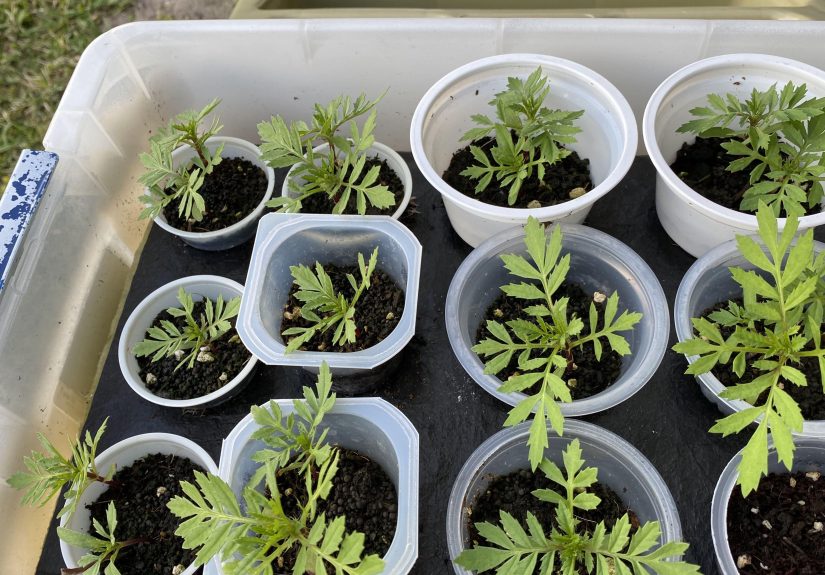
4) Yogurt Cups, Sour Cream Tubs, and Cottage Cheese Containers
The MVPs of recycled seed starting. They’re sturdy, plentiful, and (most importantly) they hold enough mix to support seedlings longer before
up-potting. Bonus: they stack nicely, which makes your “seed starting stash” look organized instead of like a plastic landslide.
How to use them
- Wash well: Leftover dairy funk is not the vibe.
- Add drainage holes: Use a nail, awl, or scissors tip to make 4–8 holes in the bottom.
- Use a drip tray: Any shallow tray worksold baking sheets are great.
- Fill + sow: Use moistened seed-starting mix and plant according to seed packet depth.
Best for
Tomatoes, peppers, brassicas, and herbsespecially if you want to keep seedlings indoors longer before planting out.
Watch-outs
Opaque cups hide soil moisture, so check by touch (or lift the containerlight usually means dry). If you tend to overwater, add fewer seeds per
cup and keep airflow moving.
5) Clear Plastic Clamshells (Salad Greens, Berries, Takeout Lids)
Those clear clamshell containers are basically mini greenhouses you accidentally bought with strawberries. The lid helps retain humidity for
germinationespecially helpful if your home is dry or your heat runs nonstop.
How to use them
- Clean thoroughly: Sticky fruit juice = future mold party.
- Add drainage: Poke holes in the bottom. (Yes, even if it hurts your soul.)
- Fill shallowly: Add seed-starting mix and level it, leaving space so sprouts don’t slam into the lid.
- Sow + close: Plant seeds, mist, then close the lid until germination.
- Vent ASAP: Once seedlings sprout, crack the lid open or remove it to reduce damping-off risk.
Best for
Tiny seeds you broadcast on the surface (lettuce, basil, snapdragons) and anything that benefits from consistent humidity during germination.
Watch-outs
A sealed clamshell can get too humid and warm, encouraging fungus. Once you see sprouts, treat the lid like training wheels: use it briefly,
then remove it.
6) Egg Cartons (Cardboard or Paper Pulp)
Egg cartons are a classic for a reason: they create neat little seed cells and are easy to organize. If you use cardboard/paper pulp cartons
(not foam), they’re compostable and can be cut apart at transplant time.
How to use them
- Choose the right carton: Paper pulp/cardboard, not foam.
- Moisten mix first: Pre-moisten seed-starting mix so it’s damp like a wrung-out sponge.
- Fill each cup: Press lightlydon’t compact it into a brick.
- Sow + mist: Plant seeds and mist gently so you don’t blast them into a new zip code.
- Bottom-water carefully: If the carton gets soggy, water less and improve airflow.
Best for
Fast-growing seedlings you’ll transplant soonlettuce, greens, some flowers, and herbs. They’re also great for “test batches” when you’re not sure
if old seeds will germinate.
Watch-outs
Egg cartons dry out quickly and can grow mold if kept too wet. The sweet spot is consistent moisture without saturation. If you plan to plant the
carton sections directly, tear or cut openings so roots can expand freely.
7) Plastic Milk or Juice Jugs (The DIY Mini-Greenhouse Hack)
A translucent milk or juice jug can be turned into a protective seed-starting chamber. You can use it indoors like a mini greenhouse or outdoors
for methods like “winter sowing” (depending on your climate and what you’re growing). Either way, it’s the closest you’ll get to a greenhouse
without installing anything that requires a permit and a marriage negotiation.
How to use them (indoor starter version)
- Wash well: Especially if it held anything sugary.
- Cut a hinge: Cut around the jug leaving one side attached, so it opens like a clamshell.
- Add drainage holes: Several in the bottom.
- Add mix + seeds: Fill with seed-starting mix, sow seeds, and close the top.
- Vent after sprouting: Open the “lid” or crack it so seedlings don’t cook in humidity.
Best for
Seeds that like steady warmth and humidity to germinate, and gardeners who want fewer open trays drying out on a windowsill.
Watch-outs
It’s easy to overdo the greenhouse effect. If you see condensation dripping like a rainforest documentary, vent more and water less.
Pro Tips for Better Germination (Even with Recycled Containers)
Bottom-water to avoid washing seeds away
If your containers sit in a tray, you can water from below by adding water to the tray and letting it wick upward through drainage holes. This helps
keep seeds from floating, shifting, or getting buried too deep.
Light matters more than you think
A sunny window helps, but many seedlings become leggy if light is weak or too far away. If you’re serious about sturdy stems, consider a simple
grow light setup and keep lights close (without overheating). Rotate trays if using a window to prevent leaning.
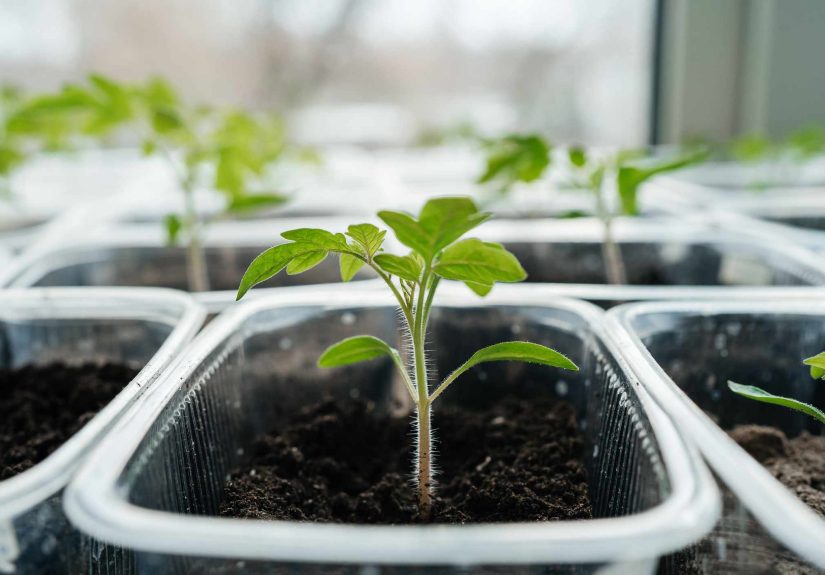
Start small, then “up-pot” as needed
Small containers are great early on because they’re easier to keep evenly moist. Once seedlings have true leaves and roots fill the space, move them
into a bigger container with a quality potting mix so they don’t stall out.
Common Mistakes (So You Don’t Raise Seedlings in a Swamp)
- No drainage holes: The fastest path to root problems.
- Too much humidity for too long: Great for germination, bad for airflow and disease once sprouted.
- Using heavy soil: Compacts easily; seedlings struggle.
- Forgetting labels: “Mystery plant roulette” is fun until it’s not.
- Overwatering tiny containers: Small pots don’t need daily floodingjust consistent moisture.
FAQ
Do I need to sterilize my potting mix?
Most store-bought seed-starting mixes are made to be clean and consistent. If you mix your own media, sanitation can reduce disease risksome
guidance even discusses heat treatment for homemade mixes. Practically, most home gardeners do fine with a fresh, reputable seed-starting mix and
clean containers.
Can I start seeds in plain garden soil?
It’s not recommended for indoor trays. Garden soil can compact, drain poorly, and bring in pests or pathogens. A light seed-starting mix helps roots
develop better indoors.
When do I remove the “greenhouse lid” on clamshells or jugs?
As soon as most seeds sprout. High humidity is helpful for germination, but seedlings need airflow and bright light to stay healthy.
Conclusion: Your Recycling Bin Is a Seed-Starting Gold Mine
Seed starting doesn’t require fancy traysjust smart containers, good drainage, clean prep, and the right mix. Toilet paper rolls protect roots,
yogurt cups give seedlings room, clamshells act like mini greenhouses, and even citrus rinds can moonlight as biodegradable starter pots.
The best part? You’ll save money, reduce waste, and get the oddly satisfying feeling of turning “trash” into tomatoes.
Extra: Real-World Experiences (The Stuff No One Mentions Until You’ve Made the Mistakes)
Let’s talk about the part of seed starting that doesn’t show up in dreamy social media photos: the little lessons you learn only after you’ve
accidentally created a fungal science experiment on your windowsill.
One of the first “aha” moments most people have with recycled containers is that small doesn’t mean easy. Tiny cups like eggshells
and egg cartons dry out fast, which makes you feel like a helicopter parent hovering over your seedlings with a spray bottle. You’ll mist, then mist
again, then panic-mist one more timeuntil you realize constant surface wetness can invite mold. The sweet spot is moist mix, not soggy mix, and a
routine that keeps you consistent instead of chaotic.
The second lesson is that DIY drainage holes are oddly emotional. Poking holes into a perfectly good yogurt cup feels wrong, like you’re violating a
sacred dairy oath. But after you lose a tray of seedlings to waterlogging once, you’ll become the kind of person who looks at plastic containers and
thinks, “Nice… but how many holes can I add?” (Answer: enough for water to escape, not enough to turn it into a colander.)
Then there’s the “greenhouse effect” surprise. Clamshells and milk jugs trap humidity so well that germination can be fast and evenuntil you forget
to vent. Suddenly you’ve got condensation dripping like a rainforest and seedlings that look a little… stressed. The fix is simple: once you see
sprouts, crack the lid, then remove it entirely when seedlings are up. Think of it like raising teenagers: at first you hover, then you slowly back
off before everyone gets weird.
Another classic experience: underestimating how quickly seedlings outgrow cute containers. Egg cartons are adorable until your tomato seedlings
develop ambitions. When roots fill the space, growth slows and plants can stall. That’s not a failureit’s just a sign to “up-pot” into something
bigger (like those yogurt cups you were about to toss). A good mental model is: small containers for germination, bigger containers for growing.
And finally, the most universal seed-starting rite of passage: the label problem. You start out confident: “I’ll remember which is basil.”
You will not remember. The tray will shift, the sunlight will rotate, and one day you’ll stare at six identical green sprouts wondering if you’re
nurturing herbs or accidentally growing a collection of weeds. Label everythingtape, marker, popsicle sticks, whatever worksbecause memory is not a
seed-starting system. It’s a vibe. And vibes do not identify seedlings.
If all of this sounds like a lot, don’t worry. The truth is that seed starting is forgiving when you get the fundamentals right: clean containers,
drainage, a light mix, steady moisture, and strong light after sprouting. The “experiences” are just the funny bumps along the waythe kind that turn
you into a better gardener the next season, and give you stories to tell when someone says, “I could never start seeds indoors.”
(You can. You just need a yogurt cup and the courage to poke holes in it.)