Table of Contents >> Show >> Hide
- The $20 wreath formula (it’s basically decorating math)
- Tools you’ll actually use (no, you don’t need a craft laboratory)
- 5 wreath styles you can make for under $20
- 1) The “Ornament Cluster” wreath (maximum sparkle, minimum effort)
- 2) The “Fresh Evergreen Swag” wreath (smells like holiday magic)
- 3) Dried orange + cinnamon wreath (rustic, cozy, and it smells like cookies)
- 4) Cozy yarn + ribbon wreath (soft, modern, and secretly the easiest)
- 5) Snowy pinecone wreath (woodland vibes on a budget)
- Budget boosters that feel like cheating (but totally aren’t)
- How to make a cheap wreath look high-end
- Fresh wreath care: keep it cute past the first week
- Quick troubleshooting (because hot glue has a personality)
- Final thoughts
- Real-life crafting experience: making a $20 wreath (the fun, the chaos, the victory) 500+ words
Holiday wreaths have a funny way of making a front door look like it has its life togethereven if the inside of the house is
currently a wrapping-paper snowstorm. The best part? You don’t need a designer budget (or a “my cousin owns a craft store” hookup)
to make one that looks genuinely expensive.
This guide breaks down how to build a DIY holiday wreath under $20 with smart shopping, simple tools,
and a few design tricks that make “cheap” read as “chic.” You’ll get multiple wreath styles, cost breakdowns, and
pro-level finishing tipsplus a real-life, boots-on-the-ground “what it’s actually like” crafting section at the end.
The $20 wreath formula (it’s basically decorating math)
Most wreaths look pricey for one of two reasons: they have a clear focal point, or they look full and intentional.
You can get both without spending big if you follow this simple formula:
- Base: wire frame, foam ring, grapevine, or a hoop (usually $3–$7)
- “Body” material: greenery, ribbon, yarn, pinecones, or bundled stems ($4–$10)
- Accents: ornaments, picks, berries, citrus, bells, cinnamon sticks ($3–$8)
- Finisher: one great ribbon or a simple hanger ($2–$5)
The trick is not buying a little of everything. The trick is buying enough of the right things so the wreath looks complete.
Think “intentional capsule wardrobe,” but for your front door.
Where to source supplies without blowing the budget
- Dollar-style stores: great for ornaments, picks, ribbon, wire, and seasonal stems. (Prices vary by store and item.)
- Craft stores: grab a wreath base and one standout ribbon; use coupons and sale aisles.
- Big-box home improvement stores: solid for greenery, pre-made garlands, and outdoor-safe supplies.
- Your yard (or a friend’s): pinecones, twigs, evergreen trimmings, and dried seed pods can be free “texture.”
- Your own stash: the “mystery ribbon drawer” is basically a craft savings account.
Tools you’ll actually use (no, you don’t need a craft laboratory)
Keep it simple. These basics cover nearly every wreath in this post:
- Wire cutters (for wreath frames and floral wire)
- Scissors
- Hot glue gun + glue sticks (aka crafting’s duct tape)
- Floral wire or pipe cleaners (fastest way to secure bulky items)
- Optional: floral tape, pruning shears, and command-style hanging hooks
5 wreath styles you can make for under $20
Below are five designs that consistently come in under budget when you shop smart and stick to the plan.
Each includes an easy cost strategy and a step-by-step build.
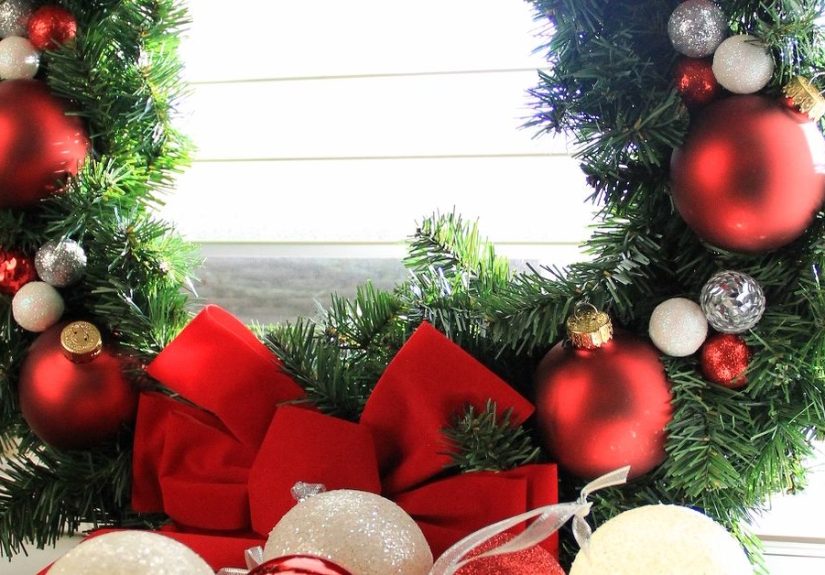
1) The “Ornament Cluster” wreath (maximum sparkle, minimum effort)
This is the classic “people will assume you bought it” wreath. It’s especially budget-friendly if you already have a few ornaments
hiding in a storage bin like they’re in witness protection.
Best for: bold color schemes, modern glam, small spaces, apartment doors
Budget plan: one wreath ring + one multi-pack of shatterproof ornaments + one ribbon
- Prep the base. Use a foam ring or metal wreath ring. If you want a polished look, paint the ring a neutral color or wrap it with ribbon.
- Sort ornaments by size. Big ones first (they fill space fast), then medium, then small for gaps.
- Glue smart. If your ornaments have removable caps, glue the cap to the ornament before attachingso they don’t pop off when the wreath gets bumped.
- Build a “front” side. Focus most ornaments on the front-facing half if you’re tight on supplies. Your door won’t report you.
- Add the finisher. A single oversized bow or a simple ribbon hanger instantly makes the whole thing look intentional.
Make it look expensive: choose a tight palette (like gold + ivory + one accent color) and vary finishes (matte + glossy + glitter).
2) The “Fresh Evergreen Swag” wreath (smells like holiday magic)
If you love natural decor, a swag-style wreath is your best friend. It uses fewer materials than a fully packed circle, but still looks lush.
Bonus: you can source greenery from trimmings, a tree lot, or affordable bundles.
Best for: classic holiday style, farmhouse, Scandinavian, nature-inspired homes
Budget plan: wire base + greenery bundles + twine + 2–3 accent pieces (pinecones, berries, ribbon)
- Shape the base. Use a wire frame, grapevine base, or even a sturdy hoop. If using a hoop, plan for a more minimalist “half-wreath” look.
- Make greenery bundles. Create small bunches (like mini bouquets) using evergreen sprigs. Secure each with floral wire.
- Attach from bottom to top. Layer bundles in one direction so stems are hidden and the wreath looks full.
- Add focal accents. Pinecones, berries, dried orange slices, or a bell cluster work great. Keep accents groupedrandom scatter often looks messy.
- Finish with twine or ribbon. A simple hanger keeps the vibe natural and not “overdone.”
Outdoor tip: hang fresh wreaths in a shaded, sheltered spot whenever possible to slow drying.
3) Dried orange + cinnamon wreath (rustic, cozy, and it smells like cookies)
Dried citrus looks high-end because it’s a texture you don’t see on every store-bought wreathand it’s easy to DIY.
Pair it with cinnamon sticks, bay leaves, or pinecones for a natural, old-world holiday vibe.
Best for: rustic, cottagecore, traditional, “I bake but also might just light a candle” energy
Budget plan: base + 2–4 oranges + twine + cinnamon sticks + optional greenery from a cheap garland
- Dry the oranges. Slice thin (about 1/4-inch), pat dry, then bake low and slow until dry (flip occasionally). Let cool completely.
- Plan your layout. Place the dried slices around the wreath base before gluingso spacing looks balanced.
- Attach with glue or wire. Hot glue is fast; wire is sturdier if your door gets a lot of action.
- Add cinnamon + pinecones. Cluster accents in 2–3 zones (like “mini arrangements”).
- Finish with a classic bow. Burlap, velvet, or plaid ribbon works beautifully with natural elements.
Make it pop: add a few metallic touches (tiny gold bells or gold-painted pinecone tips) for contrast.
4) Cozy yarn + ribbon wreath (soft, modern, and secretly the easiest)
This one is perfect if you want “holiday” without going full tinsel explosion. Wrapping a hoop or ring with yarn creates a clean, chunky texture.
Then you add ribbon, a mini greenery pick, or a few ornamentsdone.
Best for: minimalist, modern, Scandinavian, neutral home decor
Budget plan: embroidery hoop or metal ring + one skein of chunky yarn + one ribbon + tiny accent cluster
- Wrap the ring. Tie yarn onto the ring and wrap tightly, pushing strands together so the base doesn’t peek through.
- Secure as you go. A tiny dot of hot glue every few inches prevents slipping (especially with smooth hoops).
- Add ribbon tails. A simple tied bow with long tails reads modern and deliberate.
- Finish with one small cluster. Think: two pinecones + one greenery sprig + one mini ornament. Keep it small and stylish.
Design rule: if your base is bold (chunky yarn), keep accents simple. If your base is simple, let accents shine.
5) Snowy pinecone wreath (woodland vibes on a budget)
Pinecones are basically free decornature’s way of saying, “Here, have texture.” A pinecone wreath looks full and expensive because it’s naturally dimensional.
You can keep it rustic or add a light “snow” effect for winter charm.
Best for: rustic, cabin, farmhouse, winter-themed decor that lasts past December
Budget plan: wreath form + pinecones (collected or bought) + ribbon + optional snow spray
- Clean and prep pinecones. Brush off debris and let them fully dry. (If you collected them, give them time to open.)
- Wrap the wreath form. Ribbon or fabric strips give a finished look under the pinecones.
- Glue in sections. Work in repeated “zones” around the wreath so it looks evenly designed rather than random.
- Fill gaps with smaller cones. Small cones are the secret to that “professionally packed” look.
- Add a snowy finish (optional). A light dusting looks wintry; don’t bury the texture.
Budget saver: make it a “winter wreath” (not just Christmas) so you get more weeks of use for the same spend.
Budget boosters that feel like cheating (but totally aren’t)
- Buy one “hero” ribbon. A wide velvet or wired ribbon can carry a whole wreath.
- Cut picks apart. One floral pick can become 3–5 smaller accent pieces.
- Use a half-wreath layout. Concentrate decor on the bottom half of a hoop for a modern look that uses fewer materials.
- Shop your home first. Old ornaments, gift tags, bells, and even cookie cutters can be accents.
- Make it removable. Command-style hooks (used correctly) can help with hanging and seasonal swapsespecially for swag styles.
How to make a cheap wreath look high-end
Here are the “designer moves” that cost nothing:
- Limit your palette. Pick 2–3 colors max. More colors usually looks “craft bin,” not “curated.”
- Mix textures, not chaos. Combine smooth (ornaments) + rough (pinecones) + soft (ribbon) for balance.
- Use the rule of odd numbers. Groups of 3 (or 5) accents look more natural than pairs.
- Anchor a focal point. One bow, one cluster, one statement ornament groupinggive your eye a place to land.
- Think “movement.” Ribbon tails, angled greenery, and asymmetry keep it from looking flat.
Fresh wreath care: keep it cute past the first week
Fresh greenery wreaths can last weeks (sometimes longer) if you treat them like what they are: cut plant material that gets thirsty.
Here’s how to keep them looking alive and not like they just ran a marathon in the desert.
- Hydrate before hanging. Soak or heavily mist the back of the wreath before you display it.
- Mist regularly. A light mist once or twice a day helpsespecially indoors.
- Avoid heat + direct sun. Indoor heat sources and sunny spots speed up drying fast.
- Cover overnight indoors. If it’s indoors, lightly mist and cover with a bag overnight to retain moisture.
- Use cooler lighting. If you add lights, LEDs generate less heat than traditional bulbs.
Quick troubleshooting (because hot glue has a personality)
My ornaments keep falling off
Glue caps to ornaments first, then attach. For heavy accents, use floral wire or pipe cleaners instead of relying only on glue.
My bow looks sad and floppy
Wired ribbon helps. If you only have non-wired ribbon, double it up or tie a smaller bow on top of a larger one.
Also: fluff your loops like you’re giving them a pep talk.
My wreath looks “messy,” not “natural”
Step back six feet (door-viewing distance). Then simplify: remove one accent type, regroup your focal pieces, and commit to a clearer color palette.
Final thoughts
A DIY holiday wreath under 20 dollars isn’t about making something “cheap.” It’s about making something
smart: intentional design, strategic spending, and just enough sparkle to convince your neighbors you have your life together.
(It’s okay if you don’t. Your wreath does.)
Real-life crafting experience: making a $20 wreath (the fun, the chaos, the victory) 500+ words
Making a budget wreath is a little like cooking without a recipe: it starts confident, gets weird in the middle, and ends with you
standing back like, “Wait… I did that.” The first experience usually begins in a store aisle where you swear you’re only buying “a few things,”
and then you’re suddenly holding three different ribbons like you’re auditioning for a holiday-themed reality show.
The shopping part is where the budget gets won or lost. If you’ve ever walked into a craft store and immediately forgot the concept of money,
you’re not alone. The trick is walking in with a plan that’s so clear it could be printed on a wristband: base, body material, accents, ribbon.
The moment you add a fifth categorylike “tiny reindeer for whimsy” or “sparkly snowflakes because I’m feeling emotional”your $20 cap starts
sweating. A good rule is to pick one “hero” item you’re excited about (maybe a velvet ribbon or a set of ornaments) and let everything else support it.
Then comes the build, which is where you learn what your glue gun is really like. Some glue guns are calm and helpful. Others behave like they were
trained by a tiny dragon. You’ll get glue strings. You’ll stick your finger to something at least once. You’ll briefly consider wearing gloves, then
remember you need your fingers to do literally everything. This is normal. This is tradition.
The most satisfying moment is when the wreath stops looking like “supplies” and starts looking like “decor.” That transformation usually happens when
you add the first big anchor itemlike the largest ornaments on an ornament wreath, or the first lush bundle of greenery on a fresh swag. Suddenly, the
project clicks. You can see the finish line. Your brain goes from “What am I doing?” to “Oh, I’m doing something.”
Budget wreaths also teach you the power of editing. It’s tempting to keep adding things because the supply pile is right there, watching you. But most
wreaths look more expensive when you do less more deliberately. Two pinecones placed thoughtfully can look better than twelve pinecones glued in a
panic. The same goes for ribbon: one big, well-fluffed bow with long tails looks polished, while four small bows can look like the wreath is wearing
accessories to cope.
And then there’s the “door test.” You hold the wreath up, step back, and suddenly notice everything: the cluster is slightly off-center, the bow needs
fluffing, and one ornament is trying to escape. This is where you learn the best crafting skill of alladjusting. A quick re-angle of the
focal cluster, a trim of ribbon tails, or swapping one accent for another can take a wreath from “cute” to “wait, where did you buy that?”
The best part of the under-$20 approach is that it doesn’t feel precious. You’re not terrified of changing your mind mid-project because you’re not
staring down a $75 pile of specialty supplies. If you want to redo the bow, you redo it. If you want to change the color story next year, you reuse the
base and swap the accents. It becomes a tradition you can actually keep upbecause it’s fun, it’s doable, and it doesn’t require a budget meeting.
When you finally hang it up, the payoff is immediate. Your home looks festive from the outside. You get that little spark of pride every time you walk
past it. And if someone asks where you bought it, you get to casually say, “Oh, I made it,” like you’re the kind of person who just makes wreaths
now. Which you are. Welcome to the club.