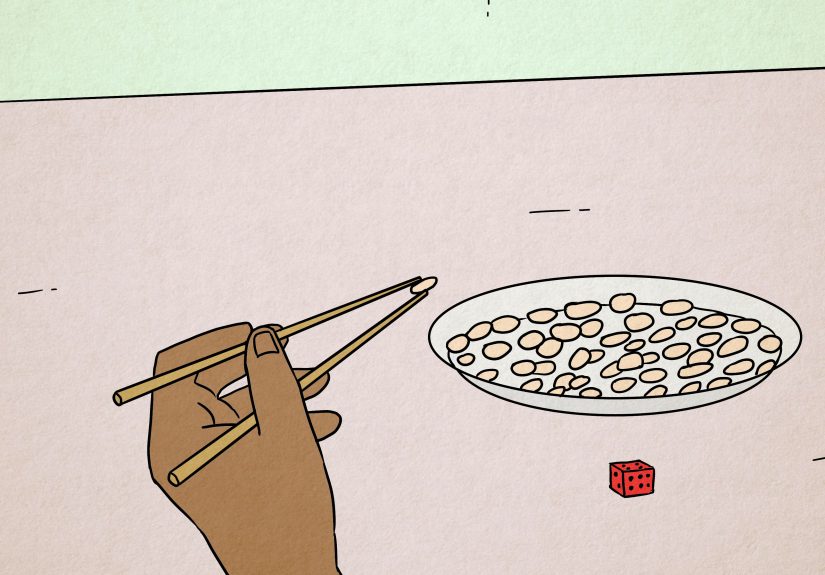
Table of Contents >> Show >> Hide
- Why Round Wall Planters Are Having a Moment
- Supplies and Tools You’ll Need
- Step-by-Step: How to Make a DIY Round Wall Planter
- Choosing the Right Plants for a Round Wall Planter
- Watering, Drainage, and Safety Tips
- Styling Ideas Inspired by Hometalk and Other DIY Creators
- Troubleshooting Common DIY Round Wall Planter Problems
- Real-Life Experiences and Extra Tips for DIY Round Wall Planters
- Conclusion: A Little Circle, a Lot of Impact
If your walls could talk, they’d probably say, “Hey, could we get something more exciting than another framed quote about coffee?” Enter the DIY round wall planter: a simple, modern project that brings greenery, texture, and just the right amount of “I totally made that myself” energy to any room. Inspired by the many clever creators on Hometalk and other DIY sites, this guide walks you through how to build your own circular wall planter, choose the right plants, and keep the whole thing looking fresh instead of crispy.
Whether you’re working with a thrifted metal basket, an embroidery hoop, or a store-bought round planter, the basic idea is the same: create a shallow shelf or pocket inside a circle, fill it with plants, and hang it securely on the wall. The result is part wall art, part mini garden, and 100% conversation starter.
Why Round Wall Planters Are Having a Moment
Round wall planters combine two very trendy things: circular decor and indoor plants. The circle shape softens sharp lines from shelves, frames, and TVs, while the greenery adds color and life in a compact footprint. For small spaces, a round wall planter is like a vertical garden you can hang anywhere you’d hang a picture.
DIYers also love round planters because they’re surprisingly flexible. You can:
- Upcycle a metal wire basket or round bin from the thrift store.
- Use embroidery hoops, brass rings, or wood hoops to form the round frame.
- Build a wood back and add hooks, straps, or leather hangers for a modern look.
- Fill them with real succulents, trailing houseplants, faux greenery, or dried stems depending on your maintenance tolerance.
In short: they look high-end, but they can be done on a very down-to-earth budget.
Supplies and Tools You’ll Need
Your exact supply list will depend on what kind of round planter you’re building, but here’s a good starting point for a Hometalk-style thrifted or hoop-based round wall planter.
Basic Materials
- Round frame – metal circle bin, wire basket, embroidery hoop, brass ring, or a pre-made round planter.
- Wood board or plywood – to create a flat back or shelf inside the circle.
- Hanging hardware – D-rings, sawtooth hangers, or a sturdy picture hanging kit rated for the final weight.
- Screws – short wood screws for attaching wood to metal or joining pieces.
- Leather strap or rope (optional) – for decorative hanging loops.
- Paint, stain, or spray paint – to finish the wood and/or metal to match your decor.
- Planter pots or liners – small nursery pots, plastic liners, or shallow pots that fit inside the circle.
- Potting mix – choose a blend suited to the plants you pick (succulent mix, indoor houseplant mix, etc.).
- Plants – succulents, trailing vines, herbs, or faux plants.
Tools
- Measuring tape or ruler
- Pencil
- Hand saw or miter saw (for cutting wood)
- Drill and drill bits
- Screwdriver or driver bit
- Sandpaper or sanding block
- Paintbrushes or rags (for stain)
- Stud finder and wall anchors for installation
If that list looks long, remember: most of these items are basic DIY tools. Once you have them, you can build a whole gallery wall of planters, shelves, and other projects.
Step-by-Step: How to Make a DIY Round Wall Planter
This step-by-step tutorial assumes you’re starting with a metal round basket or wire bin and adding a wood backing or shelf, which is a common approach in DIY Hometalk-style projects.
Step 1: Plan Your Design and Measure
First, decide how you want your planter to look:
- Do you want a full wood back behind the circle?
- Or a half moon-style shelf that holds a row of plants at the bottom?
- Will you hang it by a top strap, or attach hidden hardware on the back?
Measure the inside diameter of your circle and sketch a quick design. This helps you determine how wide and tall your wood pieces need to be and where they’ll attach to the metal frame.
Step 2: Cut and Prep the Wood
Using your measurements, cut your wood backing or shelf piece:
- For a full back, cut a circle or polygon that fits snugly inside the metal frame.
- For a half shelf, cut a straight board that spans the lower section of the circle.
Sand all the edges until smooth. If you’re using scrap wood (which is very on-brand for DIYers), make sure there are no splinters or cracks where the screws will go.
At this stage, you can pre-drill pilot holes in the wood where it will attach to the metal basket. This helps prevent the wood from splitting.
Step 3: Attach Wood to the Round Frame
Place the wood backing or shelf inside the circle. Clamp if needed to hold it steady. Use short screws through the metal frame into the wood. Space them evenly so the wood doesn’t tilt or bow.
For a full back, attach screws around the perimeter. For a shelf, secure both ends and at least one anchor in the middle if possible. Give the whole assembly a gentle shake; if it rattles or shifts, add another screw.
Step 4: Add Hanging Hardware or Strap
Flip your planter over and attach D-rings or a sawtooth hanger to the back, making sure they’re centered and level. If you’re using a leather strap or rope, attach it to the top of the circle with screws or rivets and make sure it’s symmetrical.
Remember that plants, soil, and water add weight. Pick hardware and wall anchors rated for more than what you think you’ll need. Nobody wants a surprise “plant avalanche” during dinner.
Step 5: Finish with Paint or Stain
Before adding plants, finish the wood and metal so they’re protected and cute:
- Stain the wood for a warm, rustic look.
- Paint it white or black for a clean, modern vibe.
- Spray paint the metal frame to match your hardware or room accents.
Let everything dry completely. This is a great time to scroll through more wall planter ideas while the finish cures.
Step 6: Add Planters, Soil, and Plants
For easiest maintenance, place your plants in small nursery pots or plastic liners that sit inside the round wall planter instead of planting directly into the frame. This makes it easier to remove them for watering or swapping plants out later.
Use the right potting mix for your plants:
- Succulents and cacti: fast-draining cactus/succulent mix.
- Herbs and indoor plants: high-quality indoor potting soil.
- Faux plants: zero maintenance, just arrange and enjoy!
Arrange your plants in a way that balances height and texturetrailing plants near the edges, fuller plants in the center. Step back and adjust until it feels right.
Step 7: Hang and Style
Use a stud finder to locate a stud in the wall, or use appropriate wall anchors if you’re hanging on drywall. Install the hook or screw, then hang your round wall planter and gently test its stability.
Now style the surrounding area: layer your planter with framed art, mirrors, or shelves. The round shape plays nicely with rectangular frames and adds a sculptural feel to the wall.
Choosing the Right Plants for a Round Wall Planter
Round wall planters don’t offer much depth, so choose plants that are compact, shallow-rooted, and not overly thirsty. Some great options include:
Best Options for Indoors
- Succulents: echeveria, haworthia, string of pearls, and small sedums look fantastic in shallow planters.
- Trailing vines: pothos, heartleaf philodendron, string of hearts, or ivy (in bright light).
- Air plants (tillandsia): perfect if your planter isn’t deep or doesn’t have drainage. Mist regularly and provide bright, indirect light.
- Small herbs: thyme, oregano, or chives if you’re hanging it in a bright kitchen.
If your wall doesn’t get much natural light, consider low-light plants like pothos or snake plant pupsor go faux. Modern faux greenery has come a long way, and your visitors are probably not going to ask to see your plants’ birth certificates.
Watering, Drainage, and Safety Tips
The biggest trick with a round indoor wall planter is water management. Because the planter is hanging, you really don’t want water spilling down your wall or soaking into drywall.
Drainage Basics
- Whenever possible, use inner pots with drainage holes sitting inside the decorative round planter. You can take them out to water in a sink or tub, let them drain, and then pop them back in.
- Avoid filling the planter itself with loose soil without a liner; it’s harder to control watering and drainage.
- Skip the old “rocks at the bottom” trickresearch shows it doesn’t actually improve drainage and can keep roots sitting in saturated soil. Proper drainage holes and the right soil mix are more effective.
- If your decorative planter doesn’t have drainage, water lightly and infrequently, and always check the soil moisture with your finger before watering.
Protecting Your Wall
- Place a waterproof liner or tray inside the planter to catch small drips.
- Use a moisture-resistant paint or finish on the wood backing.
- If you’re worried about splashes, choose plants that don’t need frequent watering, like succulents or air plants.
With a little planning, you can keep both your plants and your walls happy.
Styling Ideas Inspired by Hometalk and Other DIY Creators
Once you’ve mastered one DIY round wall planter, it’s dangerously easy to want more. Here are fun styling ideas inspired by popular DIY communities:
- Boho cluster: Hang three different-sized round planters in a loose cluster, mixing live plants and dried stems.
- Kitchen herb wheel: Fill a round planter with tiny pots of basil, thyme, mint, and cilantro near a bright window.
- Minimalist black and green: Paint the frame matte black, stain the wood a natural tone, and fill with simple trailing vines.
- Bedroom calm zone: Use soft colors and low-maintenance plants near your bed for a mini wall garden you see first thing in the morning.
- Outdoor accent: On a covered porch, use weather-resistant materials and fill the planter with hardy succulents or seasonal flowers.
Think of your round wall planter as a rotating display. Swap plants seasonally, refresh the look with new pots or moss, or even redo the finish if you redecorate the room.
Troubleshooting Common DIY Round Wall Planter Problems
Problem 1: Plants Keep Dying
This is usually a mix of too little light and too much water. Move the planter to a brighter spot (but not harsh direct sun for sensitive plants), and let the soil dry more between waterings. If in doubt, water less.
Problem 2: Planter Feels Unstable
If your round planter tilts or rattles, you might need:
- More attachment points between the wood and metal frame.
- A second wall anchor or hook.
- To shift heavier plants toward the center instead of the outer edge.
Problem 3: Water Drips Down the Wall
Take the inner pots out to water them, let them drain completely, and only then return them to the planter. Add saucers or drip trays inside if there’s room. If not, choose drought-tolerant plants and water sparingly.
Real-Life Experiences and Extra Tips for DIY Round Wall Planters
Now let’s talk about the part no one mentions in the pretty photos: the learning curve. Most DIYers don’t nail the perfect round wall planter on the first tryand that’s okay. Here are some “from the trenches” experiences and lessons that can save you time, money, and a few plants.
Start with One, Not a Whole Gallery Wall
It’s tempting to jump straight into three matching round planters with coordinated plants and color schemes. In reality, it’s smarter to build one first. That way you can test:
- How heavy it feels once the soil and plants are in.
- How often you actually want to water plants on a wall.
- Whether you like the look in your specific room and lighting.
Once you know how your first planter behaves in real life, you can confidently scale up to a full wall installation.
Choose Plants for Your Lifestyle, Not Just Your Aesthetic
Pretty Pinterest images are great, but your planter lives in your house, with your schedule. If you travel a lot or forget to water, lean hard into low-maintenance options:
- Succulents and cacti in bright spots.
- Faux plants in low-light corners.
- Air plants if you prefer occasional misting to regular watering.
If you love cooking and are in the kitchen daily, a round herb planter might make sense. If you never cook at home, that same planter could become a wilted guilt circle on the wall. Be honest about how you live.
Don’t Skip the Dry Fit
Before you glue, screw, or stain anything, do a complete dry fit. Place the wood backing or shelf inside the circle, sit your pots or liners on it, and set the plants in place while everything is still movable.
Ask yourself:
- Do the pots sit securely or wobble?
- Can you easily remove them to water?
- Does the arrangement look balanced from a few steps back?
Five minutes of testing can prevent hours of rework later.
Think Carefully About Wall Placement
Your DIY round wall planter will look different depending on where you hang it. A few things to consider:
- Sunlight: Bright indirect light is ideal for most indoor plants. Direct sun through a window can scorch leaves, while dim corners may stunt growth.
- Height: Hang it so you can see the plants and reach them for watering without acrobatics. Eye level or slightly above eye level usually works well.
- Obstacles: Avoid placing your planter where doors swing open, kids play, or pets could reach the plants and knock them down.
Also, be mindful of temperature. Hanging a planter right over a heater vent or radiator is an easy way to bake your plants.
Balance Real Plants with Faux Greenery
You don’t have to commit to all-real or all-faux. Many DIYers mix both: a few real trailing plants grouped with high-quality faux succulents or stems. This gives you movement and growth from the live plants without making the watering schedule overwhelming.
In high or hard-to-reach spots, faux plants are especially practical. Nobody needs to climb a ladder every three days just to water one tiny fern.
Plan for Easy Swaps
One of the best parts of a DIY round wall planter is how easy it is to change up the look. Design your planter so that:
- Plants sit in removable pots or liners.
- You can lift them out without disassembling the whole planter.
- You have a little extra room to tuck in seasonal pieces like mini pumpkins, ornaments, or fairy lights.
This way, your planter becomes a year-round decor piece: fresh herbs in spring, lush trailing vines in summer, dried stems in fall, and evergreen sprigs or faux berries in winter.
Accept That Some Plants Won’t Make It
Even the most experienced plant parents lose plants sometimes, especially in creative setups like wall planters. Think of it less as failure and more as feedback. If a certain plant died quickly, it might have wanted more light, less water, or a bigger pot.
Keep notesmentally or on your phoneabout which plants thrive in your round wall planter and which ones struggle. Over time, you’ll build a shortlist of “wall planter superstars” that always perform well in your home’s conditions.
Conclusion: A Little Circle, a Lot of Impact
A DIY round wall planter is one of those projects that looks fancy but is totally doable with basic tools, simple materials, and a free afternoon. It’s a compact way to add greenery, texture, and personality to your walls, whether you’re styling a small apartment or filling a blank space in a larger home.
By choosing the right frame, building a sturdy backing, thinking through drainage and watering, and picking plants that fit your lifestyle, you can create a planter that’s both beautiful and practical. And once you’ve made one, don’t be surprised if your walls start begging for a few more.
To wrap things up for SEO and publishing, here are the key meta elements for your article:
