Table of Contents >> Show >> Hide
Permanent marker has a big reputation. It shows up to the party, writes on nearly anything, and then acts like it pays rent. That is exactly why people panic when Sharpie lands on a painted wall, a wood table, a leather chair, or the one white shirt that somehow costs more than your monthly coffee budget.
The good news is that “permanent” does not always mean “forever.” In many cases, you can remove permanent marker with the right cleaner, the right amount of patience, and one important personality trait: the ability to not scrub like you are trying to sand a boat. The trick is matching the stain-removal method to the surface. What works beautifully on glass can ruin leather. What saves a whiteboard can scratch a painted wall. And what helps fabric might spread the mess if you rush it.
This guide breaks down how to remove permanent marker from nearly any common household surface, including walls, wood, glass, plastic, fabric, upholstery, leather, whiteboards, and even trickier spots like stone or brick. You will also learn which products to use, which ones to avoid, and how to keep a small marker accident from becoming a full-blown home-improvement subplot.
Why Permanent Marker Is So Stubborn
Permanent marker is designed to cling. Its ink typically contains colorants, solvents, and binding ingredients that help it grip smooth and rough materials alike. That is great when you are labeling storage bins, freezer bags, or project parts. It is less charming when a child decides the hallway wall is “a creative space” or when you mistake a permanent marker for a dry-erase marker during a meeting.
Because the ink bonds differently depending on the material, the best way to remove permanent marker depends on whether the surface is nonporous, semi-porous, delicate, sealed, painted, or absorbent. That is why the smartest approach is never “grab the strongest chemical and hope.” It is “start gentle, test first, and level up only if needed.” That boring advice saves finishes, saves fabric, and saves you from making the stain larger and somehow more artistic.
Before You Start: The Universal Rules
1. Test first
Always test your cleaner on a hidden area before treating the visible stain. Permanent marker is rude, but stripped paint and cloudy plastic are even ruder.
2. Blot, do not grind
On fabric, leather, and many painted surfaces, blotting lifts ink. Hard rubbing can push it deeper, spread it outward, or remove the finish along with the marker.
3. Start with the mildest effective option
Try rubbing alcohol, hand sanitizer, or a damp melamine sponge before moving on to stronger solvents like acetone.
4. Use clean cloth sections constantly
If the ink is transferring onto your cloth, that is good news. Just do not keep rubbing with the same dirty section or you will redeposit the stain you just lifted.
5. Keep heat away until the stain is gone
This is especially important for clothing and upholstery. Heat can set leftover pigment and make the next round of cleaning much harder.
The Best Methods by Surface
Glass, Metal, Tile, and Other Hard Nonporous Surfaces
These are usually the easiest places to remove permanent marker because the ink tends to sit on the surface instead of soaking deeply into it. Good choices include rubbing alcohol, alcohol-based hand sanitizer, or a small amount of acetone on a cloth. For glossy surfaces like glass, ceramic tile, stainless steel, and some laminated furniture, these cleaners often break down the ink quickly.
To remove the stain, dampen a soft cloth or cotton ball with rubbing alcohol and gently wipe the mark. Let the solvent do most of the work. If the stain is older, hold the dampened cloth over the ink for a few seconds before wiping. For especially stubborn marks on smooth surfaces, trace over the old mark with a dry-erase marker and wipe immediately. It sounds like a weird cleaning myth invented by office workers at 4:47 p.m., but it can work surprisingly well on whiteboards and similar glossy surfaces.
Best for: glass, metal, glazed ceramic, laminate, whiteboards, sealed plastic
Use caution with: cheap plastic, acrylic, delicate coatings, painted finishes
Painted Walls
Walls are where confidence goes to die. You want the marker gone, but you do not want to remove the paint in a heroic act of over-cleaning. The safest first move is a damp melamine sponge, often called a magic eraser, used with a very light hand. On many painted walls, it can lift marker without needing additional chemicals.
If that does not work, try a tiny amount of rubbing alcohol on a cotton ball or microfiber cloth and dab gently. Do not flood the wall. Do not scrub in circles like you are polishing a car. Work slowly and stop as soon as you see either the marker or the paint lifting. Flat and matte paint tend to be less forgiving than glossier finishes, so patience matters.
If the wall is wallpapered, avoid aggressive rubbing. In that case, a baking soda paste or a very light spot treatment may help, but only if the wallpaper can tolerate moisture.
Wood Furniture, Floors, and Trim
Wood is tricky because you are often cleaning the finish, not just the stain. For sealed wood, start with rubbing alcohol on a soft cloth and dab lightly. Follow with a damp cloth to remove residue. If the mark softens but does not fully disappear, a small amount of non-gel toothpaste or a toothpaste-and-baking-soda paste can add gentle abrasion. Rub with the grain, not against it, and wipe clean right away.
Avoid aggressive scrubbing, steel wool, or soaking the wood. Acetone can remove marker, but it can also damage finishes quickly. That makes it a last-resort move for wood, not a casual first date.
After cleaning, buff the area with an appropriate furniture polish or finish restorer if needed. Sometimes the goal is not perfection. Sometimes the goal is “the stain is gone, and the table no longer looks like it attended a toddler summit.”
Plastic
Plastic is a mixed bag. Some plastic surfaces handle rubbing alcohol beautifully. Others haze, dull, or soften if you use the wrong solvent. Start with rubbing alcohol on a cloth, applied gently. If that works, great. If it does not, you can try a damp magic eraser or a small amount of hand sanitizer.
Be careful with acetone or nail polish remover on plastic. Some plastics do not merely dislike acetone; they behave as though you insulted their ancestors. Always test first. If the plastic is glossy or clear, go extra slow and inspect the area after each pass.
Whiteboards and Dry-Erase Boards
This is the classic office tragedy. Someone grabs a permanent marker instead of a dry-erase marker, and the room goes silent. Fortunately, whiteboards are one of the few surfaces where a dry-erase marker can actually help fix the problem. Draw directly over the permanent marker with a dry-erase marker, let it sit briefly, then erase. If any residue remains, wipe with rubbing alcohol or whiteboard cleaner using a soft cloth.
Do not use gritty abrasives on a dry-erase board. They can scratch the surface and make future ghosting worse. In other words, save the baking soda scrub for brick and stone, not for your presentation board.
Clothing and Washable Fabric
If you need to remove permanent marker from clothes, speed helps. Blot fresh ink with paper towels. Then place the stained area face down or over a clean absorbent towel so the ink has somewhere to go. Apply rubbing alcohol or alcohol-based hand sanitizer carefully and blot. As the ink transfers, switch to clean paper towels or cloth sections often.
For washable items, follow with a heavy-duty laundry detergent or oxygen-based stain treatment, then wash according to the care label. Air-dry first and check the stain before using the dryer. If any trace remains, repeat the treatment. Heat is not your friend here. Heat is the coworker who says, “I made one small change,” right before everything catches fire.
For white, bleach-safe fabrics, stronger stain systems may help. For spandex, wool, silk, and delicate blends, spot-testing is essential and professional cleaning may be the safer move.
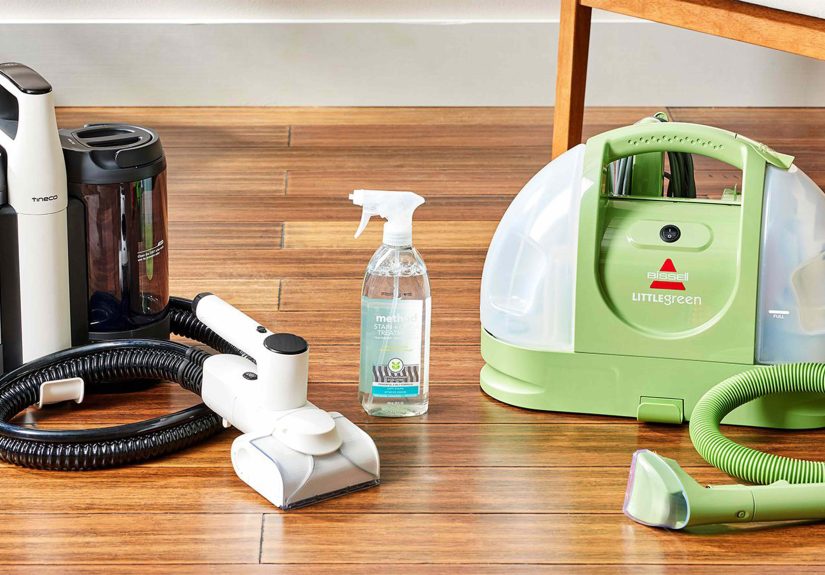
Upholstery and Carpet
For upholstered furniture and carpet, the biggest mistake is soaking the area. Too much liquid spreads the stain and pushes it deeper into padding. Start by blotting, then apply rubbing alcohol or an appropriate upholstery-safe stain remover to a cloth rather than pouring it directly on the fabric. Dab from the outside toward the center to prevent spreading.
If the stain lightens, keep going slowly. Afterward, blot with a clean damp cloth to remove residue, then allow the area to air-dry. Tougher textiles may respond to baking soda or oxygen-based stain products, but delicate fabrics should be treated with more caution. If the upholstery is silk, vintage, velvet, or unknown, this is one of those moments when calling a professional cleaner is not overreacting. It is wisdom with receipts.
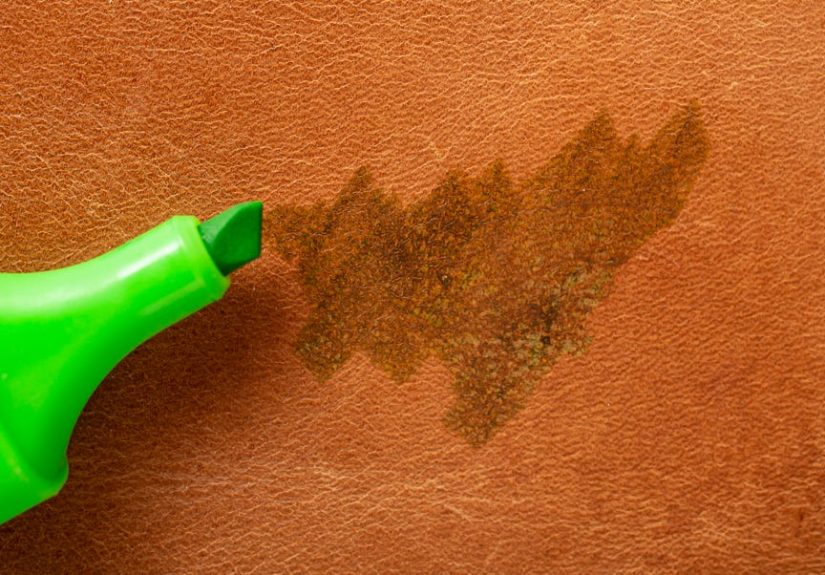
Leather and Faux Leather
Leather demands a gentler touch. Use a cotton swab or soft white cloth lightly dampened with rubbing alcohol and dab from the outside of the mark inward. Replace swabs frequently as the ink transfers. Do not saturate the leather, and do not scrub like you are erasing a bad life choice.
Once the marker is gone or mostly gone, wipe with a slightly damp cloth and follow with a leather conditioner. Alcohol can dry leather, so conditioning is not optional if you want to keep the surface supple. Faux leather may tolerate a similar method, but always test first because coatings vary widely.
Skin
If permanent marker ends up on skin, do not panic. It usually wears off naturally, but you can speed things along with rubbing alcohol, hand sanitizer, gentle soap, or a cleansing scrub. Apply lightly and wash afterward. Skip harsh scraping and repeated acetone use on skin, especially for kids or sensitive skin. Removing marker should not require turning your hand into a chemistry experiment.
Brick, Stone, and Rough Surfaces
Porous, rough materials are the hardest challenge because the marker sinks into tiny crevices. On brick, some stone, and certain textured surfaces, a baking soda paste can help. Mix baking soda with a little water to form a spreadable paste, apply it to the mark, and rub gently with a soft brush or cloth. Wipe away residue and repeat if needed.
Be more careful with natural stone countertops such as marble and granite. They can react badly to strong solvents, acids, or abrasive scrubbing. Engineered quartz is often more forgiving, but it still deserves a spot test. On stone counters, start with the manufacturer’s cleaner or a stone-safe product. If that fails and the surface is compatible, a careful spot treatment may work, but this is not the place for wild improvisation and internet courage.
What Usually Works Best
If you want the short version, here it is: rubbing alcohol is the MVP for many permanent marker stains. Hand sanitizer is a strong runner-up because it is alcohol-based and easier to control on vertical or fabric surfaces. A magic eraser is great for walls and some hard surfaces. Dry-erase marker is the whiteboard hero. Toothpaste and baking soda can help on wood and rougher materials. Acetone is powerful but deserves the most caution.
Common Mistakes That Make the Stain Worse
Using the strongest chemical first
This can strip finishes, bleach color, or damage delicate materials before you even know whether a gentler option would have worked.
Scrubbing too hard
Marker stains are annoying, but turning one small mark into a large faded patch is worse.
Ignoring the material
The same stain remover should not be used the same way on quartz, leather, polyester, and painted drywall. Surfaces have feelings. Respect them.
Putting fabric in the dryer too soon
If the stain is still there, the dryer can lock it in. Always check before applying heat.
Mixing random cleaners
Do not turn stain removal into a DIY chemistry final. Use one method at a time, rinse or wipe between attempts, and keep ventilation in mind.
When to Call a Professional
Sometimes permanent marker needs backup. Consider professional help if the stain is on unfinished wood, suede, antique furniture, silk upholstery, specialty wallpaper, valuable leather, or natural stone with an unknown sealer. Also call in a pro if you already tried two or three safe methods and the surface is starting to look worse. Pride is expensive. Professionals are sometimes cheaper.
Final Thoughts
If you have been staring at a permanent marker stain and mentally pricing a replacement table, take a breath. In many cases, you can remove permanent marker from walls, wood, glass, fabric, leather, and plastic with supplies you already own. The key is to match the method to the surface, work in small passes, and resist the universal human urge to attack the problem with maximum force.
The best approach is simple: test first, start gentle, blot patiently, and escalate only when necessary. That is how pros handle stains, and it is how you keep one little marker accident from becoming a full afternoon of regret. Permanent marker may act confident, but with the right game plan, it is not unbeatable.
Real-World Experience: What Actually Happens When You Clean Permanent Marker
In real homes, permanent marker accidents rarely happen in convenient places. They show up on painted walls five minutes before guests arrive, on a dining chair right after someone says, “Don’t worry, it’ll come right out,” or on a white blouse on the exact day you decided to wear confidence as a color. That is why experience matters as much as technique.
One of the most common situations is marker on a wall. People usually panic and scrub hard right away. That is almost always the wrong move. In practice, light passes with a damp melamine sponge tend to work better than aggressive friction. When people slow down, the wall usually fares much better. When they rush, the marker may fade, but so does the paint. Suddenly the problem is no longer “How do I remove permanent marker?” It becomes “How do I explain this weird pale rectangle in the hallway?”
Wood furniture tells a similar story. The stain itself often looks dramatic, but the bigger risk is damaging the finish during cleanup. In real-life cases, the most successful cleanups usually happen when someone dabs first, uses only a small amount of alcohol or toothpaste paste, and stops to inspect after every pass. The least successful cleanups tend to involve acetone, paper towels, impatience, and a sentence that starts with, “I figured if a little worked, more would work faster.” History does not support that theory.
Fabric is where patience earns its salary. When permanent marker hits clothes or upholstery, people often rub in circles because that feels productive. Unfortunately, it is productive in the worst way. Blotting is slower, but it gives the ink somewhere to transfer. The biggest difference between a stain that lifts and a stain that spreads is often nothing more glamorous than changing to a clean cloth section every few seconds. Not thrilling, but extremely effective.
Leather cleanup is usually less dramatic and more delicate. The best results come from treating it like a precision job rather than a wrestling match. Gentle dabbing, fresh cotton swabs, and follow-up conditioner make a huge difference. Skip the conditioner, and the stain may disappear while the leather starts looking tired and thirsty. That is not a win. That is just a different problem wearing nicer shoes.
And then there is the whiteboard mishap, the corporate classic. The dry-erase-marker-over-permanent-marker trick feels suspicious the first time you hear it, like advice from a coworker who once fixed a printer by kicking it. But on the right surface, it really can work. It is one of those rare cleaning moments that feels like a magic trick and office folklore at the same time.
The biggest lesson from real experience is this: permanent marker removal is usually less about secret products and more about method. The right cleaner matters, but control matters more. The people who get the best results are not the ones using the fanciest stain remover. They are the ones who go slowly, respect the surface, and know when to stop before “cleaning” turns into “repair.” That is the pro mindset, and it works far more often than panic ever will.