Table of Contents >> Show >> Hide
- Why Chalk Paint Is Perfect for Coffee Table Makeovers
- What You Need for a Chalk Paint Coffee Table Makeover
- Step-by-Step: Chalk Paint Coffee Table Makeover
- Design Ideas Inspired by Hometalk-Style Makeovers
- Common Chalk Paint Mistakes (and How to Avoid Them)
- How to Care for Your Chalk-Painted Coffee Table
- Real-Life Experiences with Chalk Paint Coffee Table Makeovers
- Final Thoughts
Every living room has that one awkward piece of furniture. You know the one:
the scratched, orangey-brown coffee table that has survived three apartments,
two moves, and at least one spilled bowl of cereal. Before you drag it to
the curb, grab a can of chalk paint and a brush. With one weekend and a bit
of patience, you can turn that tired table into a Hometalk-worthy
showpiece.
Chalk paint is beloved by DIYers because it’s beginner-friendly, super
forgiving, and perfect for giving furniture a soft, matte, designer look
without needing a workshop full of tools. In this guide, we’ll walk through
a complete chalk paint coffee table makeover, from prep and paint to
distressing and sealing. Along the way you’ll get real-life tips, design
ideas, and troubleshooting advice so you end up with a table you’re proud to
put front and center.
Why Chalk Paint Is Perfect for Coffee Table Makeovers
Coffee tables take a beating. Drinks, snack bowls, laptops, kids’ feet
everything lands there. That’s why chalk paint is such a good match:
-
Minimal prep. Unlike traditional latex paint, chalk paint
usually sticks to wood, laminate, and previously finished surfaces with
just a good cleaning and light scuff sanding if the finish is very glossy. -
Great coverage. The thicker formula means fewer coats,
which is ideal when you’re painting a large tabletop and base. -
Soft matte finish. Chalk paint dries to a velvety, matte
look that feels high-end and works with farmhouse, cottage, boho, or
modern decor. -
Easy to distress. Want that chippy, vintage Hometalk
vibe? Chalk paint sands back beautifully along edges and details. -
Customizable protection. Seal it with clear wax for a
soft, hand-rubbed finish or with a water-based poly for extra durability.
Whether your style leans rustic farmhouse or clean and modern, chalk paint
gives you enough flexibility to completely change the mood of your living
room without buying a brand-new table.
What You Need for a Chalk Paint Coffee Table Makeover
You don’t need a fancy workshop to pull this off. Gather:
- Old coffee table (solid wood or sturdy laminate works best)
- Chalk paint in your chosen color (white, greige, navy, or sage are classics)
- Good quality synthetic or natural-bristle paintbrush
- Microfiber cloths or rags
- Mild cleaner or degreaser
- Fine- or medium-grit sanding sponge or sandpaper
- Wood filler (optional, for deeper gouges or chips)
- Painter’s tape and a drop cloth
- Clear furniture wax or a water-based polyurethane topcoat (for sealing)
- Optional: dark wax, glaze, or stain for added depth or a two-tone look
If you want a really polished makeover, you can also swap out or spray-paint
any hardware (like handles or metal accents) for a more current finish such
as matte black, brushed brass, or soft gold.
Step-by-Step: Chalk Paint Coffee Table Makeover
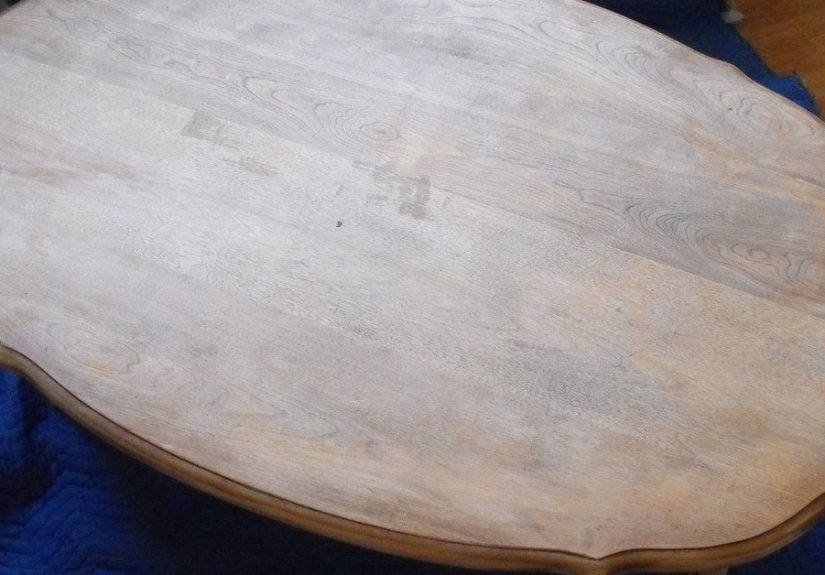
Step 1: Evaluate and Prep Your Coffee Table
Start by giving your table a quick health check. Is it wobbly? Tighten loose
screws first. Are there deep scratches, water rings, or chipped corners?
These are fixable, but it’s easier to deal with them before you ever open
the paint can.
-
Clean thoroughly. Wipe down the entire table with a mild
cleaner to remove dust, oils, and sticky residue. Coffee tables collect
everything from snack grease to furniture polish, and those can interfere
with paint adhesion. -
Repair damage. Fill deep dings or chips with wood filler.
Let it dry, then sand the patched spots smooth. -
Lightly sand glossy finishes. If your table has a shiny
factory finish, lightly scuff the flat surfaces with sandpaper. You’re not
stripping it, just giving the paint something to grip.
This is the least glamorous part of the project, but it’s what separates a
peeling paint job from a makeover that actually survives movie night.
Step 2: Plan Your Design
Before you start painting, decide what kind of look you’re going for. Some
ideas inspired by popular Hometalk-style makeovers:
-
Farmhouse two-tone. Stain the top a warm wood tone and
paint the base and legs in white or ivory chalk paint. -
All-over bright white. Perfect for small spaces where you
want to visually “lighten up” the room. -
Moody color moment. Deep navy, charcoal, or forest green
on the whole table for a modern, dramatic focal point. -
Stenciled top. Paint the table one color, then add a
subtle stencil pattern in a contrasting or lighter tone.
Once you’ve chosen your style, tape off any areas you want to keep paint-free,
like a stained top or metal casters.
Step 3: Prime Only if You Need To
One of the big selling points of chalk paint is that it often doesn’t need a
traditional primer. However, there are a few situations where a primer or
stain-blocking product is smart:
- Very dark wood you’re turning bright white
- Pieces with heavy water stains or tannin bleed-through
- Furniture that’s been polished with heavy oils or waxes for years
If your table falls into one of these categories, do a quick coat of a
stain-blocking primer on the top and any problem areas. Let it dry before
moving on.
Step 4: Apply the Chalk Paint
Now for the fun part paint. Stir the chalk paint well to mix any pigment
that may have settled at the bottom.
-
First coat. Load your brush lightly and apply the paint
in smooth strokes, working with the grain on the top and then around the
base. Don’t overwork an area; chalk paint dries quickly, so brush it on
and move along. -
Let it dry. Most chalk paints dry to the touch within
20–60 minutes depending on humidity. When it looks matte and feels dry,
you’re ready for the second coat. -
Second coat. Apply a second thin coat for full coverage.
If you’re using white over a very dark finish, you may need a third coat,
especially on the tabletop.
Thin coats are your friend. They dry faster, chip less, and show fewer
brushstrokes than one heavy, gloopy coat.
Step 5: Distress for a Farmhouse Look (Optional)
If you love the character of a slightly worn, “lived-in” finish, now’s the
time to distress the table. This step is totally optional, but it’s a
signature chalk paint look.
-
Use a fine-grit sanding sponge along the edges, corners, and raised
details where natural wear would occur. -
Sand lightly until the wood or base color peeks through. You’re going for
“subtly vintage,” not “attacked by sandpaper.” - Wipe away dust with a dry cloth when you’re happy with the look.
For a softer distressed look, some DIYers use a barely damp cloth to rub
away paint on the edges before it has fully cured. Try this on a hidden area
first to see how your specific paint behaves.
Step 6: Seal with Wax or Topcoat
Chalk paint on its own is porous and can scuff easily. Sealing is what
transforms it from “chalky art project” into “practical coffee table.”
Option 1: Clear Furniture Wax
Clear wax is classic for chalk-painted furniture and gives that soft,
hand-rubbed sheen people love.
-
Use a dedicated wax brush or a lint-free cloth to apply a thin layer of
wax in small sections. - Work it into the paint in circular motions, then wipe away excess.
- After 15–30 minutes, buff gently with a clean cloth for a subtle sheen.
If you want an “aged” or antique look, you can follow with a dark or
antiquing wax, but always apply clear wax first. That clear layer acts like a
buffer so the dark wax doesn’t grab too hard and turn the whole table muddy.
Option 2: Water-Based Polyurethane
If your household is more “kids doing crafts on the coffee table” than
“delicate tea service,” consider a water-based polyurethane instead.
- Choose a matte or satin sheen to keep the chalk-paint vibe.
-
Apply thin coats with a synthetic brush or foam applicator, sanding
lightly between coats if needed. -
Two to three coats on the top surface will help it stand up to everyday
use.
Whatever sealer you choose, give it time to cure. It may feel dry within
hours, but curing can take several days to a couple of weeks. During that
time, be gentle: no heavy stacking, soaking spills, or hot mugs with no
coaster.
Step 7: Reassemble and Style Your New Table
Once the finish is fully dry to the touch, flip the table upright, reattach
any hardware, and step back. This is the “before and after” moment when you
realize you basically just gave your living room a mini remodel for the cost
of a quart of paint.
Style ideas:
- A simple tray with a candle, a small plant, and a couple of stacked books
-
A woven basket underneath for throws or kids’ toys to keep the top
clutter-free -
Contrasting decor for example, black accents on a white table or brass
accents on a navy table
Design Ideas Inspired by Hometalk-Style Makeovers
Need a few more creative sparks before you grab the brush? These chalk paint
coffee table ideas show how flexible one can of paint can be:
-
French market table. Soft gray chalk paint with a white
stencil on top that mimics a vintage French grain sack graphic. -
Two-tone coastal. Warm wood-stained top, pale blue or
seafoam chalk-painted base, and lightly distressed edges. -
Industrial chic. Deep charcoal paint, light distressing,
and matte black or steel hardware for a loft-style feel. -
Chippy cottage white. Multiple layers of white and cream
chalk paint, heavily distressed for a rustic, cottage-core look.
The beauty of chalk paint is that if you don’t love the final color or
finish, you can sand lightly, repaint, and try again. It’s a very forgiving
medium perfect for experimenting until your coffee table fits your space
perfectly.
Common Chalk Paint Mistakes (and How to Avoid Them)
-
Skipping the cleaning step. Grease and dust are the
enemies of adhesion. Always clean first. -
Applying paint too thick. Thick coats take longer to dry,
show more brush marks, and are more prone to chipping. Think “thin and
even,” not “frosting a cake.” -
Distressing everywhere. Focus on natural wear points:
corners, edges, and raised details. If everything is distressed, nothing
stands out. -
Skipping the sealer. Unsealed chalk paint can stain and
scuff easily, especially on a coffee table that sees daily use. -
Using it hard too soon. Even after the wax or poly feels
dry, it still needs time to fully cure. Treat the table gently for the
first week or two.
How to Care for Your Chalk-Painted Coffee Table
Once your makeover is complete, a little simple maintenance will keep it
looking fresh:
- Use coasters under drinks to prevent rings and water marks.
- Wipe spills promptly with a damp cloth and dry the surface afterward.
-
Dust regularly with a soft cloth; avoid harsh cleaners or anything
abrasive. -
If you used wax, plan to refresh high-use areas every year or so with a
light new coat. -
For poly finishes, avoid dragging heavy decor across the surface to
prevent scratches.
Treat it well, and your coffee table will keep its “after” look long after
you’ve forgotten what the “before” even looked like.
Real-Life Experiences with Chalk Paint Coffee Table Makeovers
If you talk to seasoned DIYers, you’ll notice a pattern: few people stop at
just one chalk paint project. The first coffee table makeover tends to start
a chain reaction. Once you realize you can transform a sad, dated piece
over a weekend, it becomes hard to look at any thrift store or Facebook
Marketplace find the same way again.
Many people begin with a basic coffee table they’re not emotionally attached
to. That’s actually the smartest starting point. A lower-pressure piece lets
you experiment with technique. You learn how much paint your brush really
needs, how fast the paint dries in your climate, and what “just enough”
distressing looks like in real life versus on Instagram.
One common experience is underestimating how much prep matters. DIYers often
admit that their first project involved a quick dusting and then jumping
straight into painting. The result? Flaky spots where old furniture polish
or kitchen grease kept the paint from bonding properly. After that, a little
extra time wiping down the table with a cleaner feels like cheap insurance.
Another lesson that comes up again and again is about color choice. In the
can, bright white looks crisp and clean, but on a heavily used coffee table
with kids, pets, and snacks, it may show wear faster than a soft gray or
greige. Many DIYers end up toning things down a bit on their second project,
choosing colors that hide crumbs and fingerprints a little better while
still brightening the room.
Sealing is also a big learning moment. The first time someone uses clear wax,
they’re often surprised by how little they need. Loading the brush with wax
like paint leaves a sticky residue that never quite buffs to a smooth
finish. After one tacky tabletop experience, most people switch to applying
very thin layers and buffing more than they wax. On the flip side, those who
choose a water-based poly sometimes learn the hard way that heavy, wet
coats can cause drips or cloudiness. Thin, patient layers win in both cases.
There’s also a fun psychological shift that happens. That dark, heavy table
you almost dragged to the curb becomes a custom piece you’re proud of. You
start rearranging the living room around it, swapping out pillows or throws
to match your new color palette. Guests notice. You get to say, “Oh, that?
It was an old coffee table. I painted it.” There’s a quiet satisfaction in
knowing you didn’t just buy something new you created something better out
of what you already had.
Finally, experience teaches that “good enough” is often better than
“perfect.” A few minor brush marks or small imperfections usually disappear
once the table is styled and in use. Chalk paint projects have a handmade
quality that’s part of their charm. The goal isn’t a factory-smooth finish;
it’s a cozy, lived-in look that fits your home and lifestyle. Once you
embrace that, you’re free to enjoy the process rather than obsessing over
every stroke of the brush.
Final Thoughts
A chalk paint coffee table makeover is one of the easiest ways to change the
entire feel of your living room without blowing your budget. With a bit of
prep, a couple of thin coats of paint, and the right sealer, your old table
can go from “don’t look too closely at that” to “I can’t believe you
DIY’d this.”
Whether you lean farmhouse, modern, cottage, or eclectic, chalk paint gives
you the freedom to experiment until your coffee table feels like it truly
belongs in your space. And once you see what a difference one project makes,
don’t be surprised if the end tables, TV console, or old dresser start
giving you ideas too.