Table of Contents >> Show >> Hide
- What Pliers Actually Do (and Why That Matters)
- Choosing the Right Type of Pliers
- Slip-joint (everyday “grab and hold” pliers)
- Tongue-and-groove (a.k.a. channel locks / water pump pliers)
- Needle-nose (precision and tight spaces)
- Lineman’s / combination pliers (grip + twist + cut)
- Diagonal cutters (side cutters)
- Locking pliers (vise-grips)
- Specialty pliers you’ll be glad you own (when you need them)
- What to Look for When Buying Pliers
- Pliers Safety: The Habits That Prevent Most Injuries
- How to Use Pliers Effectively (Without Chewing Up Your Work)
- Care and Maintenance: Make Your Pliers Safer Over Time
- Real-World Examples: Picking the Right Pliers for Common Jobs
- Common Mistakes (So You Don’t Become a Cautionary Tale)
- Field Notes: of Hands-On Experience (So You Can Learn the Easy Way)
- Conclusion
Pliers are the unsung heroes of the toolbox: they grip, bend, twist, pull, pinch, and occasionally rescue tiny
screws that have rolled into the darkest corner of your garage like they’re hiding from taxes. But pliers also
have a talent for causing avoidable injuries (pinched fingers, flying wire ends, “why is my knuckle bleeding?”)
when they’re used wrongor when the wrong pair is forced to do the job of a totally different tool.
This guide will help you pick the right pliers for the task, use them with better control and less frustration,
and follow safety habits that keep your projects moving forward (instead of moving you toward the first-aid kit).
What Pliers Actually Do (and Why That Matters)
At a glance, pliers look simple: two handles, a pivot, and jaws. In practice, tiny differences in jaw shape,
joint design, and handle length change how much control you have, how much force you can apply, and how safely
the tool behaves under load.
The “plier math” you should know
- Jaw shape controls what you can grip without slipping or damaging the surface.
- Handle length affects leverage (longer handles = more torque, but also more opportunity to overdo it).
- Joint/pivot quality affects alignment (misaligned jaws = slipping = sudden hand-meets-metal moments).
- Cutting edges (if present) determine what you can cut cleanly, and what will snap, spray, or dent.
When you treat pliers as a “universal substitute” for wrenches, cutters, or hammers, you invite slippage and
broken parts. The right move is to choose pliers that match the joband then use them like they were designed
to be used (not like a multitool in a disaster movie).
Choosing the Right Type of Pliers
If you’ve ever tried to grab a tiny washer with bulky jaws, you already understand the main rule:
fit beats force. Here are the most useful plier categories and what they’re best at.
Slip-joint (everyday “grab and hold” pliers)
Slip-joint pliers have an adjustable pivot with two (sometimes more) jaw positions. They’re a general-purpose
option for gripping, light turning, and small household tasks. They’re handybut not magical. If you find
yourself straining or the jaws keep slipping, it’s usually a sign you need a different tool or a better jaw style.
Tongue-and-groove (a.k.a. channel locks / water pump pliers)
These have multiple adjustment “channels” that open wide and lock into positions. They’re the classic choice for
plumbing and automotive workgripping pipes, turning odd shapes, and handling larger fittings.
Pro tip: pick a size that matches your most common tasks. Oversized pliers can be clumsy in tight spaces, and
undersized ones tempt you to “just muscle it,” which is how tools get damaged and hands get hurt.
Needle-nose (precision and tight spaces)
Needle-nose pliers are for reaching into cramped areas, holding small parts, bending wire, and positioning clips.
They shine in electrical work, jewelry/craft work, and small mechanical assemblies. Many versions include side
cutters near the pivotuseful for trimming wire, zip ties, and small fasteners.
Lineman’s / combination pliers (grip + twist + cut)
Lineman’s pliers are a heavier-duty choice commonly used for electrical work: strong gripping area, broad jaws,
and cutters designed for wire. They’re great when you need to twist multiple conductors together or pull wire
with confidence.
Diagonal cutters (side cutters)
Diagonal cutters are designed to cut wire cleanly. They are not “mini bolt cutters,” and they are definitely not
“I’ll just snip this nail real quick” tools unless the tool is rated for it. Cutting hard materials with the
wrong cutters is how you chip cutting edgesand launch sharp fragments.
Locking pliers (vise-grips)
Locking pliers clamp onto an object and stay locked until released. They’re excellent for stubborn fasteners,
holding irregular shapes, and acting as a temporary “third hand.” But they can also crush soft materials and
mar surfaces if you crank them down like you’re trying to compress a diamond.
Specialty pliers you’ll be glad you own (when you need them)
- Snap-ring / circlip pliers: for retaining rings (trying this with needle-nose is a stress hobby).
- Crimping pliers: for connectors; correct die shapes matter for secure crimps.
- End-cutting nippers: for pulling nails, cutting flush, and working close to a surface.
- Hose clamp pliers: for spring clamps in automotive workless swearing, more progress.
What to Look for When Buying Pliers
Not all pliers are created equal. Two tools can look nearly identical, yet one feels smooth and controlled while
the other feels like it was assembled during a power outage. Here’s what matters.
Jaw alignment and grip
Close the jaws and look at how the teeth meet. They should align evenly without gaps or twist. Poor alignment
increases slippage, which is a top contributor to hand injuries and damaged workpieces.
Joint quality
Open and close the tool. It should move smoothly without grinding, binding, or wobbling. A solid joint helps you
apply controlled pressure instead of “pressure plus surprise.”
Handle comfort (without being fooled by “cushion grip confidence”)
Comfortable handles reduce fatigue and improve control. But remember: comfort grips are not the same thing as
electrical insulation. If you’re doing electrical work, you need properly rated insulated toolsnot just rubbery handles.
Size selection: avoid the “too big / too small” trap
Bigger pliers produce more leverage, but they also reduce finesse. For most homeowners and DIYers, a practical
starter mix is:
- 8″ slip-joint or combination pliers
- 10″ tongue-and-groove pliers (or 12″ if you do a lot of plumbing)
- 6″–8″ needle-nose pliers
- Diagonal cutters sized for your typical wire work
- One locking pliers (curved jaw is the most broadly useful)
When you should pay extra
Spend more when the job involves safety-critical performance: electrical work, frequent cutting, tight mechanical
assemblies, or professional use. The costs of poor grip, chipped cutters, or a slipping tool aren’t just annoying
they can be dangerous.
Pliers Safety: The Habits That Prevent Most Injuries
Many plier injuries come down to three things: slippage, pinch points, and
flying debris. Fix those, and you’ve already upgraded your safety game.
1) Use the right tool for the job
If you’re turning a nut, a properly sized wrench is usually the safer choice. If you’re cutting hardened wire,
use cutters rated for it. The “wrong tool shortcut” is how projects get longer and hands get more colorful.
2) Inspect before you squeeze
Don’t use pliers that are cracked, bent, broken, or “sprung” (jaws that don’t meet correctly). Also avoid tools
with loose pivots or damaged cutters. A quick inspection takes seconds and can prevent a slip that happens in milliseconds.
3) Protect your eyesespecially when cutting
Cutting wire can send small pieces flying. Even if the piece is tiny, your eye will strongly disagree with the
idea that it’s “no big deal.” Wear safety glasses or appropriate eye protection, and consider shielding the cut
end with your free hand (kept safely out of the cutting path) or a rag to reduce launch velocity.
4) Keep fingers away from pinch points
The area near the pivot and the inner handle path can pinch. Some designs include pinch-reducing features, but
your best protection is good hand placement: keep your grip behind the guards (if present) and avoid wrapping
fingers where handles may close together.
5) Don’t add “bonus force” with a hammer or cheater bar
Hitting pliers or extending handles to generate more force is a fast track to tool damage and loss of control.
If a job needs more torque, pick a tool designed for itor step back and reassess what’s actually binding.
6) Electrical work: assume everything is live until proven otherwise
For electrical tasks, turn power off, verify it’s off, and follow safe work practices. If you must use insulated
pliers, use tools that are properly rated and in good condition. Keep them clean and dry, and inspect before use.
If the insulation is damaged, retire the tool.
How to Use Pliers Effectively (Without Chewing Up Your Work)
Grip technique: where to hold the workpiece
For maximum control, grip the object as close to the pivot as practical (where the jaws are strongest) unless
you need a delicate hold at the tip. Gripping at the very tip for heavy force increases slipping.
Pull and twist in line with the tool
Pliers are designed for force along the handle direction. Twisting pliers sideways (torqueing the jaws laterally)
stresses the joint and can loosen or damage the tool. If you need a turning tool, use a wrench or socket.
Cutting technique: clean cuts, fewer chips
- Cut at right angles and avoid rocking the tool side-to-side on the cutting edges.
- Match the cutter to the material (soft copper vs. hardened steel are different worlds).
- Control the offcut so it doesn’t fly (rag, shield, or controlled hand placement).
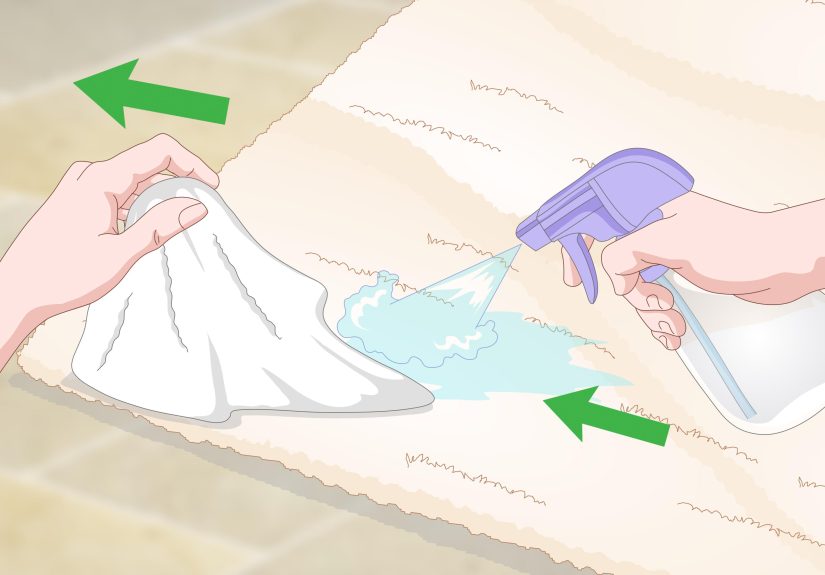
Use surface protection when appearance matters
Working on polished fixtures, chrome plumbing, or finished hardware? Put a rag or thin protective material
between the jaws and the surface to prevent scratches. Better yet, use the correct non-marring tool when possible.
Locking pliers: set them like a professional, not like a movie villain
Adjust the screw so the jaws clamp firmly without excessive crushing. If you have to strain to close the handles,
it’s too tight. If the jaws slip, tighten slightly and try again. Think “secure hold,” not “permanent tattoo on the metal.”
When pliers aren’t the answer
If you’re repeatedly repositioning, slipping, or rounding a fastener, stop. Switching tools can save time. Common upgrades:
- Wrench or socket for nuts/bolts (better contact, less damage)
- Dedicated wire stripper for insulation removal (cleaner, safer)
- Proper crimper for terminals (reliable electrical connections)
- Bolt cutters for heavy cutting tasks (instead of sacrificing your diagonal cutters)
Care and Maintenance: Make Your Pliers Safer Over Time
Well-maintained pliers are safer, easier to control, and less likely to fail at the worst possible moment.
Quick maintenance checklist
- Clean the jaws (oil, dirt, and adhesive reduce grip).
- Lubricate the pivot occasionally for smooth action.
- Check alignment and retire tools that are bent, cracked, or loose.
- Protect cutters by only cutting materials they’re designed to cut.
- Avoid excessive heat that can affect tool temper and performance.
If you use insulated pliers, keep them clean and dry and inspect the insulation carefully. Damage isn’t “cosmetic” on a safety-rated tool.
Real-World Examples: Picking the Right Pliers for Common Jobs
Example 1: Replacing a bathroom faucet supply line
You’ll likely encounter tight spaces and fittings that are awkward to reach. Tongue-and-groove pliers can grip
larger fittings, but if you’re working on polished parts, protect the finish with a rag. If a nut is involved,
a basin wrench or proper wrench may be the smarter tool for control and damage prevention.
Example 2: Hanging a picture with wire and small hardware
Needle-nose pliers help bend and position wire neatly. Diagonal cutters trim excess wire cleanly. Wear eye
protection when cutting wire, even for “tiny snips,” because tiny snips have big confidence.
Example 3: Fixing a loose electrical outlet (power off!)
After turning off the breaker and verifying the circuit is de-energized, needle-nose pliers help form wire hooks,
and lineman’s pliers help twist conductors and cut wire. If you’re using insulated tools, confirm the insulation
is intact and the tool is rated for electrical work.
Example 4: Removing a stubborn, partially stripped fastener
Locking pliers can clamp onto the fastener head and provide controlled turning force. Set them snugly, keep your
pull in line with the handles, and avoid side-loading the jaws. If you’re damaging the part you need to reuse,
step up to a dedicated extractor or the correct socket solution.
Common Mistakes (So You Don’t Become a Cautionary Tale)
- Using pliers as a wrench: rounded fasteners and sudden slips are a classic combo.
- Cutting hardened materials with standard cutters: chipped edges, flying fragments.
- Twisting pliers sideways: stressed joints, misalignment, eventual failure.
- Assuming comfort grips = insulation: dangerous misconception for electrical work.
- Over-clamping with locking pliers: crushed parts and damaged surfaces.
Field Notes: of Hands-On Experience (So You Can Learn the Easy Way)
The first time I truly respected pliers was during a “five-minute” sink repair that turned into a small saga.
I grabbed a shiny new pair of tongue-and-groove pliers and went to town on a chrome nut under the faucet.
The nut didn’t move… but the pliers didslipped, skated, and left a lovely scratch that looked like my sink had
survived a bar fight. Lesson #1: if the finish matters, protect it. A simple rag between the jaws and the fixture
would’ve saved me from explaining “character marks” to everyone who visited.
Another memorable moment: cutting wire for a wall-mounted TV install. I snipped a short piece of steel wire with
diagonal cutters and felt like a competent adult for exactly half a seconduntil the cut end launched into the
air like it had been personally offended. It didn’t hit anyone, but it did remind me that physics is always on
the job site, even when you aren’t. Lesson #2: wear eye protection when cutting, and control the offcut. Now I
either cover the cutting area with a rag or angle the cutters so the scrap can’t fly toward faces, pets, or the
void behind the workbench where lost objects go to start new lives.
I’ve also learned the “right tool” lesson the stubborn way. I once tried to turn a nut with slip-joint pliers
because the wrench was “somewhere.” The nut rounded slightly, then the pliers slipped, and my knuckles met a
sharp bracket with the enthusiasm of a high-five. Lesson #3: using the wrong tool doesn’t save timeit just
changes the schedule from “project time” to “bandage time.” When something needs torque and clean engagement,
I now reach for a wrench or socket. Pliers are for gripping and holding, not pretending to be other tools.
Locking pliers taught me a different kind of humility. The temptation is to tighten the adjustment screw like
you’re trying to compress a planet. I did that once on a small bracket and created a perfectly shaped set of jaw
markslike a tiny alligator bit it and got away. Lesson #4: set locking pliers to hold firmly, not to crush.
Tighten gradually, test, and stop when the grip is secure. If you need to clamp that hard, you probably need a
different strategy (or the part is about to lose the right to be called “reusable”).
Finally, on electrical work: I used to assume that rubbery grips were “safe enough.” Then I learned the hard
truthcomfort grips are about comfort. Real insulated tools are rated, designed, and meant to be inspected and
kept clean and dry. Lesson #5: for anything electrical, power off and verify, and if insulated tools are part of
your safety plan, use properly rated insulated pliers in good condition. Your future self (with un-zapped nerves
and intact eyebrows) will appreciate it.