Table of Contents >> Show >> Hide
- Why Stainless Steel Sinks Get Gross So Fast (and Why It’s Not a Moral Failing)
- Before You Start: The “Don’t Ruin Your Sink” Checklist
- The “Science-ish” Truth: What Baking Soda and Vinegar Actually Do
- What You’ll Need
- Step-by-Step: Deep Clean a Stainless Steel Sink with Baking Soda and Vinegar
- Troubleshooting: Fixes for Common Sink Problems
- Maintenance That Keeps Your Sink Nice Without Becoming a Weekend Project
- Common Mistakes (So You Don’t Become a “Before” Photo)
- FAQ
- Conclusion
- Real-World Experiences and Lessons Learned (Extra )
Stainless steel sinks have a special talent: they can look showroom-shiny on Monday morning and like a science experiment by Tuesday night.
The good news? You don’t need a cabinet full of mysterious blue liquids to get that clean, bright finish back. Two pantry staplesbaking soda and white vinegarcan handle most everyday sink drama, from greasy film to hard-water spots.
This guide walks you through a scratch-safe, common-sense method for cleaning a stainless steel sink with baking soda and vinegar,
plus the “what if my sink is being extra?” fixes for water spots, rust-colored specks, and lingering odors.
Why Stainless Steel Sinks Get Gross So Fast (and Why It’s Not a Moral Failing)
Stainless steel is durable, but it’s also honest. It shows everything: greasy fingerprints, soap residue, dried food splatter, and mineral deposits from hard water.
Add a few micro-scratches from normal use (totally common), and the surface can start trapping grime in a way that makes your sink look dull even when it’s “clean.”
Also important: stainless steel has a graintiny lines in the finish. Clean with the grain, and you’ll keep the sink looking smoother and shinier.
Scrub across it with something abrasive, and you can create scuffs that catch light (and your attention) forever.
Before You Start: The “Don’t Ruin Your Sink” Checklist
- Skip steel wool and harsh scrub pads. They can scratch and dull the finish fast.
- Avoid chlorine bleach or chloride-heavy cleaners unless your sink manufacturer explicitly says it’s okayand even then, never let it sit.
- Don’t let vinegar pool or soak for a long time. Quick contact is fine for most sinks; prolonged exposure can cause dullness or pitting over time.
- Test first if your sink has a specialty finish (colored, matte, or coated stainless).
- Ventilation helps. Vinegar is food-safe, but your nose may file a complaint.
The “Science-ish” Truth: What Baking Soda and Vinegar Actually Do
Baking soda: gentle abrasion + deodorizing power
Baking soda (sodium bicarbonate) is mildly abrasive, which makes it great for scrubbing away grime without (usually) scratching stainless steelespecially when used with a soft sponge or microfiber cloth.
It also helps neutralize odors, which is handy when your sink is giving “leftover onion water” energy.
Vinegar: mineral deposit remover (used briefly)
White vinegar is acidic, so it helps dissolve mineral buildup (think: chalky water spots and cloudy rings near the drain).
It’s also good at cutting soap scum and brightening streakswhen you use it and then rinse it off.
But waitdoesn’t mixing them cancel each other out?
Kind of! When baking soda and vinegar meet, they fizz because they react and release carbon dioxide.
That bubbling can help loosen gunk on the surface, but chemically speaking, they also neutralize each other over time.
The practical takeaway: use them in a smart orderbaking soda for scrubbing first, then vinegar as a quick mineral-busting rinse/wipe.
You get the benefits without relying on the fizz as your entire personality.
What You’ll Need
- Baking soda
- White vinegar (plain distilled)
- Soft sponge (non-scratch) or microfiber cloth
- Old toothbrush (for corners and around the drain)
- Spray bottle (optional but convenient)
- Warm water
- Dry towel or microfiber cloth for drying/buffing
- Optional: a drop of dish soap, and a tiny amount of mineral oil or olive oil for polishing
Step-by-Step: Deep Clean a Stainless Steel Sink with Baking Soda and Vinegar
1) Clear the sink and do a quick rinse
Remove dishes, strainers, sink matsanything that blocks the surface. Rinse away loose crumbs and grime with warm water.
If the sink is greasy, add a drop of dish soap to your sponge and do a fast once-over.
2) Sprinkle baking soda like you’re seasoning a cast-iron pan
Keep the sink slightly damp so the baking soda clings. Sprinkle a generous, even layer across the basin, sides, and lip.
For extra stuck-on grime, mix baking soda with a little water to make a spreadable paste.
3) Scrub gentlyalways with the grain
Using a soft sponge or microfiber cloth, scrub in the direction of the grain. Use light-to-moderate pressure.
Let the baking soda do the work; your biceps don’t need to.
Hit corners, seams, and around the drain with an old toothbrush. If you see dark marks, they’re often metal transfer from cookwarenot your sink “rusting” dramatically.
4) Vinegar time: spray, fizz (briefly), wipe
Put white vinegar in a spray bottle (or dampen a cloth with vinegar). Lightly mist/wipe the sink where water spots or soap scum are visible.
You’ll see fizzing where vinegar meets baking sodafun, but keep it short.
Let it sit for about 1–2 minutes, then wipe with a clean, damp cloth.
If your water is very hard, you can use a 50/50 vinegar-water mix to be gentler while still effective.
5) Rinse thoroughly (seriouslythoroughly)
Rinse everything with warm water until no powdery residue remains. Any leftover baking soda can dry into a white haze that makes you think you did something wrong.
You didn’t. It’s just clingy.
6) Dry and buff
Dry the sink completely with a microfiber cloth. This is the underrated secret to a streak-free finish and fewer future water spots.
Buff with the grain for that “just-installed” look.
7) Optional: add a tiny shine shield
If you want extra shine and water-spot resistance, put one or two drops of mineral oil (or olive oil) on a dry cloth and buff lightly with the grain.
Then use a second clean cloth to remove any excess. The goal is “subtle sheen,” not “slippery slide.”
Troubleshooting: Fixes for Common Sink Problems
Hard water spots and cloudy rings
These are mineral deposits, especially common if your water is hard. After your baking soda scrub, use a vinegar-water spray (50/50), wipe with the grain,
then rinse and dry. If a ring remains, repeat oncedon’t escalate straight to aggressive scrubbing.
Example: If you live in a hard-water area and see a chalky halo around the drain, do the vinegar wipe, rinse, and dry. Repeat weekly to prevent buildup.
Rust-colored specks (the “but it’s stainless!” moment)
Small orange spots are often surface contaminationtiny iron particles from steel cookware, cast iron pans, or even a stray metal scrubber used nearby.
Try a baking soda paste first, scrub gently with the grain, then rinse and dry.
If the specks persist, a stainless-safe cleanser designed for rust removal can help. Use it sparingly, follow label directions, and avoid harsh abrasives.
Sink looks dull even after cleaning
Dullness is usually one of three things: leftover residue, cleaning across the grain, or too much harsh chemistry over time.
Do a thorough rinse, dry completely, and buff with a clean microfiber cloth. A tiny bit of oil polish can restore a brighter look.
Odors coming from the drain
The basin may be clean while the drain trap is holding onto smells. For deodorizing (not miracle clog removal), pour about 1/2 cup baking soda down the drain,
follow with 1/2 cup vinegar, wait 10–15 minutes, then flush with hot water.
If water drains slowly or you suspect a serious clog, switch to mechanical solutions (like a drain snake) or a plumber. Baking soda + vinegar is maintenance, not magic.
Maintenance That Keeps Your Sink Nice Without Becoming a Weekend Project
- Daily (30 seconds): rinse and wipe, then dry with a cloth to prevent water spots.
- Weekly (5 minutes): baking soda scrub with the grain, rinse, dry.
- As needed: quick vinegar wipe for mineral spots, followed by a thorough rinse.
- Protective add-ons: a sink grid or bottom rack helps reduce scratches from heavy pots and pans.
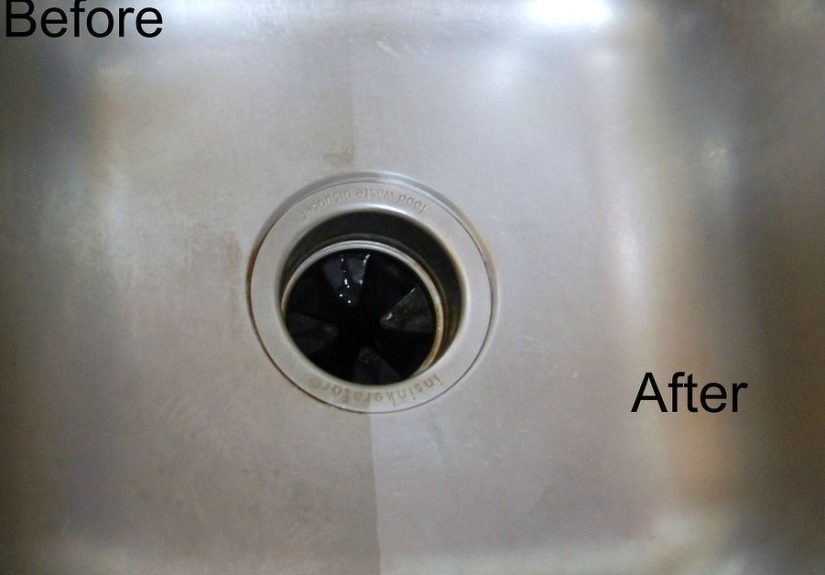
Common Mistakes (So You Don’t Become a “Before” Photo)
- Scrubbing hard with the wrong tool: rough pads and steel wool leave permanent scratch patterns.
- Letting vinegar sit too long: quick wipe = helpful; long soak = potential dullness/pitting.
- Skipping the rinse: residue dries into haze, streaks, and “why is it worse?” vibes.
- Not drying the sink: water spots are basically minerals leaving you a review.
- Using bleach regularly: many manufacturers warn that chlorine can damage stainless over time.
FAQ
Can I use apple cider vinegar instead of white vinegar?
You can, but it may leave color or residue. White distilled vinegar is the safer, cleaner choice for stainless steel.
Is baking soda safe for stainless steel?
Generally yes, because it’s a mild abrasiveespecially when paired with a soft sponge and used with the grain.
Avoid aggressive scouring powders and don’t combine baking soda with scratchy pads.
Will baking soda and vinegar disinfect my sink?
They’re excellent cleaners, and cleaning removes a lot of germs by physically lifting grime.
But if you need true disinfection (especially after raw meat prep), use a product intended for sanitizing food-contact surfaces and follow your sink manufacturer’s guidance.
Can I use this method on my stainless steel faucet too?
Maybemany faucet finishes are coated or specialty-treated. Use mild soap and water first, and be cautious with vinegar on plated or coated finishes.
If you do use vinegar, keep contact brief and rinse immediately.
Conclusion
The best way to keep a stainless steel sink looking great is surprisingly unglamorous: clean with the grain, rinse well, and dry every time.
Baking soda handles the scrubby work without harsh abrasives, and vinegar is your quick fix for mineral spotsprovided you don’t let it lounge in your sink like it pays rent.
Put this routine on autopilot once a week, and your sink will stay shiny enough that you’ll start noticing other things that need cleaning… which is both a win and a curse.
Real-World Experiences and Lessons Learned (Extra )
If you’ve ever searched “why does my stainless steel sink look cloudy” at 11:47 p.m., you’re in excellent company.
A lot of people start with the same assumption: “It’s stainless, so it should always look perfect.” In real kitchens, stainless is more like a white T-shirtreliable,
versatile, and extremely willing to show every spill you’ve ever made.
One of the most common experiences is discovering that the sink is “clean” but still looks dull. In many cases, the culprit isn’t damageit’s leftover residue.
Baking soda is fantastic, but if it dries on the surface, it can leave a pale film that reads as cloudiness under overhead lights. The fix is almost boring:
rinse more than you think you need to, then dry and buff with a microfiber cloth. People are often shocked by how much shine returns when the final step is simply… drying.
Apparently, water spots are the sink’s version of leaving your phone screen smudged and calling it “patina.”
Another pattern: the “I let vinegar soak overnight” regret. Vinegar is popular because it’s cheap and effective, so it’s tempting to treat it like a spa day for your sink.
But stainless steel generally prefers vinegar as a quick visitor, not a long-term roommate. When vinegar sits too longespecially undiluted in puddlesit can contribute to
dull patches or subtle etching over time. The lesson many homeowners share is to use vinegar like punctuation: short, purposeful, and followed by a rinse.
Then there’s the classic “rust panic.” Someone sees orange specks and assumes the sink is failing at its one job. In reality, those spots are often tiny iron deposits
transferred from cookware or a stray metal scrubber used elsewhere. The emotional arc usually goes: panic → aggressive scrubbing attempt → “why is it scratched now?” →
discovery that a gentle paste and patience works better. A baking soda paste, a soft sponge, and scrubbing with the grain removes most of these specks without turning the sink
into a brushed-metal art project.
Finally, people who consistently keep a stainless sink looking good tend to adopt one small habit: they treat drying as part of cleaning.
After doing dishes, they wipe the sink dry the same way they might wipe a countertop. It takes under a minute, and it prevents that slow buildup of minerals that later requires
bigger effort. Some also like a tiny oil buff once in a whilejust enough to restore shine and help water bead upthen they immediately remove the excess so it doesn’t feel greasy.
The overall takeaway from real households is simple: the method works best when it’s routine, not heroic. Your sink doesn’t need a weekly TED Talk. It needs five minutes, a rinse,
and a towel.