Table of Contents >> Show >> Hide
- What Is Concrete Finishing?
- Tools and Materials You’ll Need
- Step-by-Step Guide: How to Finish Concrete Like a Pro
- 1. Prep the Site Like Your Project Depends on It (Because It Does)
- 2. Pour the Concrete
- 3. Screed the Concrete
- 4. Bull Float the Surface
- 5. Edge the Slab
- 6. Groove Control Joints
- 7. Wait for the Bleed Water
- 8. Trowel for a Smooth or Polished Finish
- 9. Create a Broom Finish (Optional but Popular)
- 10. Cure the Concrete (Do NOT Skip This!)
- Common DIY Mistakes to Avoid
- Choosing the Right Finish for Your Project
- How Weather Affects Concrete Finishing
- How Long Does Concrete Take to Cure?
- Maintenance Tips to Keep Concrete Looking New
- Extra: of Real-Life Experience & Expert Tips
- Conclusion
If you’ve ever admired a perfectly smooth garage floor or a crisp, broom-textured patio and thought, “Psssh, I could totally do that,” welcome to the club. Finishing concrete is absolutely DIY-friendlybut it’s also a task that demands timing sharper than a barista at a morning-rush espresso machine. Get it right, and you’ll have a durable, attractive slab that looks like something out of a professional contractor’s portfolio. Get it wrong, and you might end up with a moon-crater driveway, cracked walkways, and a story you’ll be telling (and regretting) for years.
Consider this your complete, practical, slightly funny, definitely thorough guide to learning how to finish concrete like a prominus the expensive labor costs, “contractor attitude,” and muddy boots.
What Is Concrete Finishing?
Concrete finishing is the process of smoothing, texturing, and curing freshly poured concrete to achieve the desired look and structural integrity. The goal: create a surface that not only looks great but also holds up to weather, foot traffic, vehicles, backyard barbecues, and occasional DIY mishaps.
The finishing process begins the moment the concrete is screeded level and continues all the way through curing. Because concrete never stops curing completely (hello, science!), your part is to make sure its first hours and days set it up for success.
Tools and Materials You’ll Need
If Home Depot had a “Concrete Finishing Starter Pack,” it would look something like this:
- Concrete mix (ready-mix or bagged)
- Screed board
- Bull float
- Edger
- Groover
- Magnesium or steel trowel
- Broom (for broom finish)
- Sprayer for curing compound
- Knee boards (if working on a large slab)
- Rubber boots (trust me, you’ll thank yourself)
Optionalbut highly recommendedtools include a power trowel (if you’re covering a big area), rebar chairs, concrete vibrator, and a friend who owes you a favor.
Step-by-Step Guide: How to Finish Concrete Like a Pro
1. Prep the Site Like Your Project Depends on It (Because It Does)
The secret to good concrete finishing is good concrete pouring. Prep includes:
- Building solid forms
- Adding compacted gravel base
- Installing rebar or wire mesh
Think of this phase as laying out your canvasbecause concrete, once poured, is less forgiving than a toddler fueled by sugar.
2. Pour the Concrete
For DIYers, wheelbarrow delivery or a ready-mix truck is typical. Pour into your forms in layers, spreading as evenly as possible.
Pro tip: If you’re pouring a large slab, recruit at least two helpers. Concrete waits for no one, not even your cousin Dave who swears he’s “five minutes away.”
3. Screed the Concrete
Screeding levels the concrete and removes excess material. Use a long 2×4 or straight-edge and drag it across the surface in a sawing motion. The goal is to fill in low spots and flatten the overall surface.
This is when the slab begins to resemble something other than oatmeal.
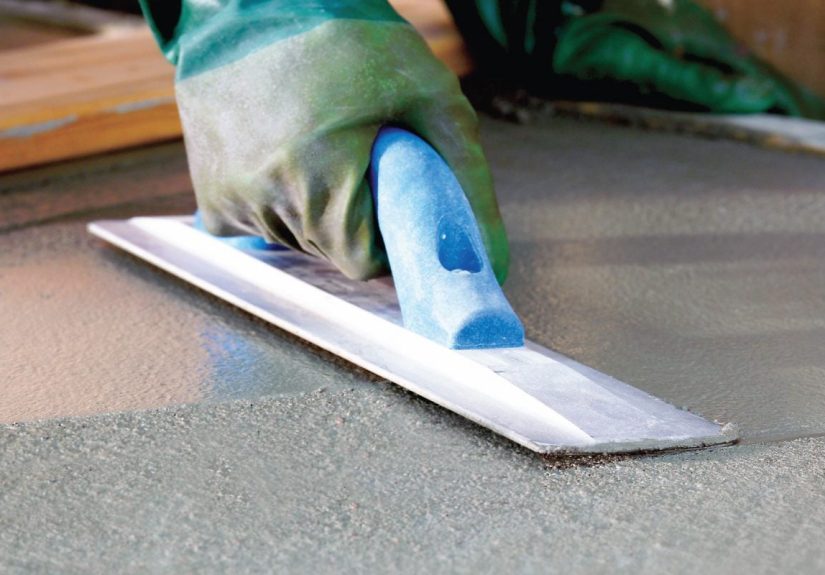
4. Bull Float the Surface
The bull float smooths the surface and forces fine aggregates downward. It’s essential for achieving a polished finish later on.
Pass the float in long, steady strokes. Avoid overworking the surface, which can bring too much moisture up and weaken the slab.
5. Edge the Slab
Use an edger to round the slab edges, preventing chipping later and giving the surface a clean, professional appearance. Think of this step as giving your concrete a tidy haircut.
6. Groove Control Joints
Concrete will crackit’s practically in its DNAbut control joints help cracks form more neatly and predictably. Use a groover to cut joints every 8–10 feet or according to slab thickness.
If you skip this step, you’re basically saying, “Surprise me!” to future cracks. Spoiler: you won’t like the surprise.
7. Wait for the Bleed Water
Bleed water is the moisture that rises to the surface after initial floating. Do NOT trowel over bleed water. Doing so weakens the surface and invites scaling or flaking.
Grab a drink, stretch your back, stare at your slab proudlyjust don’t touch it until the sheen disappears.
8. Trowel for a Smooth or Polished Finish
Once the bleed water evaporates, it’s time for troweling. For DIYers:
- Start with a magnesium trowel for initial passes
- Follow with a steel trowel for final smoothing
The more trowel passes, the smoother the finish. And yes, your arm will feel it tomorrow.
9. Create a Broom Finish (Optional but Popular)
If you’re finishing a patio, sidewalk, pool deck, or driveway, a broom finish adds slip-resistance and looks naturally textured. Drag a special concrete broom lightly across the slab once it begins to firm up. You’ll get clean, consistent lines that say, “Yes, I know what I’m doing.”
10. Cure the Concrete (Do NOT Skip This!)
Concrete curing is arguably the most important step. Proper curing prevents cracking, increases strength, and boosts durability. Use a curing compound, plastic sheeting, or water misting for 3–7 days.
Think of curing as concrete’s spa weeklet it relax, hydrate, and become its best self.
Common DIY Mistakes to Avoid
- Overworking the surface: Leads to weak, dusty concrete.
- Troweling too early: Seals in excess moisture.
- No control joints: Enjoy the chaos of random cracks.
- Skipping curing: Concrete will survivebut it won’t thrive.
- Poor site prep: Causes sinking, cracking, and regret.
Choosing the Right Finish for Your Project
Concrete isn’t one-size-fits-all. Here are common finish types:
1. Smooth Steel-Trowel Finish
Beautiful in garages or interior floors but slippery when wet. Not ideal outdoors unless sealed with grit additive.
2. Broom Finish
The beloved classic: durable, slip-resistant, and perfect for walkways and patios.
3. Exposed Aggregate
Offers texture and decorative flair. Achieved by washing away the top layer to reveal stones beneath.
4. Stamped Concrete
Creates patterns like stone, brick, or slate. A bit more advanced but absolutely doable with patience and molds.
5. Polished Concrete
High-gloss, modern, and trending in interior design. Typically achieved with specialized equipment.
How Weather Affects Concrete Finishing
Weather is the ultimate wildcard. Here’s how it impacts your DIY project:
- Hot weather: Concrete sets fasttoo fast. Use slow-setting mix and work quickly.
- Cold weather: Concrete sets slowly. Insulate your forms and avoid freezing temps.
- Windy days: Increases evaporation and cracking riskmist the surface lightly.
- Rain: Keep wet weather away for at least 24 hours. Tarps are your best friend.
How Long Does Concrete Take to Cure?
Concrete is “walkable” after 24–48 hours, but full curing takes around 28 days. During this time, treat the slab gentlyno vehicles, no heavy loads, and no overenthusiastic dance parties.
Maintenance Tips to Keep Concrete Looking New
- Seal outdoor concrete every 2–3 years
- Remove stains quickly (oil and concrete are not friends)
- Avoid harsh de-ice chemicals like ammonium nitrate
- Use mats under grills and fire pits
Extra: of Real-Life Experience & Expert Tips
Concrete finishing is one of those DIY projects that looks easy on YouTube but hits differently in real life. The first time I helped finish a slab, I learned three things quickly: concrete sets faster than your patience, gravity is not always on your side, and the bull float is deceptively heavy. So consider these experience-based tips my personal gift to your future sanity.
Start earlylike, sunrise early. Concrete doesn’t care that you stayed up late researching DIY techniques. Morning pours ensure cooler temperatures, slower set times, and less stress. Trust me, finishing concrete at 2 p.m. in July is a fast track to discovering how fast sweat can evaporate.
Have more helpers than you think you need. Concrete finishing is a team sport. One person pours, one screeds, one bull floats, and one supervises (aka takes photos). The biggest mistake beginners make is thinking they can handle the process alone. Even pros rarely tackle a slab solo.
Learn the “concrete clock.” Every slab has its own personality. Some set fast, some slow, depending on temperature, humidity, and mix type. The timing between floating, troweling, and brooming is everything. Work too early, and you’ll ruin the surface. Work too late, and the concrete laughs at your efforts. After a few projects, you develop an instinctalmost like understanding toddler mood swings.
Invest in knee boards. If you’re working on a larger slab, these are essential. Walking directly on partially set concrete is a guaranteed disaster, but knee boards distribute your weight, letting you trowel and detail the center without leaving footprints that resemble a confused dinosaur.
Keep your tools cleanreligiously. Concrete sticks to everything. If you don’t rinse your trowels, edgers, and floats between passes, you’ll end up accidentally carving unwanted textures into your beautiful slab. A 5-gallon bucket and a stiff brush are your best friends for cleanup.
When in doubt, choose a broom finish. Smooth trowel finishes look fantastic indoors but can be dangerously slick outdoors. A simple broom finish hides minor imperfections and adds traction. Plus, it creates those iconic lines that practically scream “I know how to finish concrete.”
Don’t skip sealing. Once your concrete cures, sealing it protects against water, stains, and weather damage. It’s the final step that turns a good slab into a great one. Think of it as sunscreen for your projectprotective, essential, and something you’ll be glad you applied.
At the end of the day, concrete finishing is equal parts art and muscle. You’ll learn to read the slab, anticipate its behavior, and perfect your timing. The result? A surface that lasts decades and gives you DIY bragging rights every time someone steps on your patio or driveway. And who doesn’t love a little bragging?
Conclusion
Finishing concrete doesn’t have to be intimidating. With the right tools, solid preparation, and a little patience, you can create durable, great-looking slabs that enhance your home for decades. Whether you want a smooth garage floor, a patio with personality, or a walkway that withstands the elements, the steps in this guide will help you get therewithout needing a contractor.