Table of Contents >> Show >> Hide
- What Makes a Frame Look “Anthro” Anyway?
- Choose Your DIY Path
- Before You Start: Smart Prep (That Makes Everything Look Expensive)
- Materials List (Pick Based on Your Method)
- Method 1: Fast Thrift Flip (Ornate Frame + Metallic Finish)
- Method 2: Custom Boutique Build (Plain Frame + Raised Pattern)
- Step 1: Plan your pattern (save yourself from “oops”)
- Step 2: Create raised texture
- Option A: Stencil + texture paste
- Option B: Decorative trim or beads
- Option C: Resin appliqués (floral/corner ornaments)
- Step 3: Prime + paint
- Step 4: Add gilding (leaf or wax)
- Leafing mini-steps (if you want the full fancy)
- Make It Look “Designer,” Not “Craft Day”
- Troubleshooting (Because DIY Is 20% Art, 80% “Why Is It Like This?”)
- Conclusion: Luxe Look, DIY Price
- Experiences You’ll Have While Making a DIY Anthropologie Inspired Picture Frame (And Why They’re Totally Normal)
If you’ve ever wandered past Anthropologie’s home section and blacked out for a second (in a totally normal, non-dramatic way) at the sight of a ridiculously charming picture frame, you’re not alone. Their frames tend to have that “found at a Paris flea market, inherited from a glamorous aunt, and somehow also looks great next to your Wi-Fi router” energy.
The good news: you can absolutely recreate an Anthropologie-inspired picture frame at homewithout paying “hand-finished artisanal unicorn dust” prices. This guide walks you through two beginner-friendly methods (one fast, one extra), plus styling tips, troubleshooting, and the little details that make a DIY frame look genuinely boutique.
What Makes a Frame Look “Anthro” Anyway?
Anthropologie-inspired frames usually share a few signature moves:
- Texture: carved details, raised patterns, beading, scallops, florals, or geometric relief.
- Warm metallics: antique gold, brushed brass, champagne, or mixed metalsnot shiny “trophy” gold.
- Layered color: a base tone peeking through (black, walnut, cream, or muted color) with highlights on the raised parts.
- Hand-finished vibes: tiny imperfections that look intentional (because… they are).
Choose Your DIY Path
You can get the look two ways:
- Method 1 (Fast Thrift Flip): Start with an ornate thrifted frame and upgrade the finish with paint + metallic wax.
Time: about 30–60 minutes, plus dry time. - Method 2 (Custom Boutique Build): Start with a basic frame and add raised pattern/trim, then finish with paint and gilding.
Time: 1–2 hours, plus drying/curing.
Before You Start: Smart Prep (That Makes Everything Look Expensive)
Quick safety + sanity checklist
- Ventilation matters: If you’re spray painting or using strong finishes, work outdoors or in a well-ventilated area.
- Protect surfaces: Drop cloth, cardboard, or newspaperunless you want “metallic overspray” as a permanent design choice.
- If your frame is truly vintage: Be cautious sanding unknown old paint. When in doubt, avoid aggressive sanding and instead clean + prime.
Prep steps you shouldn’t skip
- Remove glass, backing, and hardware (or mask carefully if it won’t come out).
- Clean thoroughly: Warm soapy water for most frames; let dry fully.
- Scuff sand (lightly): A quick pass with fine-grit sandpaper helps paint adhere, especially on glossy finishes.
- Prime if needed: Especially if the surface is slick, stained, or you’re changing from dark to light.
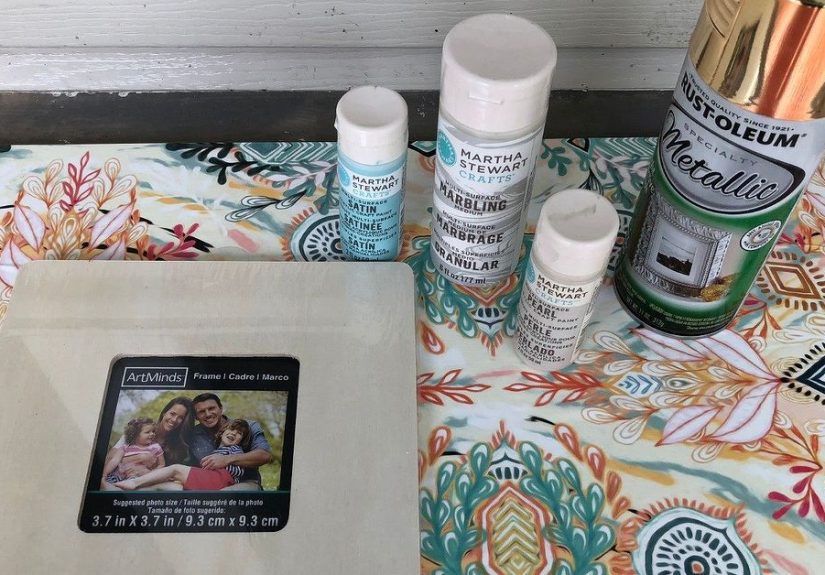
Materials List (Pick Based on Your Method)
Frame + finishing basics
- Picture frame (thrifted ornate frame or simple wood frame)
- Painter’s tape
- Fine-grit sandpaper (or sanding sponge)
- Primer (spray or brush-on, depending on your frame)
- Paint (spray paint or acrylic/chalk-style paint)
- Soft cloths / microfiber
- Gloves
For “gilded” Anthropologie vibes
- Metallic wax (like a gold-toned wax finish) or gold leaf / metal leaf sheets
- Metal leaf adhesive (size) or adhesive pen
- Soft brush for leafing (or clean, dry foam brush)
- Optional: clear sealer (matte or satin)
For raised texture (Method 2)
- Lightweight spackle, modeling/texture paste, or air-dry clay
- Stencil (botanical, geometric, scallop, art decogo wild)
- Palette knife / old gift card (perfect excuse to keep expired gift cards forever)
- Optional trims: half-round molding, wood beads, resin appliqués, decorative corners
- Strong craft glue or wood glue (hot glue can work for lightweight pieces)
Method 1: Fast Thrift Flip (Ornate Frame + Metallic Finish)
This is the quickest route to an Anthropologie-inspired picture frame because the frame already has the fancy detailsyour job is just to make them pop.
Step 1: Pick the right thrift frame
- Best candidates: carved edges, floral corners, beaded trim, scallops, or anything that looks like it once lived above a fireplace.
- Ignore the color: ugly bronze, weird orange oak, or “1997 gold” can all be fixed.
- Check structure: Make sure corners are tight and the back can hold your photo (or be repaired easily).
Step 2: Paint a base coat (optional, but powerful)
Want that “antique gold with depth” look? Start with a darker base coat (black, espresso, deep brown). The dark base will naturally shadow the crevices so your highlights look intentional.
- Prime if the surface is glossy or slick.
- Apply paint in thin coats (spray or brush), letting each coat dry.
- Don’t chase full coverage in one passdrips are not the kind of “texture” we’re going for.
Step 3: Add the magic (metallic wax technique)
Metallic wax is basically cheating (the fun kind). It catches on raised areas, creating instant dimension.
- Put on gloves. Metallic wax is clingyin the “won’t leave your hands” way.
- Use a soft cloth, finger, or small brush to apply a tiny amount.
- Work in small sections. Hit raised details first, then skim the flatter areas lightly.
- Buff with a clean cloth to even out and bring up the sheen.
Step 4: Antique it (optional, but very “boutique”)
If your frame looks too new or too shiny, add a quick antiqued finish:
- Dry-brush darker paint into crevices, then wipe the excess.
- Use a soft cloth to gently rub edges so a little base color peeks through.
- Seal lightly if the frame will be handled often (matte or satin tends to look most high-end).
Method 2: Custom Boutique Build (Plain Frame + Raised Pattern)
This method is for when you want a truly unique Anthropologie-inspired looklike botanical relief, art deco geometry, or scalloped trim that feels custom.
Step 1: Plan your pattern (save yourself from “oops”)
Decide where the detail goes:
- All the way around the frame (bold, graphic, gallery-wall ready)
- Just corners (elegant, subtle)
- Top edge only (unexpected and designer-y)
Tip: Dry fit stencils or trims before gluing. Five minutes of planning can prevent 45 minutes of creative bargaining with reality.
Step 2: Create raised texture
Choose one of these approaches:
Option A: Stencil + texture paste
- Tape your stencil in place so it doesn’t slide.
- Spread paste with a palette knife (or old gift card) in a thin, even layer.
- Lift stencil straight up to avoid smearing.
- Let it dry completely (don’t rush thiswet texture looks cute until you touch it).
- Lightly sand any sharp ridges after it dries.
Option B: Decorative trim or beads
- Measure and cut trim to fit the frame edges.
- Glue in place and let cure fully.
- Fill gaps with lightweight spackle, then sand smooth.
Option C: Resin appliqués (floral/corner ornaments)
These are the “instant Anthropologie” button. Add symmetrical corner pieces or a center crest, then paint and gild as one cohesive frame.
Step 3: Prime + paint
Raised texture drinks up paint. Priming helps everything finish evenly.
- Prime the whole frame (especially over paste/spackle).
- Apply paint in thin coats, allowing proper dry time.
- For a layered look, use a base color (dark or muted), then a lighter top tone.
Step 4: Add gilding (leaf or wax)
You’ve got two great “gold” paths:
- Metallic wax: easiest, forgiving, perfect for highlighting raised texture.
- Metal leaf/gold leaf: more dramatic and artisanalbest on specific sections (edges, corners, pattern highlights).
Leafing mini-steps (if you want the full fancy)
- Apply adhesive size in the areas you want leaf.
- Wait until tacky (follow product timingthis is where patience pays rent).
- Lay leaf sheets gently; press with a soft brush.
- Brush away loose flakes and patch thin spots.
- Seal if needed (especially if the frame will be handled).
Make It Look “Designer,” Not “Craft Day”
Upgrade #1: Matting (the easiest glow-up)
A crisp mat (even a simple white one) makes your DIY frame look intentional and elevated. It also helps smaller prints look properly “gallery” instead of “printer paper taped to hopes and dreams.”
Upgrade #2: Choose art that matches the vibe
- Line drawings, botanicals, vintage landscapes, or minimalist photos
- Muted color palettes with one accent hue
- Textural paper (think deckled edges or watercolor paper)
Upgrade #3: Style it like Anthropologie would
- Gallery wall: mix frame sizes but keep a cohesive finish family (warm metallics, blacks, creams).
- Shelf styling: layer frames behind small vases, candles, or books.
- Unexpected placement: lean a frame in the kitchen, bathroom, or entryway for that casual, curated look.
Troubleshooting (Because DIY Is 20% Art, 80% “Why Is It Like This?”)
Problem: Spray paint drips or orange peel
- Use lighter coats and keep the can moving.
- Sand lightly once dry, then recoat.
Problem: Metallic finish looks streaky
- Use less product and build gradually.
- Buff with a clean cloth to even out.
Problem: Raised paste edges look rough
- Lightly sand after fully dry.
- Prime again for a smoother topcoat.
Problem: The frame looks “too new”
- Add a darker glaze in crevices.
- Rub edges gently so a base layer peeks through.
- Switch to a matte or satin sealer instead of glossy.
Conclusion: Luxe Look, DIY Price
An Anthropologie-inspired picture frame isn’t about copying one exact productit’s about capturing the vibe: texture, warm metallics, and that slightly collected, slightly whimsical feel that makes a space look curated.
Whether you go fast with a thrift flip or full custom with raised pattern and gilding, the secret sauce is the same: careful prep, layered finishes, and letting texture do the heavy lifting. Your photos (and your walls) deserve a frame that looks like it has a backstoryeven if that backstory is “I made this on a Saturday while avoiding laundry.”
Experiences You’ll Have While Making a DIY Anthropologie Inspired Picture Frame (And Why They’re Totally Normal)
First, you’ll experience the thrift-store optimism spiral: everything looks like potential. A frame that is objectively cursedscuffed, sticky, and somehow both gold and greenwill suddenly feel like “a steal.” This is your brain doing DIY math. The good news is that DIY math is often correct. Texture and shape matter far more than the current finish, so if the silhouette is interesting, you’re already winning.
Next comes the prep phase bargaining. You’ll think, “Do I really have to sand?” and the honest answer is: not always, but you’ll be happier if you do it at least a little. Light scuff sanding is like brushing your teeth before a big eventtechnically optional, but the results are noticeably better. The experience here is mostly emotional: the moment you see primer grip evenly instead of beading up, you’ll feel an oddly specific satisfaction that can’t be purchased at retail.
If you use spray paint, expect the two-coat humility lesson. The first coat almost always looks disappointing. Patchy. Uneven. Like you made a terrible decision. This is normal. Thin coats are the whole game, and the “ugly middle stage” is just part of the process. The second and third light coats are where the transformation happenssuddenly the frame looks crisp, intentional, and surprisingly expensive. The experience is basically a tiny life metaphor, but with more cardboard.
When you hit the metallic finish stepespecially with waxyou’ll have the “oh wow, that escalated quickly” moment. Metallic wax catches on raised details instantly, and you’ll see dimension appear with each swipe. This is usually the point where people start narrating to themselves like a home makeover show: “We’re just bringing out the highlights…” even if you are alone in your kitchen. Again: normal.
If you choose leafing, your experience will be equal parts elegance and chaos. Leaf sheets are delicate, and they behave like they have a personal vendetta against still air. But once you accept that leafing is a “trust the process” activitytack it, press it, brush away the flakesthe results look genuinely artisanal. The best part is the texture: leafing rarely looks perfectly uniform, and that slight irregularity is exactly what makes it feel handcrafted.
Finally, you’ll experience the styling rabbit hole. Once you’ve made one frame, you’ll start seeing your walls differently. One frame becomes a “gallery moment.” A second frame becomes a “collection.” By the third, you’re rearranging shelves, auditioning prints, and considering whether you’re secretly an interior stylist. The truth is, a good frame changes how art reads in a space. Your DIY frame won’t just hold a photoit will make your photo look like it belongs in a thoughtfully curated home. And that’s the whole Anthropologie-inspired point.