Table of Contents >> Show >> Hide
- Why a Pink Ombre Shelf Works So Well
- What You Need for This DIY Shelf Project
- Choosing the Best Shelf Base
- How to Pick a Pink Ombre Color Palette
- Prep Work: The Step Most DIYers Want to Skip
- How to Paint the Pink Ombre Effect
- Painting Tips for a Smooth, Professional Finish
- Do You Need a Topcoat?
- How to Hang Your DIY Pink Ombre Shelf Safely
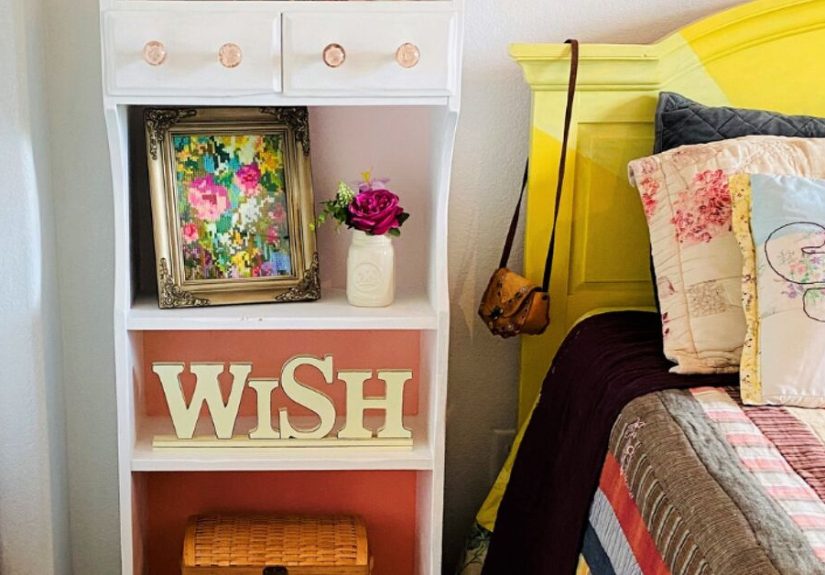
- Styling Ideas for a Pink Ombre Shelf
- Common Mistakes to Avoid
- Budget-Friendly Ways to Make It Look Custom
- Final Thoughts
- Experience and Lessons Learned From Making a DIY Pink Ombre Shelf
A plain shelf is useful. A pink ombre shelf is useful and a little dramatic, which is exactly what many rooms need. It holds books, candles, plants, perfumes, toys, or that one framed print you keep moving from corner to corner while pretending you are “still styling.” Best of all, this project looks designer-made without demanding designer-level money.
If you love budget-friendly home decor, this DIY pink ombre shelf project hits a sweet spot between creative and practical. It combines simple shelf building or shelf upgrading with one of the easiest high-impact paint techniques: the ombre finish. Instead of one flat color, you create a soft gradient that moves from pale blush to warm rose to a deeper pink. The result feels custom, playful, and polished.
This guide walks through everything you need to know, from choosing the right shelf material to sanding, priming, painting, blending, sealing, and hanging your finished piece. Whether you are refreshing a thrifted shelf, upgrading a basic MDF board, or giving a floating shelf some personality, this step-by-step tutorial will help you get a clean finish without turning your workspace into a pink tornado.
Why a Pink Ombre Shelf Works So Well
An ombre shelf adds color without feeling too heavy. That is the magic of the gradient. A solid hot-pink shelf can sometimes dominate a room, but a pink ombre shelf brings in softness, movement, and a more layered visual effect. It can work in a nursery, bedroom, office, reading nook, dorm, makeup corner, or craft room.
Pink also has more range than people give it credit for. A dusty mauve feels sophisticated. A peachy pink feels warm and friendly. A blush-to-berry fade feels modern and artistic. You do not have to build a room around bubblegum energy unless that is your personal calling.
From an interior design angle, this shelf works because it doubles as storage and wall art. It gives your wall vertical interest, helps display smaller items, and makes a simple corner look considered. It is especially effective in spaces that already have white, cream, gray, wood, or brass accents.
What You Need for This DIY Shelf Project
Basic Materials
- Wood shelf, MDF shelf, or pre-made floating shelf
- Wall brackets, floating shelf hardware, or a cleat system
- Sandpaper in medium and fine grit
- Wood filler for dents or rough edges
- Primer suitable for wood or MDF
- Three to five shades of pink paint
- White paint for blending lighter tones
- Paintbrushes and small foam rollers
- Painter’s tape
- Tack cloth or lint-free cloth
- Drop cloth
- Clear topcoat or protective finish
- Level, drill, screws, anchors, and stud finder
Optional Extras
- Sample paint pots to test your pink palette
- Small spray bottle of water for blending edges gently
- Disposable paint cups for mixing transition shades
- Gold or white brackets if you want the hardware to feel decorative
If you are using MDF, do not skip primer. MDF edges can soak up paint like they are emotionally attached to it. Primer helps seal the surface so the finish looks smoother and more even.
Choosing the Best Shelf Base
You have three easy options. First, you can build a simple shelf from a wood board. Second, you can buy a pre-cut shelf from a home improvement store. Third, you can repaint an existing shelf you already own. The third option is the fastest and cheapest, and it is ideal for a weekend refresh.
Solid wood is durable and forgiving. MDF is affordable and smooth, which makes it great for paint, but it needs careful prep and sealing. Laminate or particle board can also work, though surface prep matters more because slick finishes do not naturally invite paint to stick around.
For a beginner, a basic rectangular shelf about 24 to 36 inches wide is easiest. That size gives you enough surface area to show the ombre effect clearly without making installation overly complicated.
How to Pick a Pink Ombre Color Palette
The prettiest ombre shelves usually use three to five related shades. Start with your darkest pink and work toward your lightest. You can buy separate colors, or you can create an ombre palette by mixing your main pink paint with white in different ratios.
Easy Pink Ombre Combinations
- Soft blush, ballet pink, rose, and raspberry
- Peach pink, coral pink, warm rose, and terracotta pink
- Dusty pink, mauve rose, muted berry, and plum pink
If you want a dreamy look, keep all shades pastel. If you want more contrast, use a very pale blush at one end and a richer rose at the other. A good rule is to test the colors side by side in daylight before committing. Paint can look angelic in the can and unexpectedly loud on a shelf.
Prep Work: The Step Most DIYers Want to Skip
Do not skip it. Truly. The prep determines whether your shelf looks handmade in a chic way or handmade in a “why is the paint bubbling?” way.
Step 1: Clean the Shelf
Wipe away dust, grease, wax, and grime. Paint sticks better to a clean, dull surface than to one coated in mystery residue from life.
Step 2: Sand the Surface
Use medium-grit sandpaper first if the shelf has an existing finish or rough areas. Follow with finer grit for a smoother surface. On MDF, lightly sand the face and pay extra attention to fuzzy edges. If the shelf has dents, chips, or seams, fill them with wood filler, let them dry, then sand again.
Step 3: Remove Dust
Use a tack cloth or lint-free cloth to wipe down the entire shelf. Dust left behind can ruin a smooth finish faster than you can say “one more coat should fix it.”
Step 4: Prime
Apply a thin, even coat of primer. Let it dry fully, then lightly sand if needed for a cleaner finish. If the shelf is dark, glossy, laminate, or MDF, primer is especially important. Think of it as your project’s insurance policy.
How to Paint the Pink Ombre Effect
There are two popular ways to create an ombre shelf. You can paint sections in separate shades and blend the borders while the paint is still wet, or you can layer colors gradually using a roller and brush. For most DIYers, the section-and-blend method is the easiest.
Method 1: Section and Blend
- Divide the shelf visually into three, four, or five sections, depending on how many shades you are using.
- Paint each section with a different shade of pink.
- While adjacent sections are still wet, use a clean dry brush, foam brush, or mini roller to gently blur the line between them.
- Feather back and forth lightly until the transition softens.
- Step back often to check the balance.
Method 2: Layered Fade
Start with the lightest coat over the whole shelf. Then add darker tones gradually from one end, blending outward as you go. This approach can look softer, but it takes a lighter hand and a bit more patience.
Best Direction for the Gradient
For a single floating shelf, a left-to-right gradient looks clean and modern. For stacked shelves, try making the top shelf palest and the bottom shelf darkest. That creates a cascading ombre wall effect that looks surprisingly high-end.
Painting Tips for a Smooth, Professional Finish
- Use thin coats instead of one heavy coat.
- Brush with the grain on wood surfaces.
- Use a foam roller on flat areas to minimize brush marks.
- Lightly sand between coats if the finish feels rough.
- Let each coat dry properly before recoating.
- Do not rush the blending. Soft pressure works better than aggressive scrubbing.
Most water-based paints dry to the touch fairly quickly, but they still need more time before a second coat and much longer to fully cure. So yes, your shelf may look dry before it is truly ready for styling, stacking, or enthusiastic admiration.
Do You Need a Topcoat?
In most cases, yes. A clear protective finish helps shield the shelf from scratches, scuffs, and cleaning wear. This matters even more if your shelf will hold books, baskets, skincare bottles, or anything that slides around. A satin or matte clear coat usually works well if you want a polished but not overly shiny look.
If you like a slightly more durable furniture-style finish, choose a paint sheen that already offers some washability, then seal it if the shelf will get daily use. Thin coats are better than thick ones here too. Thick clear coats can drip, cloud, or turn your lovely gradient into a sticky cautionary tale.
How to Hang Your DIY Pink Ombre Shelf Safely
A pretty shelf still needs to behave like a shelf. That means proper installation matters.
For Bracket Shelves
Mark the location with a level, find wall studs if possible, and attach brackets securely. If studs are not available where you want placement, use wall anchors rated for the weight you expect the shelf to carry.
For Floating Shelves
Floating shelves look sleek, but the hardware must be installed carefully. A stud finder helps you locate framing, and a level keeps the shelf from becoming a downhill slide for candles. If you are mounting on drywall without stud support, use strong anchors designed for that wall type and keep weight expectations realistic.
Weight Reminder
Decorative shelves are not secret gym equipment. Do not overload them. If you want to display heavy books or pottery, use stronger supports and confirm the hardware rating first.
Styling Ideas for a Pink Ombre Shelf
Once the shelf is cured and installed, the fun part begins. A pink ombre shelf naturally draws the eye, so style it with intention.
- Bedroom: stack a few books, a candle, and a framed art print
- Nursery: add soft toys, baby books, and a small plant
- Vanity area: display perfume bottles, trays, and a compact mirror
- Office: use blush and gold accessories for a warm creative setup
- Craft room: line up jars, ribbon spools, or mini storage bins
If the shelf color is bold, keep styling simple. Let the gradient have its moment. Not every object needs to audition for attention.
Common Mistakes to Avoid
Using Too Many Unrelated Pinks
If one shade leans peach and another leans purple, the gradient can look accidental instead of intentional. Stick with a family of tones.
Skipping Surface Prep
Paint adhesion problems often start before the paint even opens. Sanding and priming are not glamorous, but neither is peeling paint.
Making the Transitions Too Harsh
Ombre should feel gradual. If your stripes are obvious, go back with a dampened roller or blending brush and soften the borders.
Overloading the Clear Coat
Multiple thin layers beat one thick, drippy layer every time.
Hanging First, Curing Later
Let the finish harden properly before placing decor on the shelf. A rushed install can leave marks, dents, or stuck-on felt pads that become permanent memories.
Budget-Friendly Ways to Make It Look Custom
You do not need luxury materials to create a shelf that looks expensive. Use paint samples instead of full cans. Upgrade inexpensive brackets with metallic spray paint. Pair the shelf with a matching pink frame or vase nearby so the color feels intentional in the room. Even a thrifted shelf can look boutique-worthy with good prep and a smart ombre palette.
Another trick is to repeat one of the pink tones elsewhere in the room, like in a pillow, planter, or artwork. That small repetition makes the shelf look integrated with the space instead of randomly fabulous.
Final Thoughts
A DIY pink ombre shelf is one of those rare home decor projects that checks every box: affordable, useful, customizable, and visually striking. It lets you play with color without committing an entire wall or room to pink. It also works for many styles, from soft and feminine to modern and artsy.
The real secret is not advanced technique. It is careful prep, a thoughtful palette, thin coats, and patience while the finish dries and cures. Once you get those parts right, the rest is creative play. Whether you hang one shelf above a desk or create a full ombre shelf display, this project can transform a blank wall into something personal and charming.
And that is the beauty of a good DIY project. You start with a board, a brush, and a mood. A few coats later, you have storage with personality.
Experience and Lessons Learned From Making a DIY Pink Ombre Shelf
The first thing I learned from making a pink ombre shelf is that color selection matters more than I expected. I originally thought any three pink paints would automatically blend into something magical, like a sunset in shelf form. Not quite. When I tested the shades side by side, one was too peachy, one was too cool, and the darkest looked almost red. Once I switched to pinks with a more consistent undertone, everything looked smoother and more intentional. That small change made the project feel far more professional.
I also learned that sanding is annoyingly important. At first, the shelf seemed smooth enough, and I was very tempted to skip right to the fun part. But after a proper sanding, the difference was obvious. The primer went on more evenly, the paint grabbed better, and the final finish looked less patchy. It was one of those classic DIY lessons: the boring step is secretly doing most of the heavy lifting.
The ombre effect itself was easier than I expected, but only when I stopped trying to over-control it. My first pass looked too striped because I treated each section like a separate color block. On the next coat, I blended the edges while the paint was still wet using softer pressure and fewer strokes. That gave me the hazy fade I wanted. Too much blending, though, started to muddy the middle shades, so I found it helpful to step back every minute or two and look at the shelf from a distance.
Another surprise was how much the finish changed as it dried. Wet paint looked darker and shinier, while dry paint looked softer and more powdery. That meant I had to resist panic when the fresh coat seemed too bold. Once dry, it settled into a more balanced pink gradient. This made patience a big part of the process. Waiting between coats was not the most exciting part of my day, but it saved me from making rushed corrections that would have made the shelf worse.
Installation taught me another useful lesson: design is cute, gravity is serious. I loved the look of floating shelves, but I took extra care with the hardware because I did not want my lovely pink creation to become a dramatic falling object. Using a level and checking wall support took a little longer, but it made the finished shelf feel solid and trustworthy.
Most of all, I learned that this kind of project is worth doing because it changes more than the shelf. It changes the mood of the room. The finished pink ombre shelf made the whole corner feel brighter, softer, and more personal. It looked like something chosen with intention, not something temporary waiting to be replaced later. That is probably my favorite thing about DIY decor. When it works, the project does not just save money. It gives the space a story.