Table of Contents >> Show >> Hide
- Why Choose a Shiplap Backsplash for a White Kitchen?
- Planning Your Budget-Friendly Shiplap Backsplash
- Step-by-Step: How to Install a DIY Shiplap Kitchen Backsplash
- Keeping Your Shiplap Backsplash Practical
- Styling a Budget-Friendly White Shiplap Kitchen
- Common Mistakes to Avoid with Shiplap Backsplashes
- Real-Life Experiences: What a DIY Shiplap Backsplash Is Really Like
- Final Thoughts
If your kitchen still looks like it’s stuck in the “golden oak and busy tile” era, a DIY shiplap kitchen backsplash might be the glow-up it’s begging for. Clean lines, crisp white paint, and that farmhouse-but-still-modern vibe can completely change how your space feelswithout draining your renovation budget or your will to live.
Inspired by Remodelaholic-style makeovers, more homeowners are skipping pricey tile and grout in favor of simple shiplap panels painted a fresh white. Done right, a shiplap backsplash is affordable, beginner-friendly, and surprisingly durable. Done wrong, it can turn into a warped, stained, food-splattered regret. Let’s stay in the first category, shall we?
Why Choose a Shiplap Backsplash for a White Kitchen?
White kitchens are timeless for a reason: they bounce light, feel larger, and make even Tuesday leftovers look a little more gourmet. Adding a shiplap backsplash takes that classic white kitchen and layers on texture and warmth so it doesn’t feel like you’re cooking in a hospital break room.
Affordable but High-Impact
Compared to traditional tile, shiplap is usually cheaper both in materials and installation. Many DIYers use primed MDF or plywood planks that cost far less than a cart full of tile, grout, and specialized tools. Some projects have reported wall-sized shiplap treatments for as little as a few dozen dollars in material, especially when using ripped plywood strips instead of pre-made boards.
Because you’re mostly working with simple cuts, a basic saw, construction adhesive, and a nail gun, it’s a realistic project for a weekend warriorespecially in a smaller kitchen or on just one feature wall.
Soft Farmhouse Style Without the Fussy Grout
Shiplap’s horizontal lines naturally draw the eye around the room, making spaces feel wider and more cohesive. In a white-on-white kitchen, a shiplap backsplash keeps things from feeling flat, adding subtle shadow lines while still staying neutral. It’s an especially smart choice if you love the “modern farmhouse” or “cozy cottage” look.
Customizable and Easy to Repaint
One of the biggest wins with a shiplap backsplash is how easy it is to change the color later. Tired of pure white? You can repaint with warm cream, soft greige, or even a dramatic deep charcoal. No grout to scrub, no tile to demojust sand lightly, prime if needed, and repaint.
Planning Your Budget-Friendly Shiplap Backsplash
Before you buy a single board, you’ll want to make a few key decisions about materials, layout, and protection. This is where budget and practicality shake hands.
Choosing the Right Material
- MDF shiplap boards: Pre-primed, straight, and smooth. Great for painted backsplashes and often more affordable than real wood. Best in low-to-moderate moisture areas when properly sealed.
- Plywood strips: A classic budget hack. You can rip a sheet of plywood into uniform planks, lightly sand, and install. With a good primer and semi-gloss paint, they mimic true shiplap for a fraction of the cost.
- Pine or real wood shiplap: Offers natural grain and warmth. Better if you want a stained look, but requires more diligence with sealing and may move more with humidity.
- Faux or peel-and-stick “shiplap”: Some DIYers use peel-and-stick vinyl planks or flooring pieces as a backsplash. It’s very budget-friendly and easy to install, but not as long-lasting in higher-heat or high-moisture zones.
For a white kitchen renovation on a tight budget, pre-primed MDF or plywood planks are usually the sweet spot: inexpensive, smooth, and ready for paint.
Where Shiplap Works Best in a Kitchen
Shiplap is ideal in areas that don’t see constant soaking or direct flames. Great spots include:
- Between countertops and upper cabinets along main prep walls
- Behind a coffee bar, floating shelves, or a breakfast nook
- On walls with small appliances rather than the main cooktop
For behind a gas cooktop or range, check your local building codes. Many areas require non-combustible materials a certain distance above the burner. In those zones, you might pair your shiplap with a tile or metal panel right behind the stove and use shiplap on the surrounding walls for continuity.
Protecting Your Budget (and Your Sanity)
Measure your walls carefully, then add extra for off-cuts and mistakes. Remember the classic DIY rule: “Measure twice, cut once”especially with long runs of shiplap. An extra board or two is cheaper than a second trip to the store mid-project.
Also factor in costs for:
- Construction adhesive
- Finish nails and a nail gun (or hammer and patience)
- Primer suitable for MDF or wood
- Durable paint (semi-gloss or satin for wipeability)
- Caulk and wood filler
- Outlet extenders so your cover plates sit flush with the new backsplash
Step-by-Step: How to Install a DIY Shiplap Kitchen Backsplash
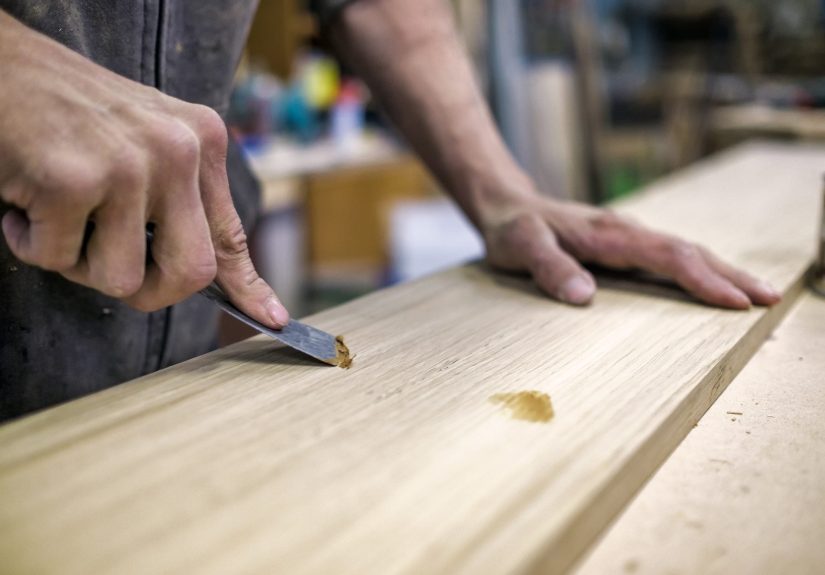
Step 1: Prep the Walls Like a Pro
Preparation isn’t glamorous, but it’s what makes your backsplash look intentionally farmhouse, not “mysterious rental damage.”
- Turn off power at the breaker to all outlets on the wall.
- Remove outlet covers and any existing backsplash or trim that’s in the way.
- Scrape off old adhesive or bumps, then patch big holes so the surface is mostly flat.
- Clean the wall to remove grease, dust, and crumbs. (You’ll be surprised.)
Step 2: Cut and Dry-Fit Your Boards
Measure each wall section and cut boards accordingly. Walls are rarely perfectly square, so measure in a few spots, especially near corners and end points. Dry-fit pieces before committing with adhesive and nails.
Many DIYers start from the countertop and work upward so that any odd-sized strip lands under the upper cabinets where it’s less noticeable. If your countertops aren’t perfectly level, you might start with a laser level line and trim the bottom board to follow the counter visually while keeping the shiplap straight.
Step 3: Install the Shiplap
- Apply a thin, continuous bead of construction adhesive on the back of each board.
- Press the board onto the wall, aligning it with your reference line.
- Use a nail gun to secure the board into studs where possible, or into the wall surface according to hardware recommendations.
- For traditional shiplap, the boards interlock. For faux shiplap, use spacers (like nickels or tile spacers) between boards to create even gaps.
Work your way up the wall, checking every few boards with a level. Cut around outlets and corners as you go; a jigsaw or oscillating tool makes it easier to notch boards around tricky spots.
Step 4: Fill, Caulk, and Sand
Once everything is installed and the adhesive is set:
- Fill nail holes with wood filler and let them dry.
- Caulk where the shiplap meets the countertop and side walls for a finished, built-in look.
- Lightly sand filled spots and any rough edges, then vacuum or wipe away dust.
Step 5: Prime and Paint
Use a high-quality primer that works with MDF or wood, especially in moisture-prone areas. Even boards labeled as “pre-primed” benefit from an extra coat to prevent the material from drinking up your paint.
For a white shiplap kitchen backsplash, choose a durable, scrubbable finishsemi-gloss or satin enamel works well. Two coats usually give the best coverage. A small foam roller gives a smooth, modern look, while a brush can soften the lines for a slightly more rustic feel.
Keeping Your Shiplap Backsplash Practical
Sealing Against Moisture and Grease
Wood and MDF are more porous than tile, so protection is non-negotiable in a kitchen. In addition to paint, you can add a clear, water-based topcoat (such as a polyurethane designed for painted surfaces) in high-splash zones, like behind the sink.
Make sure all joints and edgesespecially near countertops, sinks, and windowsare well caulked to keep water from sneaking behind the boards. A good bead of caulk now is cheaper than repairing swollen boards later.
Cleaning a White Shiplap Backsplash
With the right finish, a white shiplap backsplash is easier to clean than it looks. Use a soft cloth or sponge with mild soap and water, and avoid abrasive scrubbers that can dull the paint. For grease, a gentle degreaser that’s safe for painted surfaces works well.
The small grooves between boards can trap crumbs and dust, but a quick swipe with a microfiber cloth or small soft brush keeps things tidy. Think of it as the kitchen equivalent of dusting your baseboardsannoying, but oddly satisfying.
Styling a Budget-Friendly White Shiplap Kitchen
Once your backsplash is in place, it becomes a subtle but powerful backdrop for everything else in the room.
Pairing with Countertops and Cabinets
- White on white: White cabinets, white shiplap, and light countertops create an airy, seamless look. Add warmth with wood accents, brass hardware, or woven barstools so it doesn’t feel too clinical.
- Contrast with dark counters: A white shiplap backsplash looks stunning against black, charcoal, or deep stone countertops, especially in a galley kitchen where contrast helps define the space.
- Open shelving: Floating wood shelves mounted over white shiplap are a farmhouse favorite. Stack everyday dishes, glassware, and a few plants for a styled-but-functional feel.
Mixing Trendy and Timeless
White shiplap strikes a nice balance: it feels classic enough to age well but current enough to satisfy your “I saw this on Pinterest” heart. If you’re worried about an all-white scheme feeling too stark, add warmth with:
- Matte black or brushed brass hardware
- Warm wood cutting boards propped against the backsplash
- Textured runners and natural fiber rugs
- Soft off-white or cream paint on surrounding walls
Common Mistakes to Avoid with Shiplap Backsplashes
Skipping Surface Prep
Attaching shiplap over bumpy walls, old adhesive, or flaking paint can lead to loose boards, bad adhesion, and visible waves in your finished backsplash. Take the time to smooth and clean the wall firstit’s not fun, but it is necessary.
Using the Wrong Material in Wet Zones
Standard MDF or untreated wood directly behind a frequently used sink or a high-powered range is asking for trouble. If you love the look in those zones, consider:
- Upgrading to moisture-resistant MDF or properly sealed hardwood
- Combining shiplap with a strip of tile or metal directly behind the stove
- Adding an extra topcoat and diligent caulking around sink areas
Ignoring Expansion and Acclimatization
Wood and engineered boards react to humidity and temperature. Let your planks sit in the kitchen for at least a couple of days before installation so they can acclimate. This reduces the chance of boards warping, shrinking, or expanding once they’re on the wall.
Choosing the Wrong Paint Sheen
Flat paint on a backsplash is basically a stain collector. A scrubbable satin or semi-gloss finish gives you the classic white kitchen look with enough durability to survive spaghetti night.
Real-Life Experiences: What a DIY Shiplap Backsplash Is Really Like
On paper, a “DIY shiplap kitchen backsplash in a budget-friendly white kitchen renovation” sounds like a tidy weekend project. In real life, it’s a mix of satisfying progress, sawdust in your hair, and the occasional “why is this wall not straight?” moment. Here’s what homeowners and DIYers often discover along the way.
Expect Your First Board to Take the Longest
The very first piece of shiplap you install is doing a lot of heavy lifting: it sets your level line, your spacing, and your confidence. Many people spend more time on that board than on the next five combined. That’s normal. Once the first row is straight and secure, the rest tends to go much faster.
It’s also where you discover things like: your “straight” countertop isn’t perfectly level, your wall bows slightly, or your corner is more “vintage charm” than 90 degrees. Shiplap is forgiving, but you still want to be strategic about where imperfections landusually tucked under cabinets or in less-visible areas.
The Budget Win Feels Very Real
One of the biggest emotional payoffs is realizing just how far your money went. Instead of spending hundreds (or thousands) on tile, grout, spacers, and professional labor, you’re looking at a relatively small pile of boards, a couple cans of paint, and tools you can reuse on future projects.
For many homeowners, that cost savings is what makes a full white kitchen renovation possible. They might splurge on quartz countertops or a new range because the backsplash became a DIY savings opportunity instead of a budget buster.
Maintenance Is ManageableIf You Prep Right
At first, many people worry that a white shiplap backsplash will instantly show every speck of spaghetti sauce. The reality? Yes, you’ll see splashesbut with a good finish, they wipe off easily. The key is that early prep: proper priming, moisture-resistant materials where needed, and a durable topcoat.
Over time, you’ll find a simple rhythm: a quick wipe after cooking, a more thorough wipe-down during your weekly clean, and the occasional touch-up with paint if the kids (or the blender) get too enthusiastic. Most DIYers report that cleaning the small grooves becomes just another simple task, not a major headache.
It Makes the Whole Kitchen Feel “Designed”
One underrated benefit of a shiplap backsplash is how it makes even a modest kitchen feel intentional. Suddenly that previously awkward blank wall behind your coffee maker becomes a styled little vignette with boards, shelves, and a pretty mug rack. The white shiplap visually ties together cabinets, windows, and appliances, so the room feels cohesive rather than pieced together.
If you’re working with an older home that has been updated in bits and pieces over the years, a continuous shiplap backsplash can act like a visual reset. It bridges old trim styles, new cabinets, and existing windows in a way that feels purposeful and charming.
You’ll Start Eyeing Other Walls
Fair warning: once you’ve successfully installed a shiplap backsplash, you may develop a “shiplap problem.” Many homeowners find themselves eyeing other wallsthe breakfast nook, the mudroom, even the hallwaywith that same “you know, this would look great with shiplap” energy.
The good news is that the skills transfer directly: measuring, cutting, spacing, nailing, and finishing are the same whether you’re doing a backsplash or an accent wall. That first project builds tool confidence, and suddenly your budget-friendly kitchen renovation becomes the starting point for a whole-home refresh.
The Best Part: You See It Every Single Day
Unlike a cute throw pillow or a seasonal wreath, a kitchen backsplash is in your line of sight multiple times a daywhen you make coffee, when you cook dinner, when you sneak a late-night snack. Having a backdrop that you installed yourself, in a clean white that brightens the whole room, is a daily reminder that you can transform your home one thoughtful project at a time.
And in a world of big, overwhelming renovation shows, there’s something very satisfying about knowing your own “Remodelaholic-style” white kitchen makeover started with a pile of boards, a weekend of effort, and a clear vision of how you wanted your space to feel.
Final Thoughts
A DIY shiplap kitchen backsplash is one of the most budget-friendly ways to refresh a white kitchen renovation. It delivers texture, warmth, and personality without demanding tile-level money or skills. With smart planning, moisture-aware materials, and a durable paint finish, it can be just as practical as it is pretty.
If you’re dreaming of a fresh, bright space that feels a little farmhouse, a little modern, and a lot more “you,” shiplap might be the perfect backdrop for your newly remodeled kitchen. Measure carefully, prep thoroughly, and don’t be afraid of a little sawdustyou’ll smile every time you walk in and see what you created.