Table of Contents >> Show >> Hide
- Quick reality check: why blue dye is so stubborn
- Before you start: safety and prep
- What you’ll want on hand
- Table of contents
- Step 1: Figure out what kind of blue you used
- Step 2: Set your goal (remove vs. fade vs. neutralize)
- Step 3: Start with warm water + clarifying shampoo
- Step 4: Do a short “wash routine” for a few days
- Step 5: Try an anti-dandruff shampoo boost
- Step 6: Use dish soap only as an occasional emergency cleanser
- Step 7: Vitamin C + shampoo mask (the classic fade trick)
- Step 8: Baking soda paste (short contact, big caution)
- Step 9: Use a color remover made for your dye type
- Step 10: Consider a bleach wash (bleach bath) for stubborn stains
- Step 11: Know when to book a professional color correction
- Aftercare: how to keep your hair soft while you remove blue dye
- Common mistakes to avoid (aka “please don’t do this to yourself”)
- FAQs
- Real-Life Experiences: What People Learn the Hard Way (and Then Laugh About Later)
Blue hair dye is the friend who shows up for the party and then “forgets” to leave. You wanted ocean-mermaid vibes.
Now you’ve got a lingering teal halo that refuses to fade, even after you’ve shampooed like you’re trying to scrub a pan.
The good news: most blue shades can be faded or removedsafelyif you work from gentle to stronger methods
and treat your hair like it has feelings (because it does).
This guide walks you through 11 practical stepsstarting with low-risk wash methods, moving into targeted
treatments like vitamin C, and ending with “call a pro” options for stubborn stains. You’ll also learn why blue pigment
clings, what not to do, and how to keep your hair from turning into dry spaghetti afterward.
Quick reality check: why blue dye is so stubborn
Blue pigments (especially in vivid, “fashion” dyes) often grab onto porous hairlike hair that’s been bleached, heat-styled,
or chemically processed. If your hair is lightened, the cuticle is more open and pigment can lodge in more deeply. That’s why
blue frequently fades into greenish tones and why “one wash fix” videos can be… optimistic.
Your best strategy is to fade gradually, keep the hair hydrated, and stop the moment your hair starts feeling
rough, stretchy, or gummy. (That’s not “texture.” That’s your hair waving a tiny white flag.)
Before you start: safety and prep
- Strand test first: Try any method on a small hidden section (nape/underlayer) so you can see how your hair reacts.
- Patch test chemicals: If you’re using a color remover, developer, or bleach-based product, follow the manufacturer’s patch test directions.
- Protect skin + surfaces: Gloves, an old T-shirt, petroleum jelly along the hairline, and a towel you don’t love.
- If you’re under 18: Ask a parent/guardian for helpespecially for Steps 9–10 (chemical removers/bleach wash).
What you’ll want on hand
- Clarifying shampoo (or chelating shampoo if you have hard water buildup)
- Moisturizing conditioner + a deep mask
- Anti-dandruff shampoo (optional but helpful)
- Vitamin C tablets or powder (plain ascorbic acid; not gummies)
- Baking soda (optional)
- Wide-tooth comb, shower cap, timer, gloves
- Hair color remover (Step 9) and/or bleach-wash supplies (Step 10) if needed
Table of contents
- Step 1: Figure out what kind of blue you used
- Step 2: Set your goal (remove vs. fade vs. neutralize)
- Step 3: Start with warm water + clarifying shampoo
- Step 4: Do a short “wash routine” for a few days
- Step 5: Try an anti-dandruff shampoo boost
- Step 6: Use dish soap only as an occasional emergency cleanser
- Step 7: Vitamin C + shampoo mask (the classic fade trick)
- Step 8: Baking soda paste (short contact, big caution)
- Step 9: Use a color remover made for your dye type
- Step 10: Consider a bleach wash (aka bleach bath) for stubborn stains
- Step 11: Know when to book a professional color correction
Step 1: Figure out what kind of blue you used
This matters because removal depends on the dye category:
- Direct / semi-permanent vivid dye: Often labeled “semi-permanent,” “direct dye,” “fashion color,” or “no developer.” These stain but usually fade with repeated cleansing and targeted treatments.
- Demi-permanent: Often uses low-volume developer; tends to hang on longer than semi-permanent.
- Permanent / box dye: Harder to remove at home; usually needs a remover and/or professional correction.
If you can’t remember what you used, think back: did you mix two bottles together (color + developer)?
If yes, you’re likely dealing with oxidative dye (demi/permanent), and Step 9 becomes more important.
Step 2: Set your goal (remove vs. fade vs. neutralize)
“Remove blue” can mean different things:
- Fade it lighter so it looks intentional (soft denim, smoky teal, pastel blue).
- Remove most of it so you can recolor (often to brown, purple, or a warmer shade).
- Neutralize the tone if it’s gone swampy-green (color theory can rescue you).
If your hair is already fragile (lots of bleach, breakage, gummy feeling), aim for fade + neutralize
instead of aggressive stripping. Hair health is the real flex.
Step 3: Start with warm water + clarifying shampoo
This is the least dramatic (and safest) way to start removing blue hair dye. Warm water helps open the cuticle slightly,
and clarifying shampoo lifts buildup and loosens surface pigment.
How to do it
- Wet hair with comfortably warm (not scorching) water.
- Lather clarifying shampoo and massage for 60–90 seconds.
- Rinse thoroughly, then repeat once.
- Follow with a moisturizing conditioner or mask.
Example: If your blue is mostly on the ends, concentrate the lather there and keep the scalp gentler.
You’re fading pigment, not trying to erase your existence.
Step 4: Do a short “wash routine” for a few days
Blue fades best with consistency. For the next 3–5 washes:
- Use a clarifying shampoo occasionally, not every day.
- On other days, use a regular shampoo (not “color-safe” if your goal is fading).
- Condition every time; deep condition 1–2 times that week.
The goal is controlled fading. If you go full “strip mode” daily, you’ll remove moisture faster than pigment and end up
with hair that feels like a broom wearing extensions.
Step 5: Try an anti-dandruff shampoo boost
Many people notice anti-dandruff shampoos help fade vivid color faster than gentle, sulfate-free formulas.
Use it as a short-term tool, not your forever shampoo.
Best way to use it
- Lather and let it sit for 2–3 minutes (not 20).
- Rinse well, then condition generously.
- Repeat on the next wash day if your hair still feels okay.
Tip: If you have curls or coils, focus on the mid-lengths/ends and be extra serious about moisturizing afterward.
Your curl pattern deserves better than a “crispy era.”
Step 6: Use dish soap only as an occasional emergency cleanser
Dish soap can remove oils and help loosen stubborn dye, but it can also leave hair dry and rough. Think of it like a
power-washer: effective, but you don’t want to use it on a daily basis unless you’re trying to exfoliate your soul.
If you try it
- Mix a small amount of dish soap with shampoo (don’t use straight dish soap on dry hair).
- Lather briefly, rinse, then deep condition.
- Wait at least several days before doing it again.
Step 7: Vitamin C + shampoo mask (the classic fade trick)
Vitamin C (ascorbic acid) is one of the most popular ways to fade semi-permanent and some demi-permanent color.
It’s not magic, but it can noticeably lift blue a shade or twoespecially if your dye is fresh.
How to do a vitamin C mask
- Crush vitamin C tablets into a fine powder (or use plain powder).
- Mix with clarifying shampoo to make a paste (think yogurt consistency).
- Apply to damp hair, saturating the bluest areas.
- Cover with a shower cap and wait 30–60 minutes.
- Rinse thoroughly and follow with a deep conditioner.
Example: If your hair is blue at the ends but lighter at the roots, apply the mask to the ends first
and bring it upward lightly near the end so you don’t over-fade the top.
Step 8: Baking soda paste (short contact, big caution)
Baking soda is alkaline and can increase swelling of the cuticle, which may help loosen dyebut it can also be drying.
If your hair is already compromised, skip this and stick to Steps 3, 5, 7, and 9.
Safer way to try it
- Mix a small amount of baking soda with shampoo (not a cement-like paste).
- Massage through damp hair for 1–2 minutes.
- Rinse immediately and condition deeply.
What not to do: Don’t leave baking soda on for an hour “because TikTok said so.” TikTok also said you can
cook pasta in a dishwasher, and we all know how that ends.
Step 9: Use a color remover made for your dye type
If gentle fading isn’t cutting it, use a remover designed for what’s on your head:
- For oxidative (permanent/demi) dye: Many removers use sulfur-based chemistry that helps shrink artificial dye molecules so they can rinse out.
- For direct/vivid dye: Look for “direct dye lifter” or “semi-permanent color remover” products. These are designed to release fashion pigments.
How to make this step actually work
- Follow the instructions exactly (timing, mixing, rinsing).
- Rinse longer than you think you need to. “Thorough rinse” usually means “keep rinsing.”
- Deep condition afterwardmany removers are effective but can leave hair dry.
Note: Results vary. You may lift the blue to a pale mint, gray-blue, or even a weird “cloudy aquarium” shade.
That’s normal. The next step is either neutralizing (Step 8 bonus trick below) or a professional correction (Step 11).
Bonus: neutralize leftover blue/green with color theory
If you’re left with a greenish cast (common after blue fades), a warm, coppery/orange-based toner or color-depositing
mask can help neutralize the look. This doesn’t remove dyeit balances what you see. Go slowly and strand test.
Step 10: Consider a bleach wash (bleach bath) for stubborn stains
A bleach wash (also called a bleach bath) is a diluted lightening method used to lift stubborn fashion pigments like
blue and green more gently than a full bleach application. It can workbut it also raises the risk of dryness and breakage,
especially on previously lightened hair.
If you’re thinking about it, read this first
- Best candidate: Healthy hair, minimal breakage, and you’ve already tried Steps 3–9.
- Worst candidate: Hair that’s stretchy, melting, snapping, or already severely bleached.
- Golden rule: Strand test. Time it. Watch it like a hawk.
If you’re not experienced with bleach chemistry, the safest move is to take this step to a professional. A stylist can
adjust developer strength, timing, and placement so you don’t “accidentally” create a haircut.
Step 11: Know when to book a professional color correction
Sometimes the most “easy” way to remove blue hair dye is admitting you’ve met your match and calling someone who does
this for a living. Book a color correction if:
- Your blue won’t budge after several gentle rounds.
- You need a big change (blue to blonde, blue to light brown, etc.).
- Your hair is compromised and you can’t risk more DIY damage.
- You’re seeing patchiness, banding, or strange undertones that won’t tone out.
Pro tip: Tell your stylist exactly what you used (brand/type if possible), when you applied it, and what
you’ve tried since. Stylists love honesty almost as much as they love not being surprised.
Aftercare: how to keep your hair soft while you remove blue dye
- Deep condition: Use a mask 1–2 times per week during removal.
- Protein in moderation: If hair feels mushy/stretchy, a light protein treatment may helpthen moisturize.
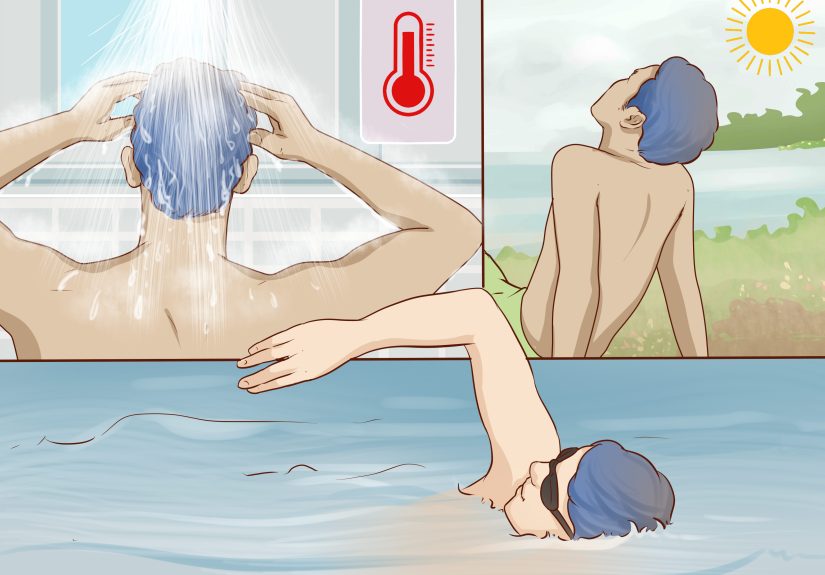
- Lower the heat: Hot tools and very hot water can increase fading, but they can also increase damage. Choose “warm,” not “volcano.”
- Protect from sun/chlorine: UV and pool chemicals can shift tones (and make hair drier). Use a hat or UV spray if you’re outside a lot.
Common mistakes to avoid (aka “please don’t do this to yourself”)
- Mixing random chemicals: Avoid DIY cocktails with peroxide, bleach, ammonia, and acids. If it sounds like a science fair volcano, it doesn’t belong on your head.
- Overdoing clarifying washes: More isn’t always better; dryness can hit before the pigment leaves.
- Leaving harsh mixtures on too long: Timers are your friend. Guessing is not.
- Skipping conditioner: If you strip without replenishing moisture, breakage becomes the main character.
FAQs
How long does it take to remove blue hair dye?
It depends on dye type and hair porosity. Some people see noticeable fading in a few washes; others need a week or two of
gentle methods plus a remover. Heavily bleached hair can hold onto blue longer.
Will vitamin C remove blue hair dye completely?
Usually it helps fade rather than erase. It’s most effective on semi-permanent dye and on newer color. Think “lift a level,” not “time travel to your natural hair.”
Why did my blue turn green?
Blue fading often reveals yellow undertones underneath (from bleach, natural warmth, or previous color). Blue + yellow = green. It’s not you. It’s color theory.
What’s the safest at-home option?
Start with clarifying shampoo routines and moisturizing aftercare, then try vitamin C. If you need more than that, a targeted remover is usually safer than jumping straight to bleach.
Real-Life Experiences: What People Learn the Hard Way (and Then Laugh About Later)
If there’s one universal truth about blue hair dye, it’s this: everyone starts confident, and everyone ends up staring at
their hair in the bathroom mirror like it just lied to them. The most common experience is the “week-one glow” followed by
the “why am I suddenly seafoam?” phase. Blue loves to fade unevenlyespecially on porous endsso people often notice the tips
stay bright while the mids go murky or slightly green. That’s why the best results usually come from treating hair in zones:
targeting the bluest areas more aggressively (vitamin C mask, remover) while keeping the less-stained sections on gentler
washes.
Another experience many people share: the temptation to panic-bleach. It’s understandableblue can feel like it’s glued on.
But the folks who get the cleanest, most predictable results tend to do the opposite: they pace themselves. They’ll do a
clarifying wash, then a deep conditioning mask. The next wash might be anti-dandruff shampoo for a couple minutes, then a
moisturizing conditioner. Then a vitamin C mask on the weekend when they can actually babysit it with a timer. In other words,
they treat removal like a mini project, not a 2 a.m. impulse decision fueled by bad lighting and a “this will be fine” attitude.
People also often report that the rinse is where the magic happensespecially with removers. Many first-timers
rinse for a minute, assume it’s done, and then wonder why the color “came back” later. In reality, leftover pigment and product
can hang around and re-oxidize or redeposit. The “I rinsed forever” crowd is usually the crowd that gets a more even outcome.
It’s not glamorous, but neither is blue water dripping down your elbows while you question every life choice.
A smaller but very real set of experiences: blue that refuses to leave bleached hair completely. Some people reach a point where
the color is faint but still presentlike a ghost of denim past. That’s when neutralizing becomes the hero. Instead of trying to
blast out the last 5% of pigment (and possibly blasting out the strength of the hair), they’ll use a warm-toned gloss or
color-depositing conditioner to balance the tone. The result can look intentionally beige-blonde or softly warm rather than icy
mint. It’s a great reminder that “removed” doesn’t always mean “invisible”sometimes it means “no longer bothering you.”
Finally, there’s the experience that turns people into lifelong salon supporters: the moment they realize professional color
correction is less about “fancy products” and more about judgment. A good stylist will strand test, adjust strength and timing,
and place product only where it’s neededsaving healthier sections from unnecessary damage. Many DIYers say their biggest lesson
wasn’t a specific method; it was learning to stop early, hydrate often, and accept that hair has a memory. Blue dye is persistent,
but it’s not invincibleand neither are you.