Table of Contents >> Show >> Hide
- What’s Actually Making Your Sink Look Gross?
- Before You Start: The 3-Minute Prep That Makes Cleaning Faster
- The 10-Minute Deep Clean (Works for Most Bathroom Sinks)
- Faucet and Handles: Get the Shine Without the Scratches
- Drain, Stopper, and Overflow Hole: The Hidden Gross Zone
- Hard-Water Stains and Mineral Buildup: Choose Your Weapon
- Disinfecting: When You Actually Need It
- Material-Specific Cheat Sheet
- Daily and Weekly Habits That Keep It Looking Pristine
- Mistakes That Ruin a Sink (or at Least Its Mood)
- Quick Troubleshooting: Common Sink Problems (and Fixes)
- Conclusion: A Pristine Sink Is Mostly About the Finish Line
- Experience-Based Tips: What Real Bathrooms Teach You (So You Don’t Learn the Hard Way)
- SEO Tags
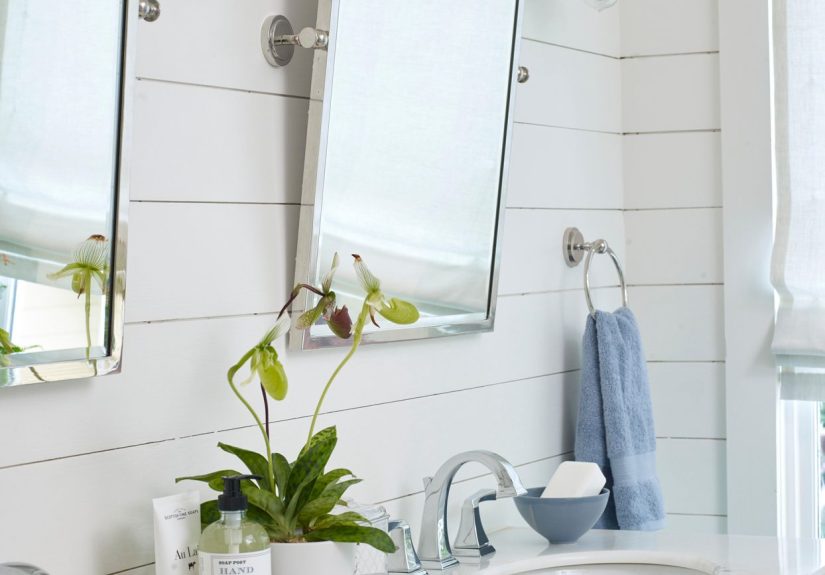
Bathroom sinks live a hard life. They get splashed, smeared, spit-rinsed, makeup-dusted, and occasionally baptized in whatever “miracle” skincare product you tried at 2 a.m. The good news: getting your sink sparkling again is simple. The better news: keeping it pristine is even easieronce you know the few habits that actually matter.
This guide walks you through a fast daily reset, a deeper weekly clean, and the “secret” spots (hello, drain stopper and overflow hole) that can make a sink look clean while still quietly plotting against your nose. We’ll also cover material-specific tips for porcelain, stainless steel, and natural stone, plus how to deal with hard-water stains without accidentally sanding your faucet into sadness.
What’s Actually Making Your Sink Look Gross?
Before you scrub like you’re training for the Cleaning Olympics, it helps to know what you’re fighting. Most sink grime is a mix of:
- Soap scum + toothpaste film: A clingy blend that dulls shine and collects dust like it’s a hobby.
- Hard-water minerals: Chalky white spots (or rusty-orange stains) caused by mineral deposits drying on surfaces.
- Oils and product residue: Makeup, lotions, beard oil, hair productsyour sink is basically a skincare museum.
- Germy “high-touch” zones: Faucet handles, drain stoppers, and around the rim where hands hover often.
Before You Start: The 3-Minute Prep That Makes Cleaning Faster
Cleaning goes quicker when you’re not hunting for supplies mid-scrub with wet hands. Grab these:
- Microfiber cloths (at least two: one for washing, one for drying/buffing)
- A soft sponge or non-scratch scrub pad
- An old toothbrush or small detail brush
- Mild dish soap
- Baking soda (optional but highly useful)
- White vinegar (optional; great for mineral depositsuse thoughtfully)
- A disinfecting spray or wipes (optional; for high-touch cleaning)
- Rubber gloves if your hands don’t enjoy “dishwater chic”
Quick safety note: Never mix bleach with ammonia or acids (like vinegar). That’s not “extra clean”that’s “call the window company because you just aired out your soul.”
The 10-Minute Deep Clean (Works for Most Bathroom Sinks)
If you only do one thing from this article, do this routine once a week. It keeps the sink bright and prevents buildup from turning into a weekend project.
Step 1: Clear the sink and rinse away loose gunk
Remove everything (soap dispensers, cups, razors) and rinse the basin with warm water. If there’s visible hair, toothpaste blobs, or mysterious grit: sweep it into the drain area and grab it with a tissue. Don’t “power-rinse” it into your plumbing and hope for the best.
Step 2: Wash with dish soap (yes, dish soap)
Add a few drops of mild dish soap to a damp sponge and scrub the basin, rim, and countertop edges. Dish soap is excellent at cutting oils, which is a big part of sink dullness. Use gentle pressure and let the soap do the work.
Step 3: Target the ring around the drain and faucet base
That dark ring around the drain? It’s usually a mixture of product residue and mineral buildup. Scrub the drain area and the base of the faucet where water likes to pool. Use the toothbrush for crevices and seams.
Step 4: Rinse thoroughly
Rinse off all cleaner and loosened grime. Residue left behind can attract more dirt and make the sink look cloudy again faster.
Step 5: Dry and buff
This is the “pristine” step. Dry the sink with a clean microfiber cloth. Drying prevents water spots and instantly boosts shine. If you want that “hotel bathroom” look, buff in small circles.
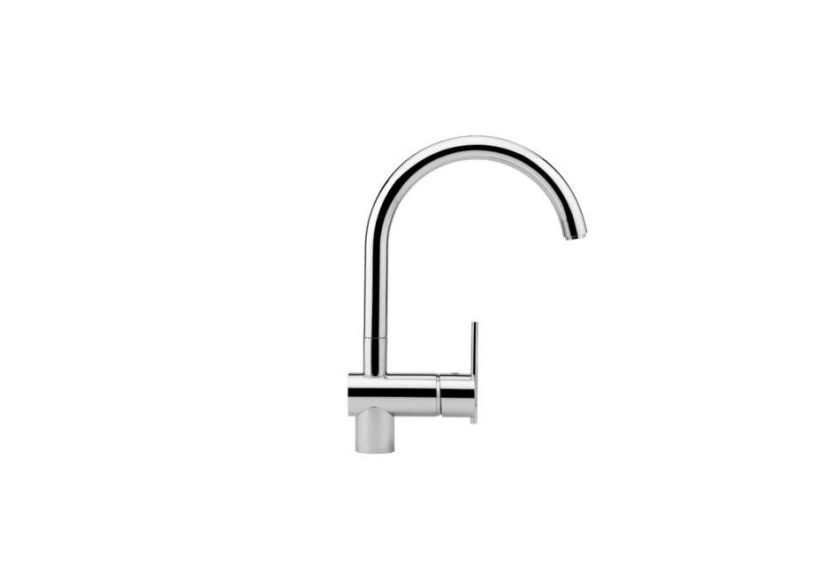
Faucet and Handles: Get the Shine Without the Scratches
Faucets look tough, but finishes can be surprisingly sensitive. The safest routine is simple: mild soap, soft cloth, rinse, dry. It’s not dramatic, but it worksand it won’t void anyone’s warranty or turn your chrome into a science experiment.
Everyday faucet cleaning
- Dampen a microfiber cloth with warm water and a tiny drop of dish soap.
- Wipe the faucet, handles, and spout.
- Rinse with a clean damp cloth (so you don’t leave soap film).
- Dry completely to prevent water spots.
Cleaning a crusty faucet aerator (hard-water special)
If your faucet is splashing sideways like it’s auditioning for a fountain show, the aerator may be clogged with mineral deposits. Try this gentle approach:
- Fill a small plastic bag with a half-and-half mix of water and white vinegar (enough to submerge the aerator).
- Secure the bag over the faucet head with a rubber band.
- Let it soak for 30 minutes (less if you’re cautious about finishes).
- Remove, run warm water, and lightly scrub with a toothbrush.
- Dry and admire your faucet’s renewed enthusiasm for flowing straight.
Finish-friendly rule: Avoid abrasive pads, steel wool, and “miracle” powders unless you’re sure they’re safe for your sink material and faucet finish. When in doubt, stay gentle.
Drain, Stopper, and Overflow Hole: The Hidden Gross Zone
Your sink can look spotless and still smell weird. That’s usually the drain and stopper area holding onto hair, product residue, and soap scum.
Step 1: Clean the stopper
Remove the stopper (how depends on your sink type), then scrub it with dish soap and a toothbrush. If it’s slimy, that’s not “moisture” it’s buildup. Rinse well and set aside.
Step 2: De-gunk the drain opening
Use the toothbrush to scrub around the drain opening and under the lip where grime hides. If there’s hair, pull it out with a tissue or a small plastic drain tool. This is not glamorous. It is, however, highly effective.
Step 3: Freshen the drain (simple, no-drama method)
If your drain is slow or funky, try a gentle DIY refresh:
- Pour about 1/2 cup baking soda into the drain.
- Follow with about 1 cup white vinegar.
- Let it fizz for 10–15 minutes (yes, it’s the middle-school volcano, but useful).
- Flush with very hot water for 30–60 seconds.
If clogs are frequent, consider an enzyme-based drain cleaner occasionally. Enzymes work more slowly but are often gentler on plumbing. Save harsh chemical drain openers for true emergencies (and follow label directions carefully).
Don’t ignore the overflow hole
Many bathroom sinks have an overflow opening near the top of the basin. It can collect grime and contribute to odors. Use a toothbrush dipped in soapy water to scrub around it, then rinse by pouring a little warm water into the overflow area. Dry what you can reach with a cloth.
Hard-Water Stains and Mineral Buildup: Choose Your Weapon
Hard-water spots are basically minerals that moved in and decided to redecorate. To remove them, you need either gentle abrasion, mild acid, or a purpose-made cleanermatched to your sink material.
Option A: Vinegar + water for light mineral spots
For many non-stone surfaces, a 50/50 mix of vinegar and water can help dissolve light mineral deposits. Apply with a cloth, let it sit briefly, then rinse thoroughly and dry. Don’t let acidic solutions sit foreverespecially on sensitive finishes.
Option B: Baking soda paste for stubborn rings
For tougher stains (like the drain-ring halo), make a paste: baking soda plus a little water (or a little vinegar if appropriate for your surface). Gently scrub with a soft sponge or cloth. Rinse and dry. The goal is “lift the stain,” not “sand the sink.”
Option C: Commercial cleansers when you need a stronger assist
If your sink looks dull despite regular cleaning, a cleanser designed for your surface can help. Many people use specialty products for porcelain, ceramic, or stainless steel to remove discoloration and restore shine. Always follow label directions, use non-scratch tools, and rinse thoroughly.
Important: If your sink is natural stone (marble, granite, travertine), skip vinegar and other acids. Use a stone-safe, pH-neutral cleaner and a soft cloth. Acid can etch stone and leave dull spots that look like permanent “water stains.”
Disinfecting: When You Actually Need It
Cleaning and disinfecting are related but not identical. Cleaning removes grime and many germs. Disinfecting uses chemicals to kill more germs on surfaces. In most homes, daily disinfecting isn’t mandatoryunless someone is sick, you’re cleaning up bodily fluids, or you want extra attention on high-touch handles.
How to disinfect properly (without wasting product)
- Clean first. Disinfectants work better on surfaces free of visible soil.
- Apply disinfectant and keep it wet. Many disinfectants require a specific “contact time.”
- Let it air-dry or wipe after the time is up (follow the product label directions).
If you’ve ever sprayed disinfectant and immediately wiped it off like you’re erasing evidencecongrats, you’ve invented “scented dampness.” Read the label. Contact time matters.
Material-Specific Cheat Sheet
The right method depends on what your sink is made of. Here’s a practical guide:
Porcelain / vitreous china / ceramic
- Best for weekly: dish soap + soft sponge; baking soda paste for stains.
- Avoid: aggressive scouring pads that scratch the glaze.
- Pro move: dry after use to prevent mineral spots from setting.
Stainless steel
- Best for weekly: dish soap + microfiber; gentle baking soda scrub if needed.
- Scrub with the grain (if visible) to reduce scratches.
- Avoid: steel wool, bleach/chlorine-based cleaners, and harsh abrasives.
Cultured marble / solid surface
- Best for weekly: mild soap, soft cloth.
- Avoid: harsh abrasives and strong solvents that can dull the finish.
Natural stone (marble, granite, travertine)
- Best for weekly: pH-neutral stone cleaner; soft microfiber.
- Avoid: vinegar, lemon, bleach, and abrasive powders (etching and dull spots).
- Consider: periodic sealing as recommended by your stone’s manufacturer.
Daily and Weekly Habits That Keep It Looking Pristine
The secret to a pristine sink isn’t stronger cleaner. It’s preventing the “dry-down” cycle that creates spots and buildup. Try these habits:
The 60-second daily reset
- Rinse the basin quickly after heavy use (toothpaste, makeup, shaving cream).
- Wipe the faucet and rim with a microfiber cloth.
- Dry the basin (especially if you have hard water).
The 10-minute weekly routine
- Wash basin + rim + faucet with dish soap.
- Scrub drain ring and faucet base with a toothbrush.
- Clean the stopper and overflow hole.
- Rinse and dry everything.
The monthly “make it feel new” refresh
- Check the aerator for buildup and soak if needed.
- Do a drain refresh (especially if hair and product buildup are common in your house).
- Spot-treat any mineral stains before they become permanent roommates.
Mistakes That Ruin a Sink (or at Least Its Mood)
- Letting cleaners sit too long: Especially acidic cleaners on finishes and stone.
- Using abrasive tools “just this once”: Scratches create tiny grooves that collect grime later.
- Skipping the rinse: Cleaner residue can cause cloudiness and attract dirt.
- Never drying: If you have hard water, air-drying is basically “spot-making.”
- Disinfecting without cleaning first: You’re asking chemistry to do what scrubbing should have handled.
Quick Troubleshooting: Common Sink Problems (and Fixes)
“My sink looks clean but still smells weird.”
Clean the stopper, scrub the drain opening, and refresh the drain with baking soda + vinegar followed by hot water. Also scrub the overflow hole if your sink has one.
“Water spots come back immediately.”
That’s hard water doing what hard water does. Dry after use, and keep a microfiber cloth under the sink for easy wiping. For existing spots, use a brief vinegar-and-water wipe (non-stone surfaces), rinse, and dry.
“My faucet is streaky no matter what I do.”
It’s often soap residue or mineral film. Use mild soap, rinse thoroughly, then dry and buff with a clean microfiber cloth. Avoid abrasive pads.
“The drain is slow, but I don’t want to nuke my pipes.”
Remove hair and gunk manually first (most effective), then do a baking soda/vinegar refresh. If you need more help, an enzyme drain product can be a gentler option for ongoing maintenance.
Conclusion: A Pristine Sink Is Mostly About the Finish Line
Here’s the surprisingly glamorous truth: the difference between “pretty clean” and “why does this look brand new?” is usually one thingdrying. Clean weekly with gentle products, hit the drain and faucet base where grime hides, and dry the sink after use to prevent water spots and buildup. Do that, and your bathroom sink will stay bright, shiny, and suspiciously photogenic.
Experience-Based Tips: What Real Bathrooms Teach You (So You Don’t Learn the Hard Way)
In real life, bathroom sinks don’t get dirty in a neat, Instagrammable way. They get dirty in a “How did toothpaste reach the underside of the faucet?” way. And the best cleaning strategies usually come from patterns you notice over timewhat keeps coming back, what stains fastest, and what turns a quick wipe into a full-on scrub session.
First, there’s the two-day illusion. You deep-clean your sink, it looks flawless, and thentwo days laterthere’s that faint haze again. That’s often not “dirt returning,” it’s water drying on the surface. If you have hard water, tiny mineral deposits start building immediately. The experience-based fix isn’t buying a stronger cleaner; it’s keeping a microfiber cloth within arm’s reach and doing a 10-second dry after brushing your teeth. People who swear their sink “never gets spots” aren’t blessed. They’re drying.
Next: the faucet base puddle problem. In many bathrooms, water collects right where the faucet meets the counter or sink deck. That little puddle becomes a magnet for grime because it’s the perfect place for soap residue and minerals to settle. Over time, it creates that stubborn ring that laughs at casual wiping. If you’ve ever tried to scrub it off and felt like you were polishing a rock, you’re not alone. The practical habit is simple: when you wipe the sink, wipe the faucet base last and dry it. It’s like closing the fridge doorsmall action, big payoff.
Then there’s the drain stopper reality check. A sink can look spotless until you remove the stopper and discover what can only be described as “a hair-and-product lasagna.” This is common in homes where people use thick conditioners, beard oils, heavy moisturizers, or makeup removersanything that coats surfaces. The best lesson here is that manual removal is faster than any chemical. Once you’ve cleaned a stopper the “real” way (soap + toothbrush), you’ll understand why “just pour something down the drain” rarely fixes the root issue.
Another real-world scenario: the guest-bathroom surprise. A sink that’s rarely used often gets dusty, and dust plus a light film of soap scum creates a dull, grayish look that’s weirdly harder to wipe than fresh splashes. If your guest sink looks “meh” no matter what, a gentle soap wash followed by a careful dry and buff usually restores shine. And if you want it to stay that way, give it a quick wipe every week even if nobody used it. Dust is sneaky.
Finally, there’s the product-mismatch lesson people learn once: the wrong cleaner can make everything worse. Abrasive tools can scratch. Strong chemicals can dull finishes. Acids can damage natural stone. The lived experience takeaway is to start gentle and only level up when you need to. A mild soap wash and thorough drying solves the majority of “my sink looks dirty” complaints. When something really is stainedhard water, rust marks, long-term buildupthen you choose a targeted method that matches your sink material.
The most consistent “pristine sink” experience isn’t a single magic product. It’s the combination of short, frequent resets (rinse, wipe, dry), plus a weekly detail clean that hits the drain, stopper, and faucet base. Once you build that rhythm, your sink stops being a project and becomes a background character againshiny, clean, and quietly doing its job without drama.