Table of Contents >> Show >> Hide
- Why Cleaning a Saxophone Mouthpiece Matters
- What You Need Before You Start
- How to Clean a Saxophone Mouthpiece: 13 Steps
- Step 1: Remove the Reed and Ligature
- Step 2: Check What Material Your Mouthpiece Is Made Of
- Step 3: Rinse the Mouthpiece with Cool or Room-Temperature Water
- Step 4: Add a Small Drop of Mild Dish Soap
- Step 5: Let It Soak Briefly if It Needs a Deeper Clean
- Step 6: Gently Clean the Inside of the Chamber and the Outside Surface
- Step 7: Use Cotton Swabs for Tight Spots
- Step 8: Treat Stubborn Mineral Buildup Carefully
- Step 9: Rinse Thoroughly
- Step 10: Sanitize with a Mouthpiece-Safe Disinfectant
- Step 11: Dry It Completely
- Step 12: Reassemble Smartly
- Step 13: Build a Simple Cleaning Routine
- Common Mistakes to Avoid
- How Often Should You Clean a Saxophone Mouthpiece?
- When to Get Professional Help
- Experience and Practical Lessons from Real Players
- Conclusion
If your saxophone mouthpiece has started to smell a little funky, look a little cloudy, or taste like yesterday’s rehearsal and last month’s cafeteria pizza, congratulations: it is officially time for a cleaning. The good news is that cleaning a saxophone mouthpiece is not difficult, does not require a chemistry degree, and absolutely should not involve panic, boiling water, or the dishwasher. What it does require is a gentle approach, a few simple supplies, and the wisdom to remember that a saxophone mouthpiece is small, delicate, and weirdly good at collecting moisture, mineral buildup, and mystery residue.
Whether you play alto, tenor, soprano, or baritone sax, your mouthpiece is one of the most important parts of your setup. It affects response, comfort, tone, and hygiene. A clean mouthpiece feels better, smells better, and helps your reed vibrate the way it should. A dirty one can collect grime in the chamber, develop hard deposits near the tip or rails, and become the kind of object that makes band directors squint suspiciously from across the room.
In this guide, you will learn exactly how to clean a saxophone mouthpiece in 13 practical steps, plus what to avoid, how often to clean it, and what experienced players wish they had known sooner. Let’s get your mouthpiece back to “pleasantly musical” instead of “small haunted cave.”
Why Cleaning a Saxophone Mouthpiece Matters
A saxophone mouthpiece deals with three things every time you play: moisture, saliva, and pressure. Over time, that combination can leave behind film, bacteria, dried residue, and mineral deposits. On hard rubber mouthpieces, bad cleaning habits can also cause discoloration. On metal mouthpieces, careless products can wear finishes or plating. On any mouthpiece, aggressive scrubbing can damage the tip, rails, baffle, or table, which is a fancy way of saying, “One rough move and your sound may start filing complaints.”
Routine mouthpiece care keeps the inside cleaner, helps reduce odor, protects the facing, and makes weekly deep cleaning easier. It also helps you notice early signs of wear, including bite marks, chips, scratches, and buildup that can affect performance.
What You Need Before You Start
- A sink or bowl with cool or room-temperature water
- Mild dish soap
- A soft mouthpiece brush, very soft toothbrush, silk swab, or cotton swabs
- A soft microfiber cloth or lint-free towel
- A mouthpiece-safe sanitizer or wind instrument disinfectant
- Optional: a little white vinegar for stubborn mineral buildup
One important material note: if your mouthpiece is hard rubber or ebonite, stay with cool or room-temperature water. Heat is not your friend here. Hot water can discolor the mouthpiece, affect the taste, and generally turn a nice piece of gear into a cautionary tale. Metal and some synthetic mouthpieces are more forgiving, but gentle cleaning is still the smart move.
How to Clean a Saxophone Mouthpiece: 13 Steps
Step 1: Remove the Reed and Ligature
Before you clean anything, take off the reed and ligature. This sounds obvious, but plenty of players skip straight to rinsing and then wonder why the reed now feels like a soggy potato chip. Set the reed aside in a proper reed case to dry. Store the ligature separately so it does not scratch the table of the mouthpiece.
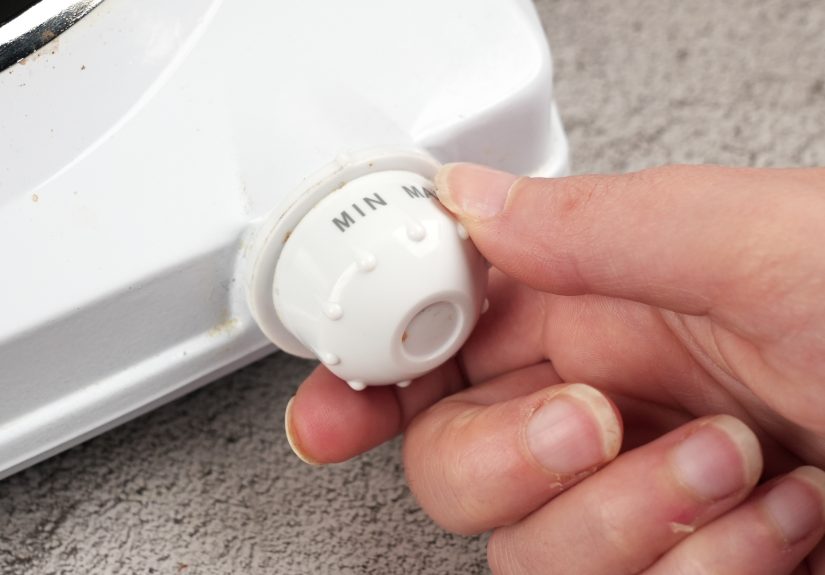
Step 2: Check What Material Your Mouthpiece Is Made Of
Not all mouthpieces want the same spa treatment. Hard rubber mouthpieces need extra caution with temperature and harsh products. Metal mouthpieces can usually handle a bit more, but plating still deserves care. Plastic or resin models are common for students and are usually durable, though that does not mean they enjoy abuse. Knowing the material helps you avoid the classic cleaning mistake: treating every mouthpiece like it was made of indestructible camping gear.
Step 3: Rinse the Mouthpiece with Cool or Room-Temperature Water
Hold the mouthpiece under a gentle stream of water to loosen loose residue. This first rinse helps remove fresh moisture and softens any light film before soap goes on. Do not blast it with high pressure. You are cleaning a mouthpiece, not pressure-washing a driveway.
Step 4: Add a Small Drop of Mild Dish Soap
Put a tiny amount of mild dish soap on your fingers, brush, or cloth. Mild soap cuts residue without being too harsh on the surface. Avoid heavy degreasers, bleach-based cleaners, or strong household chemicals. If the cleaner sounds like it belongs under a sink next to industrial gloves, it probably does not belong in your mouthpiece.
Step 5: Let It Soak Briefly if It Needs a Deeper Clean
If the mouthpiece has visible film or smells like it has been through marching season and forgotten in a closet, let it soak for a short time in soapy cool or room-temperature water. A brief soak helps loosen grime so you do not need to scrub aggressively later. Keep it sensible: this is a soak, not a retirement plan.
Step 6: Gently Clean the Inside of the Chamber and the Outside Surface
Use a soft mouthpiece brush, soft toothbrush, silk swab, or cloth to clean inside the chamber and around the beak and body. Work gently. The goal is to remove buildup, not to reshape the mouthpiece. The tip, side rails, and baffle are the most delicate areas, so slow down there and use a light touch.
Step 7: Use Cotton Swabs for Tight Spots
The corners and smaller interior areas can trap stubborn residue. A cotton swab is useful for cleaning those tight spots without forcing a larger brush where it should not go. This is especially handy if there is buildup near edges or inside the chamber where fingers have zero chance of fitting unless you are a cartoon raccoon.
Step 8: Treat Stubborn Mineral Buildup Carefully
If there is hardened white scale or old gunk that refuses to leave, use a careful spot treatment instead of brute force. A little white vinegar on a cotton swab or cotton ball can help soften deposits. Apply it to the problem area briefly, then rinse well. Do not leave acidic cleaners sitting forever, especially on hard rubber. When in doubt, go shorter, gentler, and less dramatic.
Step 9: Rinse Thoroughly
Rinse away all soap and loosened residue with clean water. Take your time here. Leftover soap can affect taste and leave a film of its own. A properly rinsed mouthpiece should feel clean, not slippery, sticky, or suspicious.
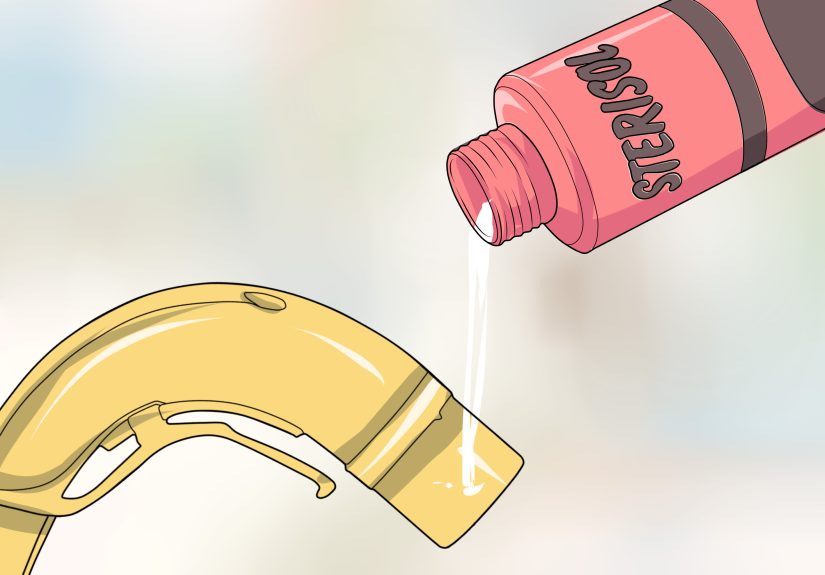
Step 10: Sanitize with a Mouthpiece-Safe Disinfectant
Cleaning and disinfecting are not the same thing. If you want to sanitize the mouthpiece, use a product specifically made for wind instrument mouthpieces. Follow the directions on the label. That is the boring answer, but it is also the correct answer. Random sprays, alcohol-heavy products, or harsh cleaners may be fine for countertops and terrible for mouthpieces.
Step 11: Dry It Completely
Use a soft microfiber cloth or lint-free towel to dry the mouthpiece inside and out. Make sure the tip, rails, and table are dry before reassembly. Moisture left behind can encourage odor, residue, and mildew over time. Also, do not toss a wet mouthpiece straight into the case and hope optimism will fix it.
Step 12: Reassemble Smartly
Once the mouthpiece is fully dry, reattach the ligature and reed only when you are ready to play or store things properly. Use a mouthpiece cap to protect the tip. If you use mouthpiece patches, this is also a good time to check whether they are peeling, dirty, or overdue for replacement.
Step 13: Build a Simple Cleaning Routine
The best mouthpiece cleaning routine is the one you will actually do. Swab or wipe moisture from the mouthpiece after playing. Deep clean it about once a week if you play regularly, or more often during heavy rehearsals, school band season, gigging, or shared-instrument situations. Consistency beats heroic emergency cleaning every single time.
Common Mistakes to Avoid
Using hot water: This is a famous mistake, especially with hard rubber mouthpieces. Heat can cause discoloration and leave the mouthpiece looking older than it is.
Scrubbing too hard: The tip, rails, baffle, and table are not places for aggression. If you scrub like you are trying to erase bad life choices, you can damage the mouthpiece.
Using harsh chemicals: Bleach, strong alcohol, abrasive cleaners, and random household sprays can damage surfaces, plating, or finish.
Skipping drying time: A clean-but-wet mouthpiece stored in a closed case is basically an invitation for odor and grime to return.
Ignoring daily moisture: If you never swab or dry the mouthpiece after playing, buildup arrives faster and cleaning gets more annoying.
How Often Should You Clean a Saxophone Mouthpiece?
For most players, a quick dry or swab after every session and a deeper wash once a week is a solid routine. If you play every day, especially in warm weather or long rehearsals, weekly deep cleaning is smart. If you share instruments, teach beginners, or play in school settings, sanitize more often. A mouthpiece is small enough that regular care takes only a few minutes, which is a very good trade compared to scraping off mystery crust later.
When to Get Professional Help
Cleaning solves dirt, odor, and light deposits. It does not fix chips, warped rails, deep bite damage, cracked beaks, or facing problems. If the mouthpiece has physical damage or suddenly plays differently even after cleaning, get it checked by a qualified saxophone repair tech or mouthpiece specialist. There is a difference between “needs a wash” and “needs a professional with tools that cost more than your first student horn.”
Experience and Practical Lessons from Real Players
One of the funny things about learning how to clean a saxophone mouthpiece is that most players do not think much about it until they have one bad experience. Maybe the mouthpiece starts smelling weird halfway through practice. Maybe you notice a chalky ring of buildup inside the chamber. Maybe your response feels a little stuffy, and after cleaning, the mouthpiece suddenly plays like itself again. That is often the moment a player realizes mouthpiece care is not just about hygiene. It is also about consistency, feel, and tone.
Beginners usually start with one of two habits. The first is cleaning nothing at all and assuming the instrument case contains magical self-maintenance powers. The second is over-cleaning with the enthusiasm of someone who just discovered dish soap. Both extremes teach lessons. Players who never clean the mouthpiece learn that grime hardens, odors deepen, and reeds do not love being paired with a sticky beak. Players who overdo it learn that rough brushing, heat, and random cleaning products can do more harm than the original dirt.
Experienced saxophonists tend to settle into a calm middle ground. They swab the mouthpiece after playing, wipe it down, and do a more careful wash on a schedule. They also notice small changes earlier. A mouthpiece that suddenly tastes off, dries slowly, or shows new residue may be telling you something about your routine. Maybe you are eating right before rehearsal. Maybe the case stays closed while everything is still damp. Maybe the swab itself needs to be washed. That last one surprises people more often than it should. Cleaning a mouthpiece with a dirty swab is a bit like washing a car with a muddy sponge. Technically, you are doing something. Spiritually, maybe not.
Another common experience is learning how much material matters. Hard rubber mouthpieces teach respect fast. Use hot water once, and you may spend the next hour wondering why your mouthpiece looks slightly sunburned. Metal mouthpieces bring their own lessons, especially if they are plated. Players often become more careful once they realize that “clean” should not mean “stripped of finish.” Over time, musicians figure out that gentle, repeatable care works better than occasional cleaning drama.
There is also a comfort factor that players do not always mention enough. A clean mouthpiece simply feels better on the face. It smells neutral, tastes normal, and does not leave you wondering what exactly is touching your reed. That matters during long rehearsals, performances, auditions, or practice sessions where the goal is making music, not conducting a silent argument with your equipment.
Perhaps the biggest lesson is that good mouthpiece care becomes part of musicianship. It is one of those quiet habits that serious players build over time. Not flashy, not glamorous, definitely not applause-worthy, but incredibly useful. No audience member has ever shouted, “Bravo for that beautifully maintained chamber,” yet a clean, reliable setup helps everything else go more smoothly. And honestly, that is enough.
Conclusion
Cleaning a saxophone mouthpiece does not have to be complicated. Remove the reed, use mild soap, clean gently, rinse thoroughly, dry it well, and avoid the big mistakes like heat and harsh chemicals. Follow the 13 steps above, and your mouthpiece will stay cleaner, last longer, and feel better to play. In other words, your sax setup gets to be a musical tool again instead of a science project.
Note: This guide covers routine cleaning and sanitation for a saxophone mouthpiece. If your mouthpiece has chips, cracks, warped rails, plating loss, or serious performance issues, stop cleaning and contact a qualified repair specialist.