Table of Contents >> Show >> Hide
- Why Cutting Chicken Breast Into Strips the Right Way Matters
- What You Need Before You Start
- How to Cut Chicken Breast Into Strips: 12 Steps
- Step 1: Start With Cold Chicken, Not Warm Chicken
- Step 2: Set Up a Safe, Clean Work Area
- Step 3: Do Not Wash the Chicken
- Step 4: Pat the Chicken Dry
- Step 5: Trim Off Excess Fat or Tough Bits
- Step 6: Identify the Grain
- Step 7: Decide on Your Strip Style
- Step 8: Flatten the Thick End Slightly if Needed
- Step 9: Slice the Chicken Into Planks
- Step 10: Cut the Planks Into Strips
- Step 11: Check for Uniform Size
- Step 12: Store, Cook, and Clean Up Properly
- Best Uses for Chicken Breast Strips
- Common Mistakes to Avoid
- Kitchen Experience: What This Skill Teaches You After a Few Real-Life Tries
- Conclusion
- SEO Tags
Note: Clean HTML body only, written for direct web publishing.
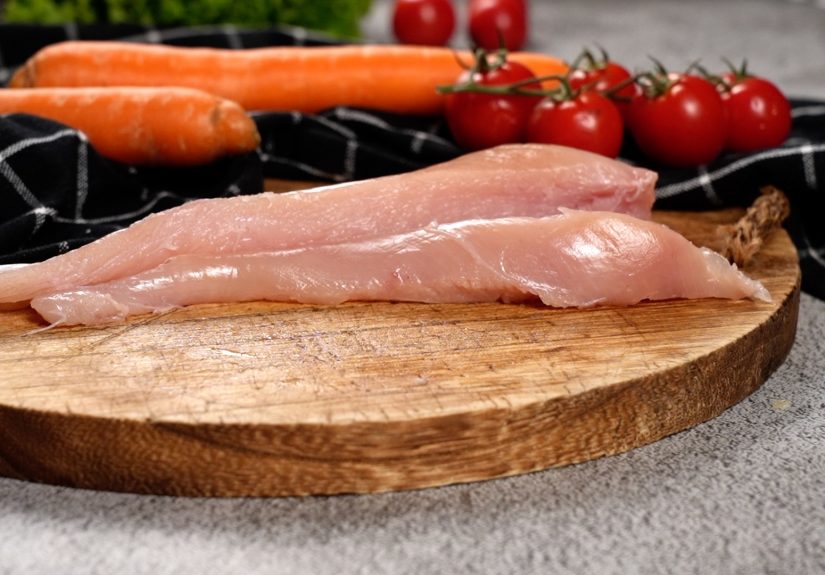
Cutting chicken breast into strips sounds like one of those kitchen tasks that should be easy in theory and oddly chaotic in practice. One minute you picture neat, uniform pieces ready for fajitas, stir-fry, or crispy homemade tenders. The next minute you are wrestling a slippery chicken breast that seems personally offended by your dinner plans. The good news is that this skill is absolutely learnable, and once you get it down, meal prep gets faster, cooking becomes more even, and your finished dish looks a whole lot better.
If you have ever wondered how to cut chicken breast into strips without mangling the meat, dulling your patience, or coating the entire kitchen in raw-chicken drama, this guide walks you through it step by step. These 12 steps cover the tools you need, the safest way to handle raw poultry, how to identify the grain, and how to make strips that actually cook at the same rate. Whether you are making chicken strips for breading, slicing chicken for salads, or prepping thin pieces for a fast weeknight stir-fry, the method is simple once you know what to look for.
Let’s turn that boneless, skinless chicken breast into clean, even strips like a person who definitely has their life together.
Why Cutting Chicken Breast Into Strips the Right Way Matters
Before we jump into the 12 steps, here is why this prep technique matters. Evenly cut chicken strips cook more consistently, which means fewer dry ends and fewer suspiciously undercooked centers. Thin, similar-sized pieces are ideal for dishes like chicken fajitas, chicken tenders, stir-fries, wraps, pasta, rice bowls, and sheet-pan meals. They also marinate more quickly because more surface area is exposed.
Texture matters too. When you cut chicken properly, especially across the grain when appropriate, the finished meat tends to feel more tender and easier to chew. That is a big deal if you are serving kids, meal prepping lunches, or trying to make homemade chicken strips that do not taste like gym shoes in breadcrumb clothing.
What You Need Before You Start
You do not need a professional butcher station. You just need a few basic tools:
- A sharp chef’s knife or boning knife
- A sturdy cutting board
- Paper towels
- A clean plate or tray for the cut chicken
- Soap, hot water, and kitchen cleaner for cleanup
A sharp knife is not just a nice-to-have. It gives you cleaner cuts and better control. A dull knife forces you to saw through the meat, which makes the surface ragged and increases the chance of slipping. That is not the kind of excitement most people want before dinner.
How to Cut Chicken Breast Into Strips: 12 Steps
Step 1: Start With Cold Chicken, Not Warm Chicken
Cold chicken is much easier to cut than warm chicken. If the chicken breast has been sitting out while you answer texts, scroll recipes, and wonder why you did not just order takeout, put it back in the fridge for a bit. Firm, chilled meat holds its shape better and feels less slippery under the knife.
If you want extra control, place the chicken in the freezer for about 15 to 20 minutes. You are not trying to freeze it solid. You just want it slightly firm so it slices cleanly. This is especially helpful if you want very thin strips for stir-fry, fajitas, or quick sautéed chicken.
Step 2: Set Up a Safe, Clean Work Area
Raw chicken is not the ingredient to freestyle with. Clear your work surface, keep other foods away, and use a clean cutting board. If possible, avoid cutting vegetables, bread, or fruit on the same surface unless it has been thoroughly washed and sanitized first.
This is also the moment to wash your hands before handling the chicken. You will wash them again afterward. Yes, again. Raw poultry is not shy about spreading germs where they do not belong.
Step 3: Do Not Wash the Chicken
This tip surprises a lot of people, but rinsing raw chicken is unnecessary and messy. It does not make the chicken cleaner in a useful way, and it can splash bacteria around your sink, faucet, countertop, and nearby utensils. In other words, washing chicken can turn one ingredient into a kitchen-wide group project.
Instead, open the package carefully and move straight to prep. The heat from proper cooking is what makes chicken safe to eat, not a rinse under the tap.
Step 4: Pat the Chicken Dry
Use paper towels to gently pat the chicken breast dry. This makes the surface less slippery and easier to grip while cutting. It also helps if you plan to season or bread the strips later, because dry surfaces hold coatings and marinades more effectively than a waterlogged piece of poultry.
Do not press aggressively. You are drying the exterior, not trying to flatten it into modern art.
Step 5: Trim Off Excess Fat or Tough Bits
Look over the chicken breast and remove visible fat, loose flaps, or any tough white tendon you do not want in the finished dish. Some tendons are edible, but they can turn chewy once cooked. If your goal is neat chicken strips for frying or sautéing, trimming now saves you from weird textures later.
You can also remove the tenderloin if it is attached and cook it separately. Some people leave it on and slice everything together. Either way works, as long as you aim for pieces that are similar in thickness.
Step 6: Identify the Grain
Take a close look at the chicken breast and find the direction the muscle fibers run. Those lines are the grain. In chicken breast, the grain usually runs in one obvious direction from the thicker end toward the narrower end.
If you cut across the grain, the fibers are shorter in the finished piece, which usually makes the chicken feel more tender when you eat it. That is one reason many cooks prefer slicing across the grain for strips used in salads, fajitas, and plated dishes.
Step 7: Decide on Your Strip Style
Before you cut, decide what kind of strips you need. For crispy homemade chicken tenders or breaded strips, you may want longer, thicker pieces. For stir-fry or fajitas, thinner strips cook quickly and fit better in the pan. For pasta or salads, medium strips are often the sweet spot.
As a general rule, aim for strips that are roughly 1/4 to 1/2 inch thick. Uniformity matters more than perfection. You are cooking dinner, not auditioning for a chicken geometry contest.
Step 8: Flatten the Thick End Slightly if Needed
Chicken breasts are naturally thicker on one end and thinner on the other. That is normal, but it can make your strips uneven if you do not account for it. If one end is especially bulky, place your palm gently over the top and steady it while you slice. You can also lightly pound the thicker portion before cutting if you need more even thickness.
This step is helpful when you want strips that cook fast and evenly, especially for pan-frying or breading. No one wants a batch where one strip is golden and juicy while another is still deciding whether it is done.
Step 9: Slice the Chicken Into Planks
If the chicken breast is thick, your first move can be to slice it horizontally into thinner planks. Hold the breast steady with your non-knife hand, keep your fingers curled safely up, and cut parallel to the cutting board using smooth, controlled strokes. This creates flatter pieces that are easier to turn into strips.
This is one of the smartest ways to handle large chicken breasts because it gives you more control over the final thickness. Think of it as creating the raw material for better strips instead of trying to cut one giant, lopsided chunk all at once.
Step 10: Cut the Planks Into Strips
Now cut each plank into strips. If tenderness is the priority, slice across the grain. If you want longer pieces for a certain presentation, you can adjust the direction, but try to keep the width consistent. Use long, confident strokes rather than hacking or pressing straight down.
For example, chicken strips for stir-fry might be thin and narrow, while strips for baked tenders might be wider and more substantial. The exact size depends on the dish, but consistent width means consistent cooking. That is the real victory here.
Step 11: Check for Uniform Size
Take a quick look at the pile. If some strips are much thicker than others, trim them now. A few seconds of adjustment during prep can save your meal later. Even chicken strips cook more predictably, brown better, and look more polished in the finished dish.
This is also the point where you can separate the pieces by intended use. Keep thinner strips for stir-fry, medium strips for sautéing, and chunkier pieces for breading or skewers. Your future self, already hungry and holding a pan, will appreciate the organization.
Step 12: Store, Cook, and Clean Up Properly
Once the chicken is cut, place the strips on a clean plate or in a bowl. Cook them promptly, or refrigerate them if you are prepping ahead. If you are marinating the chicken, cut strips absorb flavor faster than whole breasts, so you usually need less time than you would for a full piece.
Then clean everything that touched the raw chicken: knife, board, plate, countertops, and your hands. Use hot, soapy water and clean thoroughly. When you cook the chicken, make sure it reaches an internal temperature of 165°F. That final step is what turns your beautifully cut chicken strips from “promising” to actually dinner.
Best Uses for Chicken Breast Strips
Once you know how to cut chicken breast into strips, a lot of meals get easier. Here are a few classic uses:
- Chicken tenders: Bread and bake, fry, or air-fry them.
- Fajitas: Use thin strips so they cook quickly with peppers and onions.
- Stir-fry: Keep the slices narrow for fast, even searing.
- Salads and wraps: Medium strips are easy to portion and eat.
- Pasta dishes: Cut into bite-friendly strips that sit nicely in creamy or tomato-based sauces.
Common Mistakes to Avoid
A few small mistakes can make cutting chicken harder than it needs to be. The first is using a dull knife. The second is trying to cut room-temperature chicken, which slides around like it has a personal agenda. The third is ignoring the grain and ending up with chewy, awkward bites.
Another common mistake is making strips of wildly different sizes. If one piece is twice as thick as the rest, it will need extra cooking time, which usually means the thinner strips dry out while you wait. Last but not least, skipping cleanup is never a shortcut. It is just tomorrow’s problem wearing today’s apron.
Kitchen Experience: What This Skill Teaches You After a Few Real-Life Tries
The funny thing about learning how to cut chicken breast into strips is that it feels like a tiny kitchen skill until you actually start using it all the time. Then suddenly it becomes one of those foundational moves that makes you look more organized than you really are. The first few times I did it, the results were not exactly elegant. Some pieces looked like strips, some looked like chicken commas, and one or two looked like they had lost a fight with the knife. But after repeating the process, a pattern became obvious: good prep beats panic every single time.
The biggest lesson is that temperature changes everything. Slightly chilled chicken is dramatically easier to slice than soft, freshly unpacked chicken. Once you feel that difference, you stop trying to rush. The second lesson is that sharp knives are kinder than dull ones. People sometimes assume a dull blade is safer, but in real kitchen use, a sharp knife is more controlled and predictable. You do not have to muscle through the meat, and the cuts come out cleaner.
I also learned that cutting chicken strips is not just about appearance. It directly affects cooking. When the strips are even, they hit the pan and finish at roughly the same time. That matters whether you are making garlic chicken pasta, crispy strips for dipping, or a quick teriyaki stir-fry on a Tuesday night when your motivation is hanging by a thread. If the pieces are uneven, you spend the entire cooking time babysitting the pan, pulling out tiny overcooked pieces while waiting for the thicker ones to catch up.
There is also a confidence boost that comes with mastering something basic. Once you can trim, identify the grain, slice into planks, and cut clean strips without overthinking it, the whole dinner process feels smoother. You are not staring at the package of chicken like it is a puzzle box sent to test your character. You are just prepping food. Calmly. Efficiently. Possibly even with music on.
Another real-world bonus is flexibility. When you know how to cut chicken breast properly, you can adapt to the recipe instead of being limited by whatever shape the meat came in. Need thin strips for tacos? Done. Thick pieces for breaded baked tenders? Easy. Small slices for a rice bowl? No problem. You stop depending on pre-cut chicken from the store, which is often more expensive and not always cut the way you want.
Over time, this skill also teaches you respect for cleanup and food safety. Raw chicken demands attention, and that is not a bad thing. It builds better habits: washing hands, keeping surfaces clean, and treating prep as part of cooking rather than some annoying obstacle before the “real” recipe starts. Once those habits become automatic, the whole kitchen runs better.
So yes, learning how to cut chicken breast into strips may sound humble. It is not flashy. It will not win a cooking show. But it is one of those practical techniques that pays off again and again. And honestly, anything that helps dinner come together faster, cleaner, and with fewer weird-shaped chicken blobs deserves some respect.
Conclusion
Learning how to cut chicken breast into strips is one of those small kitchen wins that makes a big difference. With a sharp knife, cold chicken, good attention to the grain, and a little patience, you can turn a whole breast into even, useful strips for almost any recipe. The result is better texture, faster cooking, and a far less chaotic meal-prep experience.
Once you practice these 12 steps a few times, the process becomes second nature. And that means fewer ragged cuts, fewer uneven batches, and a lot more confidence every time chicken is on the menu.