Table of Contents >> Show >> Hide
- Before You Start: The “Don’t Make It Worse” Safety Checklist
- What You’ll Need
- The Best Method: Acetone + Cotton + Foil (Least Mess, Most Control)
- Step 1: Clip the Acrylics Down (But Don’t Clip Your Real Nail)
- Step 2: File Off the Shine (This Is Not Optional)
- Step 3: Protect Skin Around Nails
- Step 4: Soak Cotton in 100% Acetone
- Step 5: Wrap Each Finger with Foil (or Use Clips)
- Step 6: Wait, Then Check
- Step 7: Gently Push Off Softened Acrylic
- Step 8: Repeat as Needed (Yes, Repeating Is Normal)
- Alternative: Bowl Soak Method (Works, But Dries Skin More)
- What NOT to Do (Acrylic Removal Myths That Cause Damage)
- Troubleshooting: If Your Acrylic Nails Won’t Come Off
- Aftercare: How to Rehydrate Nails After Acrylic Removal
- When You Should NOT DIY (Go to a Pro Instead)
- FAQ: Quick Answers People Actually Google
- Conclusion: The “No Harm” Formula
- Real-World Experiences: What It’s Actually Like Removing Acrylics at Home (And What People Wish They Knew)
Acrylic nails are fabulous until the moment one corner lifts and you start thinking, “What if I just… pop it off?” Friend, that is the nail-care equivalent of ripping a price tag off a sweater and taking half the knit with it.
The good news: you can remove acrylic nails at home without wrecking your natural nails. The bad news: it requires the two things humans avoid mostpatience and following directions. (Yes, even if you’re “pretty sure” you can freestyle it.)
This guide walks you through the safest at-home acrylic nail removal methods used by pros and supported by dermatology and beauty experts: the acetone + cotton + foil (or clips) method and the bowl soak method, plus the aftercare that keeps your nails from feeling like dry leaves in October.
Before You Start: The “Don’t Make It Worse” Safety Checklist
- Don’t yank, peel, bite, or pry acrylics offthis can strip layers of your natural nail.
- Ventilate: open a window or run a fan (acetone fumes are not a spa scent).
- Acetone is flammable: keep it away from candles, lighters, and heat sources.
- Protect your skin: petroleum jelly around cuticles helps reduce dryness and irritation.
- Plan for time: most safe removals take 30–60 minutes, sometimes longer.
What You’ll Need
Gather your tools first so you’re not running around with foil fingers like a confused baked potato.
- Nail clippers (for trimming length)
- Coarse nail file (100/180 grit is common)
- Nail buffer (optional, for gentle smoothing after)
- 100% acetone (best for dissolving acrylic)
- Cotton balls or cotton pads
- Aluminum foil squares or nail clips
- Cuticle pusher or orangewood stick (gentle tools only)
- Petroleum jelly (to protect surrounding skin)
- Cuticle oil + thick hand cream (your post-acetone rescue squad)
- Small bowl (if using the bowl method)
The Best Method: Acetone + Cotton + Foil (Least Mess, Most Control)
This is the method most nail pros recommend for at-home acrylic nail removal because it keeps acetone mostly on the nails (not on your entire fingertips). It’s also easier to “check your progress” without fully dunking your hands in a chemical swimming pool.
Step 1: Clip the Acrylics Down (But Don’t Clip Your Real Nail)
Use nail clippers to shorten the acrylic length. Trim in small snips. If you feel resistance or see your natural nail bending, stopbetter to file the rest down than accidentally clip your real nail.
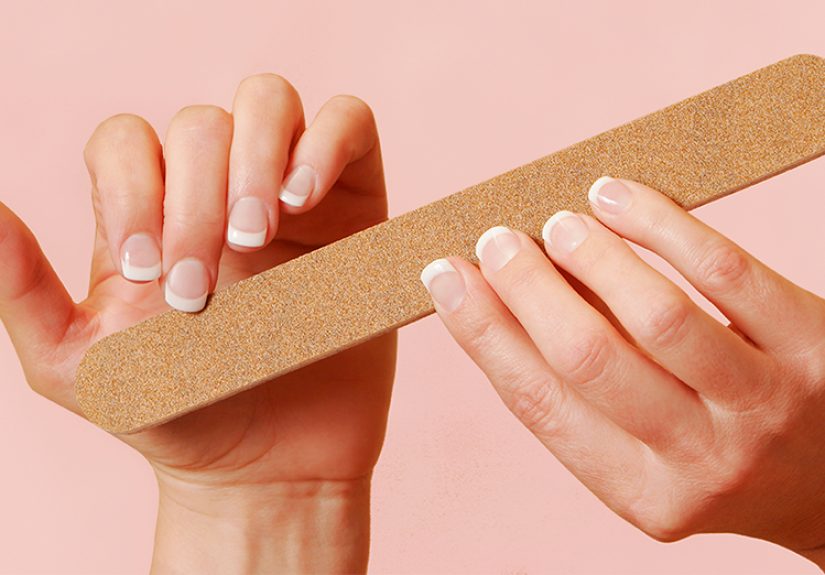
Step 2: File Off the Shine (This Is Not Optional)
Lightly file the top layer until the glossy finish is gone. You’re not trying to sand down to your natural nail; you’re creating a rough surface so acetone can penetrate faster.
Pro tip: Focus on removing the seal/topcoat and thinning the bulk. The less acrylic left, the less time you’ll spend marinating your fingers in acetone.
Step 3: Protect Skin Around Nails
Apply a thin layer of petroleum jelly around your cuticles and the skin surrounding each nail. This doesn’t “block” acetone completely, but it helps reduce irritation and dryness.
Step 4: Soak Cotton in 100% Acetone
Saturate cotton balls or pads with acetonewet enough that they’re fully soaked, not just damp. Place one on each nail so it covers the acrylic surface.
Step 5: Wrap Each Finger with Foil (or Use Clips)
Wrap aluminum foil around each fingertip to hold the acetone-soaked cotton tightly against the nail. If you have nail clips, you can use those instead (less fiddly, more “I have my life together”).
Step 6: Wait, Then Check
Set a timer for 10–15 minutes, then check one nail. In many cases you’ll need 20–30 minutes total, and thicker sets can take longer.
You’re looking for acrylic that has softened and looks gummy or flaky, like it’s starting to lift in layers. If it’s still hard, rewrap and give it more time.
Step 7: Gently Push Off Softened Acrylic
Remove one foil wrap at a time. Use a cuticle pusher or orangewood stick to gently nudge softened acrylic off. If it doesn’t slide off easily, stoprewrap and soak longer.
Step 8: Repeat as Needed (Yes, Repeating Is Normal)
Acrylic often dissolves in layers, not one dramatic “movie makeover” peel. Reapply acetone-soaked cotton and foil for another 10 minutes if needed. This is slower than ripping, but your natural nails will thank you by not looking like sanded plywood afterward.
Alternative: Bowl Soak Method (Works, But Dries Skin More)
The bowl method can be effective, especially if you’re removing a very thick set. The tradeoff is that it can be harsher on your skin because more of your fingertip is exposed to acetone.
How to Do It Safely
- Clip down length and file off the shine (same as above).
- Apply petroleum jelly around nails and on fingertips (avoid the nail surface).
- Pour enough 100% acetone into a small bowl to cover nails.
- Soak fingertips for 10 minutes, then check progress. Repeat in intervals until softened.
- Gently push off softened acrylic. Never force.
Comfort hack: If your skin gets irritated, switch to the foil method for better control. You can also take short breaks between soaking intervals, rinse hands, and re-apply petroleum jelly.
What NOT to Do (Acrylic Removal Myths That Cause Damage)
If you want to remove acrylic nails at home without harm, avoid “viral” shortcuts that rely on brute force, mystery mixtures, or wishful thinking.
- Don’t peel or pop them off (this can remove layers of your natural nail plate).
- Don’t use floss to “lift” acrylicslifting is not removal; it’s trauma with string.
- Don’t pry with metal tools if acrylic isn’t softened (gouges happen fast).
- Don’t soak in random concoctions (dish soap + hot water rarely dissolves acrylic effectively).
- Don’t over-file your natural nails trying to “get it over with.”
Troubleshooting: If Your Acrylic Nails Won’t Come Off
Problem: “It’s not budging after 15 minutes.”
This is common. Acrylic doesn’t dissolve instantlyespecially if the set is thick, has extra topcoat, or was applied with strong adhesion. Rewrap for another 10 minutes and make sure you’re using 100% acetone (not “gentle remover”).
Problem: “It’s gummy in spots but hard in others.”
That means it’s dissolving in layers. Remove what slides off easily, then rewrap just the stubborn nails. Also, file the remaining acrylic lightly to thin it out before soaking again.
Problem: “My skin is getting really dry or irritated.”
Switch from bowl soaking to foil wraps to reduce acetone contact. Rinse hands between rounds, reapply petroleum jelly to surrounding skin, and moisturize immediately after finishing.
Aftercare: How to Rehydrate Nails After Acrylic Removal
Acetone does its job wellmaybe too well. It can leave nails and skin dry, tight, and chalky. Aftercare is how you remove acrylic nails at home without harm that lingers for weeks.
Right After Removal (First 30 Minutes)
- Wash hands with gentle soap to remove acetone and residue.
- Buff lightly only if needed to smooth leftover productavoid aggressive buffing.
- Apply cuticle oil to each nail and surrounding skin. Massage for 30–60 seconds per hand.
- Seal with a thick hand cream (think “night cream,” not “light lotion”).
The Next 7 Days (Your Nail Recovery Mini-Plan)
- Use cuticle oil daily (twice a day if your nails feel dry).
- Keep nails shorter for a weekthin nails + long length = easy breaks.
- Wear gloves for dishwashing/cleaning (water + detergents can worsen peeling).
- If nails feel weak, use a gentle strengthening base coat (avoid harsh treatments if your nails are already thin).
- Take a break from acrylics if nails are tender, peeling, or sore.
When You Should NOT DIY (Go to a Pro Instead)
At-home acrylic nail removal is for healthy nails and normal wear. If you notice any of the following, it’s safer to see a nail tech or healthcare professional:
- Pain, swelling, or warmth around the nail
- Green, brown, or black discoloration
- Bleeding, open skin, or a lifted natural nail
- Signs of infection (oozing, increasing redness, or worsening soreness)
- Allergic reactions (severe itching, rash, blistering)
FAQ: Quick Answers People Actually Google
How long does it take to remove acrylic nails at home?
Most safe removals take 30–60 minutes. Very thick acrylics, heavy topcoats, or multiple layers can take longer. If you’re done in 7 minutes, you probably peeled something you shouldn’t have.
Can I remove acrylic nails without acetone?
If the goal is “without harm,” acetone is typically the most reliable option for dissolving acrylic safely. Alternatives often rely on prying, which increases damage risk. If acetone bothers your skin, protect surrounding areas with petroleum jelly and focus on controlled foil wraps instead of bowl soaking.
Should I file off acrylic nails instead of soaking?
Filing can remove bulk, but fully filing down acrylic at home can easily lead to over-filing the natural nail. A safer approach is: clip + file the shine/bulk + acetone soak, then gentle removal.
Conclusion: The “No Harm” Formula
The easiest way to remove acrylic nails at home without harm is not a secret trickit’s a simple formula: thin the acrylic, dissolve with 100% acetone, remove gently, then rehydrate like it’s your job. No ripping. No prying. No wrestling match with your fingertips.
If you only remember one thing: if it doesn’t slide off easily, it’s not ready. Rewrap, wait longer, and let chemistry do the heavy lifting.
Real-World Experiences: What It’s Actually Like Removing Acrylics at Home (And What People Wish They Knew)
Most people go into at-home acrylic nail removal thinking it’ll be a quick “soak and swoop” situation. Then reality shows up with a timer and a personality. A super common experience is the moment you unwrap the foil, peek at one nail, and think, “Oh… it’s still here.” That’s normal. Acrylic doesn’t dissolve like regular polishit softens in layers, and those layers don’t always soften evenly. Plenty of DIYers report that two nails cooperate, three nails partially cooperate, and the pinky acts like it signed a long-term lease.
Another classic experience: the temptation to use force right when you’re tired of waiting. This is where damage happens. People often describe a “peeling label” feelinglike the acrylic wants to lift at one edgeso they pry it. The problem is that your natural nail can come with it in thin sheets. The folks who have the best outcomes tend to follow a boring but effective rhythm: remove what slides off with almost no pressure, then rewrap the stubborn nails for another 10 minutes. It’s not glamorous, but it’s the difference between “my nails feel fine” and “my nails feel like paper.”
Dryness is also a near-universal post-removal experience. Even when you do everything right, acetone can leave nails looking chalky and feeling tight. People often say their fingertips feel “weirdly squeaky” after rinsing, which is basically your cue to start aftercare immediately. Cuticle oil becomes the hero hereespecially if you massage it in for a full minute rather than doing a quick dab and hoping for miracles. Many DIYers also like using a thick hand cream right after oil, because it seals in moisture and makes hands feel normal again faster.
One surprisingly common “aha” moment: realizing that prep work saves time. People who skip filing the shine off the acrylic usually end up soaking longer and rewrapping more times. On the flip side, people who carefully file down the bulk (without touching the natural nail) often find the acrylic softens more evenly and slides off with less fuss. There’s also the learning curve of wrappingfirst hand is easy, second hand is a comedy sketch. A helpful trick is to pre-cut foil squares and set them up like an assembly line before acetone touches anything.
Finally, a lot of people mention an emotional experience: nail regret. Not regret about having acrylicsmore like regret about not taking breaks. After removal, nails can look thinner or uneven for a bit, and that’s when some folks immediately want to slap on another full set. The healthier approach that many eventually adopt is a short “recovery week”: keep nails short, oil daily, protect hands from water and chemicals, and let the nail plate settle down. People who do this often report their nails feel stronger faster and their next set looks better because the base is healthier. In other words: your best manicure starts with what you do after the last one comes off.