Table of Contents >> Show >> Hide
- Why encrypt an external hard drive on Linux?
- What you need before you start
- Method 1: Encrypt the drive with a graphical tool
- Method 2: Encrypt the external hard drive with LUKS and cryptsetup
- Step 1: Identify the correct partition
- Step 2: Unmount the partition if it is mounted
- Step 3: Format the partition as a LUKS container
- Step 4: Open the encrypted partition
- Step 5: Create a filesystem inside the unlocked container
- Step 6: Create a mount point and mount it
- Step 7: Unmount and close the encrypted drive when finished
- A practical example from start to finish
- How to unlock the encrypted drive later
- Best practices for external drive encryption on Linux
- Common mistakes to avoid
- How to change or add a LUKS passphrase
- Troubleshooting tips
- Final thoughts
- Real-world experiences with encrypting an external hard drive on Linux
External hard drives are wonderfully convenient. They hold backups, travel well, and quietly collect the digital clutter of modern life. Unfortunately, they also love to wander off. One forgotten drive in a coffee shop or coworking space can turn into a privacy disaster faster than you can say, “Wait, that folder was definitely not for public viewing.”
That is exactly why encrypting an external hard drive on Linux is such a smart move. When you encrypt the drive, the data stays unreadable without the correct passphrase or key. So even if the drive is lost, borrowed, misplaced, or casually snooped through by someone with too much curiosity and not enough boundaries, your files stay protected.
On Linux, the most common way to do this is with LUKS and cryptsetup. That combination gives you solid, system-level encryption for an entire partition or disk. If you prefer a point-and-click route, many Linux desktop environments also let you do the same job with a graphical disk utility. In this guide, you will learn both paths, along with best practices, common mistakes, and a few real-world lessons that can save you from turning your backup drive into an expensive paperweight.
Why encrypt an external hard drive on Linux?
There is a big difference between deleting a file and protecting a file. Deleting removes convenience. Encryption removes readability. If your external drive contains backups, tax records, work projects, family photos, client files, SSH keys, or that mysterious folder named “Important Stuff 2 Final Really Final,” encryption gives you an extra layer of defense that does not depend on the drive staying in your possession forever.
Encrypting an external hard drive on Linux also makes sense because Linux gives you mature, built-in tools for the job. You do not need to chase random utilities around the internet or trust some suspicious app with a logo that looks like it was designed at 2 a.m. With LUKS, you can encrypt the whole partition, unlock it only when needed, and then close it when you are done. Clean, practical, and gloriously boring in the best security-minded way.
What you need before you start
1. Back up the drive first
This is the part many people try to “save time” on. Please do not. Initializing a partition for LUKS encryption typically wipes the existing data on that target. If the drive already has files you care about, copy them somewhere safe before you do anything else.
2. Know which device is the external drive
Linux names storage devices in ways that are logical once you know them and mildly terrifying when you do not. Your external drive might appear as /dev/sdb, /dev/sdc, or something similar, and partitions may look like /dev/sdb1. Double-check before running any formatting command. One wrong letter and your “security project” becomes “accidental operating system demolition.”
3. Install the needed tools
Most distributions already include what you need or make it easy to install:
cryptsetupfor creating and managing LUKS encryptionlsblkfor identifying drives and partitions- A graphical disk tool such as GNOME Disks if you want the easier route
On Debian-based systems, for example, you can usually install the essentials with:
On Fedora, the package names may differ slightly, but cryptsetup is standard and GNOME Disks is commonly available.
Method 1: Encrypt the drive with a graphical tool
If you use a Linux desktop and prefer not to spend quality time staring at terminal prompts, the GUI method is perfectly fine. In many desktop environments, GNOME Disks or a similar utility can create an encrypted partition for you.
General GUI workflow
- Connect the external hard drive.
- Open Disks or your system’s disk management utility.
- Select the external drive carefully.
- If needed, create a new partition table.
- Create a new partition.
- Choose the option to password-protect or encrypt the partition.
- Set a strong passphrase.
- Format the encrypted volume with a filesystem such as ext4.
After that, Linux should prompt you for the passphrase when you connect the drive. For many everyday users, this is the easiest way to encrypt an external hard drive on Linux without learning every underlying command on day one.
The main downside is control. A graphical tool is great for setup, but the command line gives you more visibility, more repeatability, and more power when something goes sideways. And sooner or later, something always decides to go sideways. Storage has a flair for drama.
Method 2: Encrypt the external hard drive with LUKS and cryptsetup
This is the classic Linux approach. It is reliable, flexible, and worth learning even if you start with the GUI. The example below assumes you are encrypting a partition called /dev/sdb1. Replace that with your actual device name.
Step 1: Identify the correct partition
Run:
This shows connected block devices, partitions, filesystem types, labels, and mount points. Look for your external drive by size and current structure. If the drive is brand new or freshly repartitioned, you may need to create a partition first using Disks, GParted, or another partitioning tool.
Step 2: Unmount the partition if it is mounted
If Linux auto-mounted the partition, unmount it before encrypting:
If that command complains that the device is busy, close any file manager windows or terminal sessions using the drive and try again.
Step 3: Format the partition as a LUKS container
This is the moment of no return. Run:
You will be asked to confirm and then set a passphrase. Choose one that is long, unique, and memorable enough that you will not accidentally lock yourself out forever. A strong passphrase beats a short, “clever” password every time.
Step 4: Open the encrypted partition
Once the LUKS container exists, unlock it and give it a mapper name:
This creates a mapped device at:
Think of this as the unlocked doorway into the encrypted storage.
Step 5: Create a filesystem inside the unlocked container
Now format the unlocked mapping with a filesystem. ext4 is a common Linux-friendly choice:
If you want the drive to be used mainly on Linux systems, ext4 is simple and dependable. If cross-platform compatibility matters, your planning gets more complicated, and you may need a different workflow or encryption tool. But for a Linux-only encrypted external drive, ext4 is a very sensible default.
Step 6: Create a mount point and mount it
Your encrypted drive is now unlocked, mounted, and ready to use. Copy files into it just like any other mounted filesystem.
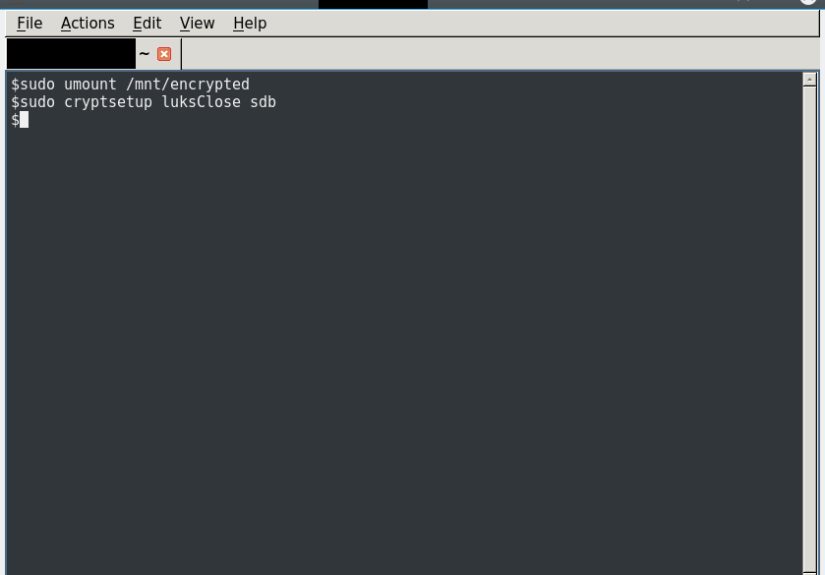
Step 7: Unmount and close the encrypted drive when finished
When you are done, do not just yank the cable like you are ending a bad conversation. Close things properly:
This unmounts the filesystem and closes the LUKS mapping. Only then is the data back in its locked state on disk.
A practical example from start to finish
Here is the full command flow in one place:
And when you are finished:
Later, when you reconnect the drive and want access again, you do not repeat the formatting steps. You only unlock and mount it:
How to unlock the encrypted drive later
After the initial setup, daily use is simple. Plug in the drive, then either unlock it through the desktop prompt or use the terminal:
To check whether the mapping exists, use:
You should see the encrypted partition and the mapped device under /dev/mapper. That visual confirmation is handy when you are troubleshooting or just want reassurance that Linux did not decide to be “creative” with your storage layout.
Best practices for external drive encryption on Linux
Use a strong passphrase
A strong passphrase is one of the biggest factors in real-world security. Make it long, unique, and hard to guess. Random words with punctuation can work well. “CoffeeTruckSunrise!Marble77” is dramatically better than “linux123.”
Keep backups of important data elsewhere
Encryption protects confidentiality, not availability. If the drive fails physically, encryption will not save your files. Keep another backup in a separate location.
Label the drive clearly
When you create the filesystem, you can add a label later with tools like e2label for ext4. A clear label saves confusion when multiple drives are attached.
Consider adding a second passphrase
LUKS supports multiple keyslots, which means you can add a backup passphrase. That is useful if two trusted users need access or if you want a recovery credential. Just do not remove the original passphrase until you have verified the new one actually works. Linux is many things, but forgiving is not always one of them.
Common mistakes to avoid
Encrypting the wrong device
This is the biggest nightmare scenario. Always confirm the device name with lsblk -f before running luksFormat.
Forgetting to unmount before formatting
Trying to encrypt a mounted partition can produce errors or messy results. Unmount first.
Using a weak or disposable passphrase
If you pick a terrible passphrase, encryption becomes more like polite decoration than serious protection.
Assuming Linux encryption is automatically cross-platform
LUKS is excellent on Linux. It is not the easiest native choice for Windows or macOS users. If your drive must move between operating systems regularly, think through compatibility before you commit.
How to change or add a LUKS passphrase
If you want to add a new passphrase later, you can do so without re-encrypting the whole drive:
To remove an old passphrase:
The smart move is to add the new passphrase, test it, unlock the drive with it successfully, and only then remove the old one. That order saves a lot of regret.
Troubleshooting tips
“Device is busy”
Close file manager tabs, shells, or applications using the drive. Then try unmounting again.
“No key available with this passphrase”
Double-check keyboard layout, capitalization, and whether Caps Lock is on. This sounds silly until it happens to you at 1:14 a.m. and suddenly becomes deeply philosophical.
Drive unlocks but will not mount
Make sure you created a filesystem after opening the LUKS container. Encryption gives you the secure container; the filesystem gives you a usable storage structure inside it.
The drive does not auto-prompt on desktop
Try unlocking it manually with cryptsetup open. If that works, the issue may be with the desktop automount behavior rather than the encryption itself.
Final thoughts
If you want to encrypt an external hard drive on Linux, LUKS and cryptsetup are still the gold-standard answer for most Linux users. They are powerful without being absurdly complicated, secure without being flashy, and flexible enough for both simple backups and more serious privacy needs.
The graphical method is excellent for convenience. The command-line method is better when you want confidence, repeatability, and the ability to understand what the system is actually doing. Whichever route you choose, the important thing is not waiting until after a drive is lost to start caring about encryption.
In storage security, the best time to lock the door is before the suitcase leaves the house.
Real-world experiences with encrypting an external hard drive on Linux
In practice, the experience of encrypting an external hard drive on Linux usually starts with one emotion: caution. Not because the tools are bad, but because they are powerful. The first time most people run cryptsetup luksFormat, they pause and reread the command three times, then check lsblk four more times, then maybe make tea, then come back and check again. That hesitation is healthy. Linux rewards care and punishes overconfidence with almost theatrical timing.
Once the drive is encrypted, though, daily life tends to get much easier than people expect. On a desktop Linux system, plugging in an encrypted external drive often feels surprisingly normal. You connect it, enter the passphrase, and the drive appears like any other mounted volume. The security is serious, but the workflow is not especially dramatic. That is one of the nicest things about modern Linux encryption: after setup, it fades into the background and just does its job.
One common experience is realizing that encryption changes your habits in good ways. People start ejecting drives properly instead of doing the classic “I copied the file, so we are probably fine” move. They become more aware of mount points, device names, and where important backups actually live. In other words, encrypting a drive often turns a casual user into a more careful one, which is an unexpected bonus.
Another real-world lesson is that passphrase choice matters more than people think. A weak password creates false confidence, while an overly complicated one creates panic the next time you need the files six months later. The sweet spot is a passphrase that is strong, memorable, and tested. People who have had the unpleasant experience of forgetting an encryption password rarely become casual about credential management ever again.
There is also the compatibility lesson. Linux users who encrypt an external drive with LUKS are usually delighted on Linux and then mildly shocked when the drive is not instantly convenient elsewhere. That is not a flaw in Linux so much as a reminder to choose tools according to your environment. If the drive is meant for a Linux workstation, LUKS feels elegant. If it must move between Linux, Windows, and macOS every other day, your planning needs to reflect that reality.
Perhaps the most valuable experience, however, is peace of mind. Once an external hard drive is encrypted correctly, it stops feeling like a liability and starts feeling like a properly secured backup or portable workspace. You still need backups. You still need good passphrase hygiene. You still need basic care. But you no longer have to treat a missing drive as an automatic privacy catastrophe. And in a world where devices disappear, get stolen, or simply grow legs during travel, that confidence is worth a lot.