Table of Contents >> Show >> Hide
- Why a Leaky Outdoor Faucet Is a Bigger Deal Than It Looks
- Step 1: Figure Out Where the Leak Is Coming From
- Step 2: Gather Your Tools and Parts
- Step 3: Turn Off and Drain the Water Safely
- Step 4: How to Fix the Most Common Outdoor Faucet Leaks
- When It’s Time to Replace the Faucet Instead of Repairing
- Pro Tips to Make Your Outdoor Faucet Repair Last
- Preventive Maintenance: Keep Your Hose Bib in Top Shape
- Real-Life Experiences: Lessons from Fixing Leaky Outdoor Faucets
- Conclusion: Take Control of That Drip
Hear that drip… drip… drip every time you walk past your hose bib? That’s not just an annoying background
soundtrack to your weekend. A leaky outdoor faucet can quietly waste hundreds of gallons of water a year, bump up
your utility bill, and even damage your home’s foundation or siding if the leak runs down the wall long enough.
The good news: most leaks are totally fixable with basic tools, a few inexpensive parts, and a little confidence.
In this guide, we’ll walk through how to fix a leaky outdoor faucet step-by-step, explain what all those parts are
called (yes, “hose bib” and “spigot” are the same thing), and share pro tips so you don’t have to redo the job next
weekend. We’ll also cover when it’s smarter to call a plumber or replace the faucet entirely. By the end, you’ll
know exactly how to tackle that leak like a seasoned DIYer.
Why a Leaky Outdoor Faucet Is a Bigger Deal Than It Looks
It’s easy to ignore an outdoor drip because it’s not inside your house. But that water still costs money and can
cause surprisingly serious problems over time. A slow drip can add up to hundreds or even thousands of gallons per
year, depending on how bad it is. That’s water you’re literally paying for to go nowhere useful.
Worse, if the leak is near the wall, sill, or foundation, the constant moisture can stain siding, encourage mold and
mildew, and gradually erode soil around the base of your house. In cold climates, a leaking frost-free faucet can
leave water in the line that freezes and cracks pipes inside the wall, turning a $10 washer into a four-figure
plumbing repair.
Bottom line: fixing a leaky outdoor faucet isn’t just about the annoyance. It’s about protecting your home,
conserving water, and keeping your utility bill under control.
Step 1: Figure Out Where the Leak Is Coming From
Before you grab a wrench and start taking things apart, take a minute to diagnose the leak. The location tells you a
lot about what’s wrong and what you’ll need to fix.
1. Drip from the spout (end of the faucet)
If the leak is coming from the spout when the faucet is turned off, the usual culprit is a worn washer or a damaged
valve seat inside the faucet. This is one of the most common outdoor faucet problems and usually a straightforward
repair.
2. Leak around the handle or stem
If you see water seeping or spraying from around the handle when the faucet is on, the packing nut or packing
material around the valve stem is likely loose or worn. Tightening that nut or replacing the packing usually solves
it. Think of this as the “easy win” leak.
3. Leak from the top or cap (vacuum breaker / anti-siphon)
Many newer outdoor faucets have a vacuum breaker or anti-siphon cap on top, which prevents dirty water from being
sucked back into your home’s plumbing. If water leaks or sprays from this cap, the internal rubber seal may be worn
out, or the cap might be cracked. Often, there are inexpensive repair kits specifically for this part.
4. Water inside the wall or at the foundation
If you notice damp drywall just inside the house, water stains near the interior side of the faucet, or water
running down the wall even when the spigot looks fine, you could be dealing with a cracked frost-free sillcock or
pipe inside the wall. That’s still fixable, but the repair is more involved and may be a good time to call a pro if
you’re not comfortable opening up walls.
Step 2: Gather Your Tools and Parts
You don’t need a full plumber’s truck to fix most outdoor faucet leaks. In fact, you may already own a lot of what
you need. Here’s a basic list:
- Adjustable wrench or small socket set
- Phillips and flathead screwdrivers
- Replacement stem washer(s) and/or O-rings
- Replacement vacuum breaker or repair kit (if that’s the problem)
- Plumber’s tape (Teflon tape) for threaded connections
- Penetrating oil (for stuck or corroded parts)
- Plumber’s grease or silicone faucet grease (optional but helpful)
- Rag or towel and a small bucket
If you’re not sure what size washer or stem your faucet uses, you can remove the old part and bring it to the
hardware store. Many stores have small trays or boards that let you match washers and O-rings by size. When in
doubt, buy a small assortment kitoutdoor faucets are not picky about brand, but they are picky about size.
Step 3: Turn Off and Drain the Water Safely
Any time you’re working on plumbing, step one is always to shut off the water. For outdoor faucets, this usually
means:
- Find the shutoff valve inside your house that feeds the outdoor faucet. It’s often in the basement, crawlspace,
utility room, or near where the pipe exits the wall. - Turn that valve clockwise to shut it off.
- Go back outside and open the faucet fully to drain any remaining water in the line.
Draining the line is especially important with frost-free faucets, because trapped water inside a horizontal pipe
can freeze and crack the line in winter. Once the water is off and drained, you’re safe to start disassembling
things without getting an impromptu outdoor shower.
Step 4: How to Fix the Most Common Outdoor Faucet Leaks
Fixing a drip from the spout (replace the stem washer)
If the faucet drips from the spout when it’s closed, the stem washer at the end of the valve stem is probably worn
out. Here’s how to fix it:
- Shut off the water and drain the faucet, as described earlier.
- Remove the screw in the center of the handle and pull the handle off. If it’s stuck, gently rock it back and
forth or use a handle puller (many hardware stores sell inexpensive ones). - Use an adjustable wrench to loosen and remove the packing nut or bonnet nut behind the handle.
- Pull out the entire valve stem assembly. For standard faucets, the washer is usually at the end of this stem.
For frost-free faucets, the washer may be at the far end of a long stem. - Remove the small screw holding the rubber washer in place. Swap in a new washer of the same size.
- Inspect the valve seat inside the faucet body with a flashlight. If it looks pitted or rough, you may need a
valve seat tool to smooth it out or a replacement stem designed to work with a worn seat. - Reassemble the faucet: reinstall the stem, tighten the packing nut, put the handle back on, and snug the handle
screw. - Turn the water back on and test. The drip should be gone or significantly reduced. If it’s still there, the seat
may be badly damaged and the faucet may be ready for replacement.
Fixing leaks around the handle (tighten or repack the packing nut)
Handle leaks are often the easiest repair and can sometimes be fixed in under two minutes.
- With the water on, use an adjustable wrench to gently tighten the packing nut just behind the handle. Turn it a
quarter turn at a time and check for leaks. - If tightening doesn’t help, shut off the water, then remove the handle and packing nut.
- Look for packing material inside the nutthis might be a small ring of graphite, Teflon packing, or a rubber
washer. Replace it with new packing or a packing washer of the same size. - Apply a dab of plumber’s grease to the stem, then reinstall the packing nut and handle.
- Turn the water back on and test. If it still leaks, you may need to replace the entire stem or the faucet
itself, but in many cases, fresh packing solves it.
Fixing a leaking vacuum breaker or anti-siphon cap
If water sprays or drips from the top of the faucet where the vacuum breaker is located, you’re dealing with a worn
seal or a damaged cap. Fortunately, many manufacturers sell simple repair kits.
- Turn off the water and open the faucet to relieve pressure.
- Look for a small screw on top of the vacuum breaker cap. Remove it and lift off the cap.
- Inside, you’ll usually find a small plunger and rubber seal. Inspect them for cracks, hardening, or obvious
wear. - Replace the plunger and seal with parts from the repair kit, or replace the entire cap if recommended by the
manufacturer. - Reinstall the cap and screw, then turn the water back on and test.
If the vacuum breaker continues to drip slightly right after you shut the faucet off, a tiny amount of discharge can
be normal as the device relieves pressure. But steady streaming or spraying is a sign it truly needs repair or
replacement.
Fixing leaks on a frost-free (frost-proof) outdoor faucet
Frost-free faucets are designed so that the actual shutoff point is inside the heated part of the house, not at the
outside wall. When they leak, the repair is similar to a standard faucet but with a longer stem.
- Shut off the water to the faucet.
- Remove the handle and the retaining or packing nut.
- Pull the entire long stem out of the faucet body. Expect some residual water to come out with it.
- Inspect the O-rings and washer(s) along the stem. Replace any that are cracked, flattened, or brittle.
- Check the stem for corrosion or physical damage. If it’s badly worn or bent, consider replacing the entire
stem. - Apply plumber’s grease to new O-rings and reassemble the faucet.
- Turn the water back on and test with a hose attached. Watch for leaks at the spout and behind the wall (listen
for water movement when the faucet is off).
When It’s Time to Replace the Faucet Instead of Repairing
As much as we all love a good DIY save, there are times when replacing the outdoor faucet is the more sensible
option. Consider a full replacement if:
- The faucet body itself is cracked, corroded through, or leaking from multiple spots.
- You’ve replaced washers and O-rings, and it still won’t fully shut off.
- The valve seat is severely damaged and can’t be reseated effectively.
- The faucet is very old and lacks a built-in vacuum breaker, and your local code now requires one.
Replacing a faucet usually involves shutting off the water, disconnecting the supply line inside the house, and
removing the old unit from the wall. For non-frost-free faucets, this is often a fairly quick job. For frost-free
models that run deep into the wall cavity, the process can be trickierespecially if the pipe is soldered rather
than threaded. If you see sweating copper joints and feel your stress level rising, that’s a perfectly reasonable
time to bring in a licensed plumber.
Pro Tips to Make Your Outdoor Faucet Repair Last
Want to avoid revisiting this repair in a couple of months? Here are some expert tips that make a big difference:
- Don’t overtighten. Cranking down too hard on packing nuts or bonnet nuts can damage threads,
crush washers, and create new leaks. - Use plumber’s grease sparingly. A tiny amount on moving parts and O-rings helps them seal
better and last longer, especially on frost-free stems. - Wrap threads with Teflon tape. For any threaded connections you open, add a couple of wraps of
plumber’s tape to help create a watertight seal when you reassemble. - Disconnect hoses before winter. Leaving a hose attached can trap water in the faucet body and
line, increasing the risk of freezing and crackingeven with frost-free faucets. - Check for slow “mystery drips” after repairs. Turn the water back on, run the faucet, then shut
it off and watch both inside and outside for a few minutes to be sure everything is truly dry.
Preventive Maintenance: Keep Your Hose Bib in Top Shape
Once your outdoor faucet is finally behaving, spend a little time each season to keep it that way:
- Check for drips at the start and end of the watering season.
- Inspect the handle, packing nut, and vacuum breaker for signs of wear or cracking.
- Replace cheap washers or O-rings at the first sign of trouble instead of waiting for a major leak.
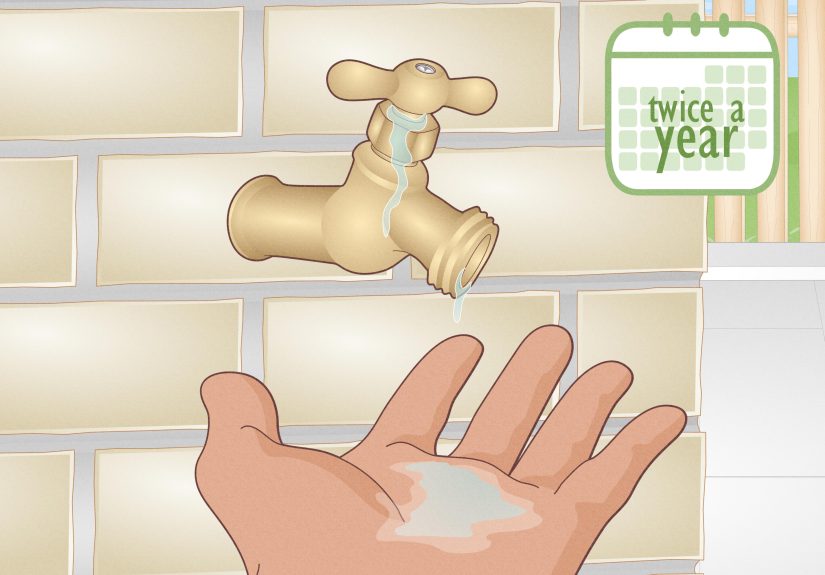
- In cold climates, shut off and drain outdoor faucets before freezing weather hits, or use insulated covers if
shutoff valves aren’t easily accessible.
A few minutes of preventive care every year can save you from mid-winter plumbing emergencies and surprise water
bills later on.
Real-Life Experiences: Lessons from Fixing Leaky Outdoor Faucets
If you’ve ever stood in the plumbing aisle staring at a wall of washers, O-rings, and mysterious brass parts,
you’re not alone. Outdoor faucet repairs are one of those projects that sound simple in theory but can surprise you
in practice. Here are a few real-world “stories” and takeaways to boost your confidence before you dive in.
The “It Was Just the Packing Nut” Win
One of the most common scenarios goes like this: the handle sprays water every time the faucet is turned on, and the
homeowner assumes the entire faucet is shot. In reality, the fix is often a quarter-turn of a wrench on the packing
nut. Many people are amazed that a leak that looked dramatic could be cured in less than a minute without replacing
a single part.
The lesson here is simple: always start with the obvious, low-effort fix. Check the packing nut. Look for loose
parts. Try the simple adjustment before committing to a full teardown. You might be done before your coffee gets
cold.
The Mismatched Washer Mystery
Another common experience: someone carefully follows all the steps to replace a worn washer, reassembles the faucet,
and… the leak is still there. Frustrating, right? Often, the issue is that the replacement washer is close to the
right size, but not exact. Even a small mismatch can prevent a perfect seal.
A smarter approach is to bring the old washer and stem to the store and physically match them in the plumbing aisle.
Some hardware stores even have boards where you can push the stem threads into a sample pattern to find compatible
parts. It feels a bit old-school, but this hands-on method can save you multiple trips and a lot of muttering under
your breath.
The Frost-Free Faucet Surprise
Frost-free faucets sound indestructible, but many homeowners learn the hard way that they’re not “forget about it
forever” devices. One common story goes like this: the homeowner leaves a hose connected all winter, water gets
trapped, the pipe freezes and cracks inside the wall, and months later they discover water damage in a basement or
finished room.
When they go to repair the leak, they’re surprised to find that the actual shutoff point is a foot or more inside
the house. Pulling out a long stem assembly can feel intimidating at first, but the repair steps are almost identical
to a standard faucetjust stretched out. The big takeaway: “frost-free” doesn’t mean “maintenance-free.” You still
need to disconnect hoses and shut off and drain lines in harsh climates.
Knowing When to Call in Backup
Finally, there are the stories where the DIY route hits a reasonable limit. Maybe the faucet is soldered directly to
copper piping in a tight spot, or maybe the leak is clearly inside the wall and you’re not ready to cut open
finished drywall. In those cases, the most expert move you can make is knowing when to call a plumber.
Bringing in a professional doesn’t erase your DIY credit proves you know how to manage a project. You diagnosed the
problem, tried the straightforward fixes, and recognized when specialized tools or experience were needed. The next
time something drips, sprays, or hisses, you’ll be even better prepared to decide whether it’s a “grab the wrench”
job or a “grab the phone” job.
In the end, fixing a leaky outdoor faucet is one of the best “gateway” DIY plumbing projects. You’ll learn how your
hose bib works, get comfortable shutting off and turning on water supply lines, and gain skills that translate to
indoor faucets, shower valves, and more. Plus, every time you step outside and see a dry, obedient spigot instead of
a wasteful drip, you’ll get that quiet satisfaction that only a successful repair can bring.
Conclusion: Take Control of That Drip
A leaky outdoor faucet doesn’t have to live rent-free in your brain (or your water bill). Once you know how to
identify where the leak is coming from and understand the basic anatomy of your hose bib, the fix usually comes down
to a few simple steps: shut off and drain the water, disassemble the faucet, replace worn washers or O-rings, and
reassemble carefully.
Whether you’re tightening a packing nut, swapping out a stem washer, or tackling a frost-free faucet for the first
time, you’re building skills that will pay off with every future plumbing project. And if you run into something
beyond your comfort zone, you’ll be able to speak your plumber’s language and describe the problem clearlywhich
often means a quicker, cheaper repair.
So grab your wrench, channel your inner pro, and show that leaky outdoor faucet who’s boss. Your water billand your
sidingwill thank you.