Table of Contents >> Show >> Hide
- What Spirulina Is and Why People Grow It at Home
- Is Home Spirulina Growing Right for You?
- What You Need to Start
- How to Set Up a Spirulina Culture
- Daily Care Tips That Matter Most
- Common Spirulina Problems and What They Usually Mean
- When Spirulina Is Ready to Harvest
- How to Harvest Spirulina Safely
- How to Store and Use Fresh Spirulina
- Food Safety and Smart Caution
- Real-World Growing Experiences: What Home Growers Usually Learn
- Final Thoughts
Growing spirulina at home sounds a little futuristic, a little crunchy, and a little like the kind of idea you get after buying one too many smoothie ingredients. But it is very possible when you understand what spirulina needs to stay healthy: warm temperatures, alkaline water, steady light, gentle movement, and a clean setup. In other words, spirulina is not dramatic, but it is picky. Think less “houseplant” and more “tiny green farm with opinions.”
If you want fresh spirulina instead of the store-bought powder that usually tastes like a multivitamin and a pond had a complicated relationship, home cultivation can be rewarding. It gives you more control over freshness, cleanliness, and harvesting. It can also teach you very quickly that algae, despite its humble reputation, has standards.
This guide covers how to grow spirulina at home, the care habits that matter most, how to harvest it safely, and what beginners often learn the hard way. The goal is simple: help you grow a healthy culture without turning your kitchen, patio, or laundry room into an accidental science fair exhibit.
What Spirulina Is and Why People Grow It at Home
Spirulina is the common name most people use for Arthrospira, a blue-green microalga that is widely sold as a dietary supplement. It is popular because it is nutrient-dense, rich in protein, and easy to add to smoothies, sauces, dips, or energy bites. That said, the main reason many home growers become obsessed with it is not just nutrition. It is freshness.
Fresh spirulina is very different from the dry powder most people know. When grown and harvested properly, it has a softer texture, a cleaner flavor, and more culinary flexibility. For many home growers, that difference is the whole point. Instead of scooping dusty green powder from a jar, they can harvest a fresh paste-like biomass and use it right away.
There is also a practical appeal. Spirulina grows quickly under the right conditions, does not need soil, and works well in compact systems. It is one of those rare foods that makes people feel like they are living in the future while standing next to a plastic tub and a pH meter.
Is Home Spirulina Growing Right for You?
Home spirulina growing is a great fit for people who enjoy routine care. If you like checking temperatures, noticing small changes, and keeping things tidy, you may love it. If you want something you can ignore for five days and then praise for surviving, a cactus would like a word.
Spirulina is not difficult in the traditional gardening sense, but it does need consistency. A healthy culture depends on a fairly narrow comfort zone. When the water gets too cool, the light gets too intense, or contamination slips in, growth can stall quickly. Beginners do best when they treat spirulina like a simple food-production system rather than a novelty jar of green water.
What You Need to Start
Basic Equipment
A beginner-friendly home spirulina setup usually includes a shallow, food-safe container, a live starter culture, a nutrient medium, a thermometer, a pH testing tool, a clean stirring utensil or gentle aeration system, a fine mesh cloth or filter for harvesting, and a warm, bright growing area. Many people use a glass aquarium or food-safe plastic tub because both are easy to clean and easy to monitor.
Shallow and wide containers are usually easier than deep ones because light penetrates more evenly and self-shading is reduced. Spirulina needs light to grow, and overly dense or overly deep culture water makes that harder. A smaller container is also smarter for beginners because it limits your mistakes to a manageable size.
Starter Culture and Growing Medium
You need a live food-grade spirulina starter culture. Powdered spirulina will not magically come back to life, no matter how encouragingly you speak to it. Starting with a live culture from a reputable supplier is the safest and simplest choice.
Spirulina also needs a specific alkaline nutrient medium. Some experienced growers mix their own medium using ingredients such as bicarbonate and mineral salts, but beginners are usually better off with a premixed or clearly labeled food-grade nutrient blend. It is easier, more consistent, and far less likely to turn your first batch into a cautionary tale.
How to Set Up a Spirulina Culture
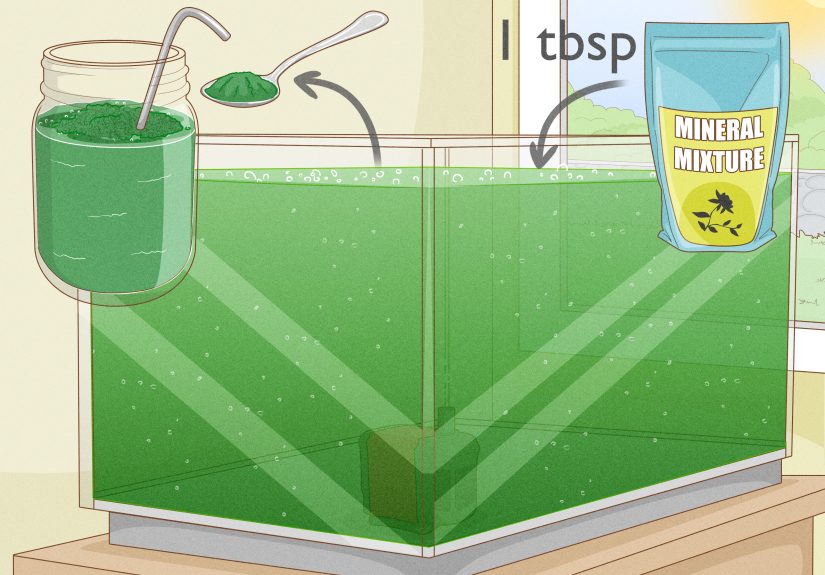
Start by thoroughly cleaning your container and tools. Spirulina grows best when it has the stage to itself. Fill the container with the prepared culture medium, then add the live starter culture gently so you do not shock it. Place the container somewhere warm and bright, but not under brutal direct midday sun that can overheat the system.
For most home growers, the sweet spot is a stable indoor or semi-protected space where temperature and light are easier to control than they would be outdoors. A sunny window, greenhouse shelf, or warm utility room can work. If natural light is inconsistent, a grow light can help keep things steady.
Once the culture is set up, begin gentle daily mixing. This helps distribute nutrients, improves light exposure, and discourages stagnant zones. Spirulina likes movement, but not chaos. You are aiming for circulation, not a tiny whirlpool of doom.
Daily Care Tips That Matter Most
1. Keep the Temperature Warm and Steady
Temperature is one of the biggest drivers of healthy growth. Spirulina generally performs best in warm conditions, with many home-growing guides and cultivation references placing the ideal range around 86 to 95°F. Cooler temperatures slow growth, and major temperature swings can stress the culture.
If your space gets chilly at night, growth may lag even if the afternoons are warm. If your container sits in hard summer sun, overheating can become the bigger problem. Stable warmth beats temperature drama every time.
2. Watch the pH
Spirulina prefers an alkaline environment, typically in the pH 9 to 11 range, with many growers aiming around 10. This high pH helps support spirulina while making life harder for many unwanted contaminants. That is one reason pH is not just a chemistry detail; it is part of your food-safety strategy.
Use pH strips or, better yet, a reliable pH meter. If the pH drops noticeably, do not shrug and hope for the best. A falling pH can signal that the culture is stressed, the medium is out of balance, or contamination risk is rising.
3. Give It Bright but Reasonable Light
Spirulina needs strong light, but more is not always better. Moderate, steady illumination is usually more helpful than blasting the culture with punishing direct sun all day. Many growers target roughly 12 to 16 hours of light daily, depending on the setup, the season, and the strength of the light source.
If the culture seems to bleach, yellow, or brown near the surface, the light may be too harsh or the temperature may be climbing too high. If it remains pale and sluggish for days, it may need more light or warmer conditions.
4. Stir Gently and Consistently
Spirulina does not like being left completely still. Gentle stirring once or twice a day helps even out light exposure, keeps cells suspended, and reduces dead spots where problems can develop. Some home growers use very light aeration instead, but the goal is the same: keep the culture moving without battering it.
5. Stay Clean
Always use clean utensils, clean hands, and clean harvest tools. Do not dip random spoons into the culture after stirring your coffee. Do not let dust, pet hair, insects, or kitchen mystery splashes join the party. Spirulina may be resilient in alkaline water, but contamination is still the enemy.
Common Spirulina Problems and What They Usually Mean
Slow Growth
If your spirulina is growing slowly, the usual suspects are low temperature, weak light, poor nutrient balance, or a culture that was too small or weak to begin with. Before changing everything at once, check temperature, pH, and light first.
Yellowing or Bleaching
This usually points to too much heat, too much intense light, nutrient stress, or a culture that has been left too dense for too long. Spirulina should look richly green. If it starts looking washed out, something is off.
Bad Smell
A healthy spirulina culture has a mild earthy or green smell. If it smells rotten, sour, or aggressively swampy, stop and investigate. That can signal contamination or decay, and it is not something to gloss over with optimism.
Clumping or Floating Mats
Very dense cultures can clump and float, especially when light penetration drops and circulation is poor. Gentle mixing and timely harvesting help prevent this. Spirulina likes to be productive, but not overcrowded.
When Spirulina Is Ready to Harvest
As your culture matures, the water becomes darker and more opaque. Many growers look for a deep, rich green color and a thicker texture. A simple spoon test can also help: if a spoon lifted from the culture comes out coated in a noticeable green layer, you are getting close.
Do not harvest too early. A weak, thin culture needs time to build strength. At the same time, do not wait forever. Very dense cultures can shade themselves, slow down, and become harder to manage. Spirulina is happiest when harvested regularly and allowed to regrow.
How to Harvest Spirulina Safely
Harvesting spirulina at home is straightforward when you keep it sanitary. First, wash your hands and make sure the filter cloth, bowl, and tools are clean. Scoop or pour a portion of the culture through a fine mesh cloth or filter. The spirulina biomass will collect in the cloth while the liquid passes through.
Next, rinse the harvested spirulina gently with clean water to remove residual medium. Then gather the soft green biomass into a paste. At this point, you can use it fresh or store it briefly in the refrigerator.
A common beginner mistake is harvesting too much. Leave plenty of culture behind so it can rebound. A good rule of thumb is to harvest modestly and consistently rather than taking a giant green victory lap all at once. After harvesting, top up the system with fresh prepared medium as needed and return to your normal care routine.
How to Store and Use Fresh Spirulina
Fresh spirulina is best used quickly. Many growers refrigerate it and consume it within a few days. You can stir it into smoothies, yogurt, pesto-style sauces, hummus, dressings, or energy bites. Fresh spirulina tends to blend more smoothly than powder and usually tastes less aggressive.
If you want longer storage, drying is an option. Low-temperature drying is generally gentler than high heat, though any drying process changes the character of the product. Fresh spirulina is all about immediacy. Dried spirulina is about convenience. Neither is wrong, but they are not the same experience.
Food Safety and Smart Caution
Never try to culture spirulina from random pond water, wild algae, or mystery green sludge from a container you forgot on the balcony. Spirulina grown for food should come from a known live culture and a controlled medium. Contamination with unwanted microorganisms or toxins is one of the biggest reasons controlled growing conditions matter.
If your culture changes color dramatically, develops a foul smell, behaves oddly, or makes you question your life choices, do not eat it. When in doubt, throw it out. That rule has saved more home food projects than any gadget ever made.
Also remember that spirulina is still a supplement-like food for many people. Anyone who is pregnant, has allergies, has phenylketonuria, takes blood thinners, or has a medical condition should talk with a qualified healthcare professional before consuming it regularly.
Real-World Growing Experiences: What Home Growers Usually Learn
The first thing many home growers discover is that spirulina does not reward impatience. In the first few days, the culture can look almost unchanged, which makes beginners wonder whether they bought expensive green water and a new hobby in disappointment. Then, usually sometime after the routine starts clicking, the culture deepens in color and suddenly looks alive in a much more convincing way. That shift is satisfying, and it teaches an early lesson: consistency matters more than dramatic intervention.
Another common experience is learning that spirulina notices everything. A room that feels pleasantly warm to you may still be too cool for fast growth. A bright window that seems perfect in the morning may become an algae sauna by midafternoon. Many beginners report that their biggest improvements come not from buying more equipment, but from making the environment steadier. Moving the tank away from harsh sun, checking pH more regularly, or stirring on a reliable schedule often does more good than fancy upgrades.
Growers also tend to realize that “clean enough” is not the same as clean. One of the most repeated practical lessons is that spirulina rewards simple hygiene. Using dedicated tools, rinsing filters thoroughly, and avoiding cross-contact from the kitchen makes the whole system feel more stable. This is especially true once people begin harvesting regularly. The harvest step can feel exciting, but it is also the moment when contamination has the easiest chance to sneak in.
Then there is the emotional side of the process, which nobody mentions enough. Home growers often start with a very efficient vision: grow spirulina, harvest superfood, become unstoppable. In reality, the culture teaches patience first. You learn to observe tiny changes in texture, color, smell, and density. You learn that small maintenance tasks done on time are easier than rescue missions done late. You learn that spirulina is not hard because it is dramatic; it is hard because it is honest. If the conditions are good, it grows. If they are not, it lets you know.
Many regular growers also describe a change in how they use the harvest. At first, fresh spirulina often ends up in one symbolic smoothie, because that feels like the law. Later, people get more creative. They mix it into dips, blend it into dressings, stir it into yogurt, or pair it with fruit to soften the marine edge. Once the novelty wears off, practical kitchen use becomes more important than bragging rights. That is usually a good sign. It means the project has moved from experiment to habit.
Perhaps the most valuable shared experience is this: successful home spirulina growing is usually less about perfection and more about pattern recognition. Growers who do well are not necessarily the ones with the fanciest setup. They are the ones who notice when the culture looks a little too pale, when the pH starts drifting, when the container gets too warm, or when the growth rate slows after skipped care. In other words, the best spirulina growers become good observers. The algae does the growing, but the human does the noticing.
That is why so many people stick with it. Spirulina is food, yes, but it is also feedback. It turns everyday care into visible results. And when you finally harvest a healthy, clean, vivid green batch that you grew yourself, it feels oddly thrilling. Slightly nerdy, definitely green, but thrilling.
Final Thoughts
If you want to grow spirulina at home successfully, focus on the basics: buy a live food-grade culture, use a proper alkaline nutrient medium, keep the water warm, provide steady light, monitor pH, stir gently, and harvest cleanly. Those habits matter more than gimmicks.
Home spirulina cultivation is part kitchen project, part micro-farm, and part lesson in paying attention. Done well, it can be a practical source of fresh spirulina and a surprisingly satisfying routine. Done carelessly, it becomes an expensive green reminder that biology loves details. Respect the process, keep the setup clean, and your little algae operation can thrive.