Table of Contents >> Show >> Hide
- What Is Corrugated Roofing, Exactly?
- Before You Start: The Reality Check
- Tools and Materials You Will Likely Need
- Step 1: Measure the Roof Like You Actually Want the Panels to Fit
- Step 2: Check the Roof Slope, Deck, and Local Code
- Step 3: Tear Off the Old Roof If Needed
- Step 4: Install the Underlayment
- Step 5: Install Drip Edge and Closure Strips
- Step 6: Lay the First Panel Perfectly
- Step 7: Fasten Panels the Right Way
- Step 8: Overlap Panels and Seal Laps Correctly
- Step 9: Flash Every Penetration Like You Respect Water
- Step 10: Install the Ridge Cap
- Step 11: Clean Up the Roof Like a Pro
- Common Mistakes to Avoid
- Expert Tips for a Better-Looking, Longer-Lasting Roof
- Conclusion
- Field Notes and Real-World Experience: What DIY Installers Usually Learn the Hard Way
- SEO Tags
If you have ever looked at a shed, barn, workshop, porch cover, or modern farmhouse addition and thought, “I could totally roof that,” corrugated roofing is probably the material whispering sweet nothings in your ear. It is tough, lightweight, and friendlier to DIYers than some premium metal systems. It also has one sneaky personality trait: it looks simple until you install it crooked, overdrive a few screws, forget a closure strip, and accidentally build a deluxe rain-harvesting system inside your own structure.
The good news is that installing corrugated roofing is absolutely doable for a skilled homeowner with patience, proper safety gear, and a willingness to follow the panel manufacturer’s instructions like they are the final boss of the project. In this guide, you will learn how to install corrugated roofing step by step, what tools and materials you need, where DIY jobs usually go sideways, and the expert tips that make the difference between a roof that looks sharp and a roof that looks like it lost a bar fight.
What Is Corrugated Roofing, Exactly?
Corrugated roofing is a metal roof panel with repeating waves or ribs that add stiffness and help shed water. In residential and light agricultural work, it is commonly used for sheds, garages, workshops, patio covers, carports, and some homes. Most corrugated roof systems used by DIYers are exposed-fastener systems, meaning the screws are visible after installation.
That exposed-fastener design is one reason corrugated panels are often more approachable than standing seam systems. There are fewer specialty tools, the panels install in a more direct sequence, and the material cost is usually easier on the wallet. The tradeoff is that details matter more than ever. With exposed fasteners, every mistake is sitting out in public, wearing a shiny washer.
Before You Start: The Reality Check
Let’s be honest: roofing is not a casual Saturday craft project like painting a bookshelf while listening to a podcast. It is high, slippery, sharp-edged, weather-sensitive work. If your roof is tall, steep, complex, or full of penetrations like chimneys and skylights, hiring a pro may be the smartest move you make all year.
If you are taking the DIY route, start with a simple roof shape. A basic gable roof over a shed, detached garage, or workshop is the sweet spot. The cleaner the roof geometry, the easier it is to keep panels square, control laps, and flash the edges correctly.
Tools and Materials You Will Likely Need
Basic Tools
Tape measure, chalk line, square, drill or screw gun with clutch control, driver bits, snips or the cutting tool approved for your panel system, ladder, safety glasses, gloves, non-slip shoes, and appropriate fall-protection equipment.
Roofing Materials
Corrugated panels, underlayment, drip edge or eave trim, rake trim, closure strips, butyl tape or sealant tape, metal roofing screws with sealing washers, ridge cap, flashing for penetrations and transitions, and touch-up paint if approved by the manufacturer.
Nice-to-Have Items
A panel carrier, magnetic sweep for metal shavings, helper for lifting long panels, and a calm weather forecast. Seriously, the forecast is not optional. A corrugated panel in the wind behaves like a kite with attitude.
Step 1: Measure the Roof Like You Actually Want the Panels to Fit
Measure the full roof area carefully, including each plane, overhang, ridge length, rake edges, valleys, and any penetrations. Order extra material for waste, trim cuts, and the reality that the universe enjoys humbling first-time roofers.
Do not rely on a rough estimate from the ground. Measure the rake, eave, and panel run precisely. Corrugated systems also require allowance for side laps, end laps where needed, and trim coverage. One panel short does not just delay the job; it can leave an exposed section open to weather while you wait for more material.
Step 2: Check the Roof Slope, Deck, and Local Code
Here is a major expert tip: not every corrugated or exposed-fastener panel is approved for the same roof pitch. Some systems are intended for steeper slopes, while others are engineered for lower slopes. Never assume “metal roof” means “works anywhere.” Your specific panel profile decides what is allowed.
Inspect the roof deck or framing before you install anything. Replace rotten sheathing, fix soft spots, correct proud nails, and make sure the substrate is flat and uniform. Corrugated roofing does not magically hide structural sins. It will happily trace them, amplify them, and show them off in broad daylight.
Also check local building code requirements for wind uplift, underlayment, fastening schedules, and whether you can install over an existing roof. In many areas, overlaying one roof over another may be limited by code or by the condition of the existing roof.
Step 3: Tear Off the Old Roof If Needed
Yes, some metal roofs can go over existing shingles in certain situations. But if you want the best chance of a long-lasting installation, a full tear-off is often the smarter move. Removing the old roofing lets you inspect the sheathing, replace damaged flashing, and start fresh with a flat, clean base.
If the existing roof stays, do not treat that as permission to skip planning. You still need to confirm code compliance, substrate condition, panel compatibility, and ventilation details. “It fit over the old shingles” is not the same thing as “it was installed correctly.”
Step 4: Install the Underlayment
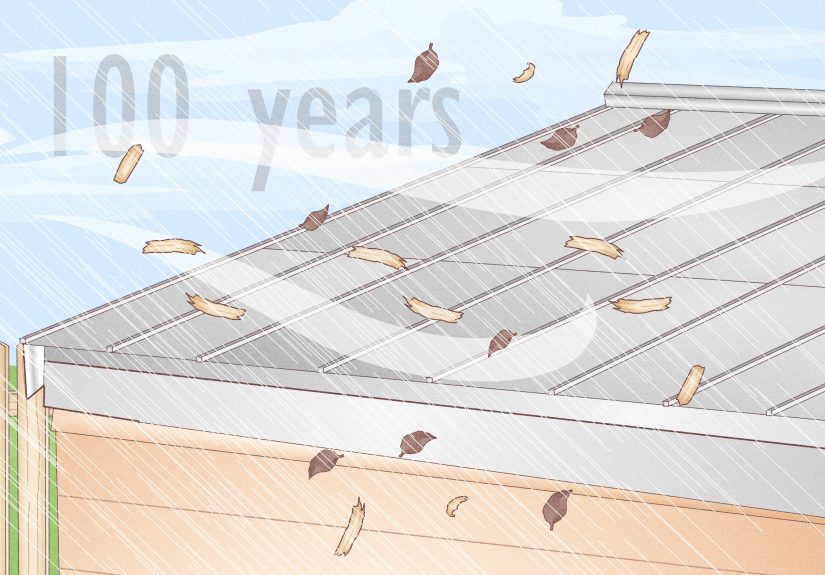
Underlayment is not a formality. It is the backup water barrier that helps protect the deck if wind-driven rain, condensation, or a fastener issue ever tries to turn your roof into an indoor water feature.
Follow the underlayment manufacturer’s overlap instructions exactly. Metal expands and contracts, and the roofing assembly needs enough flexibility to move without compromising the layer below. On some systems, a slip sheet may also be recommended above the underlayment to help the metal move more freely and reduce abrasion.
Make sure the deck is smooth, clean, and dry before you begin. Wrinkles, trapped debris, and wet spots are not harmless. They can telegraph through the installation and create trouble later.
Step 5: Install Drip Edge and Closure Strips
Next comes drip edge or eave trim at the roof perimeter. This detail helps direct water away from the fascia and into the gutter system if one is present. It also gives the panel edge a cleaner, more controlled starting point.
At the eaves, install the appropriate inside closure strips and sealant tape if your system calls for them. These closures fit the panel profile and block insects, debris, and blowing rain from sneaking under the metal. They may look like humble foam accessories, but they are tiny bodyguards for your roof assembly.
Do not improvise with whatever scrap foam is lying around in the garage. Use the closure profile intended for your roofing panels. A bad fit here can create gaps, weak support, and leaks.
Step 6: Lay the First Panel Perfectly
This is the make-or-break moment. The first panel controls everything that follows. If it is out of square, every panel after it will drift farther off line, and by the time you reach the ridge or far rake, you may discover that geometry has filed a formal complaint.
Start at the eave and align the first panel square to the roofline. Set the correct eave overhang according to your panel system. Confirm alignment at least twice before fastening it down. A chalk line is your best friend here. Unlike your human helper, it does not get distracted, thirsty, or overly confident after ten minutes.
Step 7: Fasten Panels the Right Way
Corrugated roofing is usually part of an exposed-fastener system, so the screw pattern matters a lot. Use the correct metal roofing screws with sealing washers, and follow the panel manufacturer’s fastener map for spacing, location, and substrate type. Eaves, ridges, and high-wind zones may require different fastening patterns than the field of the roof.
One of the most common DIY mistakes is overdriving screws. If you crush the washer, distort the panel, or create “oil canning” and stress around the hole, you are not making the roof tighter. You are creating future leak opportunities with impressive self-confidence.
Drive screws straight, not at an angle. Keep consistent pressure. Use a drill with clutch control when possible. And use compatible fasteners for the panel material and the environment. Mixing the wrong metals can accelerate corrosion, especially in coastal or harsh industrial conditions.
Step 8: Overlap Panels and Seal Laps Correctly
As you move across the roof, overlap side laps according to the panel instructions. Some corrugated roofing systems use one corrugation in certain applications, while others may require more robust lap details for roofing, wind, or lower-slope conditions. End laps, when needed, also vary by system and roof pitch, so do not guess.
Use butyl tape or the sealant specified for the roof system at the required lap locations. On many corrugated systems, fasteners at the eave and lap areas must penetrate closures and sealant tape as part of the weather-tight assembly. Translation: if the instructions say “through the closure and tape,” do not freelance.
Another expert tip: orient side laps away from prevailing wind and driving rain whenever the panel instructions recommend it. That one detail can improve water shedding and reduce the odds of wind-driven trouble.
Step 9: Flash Every Penetration Like You Respect Water
Roof leaks often begin at penetrations, not in the middle of a field panel. Pipes, vents, skylights, chimneys, sidewalls, endwalls, valleys, and transitions all need the correct flashing detail for the system.
Use purpose-made flashings, boots, closures, and sealants. Do not depend on caulk alone to perform magic. Good flashing is designed to channel water away from the opening, not merely beg it to go elsewhere. Sealant can help, but the geometry of the flashing should be doing the real work.
If your roof includes a chimney, valley, dormer, or complicated wall intersection, slow down. Those are the spots where experienced roofers earn their lunch. A simple shed roof is one thing. Flashing a cluttered roof correctly is a whole different sport.
Step 10: Install the Ridge Cap
At the ridge, install the proper outside or vented closure strips, tape or sealant as required, and then secure the ridge cap according to the manufacturer’s instructions. On many systems, ridge pieces overlap one another, and screws are driven through the cap and into the supporting ribs or substrate in a defined pattern.
If the roof design calls for ventilation, do not block it by casually stuffing every opening shut. Use the vented closure and ridge components intended for the system. A metal roof that cannot breathe may reward you later with condensation headaches you absolutely did not order.
Step 11: Clean Up the Roof Like a Pro
Once the panels and trim are installed, remove all loose metal shavings, scraps, and debris from the roof surface. This is not cosmetic fussiness. Metal shavings can rust and stain the roof or contribute to corrosion. Sweep or blow the roof clean carefully, and inspect every fastener, lap, and trim edge before calling it done.
Also inspect washers for consistent compression, trim for secure attachment, closures for fit, and cut edges for proper treatment if the manufacturer requires it.
Common Mistakes to Avoid
Starting with a Crooked First Panel
Everything downstream gets worse from there.
Ignoring the Panel Manual
Corrugated roofing is not one universal product. Profile, gauge, slope rating, overlap details, and fastening schedules vary.
Using the Wrong Fasteners
Wrong screw type, wrong washer, wrong coating, or wrong metal compatibility can shorten roof life fast.
Overdriving Screws
If the washer looks pancaked into another dimension, back off.
Skipping Closures and Sealant Tape
That is how wind-driven rain, bugs, and debris get invited inside.
Working in Bad Weather
Wet metal is slippery, windy panels are dangerous, and roofing in a storm is a terrible way to test your life choices.
Expert Tips for a Better-Looking, Longer-Lasting Roof
Measure twice, square three times. Panel alignment is more important than speed.
Use the correct closure strips. Generic substitutes often fit badly.
Respect thermal movement. Metal expands and contracts, so follow the system’s fastening and lap details.
Keep the roof clean during installation. Metal shavings are small, annoying, and surprisingly destructive.
Match fasteners to environment. Coastal and corrosive locations may require upgraded fasteners and coatings.
Know when to call a pro. Complex flashing and steep roofs are not ego projects.
Conclusion
Installing corrugated roofing is one of those projects that rewards care far more than bravado. The panels themselves may go up quickly, but the real success comes from the details: a sound deck, correct slope, proper underlayment, square layout, compatible fasteners, sealed laps, well-fitted closures, and smart flashing. Miss those, and even beautiful metal panels can fail. Nail them, and you get a roof that looks sharp, sheds water well, and holds up for years.
So yes, corrugated roofing can be a very solid DIY project. Just do not treat it like a speed run. Treat it like precision work with sharp edges, a weather system, and gravity all taking notes.
Field Notes and Real-World Experience: What DIY Installers Usually Learn the Hard Way
The first real lesson most DIY installers learn is that corrugated roofing is not hard in a mysterious way; it is hard in an extremely obvious way. Every shortcut announces itself. If your first panel is off, the rest of the roof does not kindly correct the error. It magnifies it. What looked like “barely noticeable” at the eave becomes “why is the ridge cap doing interpretive dance?” by the end of the run.
Another common experience is discovering that long panels are awkward even when they are not especially heavy. On paper, one corrugated panel seems manageable. On a roof, in a breeze, while you are trying not to scratch the finish or whack the ladder, it suddenly develops the personality of a rebellious canoe. That is why experienced installers plan staging, lifting, and layout before the first screw goes in. The less improvising you do while standing on a roof, the better the day goes.
DIYers also tend to underestimate how much time gets spent on preparation. The visible part of the project is the shiny panel installation, but the hidden part is what determines whether the roof behaves itself for the next decade. Fixing the deck, rolling out underlayment neatly, installing trim straight, aligning closures, and laying out chalk lines all feel slow in the moment. Then you reach the panel stage and realize the prep work is the reason the installation now feels controlled instead of chaotic.
One experience nearly everyone remembers is the first time they use too much force on a screw gun. New installers often think tighter equals better. Then they look down and see a washer crushed like a cookie under a chair leg. After that, they suddenly become very respectful of clutch settings. A well-driven fastener feels firm and seated, not tortured. Metal roofing loves consistency far more than aggression.
There is also the flashing lesson. People begin roofing projects thinking the panels are the whole job. Veterans know the panels are the easy part. The details around pipes, walls, ridges, and transitions are where patience earns its paycheck. Once a DIYer has spent an afternoon making one penetration neat and watertight, they usually stop calling flashing “just the trim pieces.” Water is clever, and flashing is the chess match.
Finally, there is the humbling cleanup moment. After the last cap goes on, many first-timers want to admire the roof from the ground and declare victory. Then the experienced voice in their head says, “Go get the shavings.” And that voice is right. Brushing off filings, checking every lap, confirming fasteners, and doing one last slow inspection is part of the job. The best DIY corrugated roof installations do not look rushed. They look deliberate. That is usually because the installer learned, somewhere between panel one and panel last, that neat work is fast work’s smarter cousin.