Table of Contents >> Show >> Hide
- How a Garbage Disposal Works (And Why Maintenance Matters)
- Daily Habits to Keep Your Disposal Running Smoothly
- What You Should and Shouldn’t Put in a Garbage Disposal
- How to Clean Your Garbage Disposal the Safe, Natural Way
- Simple Ways to Prevent Odors
- How to Avoid Jams and What to Do if It Stops Working
- Long-Term Maintenance Tips to Extend Your Disposal’s Life
- Real-Life Experiences: What Actually Keeps a Garbage Disposal Happy?
- Bringing It All Together
If your kitchen sink is the stage, your garbage disposal is the behind-the-scenes hero. It quietly grinds up food scraps, keeps your drain flowing, and only complains when we ignore it or feed it something it was never meant to eat (looking at you, pasta casserole and chicken bones). The good news? A little routine care and a few smart habits can keep your garbage disposal running smoothly for yearswithout surprise clogs, funky smells, or terrifying grinding noises.
Inspired by the maintenance wisdom you’d expect from a place like This Old House, plus tips from plumbers, home improvement pros, and appliance experts across the country, this guide will walk you through how to use, clean, and troubleshoot your disposal the right way.
How a Garbage Disposal Works (And Why Maintenance Matters)
Despite what many people think, a garbage disposal doesn’t have “blades” like a blender. Instead, it uses a spinning plate (the flywheel) and small impellers that sling food against a stationary grind ring. The food gets pulverized into tiny particles, which then wash down the drain with water.
When you don’t maintain the disposal, several things can go wrong:
- Built-up gunk: Food particles and grease cling to the grind chamber and splash guard, leading to slow drains and bad smells.
- Jams: Hard or fibrous materials can wedge inside the grind ring or impellers and stop the motor.
- Clogs: Starches, coffee grounds, and grease collect in the trap and pipes, causing backups in your sink.
- Wear and tear: Letting the disposal sit unused or overloaded can lead to corrosion or shortened lifespan.
The fix is simple: run it properly, clean it regularly, and don’t treat it like a second trash can.
Daily Habits to Keep Your Disposal Running Smoothly
1. Run Cold Water Before, During, and After Use
Cold water is your disposal’s best friend. Turn on a steady stream before you flip the switch, keep it running the whole time you’re grinding, and let it flow for 10–20 seconds after you turn the disposal off.
Why cold water and not hot?
- Cold water helps keep fats and grease solid so the disposal can grind them up instead of melting them into a sticky coating on your pipes.
- The water flow carries tiny food particles through the trap and into the main drain line instead of letting them settle in the pipes.
2. Use the Disposal Regularly
Just like a car that sits in the driveway too long, a garbage disposal that rarely runs can stiffen up. Rubber parts dry out, metal parts can corrode, and leftover bits of food become a science experiment.
Even if you don’t have much to grind, flip it on once a day with cold water running. Toss in a few small scraps or ice cubes to keep the moving parts limber and the chamber rinsed out.
3. Feed It Slowly and in Small Batches
One of the fastest ways to jam a disposal is to shove an entire plate of leftovers into it at once. Instead:
- Scrape most food into the trash or compost first.
- Feed small amounts of soft scraps into the disposal while it’s running.
- Listen for the grinding to settle into a softer hum before you add more.
Think of it like a conveyor belt, not a trash compactor.
What You Should and Shouldn’t Put in a Garbage Disposal
Best Types of Scraps for the Disposal
Garbage disposals are designed for small, soft food scraps, such as:
- Soft fruit and vegetable peels (in small pieces)
- Cooked leftovers in tiny amounts (rice stuck to plates, for example)
- Soft bits of meat (no bones)
- Small citrus peels, great for freshening the smell
If you wouldn’t mind chewing it yourself, your disposal will usually be okay with grinding a small amount of it too.
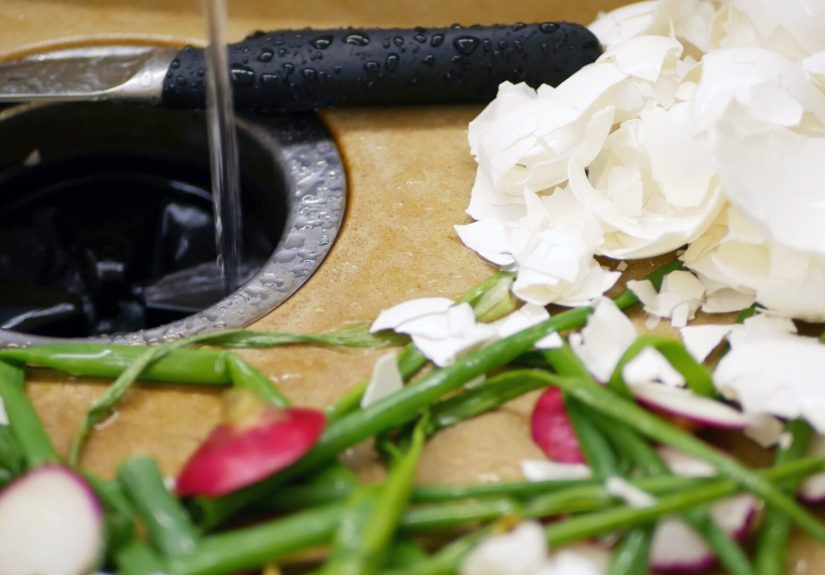
Foods to Avoid (The “Never Again” List)
Certain foods almost guarantee clogs, jams, or nasty buildup. Keep these out of the disposal and send them to the trash or compost instead:
- Grease, fats, and oils: They might pour down as liquid, but they cool and solidify inside your pipes, creating stubborn clogs.
- Coffee grounds: They form a dense, sludgy layer that sits in the trap like wet sand.
- Eggshells and nut shells: Tiny hard particles can stick to existing buildup and worsen clogs over time.
- Starchy foods (pasta, rice, potatoes): They swell and turn sticky, gluing everything together in the pipes.
- Fibrous vegetables (celery, corn husks, onion skins, pumpkin guts): Fibers can wrap around the moving parts like string around a propeller.
- Bones, fruit pits, and other very hard items: These can damage or jam the grinding mechanism.
- Non-food items: Produce stickers, twist ties, plastic, foil, or utensils should never go near the disposal.
When in doubt, remember this rule: the garbage disposal is for rinse-level scraps, not entire meals.
How to Clean Your Garbage Disposal the Safe, Natural Way
You don’t need harsh chemicals to keep your disposal clean and fresh. In fact, chemical drain cleaners can corrode metal parts and damage seals. Stick with simple, natural ingredients you already have in your kitchen.
Step-by-Step Deep Cleaning Routine (Do This Monthly)
-
Cut the power.
Turn the disposal switch off and unplug the unit under the sink if possible. If it’s hard-wired, switch off the circuit at the breaker box. Safety firstno fingers near moving parts.
-
Remove visible debris.
Use tongs or pliers (never your hands) to remove any large items or debris sitting in the chamber.
-
Scrub the splash guard and upper chamber.
Most odors come from the rubber splash guard and the top of the grind chamber. Pull the rubber baffle up if it’s removable and scrub it with hot, soapy water and a small brush or old toothbrush. Wipe around the opening of the disposal as well.
-
Use baking soda and vinegar.
Pour about 1/2 cup of baking soda into the disposal. Follow with 1 cup of white vinegar. The mixture will fizz and foam, loosening grime and killing odor-causing bacteria. Let it sit for 10–15 minutes.
-
Flush with hot water.
After the fizzing slows, flush the disposal with hot (not boiling) water for a minute to rinse away loosened debris.
-
Polish with ice and salt.
Restore power. Toss a dozen ice cubes into the disposal and add 1/2 cup of coarse salt. Run cold water, then turn the disposal on. The crunchy mixture scours the grind chamber and helps knock off stuck-on gunk.
-
Finish with citrus.
For a fresh scent, grind a few small wedges or peels of lemon, lime, or orange with cold water running. The oils help deodorize, and the peels provide gentle scrubbing action.
Repeat this routine about once a monthor more often if you cook a lot and use the disposal daily.
Simple Ways to Prevent Odors
Even a well-functioning disposal can smell if you let food sit too long. To keep things fresh:
- Run the disposal right away after rinsing plates; don’t let scraps sit there all afternoon.
- Rinse with cold water for 15–20 seconds after grinding.
- Clean the splash guard regularlyit traps tiny food particles and grease.
- Use occasional “freshening” grinds with citrus peels or vinegar ice cubes.
If your disposal still smells even after deep cleaning, it can be a sign of buildup deeper in the drain lineor that the unit is older and nearing the end of its 10–12-year lifespan.
How to Avoid Jams and What to Do if It Stops Working
Common Causes of Garbage Disposal Jams
Jams usually happen when something too hard, too fibrous, or too large gets wedged between the flywheel and the grind ring. Sometimes, non-food items (like a spoon or bottle cap) accidentally slide in as well.
Signs you’ve got a jam include:
- A humming sound when you flip the switch, but no grinding
- Silence and no movement at all
- Water backing up into the sink when the disposal runs
Step-by-Step: Safely Unjamming a Disposal
- Turn off the power. Switch the unit off, then unplug it or turn off the breaker.
- Check for a reset button. Many disposals have a small red reset button on the bottom. If it’s popped out, wait a minute, then press it back in.
- Use the hex key. Most units come with an Allen wrench (hex key). Insert it into the hole in the center of the bottom of the disposal and gently turn it back and forth to free the jammed flywheel.
- Remove the obstruction. Use tongs or pliers to pull out any visible object once the flywheel moves freely. Never reach inside with your hand.
- Restore power and test. Plug the unit back in or turn on the breaker. Run cold water and turn on the disposal. If it spins normally, you’re back in business.
If the disposal still hums, trips the breaker repeatedly, or stays completely silent, it may be time to call a plumber or consider replacing the unit.
Long-Term Maintenance Tips to Extend Your Disposal’s Life
A well-cared-for garbage disposal can last a decade or more. Here’s how to get the most from it:
- Don’t overload it. Large volumes of scraps at once strain the motor and increase the risk of clogs.
- Use it like a helper, not a trash can. Most food waste should still go in the trash or compost.
- Check for leaks. Every few months, open the cabinet and look for signs of moisture or corrosion under the unit.
- Listen for changes. Odd grinding, rattling, or shrieking sounds can signal a foreign object or a failing motor.
- Replace when necessary. If your disposal is old, loud, smelly, and constantly clogging despite good care, upgrading may be a better investment than repeated repairs.
Real-Life Experiences: What Actually Keeps a Garbage Disposal Happy?
Ask three homeowners how they care for their garbage disposal and you’ll probably get three different routines, plus at least one story about “that time the disposal ate a fork.” While everyone’s kitchen habits are different, a few common experiences pop up again and again.
The Ice Cube Myth (That’s Actually Pretty Helpful)
One popular trick is running a batch of ice cubes through the disposal. At first, it sounds silly: how could ice sharpen anything? The truth is, it doesn’t sharpen metal, but it does help knock off small bits of gunk stuck to the grind chamber and ring.
Homeowners who use ice regularly often notice:
- The disposal sounds smoother after an “ice cleaning.”
- Lingering odors are reduced, especially when ice is combined with rock salt or a little dish soap.
- It’s a convenient way to give the disposal a workout, even when there aren’t many food scraps.
If you’re nervous about putting too much in the disposal, start with a handful of ice cubes once a week, run cold water, and let it grind until the noise changes from crunching to a steady hum.
The “No Coffee Grounds” Lesson You Only Need Once
Many people learn the hard way that coffee grounds, while tiny, can create big headaches. They settle into the P-trap, mix with grease, and form a dense sludge that doesn’t want to budge. A sink that drains slowly after your morning brew is often a clue.
Once someone pays for a plumber to clear a coffee-ground clog, they usually swear off sending grounds down the disposal ever again. Instead, they compost them or toss them in the trashand magically, those slow-draining problems disappear.
Grease: The Invisible Villain
Pouring hot, liquid grease down the drain feels harmless in the moment. But over time, that grease cools and clings to the inside of pipes like candle wax. Add food particles, starchy bits, and coffee grounds, and you’ve got a stubborn clog forming slowly in the dark.
Homeowners who change this one habitletting grease cool in a can or jar and tossing it in the trashoften see far fewer clogs and less frequent plumber visits. It’s a simple shift that makes a huge difference.
The “Run It Regularly” Rule
Another common experience: the disposal that sat unused for months. When someone finally flips the switch, the motor hums but doesn’t spin. Sometimes it can be freed with a hex key; other times, it’s simply seized from rust and inactivity.
People who get into the habit of running their disposal briefly every dayeven with just cold water and a couple of ice cubesfind that the unit stays quieter, smells better, and is less likely to seize up or corrode prematurely.
When Replacing Makes More Sense Than Repairing
Every disposal has a limit. If yours is constantly clogging, smells bad no matter how often you clean it, or has started leaking from the housing, you may have reached the “this old house meets new appliance” stage.
Many homeowners report that after replacing an old, underpowered unit with a new, higher-horsepower model, they notice:
- Quieter operation (especially with insulated, “quiet” designs)
- Smoother grinding of everyday scraps
- Fewer jams and fewer panicked moments over a sink full of dirty dish water
It’s still crucial to use and maintain it properlybut starting with a newer, better-sized unit gives your kitchen plumbing a fresh start.
Bringing It All Together
Keeping your garbage disposal running smoothly isn’t complicated. Use cold water, run it regularly, feed it only what it can handle, and clean it with simple kitchen ingredients. Avoid the usual troublemakersgrease, coffee grounds, fibrous veggies, and starchy foodsand you’ll avoid most clogs and odors before they ever begin.
Think of your disposal as a small but mighty kitchen helper. Treat it kindly, and it will quietly take care of your scraps, keep your sink clear, and help your “this old house” (or brand-new condo) feel like it’s working exactly the way it should.