Table of Contents >> Show >> Hide
- What Is a Wrestling Bed?
- Before You Start: Smart Planning Wins the Belt
- Tools and Materials
- Step-by-Step: How to Make a Wrestling Bed
- Step 1: Build or choose a solid base frame
- Step 2: Sand every visible and touchable surface
- Step 3: Add the corner posts
- Step 4: Create the ring effect with safe decorative rails
- Step 5: Prime and paint the frame
- Step 6: Add a themed headboard or nameplate
- Step 7: Finish the details
- Step 8: Test for stability before the mattress goes in
- Step 9: Set room rules immediately
- Design Ideas That Make the Bed Look Better
- Common Mistakes to Avoid
- How to Keep a Wrestling Bed Safe Over Time
- Why This Project Works So Well
- Extra Experience and Lessons Learned From Building a Wrestling Bed
- Conclusion
If your bedroom design goals include equal parts “cozy sleep” and “main event energy,” a wrestling bed might be your dream project. I’m not talking about turning your mattress into a place for body slams, elbow drops, or dramatic championship speeches in the mirror. I mean a wrestling-ring-style bed: a sturdy, themed bed frame with corner-post flair, decorative ropes or rails, bold colors, and just enough attitude to make an ordinary room look like it’s ready for entrance music.
The best version of this project is simple: build or upgrade a solid bed frame, add wrestling-ring-inspired details, and keep the final result safe, stable, and bedroom-friendly. That means no turning the bed into a trampoline, no making it a practice mat, and no designing anything that encourages roughhousing. Think “cool custom furniture,” not “tiny arena for chaos.”
In this step-by-step tutorial, you’ll learn how to plan the design, choose materials, build the frame, add ring-style corner posts, finish the surfaces, and decorate the bed so it looks fun without becoming a safety nightmare in costume. Let’s get into the match card.
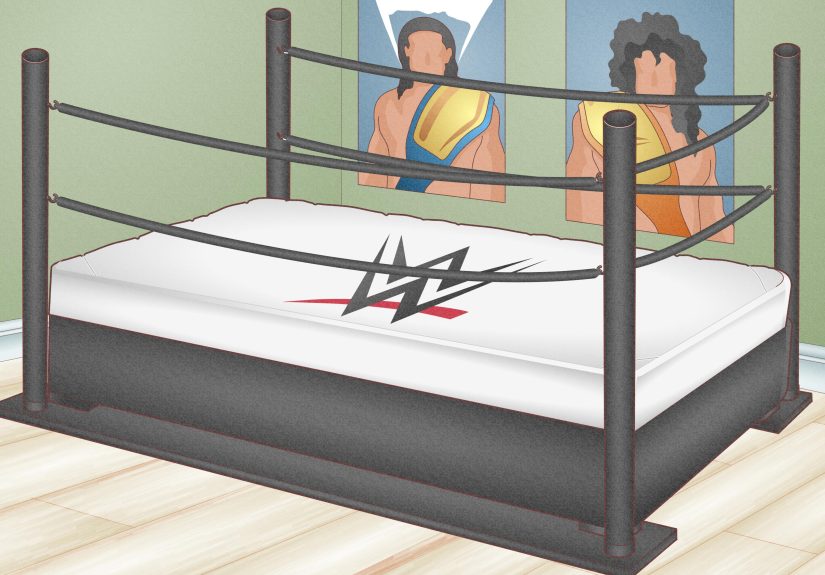
What Is a Wrestling Bed?
A wrestling bed is usually a standard bed frame styled to look like a wrestling ring. The look often includes square or round corner posts, rope-inspired side details, bold paint colors, faux championship accents, and themed bedding. The structure is still a bed first. That matters. A real wrestling surface uses specialized padding, room layout rules, and certified mats. A themed bed does not replace any of that.
So if you want the visual vibe of pro wrestling in a bedroom, great. If you want a place to practice takedowns, that’s a different project entirely, and your safest move is to use certified athletic mats in a properly supervised space. Your mattress will thank you. Your spine will also send flowers.
Before You Start: Smart Planning Wins the Belt
1. Decide on the bed size first
Choose the mattress size before you buy lumber, paint, rope, or decorative parts. A twin is the easiest option for a kid’s room or a compact setup. A full gives you more space and more visual impact. Once you know the mattress size, build your frame to fit it snugly but not so tightly that inserting the mattress becomes a grudge match.
2. Pick a style direction
You have two strong design lanes:
- Clean wrestling-ring style: black frame, red or white accents, simple corner posts, minimal graphics.
- Big-event theme style: bright colors, faux turnbuckles, personalized nameplate, logo-inspired details, and themed bedding.
3. Keep the project low to the ground
A platform-style or standard-height bed is the smartest choice. Skip any design that turns the project into a loft, climbing structure, or elevated stage. The more “arena” it looks, the more tempting it becomes to treat it like one, and that is exactly the plot twist you do not want.
4. Make safety part of the design
Rounded edges, secure fasteners, smooth sanding, stable posts, breathable finishes, and decorative elements that don’t create entanglement risks all matter. If the bed is for a child or teen, keep ropes soft, high, and decorative onlyor use painted rails instead of actual rope for the same look with less risk.
Tools and Materials
You can adapt this list to your skill level, but a basic wrestling-ring-inspired bed usually includes:
- Bed frame lumber or a simple platform bed base
- Plywood or slats for mattress support
- Wood screws and wood glue
- Four corner posts made from wood or sturdy decorative tubing
- Sandpaper or a power sander
- Primer and low-odor interior paint
- Foam wrap, fabric sleeves, or soft decorative tubing for faux ring details
- Drill/driver
- Saw appropriate for your lumber
- Measuring tape, level, and square
- Painter’s tape for stripes, corners, or logo-style shapes
- Optional: upholstered panel for a headboard, LED strip lighting, removable decals, or personalized nameplate
Wear eye protection when cutting, use a dust mask when sanding, and finish the bed in a well-ventilated area. Paint may look innocent sitting in a can, but once you crack it open, it becomes that one friend who insists on staying longer than expected.
Step-by-Step: How to Make a Wrestling Bed
Step 1: Build or choose a solid base frame
Start with the actual bed structure. You can build a simple rectangular platform frame or modify a plain store-bought bed. If you build from scratch, keep the design straightforward: side rails, head and foot supports, center support if needed, and a stable deck or slat system for the mattress. The wrestling look comes later. Don’t overcomplicate the frame trying to be clever on move one.
Focus on these basics:
- The mattress should sit flat and fully supported.
- The frame should not wobble when pushed from the side.
- There should be no exposed sharp edges or protruding screws.
- The final structure should feel like furniture, not stage scenery.
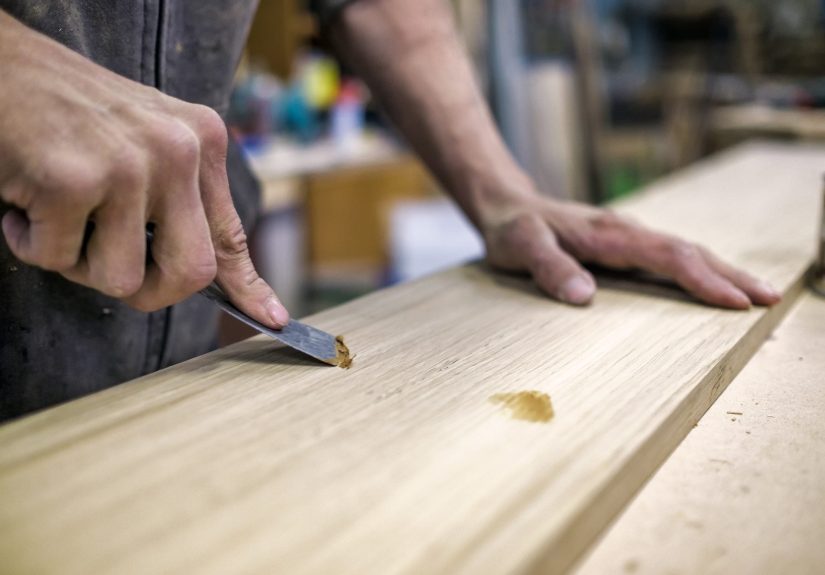
Step 2: Sand every visible and touchable surface
Before you paint or assemble decorative features, sand the frame thoroughly. Pay extra attention to edges, corners, and any place hands, knees, or sleepy feet may land. A wrestling theme can look tough without feeling splintery. That’s the sweet spot.
Step 3: Add the corner posts
This is the detail that sells the whole concept. Attach one post at each corner so the bed visually reads like a ring. Keep them securely fastened and proportionate to the bed. They should look dramatic, but they should not become ladders, balance beams, or “watch this” temptations.
For the safest result, use thick, smooth posts with rounded caps. If you want the turnbuckle look, wrap upper sections with soft foam or upholstered sleeves. Decorative posts should feel finished and stable, not like random construction leftovers trying to audition for a second life.
Step 4: Create the ring effect with safe decorative rails
You have a few options here:
- Painted rails: The safest and easiest. Paint horizontal stripes on side panels to mimic ring ropes.
- Soft faux ropes: Use padded, decorative ropes attached tightly enough to look neat but not placed where someone can roll into or tangle with them while sleeping.
- Upholstered rails: Build low, padded side elements that suggest ropes without acting like actual ropes.
If the bed is for a younger user, painted or upholstered “rope” details are smarter than real rope. It still looks great, and it removes the whole “accidentally recreated a pay-per-view entrance scene at bedtime” problem.
Step 5: Prime and paint the frame
Once the frame and posts are assembled, apply primer, then paint. Popular color combinations include black and red, black and white, blue and silver, or all-black with one bold accent color. Use painter’s tape for crisp stripes or corner-block graphics.
For a more polished look, paint the base frame one neutral color and reserve the loud wrestling energy for smaller accents. Too many bright colors can make the bed feel less like a custom design and more like it lost a fight with a toy aisle.
Step 6: Add a themed headboard or nameplate
A simple headboard can transform the project from “nice DIY bed” into “okay, that is clearly the main event.” You can create an upholstered headboard, mount a painted wood panel, or add a custom sign with a nickname, family name, or made-up championship brand.
Good examples include:
- “Saturday Night Slam Room”
- “The Champion’s Corner”
- Initials inside a faux title-belt design
- A clean monogram with wrestling-ring trim
Step 7: Finish the details
This is where the bed starts looking intentional instead of half-built. Add corner caps, fabric wraps, decals, matching bedding, and maybe a few removable accessories. Keep everything easy to clean and easy to update. Kids age out of themes. Teen tastes change. Today’s beloved color combo can become tomorrow’s “please remove this before anyone sees it.”
Step 8: Test for stability before the mattress goes in
Push the frame from multiple angles. Tighten fasteners. Check that posts do not twist. Look for any movement at joints. Run your hands along edges to catch rough spots. If something squeaks, wiggles, shifts, or looks suspiciously dramatic, fix it now rather than after the room reveal.
Step 9: Set room rules immediately
This sounds less exciting than painting flames on a corner post, but it matters more. Make it clear that the wrestling bed is for sleeping, reading, relaxing, and looking awesome. It is not for jumping, tackling, pretend matches, or launching off the top rope. There is no top rope. There never was. That is the point.
Design Ideas That Make the Bed Look Better
Go bold with bedding
Choose solid-color bedding that matches the frame. Black, red, navy, and white work especially well. Graphic pillows can add personality without cluttering the design.
Use lighting wisely
Soft LED lighting behind the headboard or under the bed frame creates a dramatic effect without making the room feel chaotic. Keep the lighting subtle. You want “cool custom room,” not “small casino with a bedtime policy.”
Add wall art instead of extra bed hardware
If you want more visual excitement, put it on the wall. Posters, framed prints, removable decals, or a mock championship display are safer than adding more rails, bars, hooks, or hardware to the bed itself.
Common Mistakes to Avoid
- Making the posts too tall: They can look awkward and invite climbing.
- Using hard, exposed rope or cable: Decorative elements should never create snagging or entanglement hazards.
- Skipping sanding: A splinter is a terrible surprise and an even worse room feature.
- Painting before dry-fitting: Always test the build first.
- Forgetting mattress support: A beautiful frame with bad support is still a bad bed.
- Treating the finished bed like sports equipment: It is furniture wearing a costume.
How to Keep a Wrestling Bed Safe Over Time
Check screws and joints every few months. Re-tighten hardware if anything loosens. Wipe down decorative rails and posts regularly. Touch up chips before the finish starts peeling. If you used decals, replace them once they curl or crack. If any decorative rope becomes loose, remove it or redo it safely instead of letting it hang around like a washed-up villain from an old storyline.
Also pay attention to the whole room, not just the bed. Secure tall dressers, shelves, and TVs. Keep the area around the bed uncluttered. If you added lights, keep cords organized and out of pathways. A themed room should be fun, but it should still behave like a room designed by a sane person.
Why This Project Works So Well
A wrestling bed works because it blends familiar furniture with a strong visual identity. It turns a basic bed into a focal point. It can be personalized without requiring luxury-level spending. And it gives a bedroom a story. That story can be playful, energetic, and memorable without sacrificing comfort.
The secret is balance. The strongest version of this project is not the loudest one. It is the one that looks exciting, sleeps comfortably, cleans easily, and stays solid over time. A well-built wrestling bed should feel like a custom piece you’re proud of, not a one-weekend gimmick that taps out by Tuesday.
Extra Experience and Lessons Learned From Building a Wrestling Bed
The most surprising part of making a wrestling bed is that the visual effect shows up much faster than most people expect. Once the frame is squared up and the corner posts go on, the whole thing suddenly makes sense. Before that moment, it can feel like you are just moving boards around and wondering why your bedroom looks like a hardware store had a minor emotional event. Then the posts go in, the colors go on, and the project finally starts cutting a promo.
Another lesson is that restraint makes the finished bed look better. It is tempting to add everything: ropes, logos, belts, lights, stickers, giant signs, faux turnbuckles, dramatic lettering, maybe a smoke machine if common sense has fully left the building. But the best wrestling beds usually look clean and deliberate. One or two signature details do more than ten competing ideas. A sharp paint scheme, sturdy corner posts, and a good headboard can carry the entire theme without making the room feel busy.
People also tend to underestimate how important paint and finish quality are. If the frame is sturdy but the finish looks rushed, the whole project loses its impact. Clean lines, even coats, and enough drying time make a huge difference. This is one of those projects where patience quietly becomes the real champion. Rushing the last ten percent can make the first ninety percent look like an opening act.
Comfort matters more than theme, too. That may sound obvious, but themed furniture sometimes gets so excited about its costume that it forgets its job. A wrestling bed still needs to be easy to get into, comfortable to sleep in, and pleasant to live with every day. The mattress support needs to be solid. The side details should not jab your arm at 2 a.m. The posts should not feel like they are waiting for you to misjudge a corner in the dark. If the bed looks amazing but sleeps terribly, the project has technically cut a promo and then lost in under three minutes.
Finally, the best experience comes from treating the project as room design, not just furniture assembly. A wrestling bed looks strongest when the rest of the room supports it. Matching bedding, a clean rug, a few framed graphics, and smart lighting can make the whole space feel intentional. That is usually the moment the project stops being “a DIY bed” and starts feeling like a real themed room. And that is the sweet payoff: not just building something unusual, but building something that feels personal, fun, and actually worth using long after the paint dries.
Conclusion
Making a wrestling bed is really about building a solid bed frame and giving it the personality of a wrestling ring without turning it into a piece of sports equipment. Start with structure, add corner-post drama, keep the details safe, and let the theme do the heavy lifting. When done right, a wrestling-ring-style bed can become the standout piece in a bedroom while still being practical, sturdy, and comfortable enough for everyday life.
In other words, build it like a craftsperson, decorate it like a fan, and use it like a bed. That is how you win the title.