Table of Contents >> Show >> Hide
- What Is Mochi Ice Cream, Exactly?
- Ingredients and Tools You’ll Need
- Step-by-Step: The Classic Microwave Mochi Ice Cream Method
- Flavor Ideas That Actually Taste Amazing
- Troubleshooting: Fix the Most Common Mochi Ice Cream Problems
- Storage and Serving Tips
- Mini FAQ
- Kitchen Notes: Real-World Mochi Ice Cream “Experience” (The Part Nobody Mentions)
- Conclusion
Mochi ice cream is what happens when chewy meets creamy and they decide to be best friends forever. It’s that
magical little dessert ball: a cold scoop of ice cream wrapped in a thin, soft, slightly sweet mochi “jacket.”
And yesmaking it at home is totally doable, even if your kitchen confidence level is currently “I once burned water.”
What Is Mochi Ice Cream, Exactly?
Traditional mochi is a Japanese rice cake known for its bouncy, pleasantly chewy texture. Mochi ice cream takes that
chew and gives it a frozen centerusually a small scoop of ice creamso you get a warm-and-fuzzy comfort dessert
experience… except it’s cold, and you’ll probably eat three before you realize what happened.
The key concept is simple: freeze the filling hard, then wrap it fast with mochi dough
that’s been cooked until it turns sticky and slightly translucent. Once you learn the rhythm, it’s basically a mini
assembly line of happiness.
Ingredients and Tools You’ll Need
Core Ingredients
- Ice cream: 1 pint (any flavor). Choose something you love plain, because mochi won’t fix bad ice cream.
- Sweet rice flour (glutinous rice flour): 1 cup (about 160g). Look for “Mochiko” or “sweet rice flour.”
- Granulated sugar: 1/3 cup (about 65g). Adjust slightly to taste.
- Water: 3/4 cup (180ml).
- Cornstarch or potato starch: for dusting (this is non-negotiable unless you enjoy wrestling sticky dough).
Optional Flavor Boosts (Pick One or Mix)
- Matcha powder: 1–2 teaspoons for green tea mochi
- Cocoa powder: 1–2 tablespoons for chocolate mochi
- Freeze-dried fruit powder: 2–3 tablespoons for berry mochi
- Vanilla extract: 1/2 teaspoon (subtle but nice)
- Food coloring: a drop or two, purely for vibes
Tools (Nothing Fancy Required)
- Small cookie scoop or tablespoon
- Rimmed baking sheet + parchment paper
- Microwave-safe bowl
- Whisk (for the beginning) + rubber spatula (for the sticky part)
- Plastic wrap (or a microwave-safe cover)
- Rolling pin (or a sturdy bottleno judgment)
- Round cookie cutter (optional, but makes your mochi look like it went to finishing school)
Step-by-Step: The Classic Microwave Mochi Ice Cream Method
This is the most home-cook-friendly approach: minimal equipment, quick cooking, and maximum “wait, I made that?” energy.
Expect about 30–45 minutes of hands-on time plus freezer time.
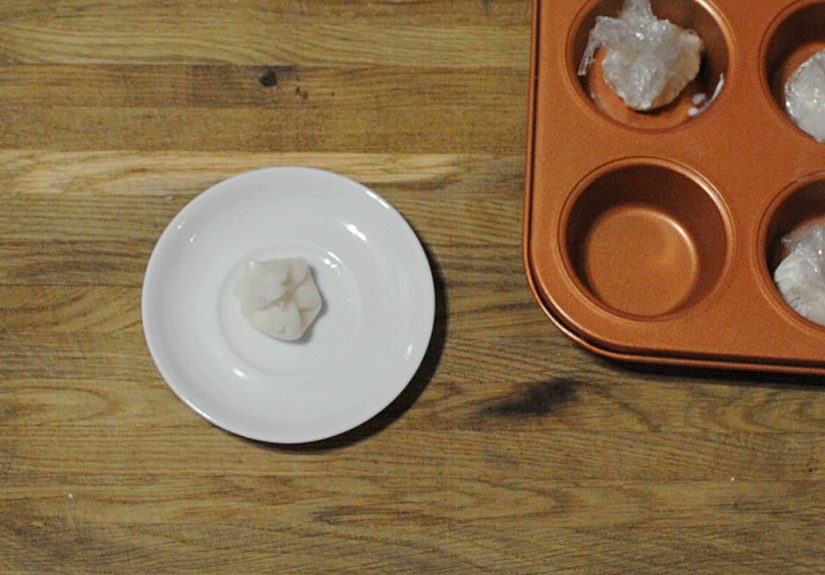
Step 1: Scoop and Freeze the Ice Cream
- Line a baking sheet with parchment paper.
-
Scoop 10–12 small balls of ice cream (about 1 tablespoon each). Smaller is easier to wrap and melts slower.
Place them on the baking sheet. -
Freeze until very firmat least 1 hour (longer is fine). If they’re not rock-solid, wrapping becomes a sticky
race you will not enjoy.
Step 2: Mix the Mochi Dough
- In a microwave-safe bowl, whisk together 1 cup sweet rice flour and 1/3 cup sugar.
- Add 3/4 cup water and whisk until smooth. (No lumps = no surprise chewy pebbles later.)
- If flavoring the mochi, whisk in matcha/cocoa/fruit powder now.
Step 3: Microwave Until Sticky and Slightly Translucent
- Cover the bowl with plastic wrap (leave a small vent) or a microwave-safe lid.
- Microwave on high for 1 minute.
- Stir well with a wet rubber spatula (wet helps prevent sticking), scraping the sides and bottom.
- Microwave another 1 minute, then stir again.
-
Microwave in 30-second bursts until the dough looks glossy, thick, and a bit translucent. Most kitchens land
around 2.5–4 minutes total, depending on the microwave.
Safety note: The dough will be hot. Not “a little warm,” but “hot enough to make you regret your life choices.”
Let it cool for 5–10 minutes so it’s workable.
Step 4: Roll Out the Mochi (Starch Is Your Best Friend)
- Dust a large sheet of parchment generously with cornstarch (or potato starch).
- Scrape the mochi dough onto the parchment.
- Dust the top heavily with more starch.
-
Roll into a rectangle about 1/8 inch thick. If it sticks, add more starch. If you think you added enough,
add a little more. Mochi is sneaky. - Chill the rolled dough in the fridge for 10–15 minutes. This helps it firm up slightly for cutting and wrapping.
Step 5: Cut and Wrap (The “Work Fast, Eat Later” Phase)
- Dust your hands with starch.
- Cut 10–12 circles (about 3–3.5 inches wide). A cookie cutter is great, but a cup rim works too.
-
Take 2–3 ice cream scoops out of the freezer at a time (keep the rest frozen). Place one scoop in the center
of a mochi circle. -
Quickly pull the edges up around the ice cream and pinch to seal. If it’s sticky, dust with more starch. If it’s cracking,
your mochi may be too coldwarm it in your hands for a few seconds. - Place seam-side down on parchment and return to the freezer immediately.
Step 6: Freeze to Set
Freeze the finished mochi ice cream for at least 2 hours. This helps the mochi “hug” the ice cream so it holds
its shape when you bite in.
Flavor Ideas That Actually Taste Amazing
Mochi ice cream is basically a flavor playground. You can flavor the ice cream, the mochi, or bothjust keep the dough additions
dry (powders) so the texture stays chewy.
Matcha Mochi + Vanilla Ice Cream
Add 1–2 teaspoons matcha powder to the flour/sugar before adding water. Wrap around vanilla or sweet cream ice cream for a classic
green-tea-shop vibe.
Chocolate Mochi + Strawberry Ice Cream
Whisk 1–2 tablespoons cocoa powder into the dry mix. Strawberry ice cream inside tastes like a fancy chocolate-dipped strawberry,
but in bite-size form.
Berry Mochi + Cheesecake Ice Cream
Crush freeze-dried strawberries or raspberries into a fine powder and add 2–3 tablespoons to the dough. Pair with cheesecake or
vanilla bean ice cream for a “dessert aisle power couple.”
Mango Sorbet + Plain Mochi
Use sorbet for a dairy-free option and keep the mochi plain. It’s bright, refreshing, and feels suspiciously like summer.
Troubleshooting: Fix the Most Common Mochi Ice Cream Problems
“My mochi dough is glue. I can’t handle it.”
- Use more starch: Dust everythingsurface, dough, hands, rolling pin.
- Cool the dough a bit more: Warm mochi is extra sticky.
- Cook thoroughly: Undercooked dough can be wet and overly sticky; it should look glossy and cohesive.
“The mochi tears or cracks while wrapping.”
- Roll slightly thicker: Aim for about 1/8 inch, not paper-thin.
- Don’t over-chill the dough: If it’s too cold, it can lose flexibility. Let it sit 1–2 minutes at room temp.
- Work in small batches: Keep the rest covered so it doesn’t dry out.
“My ice cream melts before I finish wrapping.”
- Freeze scoops longer: Harder is better.
- Smaller scoops: Big scoops melt faster and are harder to seal.
- Batch strategy: Only pull out a few scoops at a time.
- Cold tools help: Chill your baking sheet and even your scoop if your kitchen runs warm.
“The mochi turned tough and chewy (in a bad way).”
- Don’t overcook: Microwave just until translucent and thickthen stop.
- Measure flour correctly: Too much flour can make a stiff dough.
- Don’t store uncovered: Exposure to freezer air can dry the mochi and change the bite.
Storage and Serving Tips
- Store airtight: Keep mochi ice cream in a sealed container or freezer bag to prevent freezer burn.
- Separate with parchment: If stacking, add parchment between layers so they don’t stick together.
- Best texture window: Enjoy within 1–2 weeks for peak chew and flavor.
- Serve smart: Let it sit at room temp for 1–3 minutes before eating so the mochi softens slightly.
Mini FAQ
Is “glutinous rice flour” the same as “sweet rice flour”?
In most U.S. grocery and baking contexts, yesthey’re used interchangeably for mochi-style chew. What matters is that you’re using
flour made from sticky (glutinous) rice, not regular rice flour meant for breading or gluten-free baking blends.
Do I need a steamer?
Nope. Microwave mochi works beautifully at home and is one of the most popular approaches for a reason: it’s quick, consistent,
and doesn’t require special equipment.
Can I make mochi ice cream without cornstarch?
You need something to prevent sticking. Potato starch is a common alternative. In a pinch, extra sweet rice flour can work, but it
won’t feel as silky on the outside.
Kitchen Notes: Real-World Mochi Ice Cream “Experience” (The Part Nobody Mentions)
The first time you make mochi ice cream, you learn a valuable truth: mochi has a personality. It’s not meanjust clingy. It clings
to bowls, spatulas, rolling pins, and occasionally your confidence. But once you accept that starch is not an “optional garnish,”
the whole process becomes weirdly relaxing.
One of the most satisfying moments is watching the dough change in the microwave. At first, it looks like a boring beige batter.
Then it thickens, turns glossy, and suddenly you’re staring at a stretchy, shiny mass that feels like edible Play-Doh (in a good way).
That visual cueglossy and slightly translucentis your “stop” sign. Ignore it and keep microwaving, and the dough can
tighten up like it’s training for a marathon. Respect it and you’ll get that soft chew everyone loves.
The wrapping stage is where your kitchen rhythm matters more than perfect technique. Many people find it easiest to set up a “cold
station” and a “work station.” Cold station: freezer tray of ice cream scoops. Work station: rolled mochi, cutter, starch, and a
parchment-lined tray ready to receive finished mochi. Pull out two or three scoops, wrap quickly, return them to the freezer, repeat.
This tiny batch method keeps you from wrestling melting ice creamand also makes the process feel like a fun cooking show challenge,
minus the dramatic music and judges who say things like, “Your mochi lacked intention.”
Another surprise: mochi ice cream is a social dessert. If you’re making it with family or friends, it becomes a little production
linesomeone scoops, someone cuts, someone wraps, someone “samples” (a highly technical role). Kids usually love dusting starch and
pressing circles, and adults love pretending they’re only helping for the craftsmanship. If you bring a plate of homemade mochi ice
cream to a gathering, it has strong “how did you DO that?” energywhile you quietly know the answer is mostly “microwave + hustle.”
Flavor experimenting is also half the fun. You might start with vanilla and matcha because it feels classic, then get curious and try
cookies-and-cream inside strawberry-flavored mochi, or mango sorbet inside plain mochi for a bright, clean finish. And when a combo
doesn’t totally work (it happens), it’s rarely a disastermore like a “well, I invented a new dessert that I will politely not repeat.”
The best part is that even imperfect-looking mochi usually tastes great. The chew covers a multitude of sins.
Finally, there’s the first bite. The outside is cool and tender, then you hit the ice cream and it’s like a texture two-step: chewy,
creamy, chewy again. It’s the kind of dessert that makes you pause and think, “Oh. This is why people buy these.” And then you think,
“Wait. I made these.” And then, somehow, you think, “I should make a double batch next time,” which is exactly how mochi ice cream
becomes a recurring character in your freezer.
Conclusion
Homemade mochi ice cream is part recipe, part timing, and part accepting that you will use more cornstarch than you expected. Freeze
your scoops hard, cook the dough until glossy, work in small batches, and you’ll end up with chewy, creamy bites that feel
legitimately special. Once you nail the basics, the flavor possibilities are endlessso your freezer may never be lonely again.