Table of Contents >> Show >> Hide
- What a DIY Underwater Aquarium Filter Needs to Do
- Important Safety Rules Before You Build (Seriously, Read This)
- DIY Option A: Internal Underwater Aquarium Filter (Submersible Pump + Media Chamber)
- DIY Option B: Super-Budget Underwater Sponge Filter (Air-Driven)
- How to Start Your DIY Filter Without Hurting Fish
- Maintenance Schedule for a Homemade Aquarium Filter
- Troubleshooting Common DIY Filter Problems
- When DIY Is a Great Idea (and When It Isn’t)
- Final Thoughts
- DIY Filter Experiences and Lessons From Real-World Hobbyist Setups (500+ Words)
If you’ve ever looked at aquarium filters and thought, “That’s just a pump, some foam, and a suspicious amount of plastic markup,” you’re not wrong. A good fish tank filter is a simple idea: move water through media that traps debris, supports beneficial bacteria, and (optionally) polishes the water. The magic is in the design, not the price tag.
This guide shows you how to make your own underwater aquarium filter (an internal filter that sits inside the tank), plus a low-cost sponge-filter alternative. We’ll keep it beginner-friendly, fish-safe, and practicalbecause your fish deserve clean water, and your wallet deserves a break.
What a DIY Underwater Aquarium Filter Needs to Do
Before building anything, let’s talk function. A homemade filter still needs to do the same job as a store-bought one: provide mechanical filtration, biological filtration, and optional chemical filtration.
1) Mechanical filtration (the “gross stuff catcher”)
This stage traps visible debris: uneaten food, fish waste, plant bits, and floating particles. Think sponge, foam, or filter floss. If you skip this stage, the rest of your filter media clogs quickly and becomes less effective.
2) Biological filtration (the real MVP)
This is where beneficial nitrifying bacteria live. These bacteria help convert toxic ammonia (from fish waste and decaying food) into nitrite, then nitrate. A healthy biofilter is what keeps an aquarium stable instead of turning it into a tiny glass disaster.
3) Chemical filtration (optional, not mandatory)
Activated carbon or specialty resins can remove discoloration, odors, and some dissolved impurities. Useful? Yes. Essential for every tank? No. Many aquariums do great with mechanical + biological filtration and regular water changes.
How much flow do you need?
As a beginner-friendly rule, aim for a filter setup that turns over the tank’s volume roughly 3 to 5 times per hour. Example: a 20-gallon tank usually does well with a pump/filter flow in the 60–100 GPH range (adjusted for media resistance and fish comfort). Gentle community fish prefer softer current, while some species enjoy stronger flow.
Important Safety Rules Before You Build (Seriously, Read This)
You’re mixing water and electricity. Let’s not be dramaticbut let’s also not be reckless.
- Use a GFCI outlet (or a portable GFCI device) for aquarium equipment.
- Create a drip loop on every power cord so water can’t run into the outlet.
- Use aquarium-safe materials only: inert plastic, aquarium sponge/foam, ceramic bio media, filter floss.
- Avoid metal parts inside the tank (many metals corrode or leach harmful compounds).
- Never wash filter media with soap. Rinse in removed tank water.
- Choose a submersible pump rated for aquarium use and match it to your tank size.
If you’re building an air-driven sponge filter instead of a powerhead filter, add a check valve if the air pump sits lower than the top of the tank. That prevents water from back-siphoning during a power outage.
DIY Option A: Internal Underwater Aquarium Filter (Submersible Pump + Media Chamber)
This is the main build: a compact homemade internal aquarium filter that stays underwater and uses a small submersible pump or powerhead to pull water through filter media.
What You’ll Need
- 1 small submersible aquarium pump/powerhead (appropriate GPH for your tank)
- 1 plastic media container (fish-safe):
- small food-safe plastic box, or
- a sturdy plastic bottle/container (no soap residue, no fragrance)
- Aquarium sponge/foam (coarse and/or medium)
- Filter floss (optional, for polishing)
- Biological media (ceramic rings, bio balls, porous stones, or established sponge pieces)
- Activated carbon (optional, in a media bag)
- Suction cups or a mounting bracket (depending on pump style)
- Zip ties or aquarium-safe clips
- Scissors / craft knife (used carefully)
- Fine sandpaper (optional, to smooth cut plastic edges)
Design Idea (Simple and Effective)
The easiest internal filter design is a media box + pump layout:
- Water enters through intake holes/slits in the container.
- It passes through mechanical media first (sponge/foam/floss).
- Then through biological media (ceramic rings, porous bio media).
- Then into the pump chamber and back into the aquarium.
This order helps keep your bio media from clogging too fast. Cleaner water reaching the bio media means better water flow and better oxygen delivery for beneficial bacteria.
Step-by-Step Build Instructions
Step 1: Prepare the container
Choose a plastic container that fits discreetly in your tank and leaves enough room for fish movement. Cut or drill intake holes along the sides and lower portion of the container. Keep holes smaller than your smallest fish/shrimp (or cover the intake side with sponge).
Pro tip: If you keep shrimp fry or tiny fish, use sponge over every intake area. Their curiosity is powerful and deeply inconvenient.
Step 2: Create separate media zones
You don’t need a fancy cartridge system. Just stack media in layers:
- First layer (intake side): coarse sponge (catches big debris)
- Second layer: finer sponge or filter floss (polishes water)
- Third layer: biological media in a mesh bag or loose chamber
- Optional fourth layer: activated carbon (only if you want chemical filtration)
If you use carbon, place it after mechanical media so it doesn’t get clogged with gunk immediately.
Step 3: Position the pump
Place the submersible pump so it pulls water after it has moved through the media (not before). In other words, you want the pump drawing filtered water, not dirty water. This improves performance and reduces debris buildup in the pump impeller.
Mount the pump securely using suction cups or clips. Make sure the output nozzle is angled to create surface movement (for gas exchange) without blasting your fish across the tank like confetti.
Step 4: Test fit outside the tank (dry run)
Before submerging, check:
- No sharp plastic edges
- Media stays in place
- Pump cord has enough slack for a proper drip loop
- Container is stable and won’t tip
Step 5: Install and prime
Place the filter in the aquarium and fully submerge it. Most submersible pumps self-prime once submerged, but confirm your pump’s instructions. Plug it in only after the pump is underwater (if required by the manufacturer).
You should see steady flow within seconds. If the flow is weak, the media may be packed too tightly, the intake may be blocked, or the pump may be undersized.
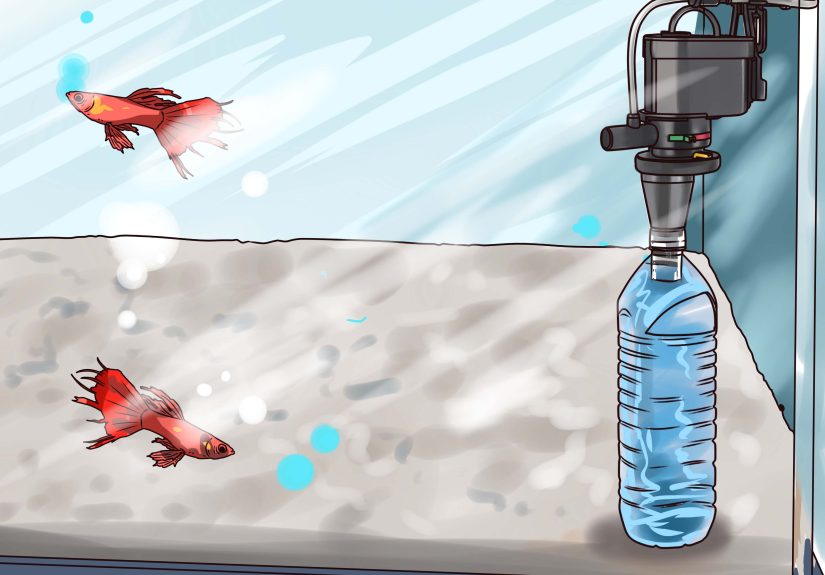
DIY Option B: Super-Budget Underwater Sponge Filter (Air-Driven)
If your goal is low cost, low stress, and high reliability, an air-driven sponge filter is hard to beat. The sponge sits underwater, an air pump pushes bubbles up an uplift tube, and that rising air draws water through the sponge. It’s simple, safe, and excellent for fry, shrimp tanks, quarantine tanks, and gentle-flow setups.
Basic parts
- Sponge filter body (or DIY sponge + tube assembly)
- Air pump (outside tank)
- Airline tubing
- Check valve (if pump is below waterline/top of tank)
- Optional control valve to reduce airflow
Sponge filters are mostly mechanical + biological filtration. Chemical media is usually not part of the setup, which is totally fine for many tanks.
How to Start Your DIY Filter Without Hurting Fish
A homemade filter can move water on day one, but the biological filtration takes time to establish. That means your DIY build is not “fully ready” just because it’s bubbling or humming.
Best practices for startup
- Seed the filter with established media (used sponge, bio rings, or gravel from a healthy tank) if possible.
- Stock lightly at first if doing a fish-in cycle.
- Test ammonia and nitrite frequently during the first weeks.
- Do partial water changes as needed if ammonia/nitrite rise.
- Don’t overfeed new tanksuneaten food becomes ammonia.
Depending on your method and tank conditions, cycling can take several weeks. In many beginner home setups, expect something in the 4–8 week range before the biofilter becomes consistently stable.
Maintenance Schedule for a Homemade Aquarium Filter
DIY filters are not “set and forget” (neither are store-bought filters, despite what the packaging implies). The good news: maintenance is simple.
Weekly
- Check flow rate and surface agitation
- Inspect intake sponge for clogging
- Look for trapped debris around the pump
- Test water (especially in newer tanks)
Every 2–4 weeks (or as needed)
- Rinse mechanical sponge/floss in old tank water
- Replace or rinse filter floss if heavily clogged
- Replace activated carbon (if using it and you want it active)
Monthly-ish
- Inspect pump impeller for slime/debris buildup
- Clean pump housing gently (no soap)
- Check suction cups and cable positioning
Important: Don’t deep-clean everything at once. If you vacuum the substrate aggressively and scrub all filter media on the same day, you can remove too much beneficial bacteria and destabilize the tank.
Troubleshooting Common DIY Filter Problems
Problem: Weak flow
- Mechanical media is clogged
- Pump is too small for the media load
- Intake holes are blocked by algae/debris
- Media packed too tightly
Problem: Water is clear, but ammonia/nitrite is present
That means your mechanical filtration is working, but your biological filtration is not fully established or has been disrupted. Test more often, reduce feeding, and protect your bio media from over-cleaning.
Problem: Fish are struggling in strong current
- Aim the outlet at the glass
- Use a spray bar or diffuser attachment
- Reduce pump flow if adjustable
- Add sponge prefilter to soften intake and flow
Problem: Cloudy water after cleaning
Usually normal if you stirred debris. It should settle or filter out. If it persists, increase mechanical filtration and check feeding habits. If it looks milky and tests show ammonia/nitrite changes, it may be a bacterial bloom in a cycling tank.
When DIY Is a Great Idea (and When It Isn’t)
DIY is great for:
- Small to medium freshwater tanks
- Shrimp tanks and fry grow-out tanks
- Quarantine or hospital tanks
- Budget-conscious hobbyists
- People who enjoy customizing media and flow
DIY may not be ideal for:
- Heavy bioload tanks with large messy fish
- Advanced reef systems needing specialized filtration
- Anyone who wants zero tinkering (aquariums respectfully decline that lifestyle)
Final Thoughts
Making your own underwater aquarium filter is absolutely doable, and in many cases it works beautifully. The key is not fancy partsit’s understanding filtration basics: trap debris first, protect and feed beneficial bacteria, maintain steady flow, and keep everything safe around electricity.
If you build with those principles in mind, your DIY filter can be quiet, effective, inexpensive, and surprisingly durable. And once you see crystal-clear water coming from something you built yourself, you’ll get that classic aquarium hobby feeling: “I should probably start another tank.”
DIY Filter Experiences and Lessons From Real-World Hobbyist Setups (500+ Words)
One of the most common experiences people have when building a homemade underwater aquarium filter is realizing that flow on paper is not the same as flow in the tank. A pump might be rated at 100 GPH, but once you add sponge, floss, a small media chamber, and a slightly awkward intake path, actual flow drops. New builders often think something is broken, when in reality the filter is just doing what filters do: losing flow as water is forced through media. The lesson here is simplechoose a pump with a little headroom and use adjustable flow if possible.
Another frequent experience is the “I cleaned it too well” moment. Beginners are often so proud of their DIY filter that they scrub every part until it looks brand-new. Then a few days later, the tank parameters wobble, fish act stressed, and everyone wonders why. The hidden issue is usually the biological media. The filter may look cleaner, but too much beneficial bacteria was removed at once. Many hobbyists learn quickly that aquarium-clean and kitchen-clean are very different standards. In aquarium maintenance, “gently dirty” is often healthier than spotless.
People also discover that media order matters more than expected. A common first attempt is to stuff a container with whatever fits: carbon, ceramic rings, floss, and sponge all mixed together. It works for a while, but maintenance becomes frustrating because the fine media clogs early and blocks water from reaching the bio media efficiently. After rearranging to coarse sponge first, finer polishing media second, and bio media later in the flow path, performance usually improves immediately. This is one of those hobby lessons that feels obvious only after you’ve accidentally built the aquatic equivalent of a traffic jam.
Shrimp keepers and nano-tank owners often report the best results with sponge-heavy designs. Their experience is that gentle flow and stable biological filtration outperform “high-tech” power in small tanks. A DIY sponge prefilter on an internal pump can dramatically improve safety for baby shrimp and keep the impeller cleaner. Many hobbyists start by trying to make a tiny canister-like system inside the tank, then simplify over time into a more forgiving sponge-and-bio-media setup that is easier to clean and less likely to trap fry.
There’s also a strong pattern around noise troubleshooting. When a DIY filter buzzes, rattles, or hums, the pump is not always the problem. Sometimes the plastic housing resonates against glass, suction cups harden, or the outlet splashes too much at the surface. Hobbyists often solve this by adjusting the angle, adding a bit of sponge as a buffer, or slightly changing the waterline. In other words, “loud filter” can be more of a mounting issue than a motor issue.
Finally, experienced aquarists often say the biggest benefit of building your own filter is not just saving moneyit’s learning how your aquarium actually works. Once you’ve built and maintained a DIY unit, you start thinking in terms of flow paths, oxygenation, bioload, clogging points, and maintenance intervals. That knowledge makes every future tank easier, whether you keep using homemade filters or switch back to commercial ones. A DIY filter turns aquarium care from “replace cartridge and hope” into a more confident, informed system. And honestly, that confidence is worth a lotespecially at 10 p.m. when your tank suddenly sounds different and you’re the only one in the room who knows why.