Table of Contents >> Show >> Hide
- What Does It Mean to Mirror a Hard Drive in Windows?
- Before You Start: What You Need
- How to Mirror a Hard Drive in Windows: 10 Easy Steps
- Step 1: Decide Whether You Need Mirroring or Cloning
- Step 2: Back Up Your Important Data First
- Step 3: Connect the Second Drive to Your PC
- Step 4: Confirm Both Drives Are Healthy
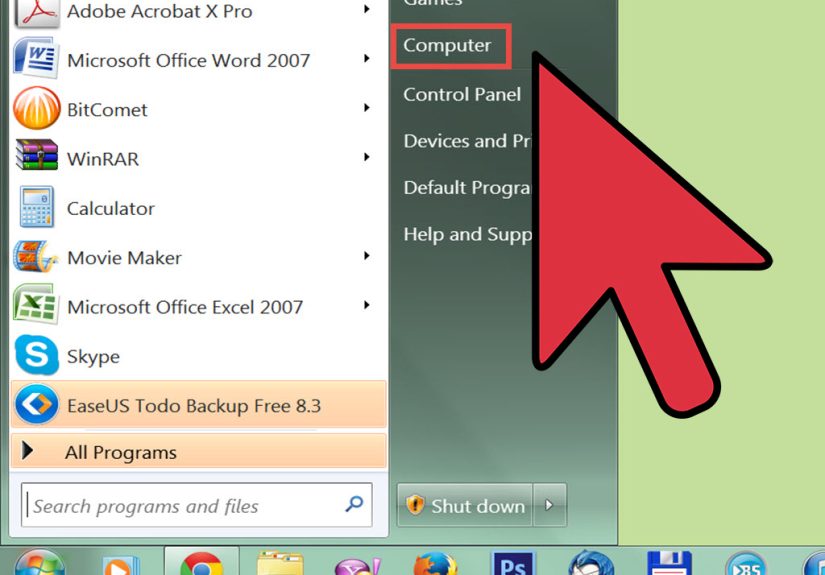
- Step 5: Open Storage Spaces
- Step 6: Select the Drives You Want to Use
- Step 7: Create the Storage Pool
- Step 8: Choose “Two-Way Mirror” as the Resiliency Type
- Step 9: Format and Finish the Setup
- Step 10: Test the Mirror and Monitor It
- What If You Want to Mirror the Windows Boot Drive?
- Common Mistakes to Avoid
- Final Thoughts
- Real-World Experiences: What Mirroring a Hard Drive in Windows Actually Feels Like
- SEO Tags
If your hard drive suddenly decides it has had enough of this whole “working” thing, a mirrored drive can save your bacon. In Windows, drive mirroring lets you keep the same data on two drives at once, so if one fails, the other still has your files. Think of it as giving your data a loyal stunt double. It is not glamorous, but when disaster strikes, it feels very glamorous.
That said, many people use the word mirror when they really mean clone. Those are not the same job. A mirrored setup keeps two drives in sync over time. A clone is usually a one-time copy, often used when replacing an old drive with a new SSD. If you came here to protect everyday files from a drive failure, mirroring is your friend. If you want to move Windows to a new drive, cloning is probably the better tool.
This guide walks through the easiest built-in Windows method for mirroring a hard drive: Storage Spaces with a two-way mirror. It is approachable, practical, and far less intimidating than it sounds. Then, because real life loves complications, I will also explain what to do if your actual goal is to mirror or replace your Windows boot drive.
What Does It Mean to Mirror a Hard Drive in Windows?
A mirrored drive setup writes the same data to two drives at the same time. In Windows terms, this is similar to RAID 1 or a two-way mirror. The payoff is redundancy. If one drive fails, your files still exist on the other drive. The catch is capacity: if you use two 1TB drives in a two-way mirror, you usually get about 1TB of usable space, not 2TB. Your second drive is busy being the backup dancer, not extra seating.
Mirroring is great for:
- Protecting personal files, photos, and project folders
- Keeping a small home office file library safer
- Reducing downtime after a single-drive failure
- People who want built-in Windows storage redundancy without buying a dedicated NAS
Mirroring is not great for everything. It does not replace a full backup strategy, it does not protect you from accidental deletion, and it does not magically shield you from ransomware, file corruption, or “I renamed the wrong folder and now everything is weird.” For that, you still want a separate backup.
Before You Start: What You Need
Before you click anything, make sure you have the following:
- Two physical drives connected to your Windows PC
- Enough matching or near-matching capacity on both drives
- A backup of anything important already stored on those drives
- Administrator access on your Windows PC
For the smoothest experience, use two drives of the same size and similar speed. Mixing a fast SSD with a sluggish old hard drive is possible in some situations, but it is like pairing a sprinter with someone wearing flip-flops. The setup may work, but it will not be elegant.
How to Mirror a Hard Drive in Windows: 10 Easy Steps
Step 1: Decide Whether You Need Mirroring or Cloning
This is the step people skip, and then they spend their afternoon arguing with Disk Management. If you want ongoing protection for files, choose mirroring. If you want to replace your current drive with a new one, choose cloning. This article focuses on mirroring with Storage Spaces, which is the easiest built-in Windows route for most users.
Step 2: Back Up Your Important Data First
Yes, even though mirroring is about protection. Especially because mirroring is about protection. During setup, Windows may need to prepare or reformat selected drives. If those drives contain important files, move that data elsewhere first. An external drive or cloud backup works fine. Trust me, “I thought it would be fine” is the national anthem of preventable tech problems.
Step 3: Connect the Second Drive to Your PC
If your PC has room for an additional internal drive, install it properly and make sure the cables are secure. If you are testing or building a small setup, a supported secondary drive connection can also work, but internal drives are usually best for reliability and performance. Once connected, boot into Windows and confirm the drive appears in Disk Management or File Explorer.
Step 4: Confirm Both Drives Are Healthy
Before building a mirror, check that both drives are in good shape. Open Disk Management and look for drives that are online and detected correctly. If you are using a brand-new disk, initialize it if Windows prompts you to do so. If a drive is already showing odd behavior, slow performance, or connection dropouts, do not recruit it into your redundancy plan. A flaky mirror partner is not a partner. It is a liability.
Step 5: Open Storage Spaces
In Windows search, type Storage Spaces and open it from Control Panel. Then click Create a new pool and storage space. This is where Windows lets you group physical drives into a storage pool and create a resilient virtual drive on top of them.
Storage Spaces is often the easiest built-in method because it is more approachable than older dynamic disk tools. It is also better suited to users who want a reliable mirrored data volume without diving into advanced disk commands.
Step 6: Select the Drives You Want to Use
Windows will show eligible drives that can be added to the new storage pool. Choose the two drives you want for the mirror. Double-check the selection before continuing. This matters because the drives you add to the pool may be prepared for the new storage setup. If you accidentally choose the wrong disk, your bad day can become a learning experience you did not ask for.
Step 7: Create the Storage Pool
After selecting your drives, click Create pool. Windows will build the storage pool using the physical disks you chose. Think of the pool as the foundation. You are not finished yet; now you need to create the actual mirrored storage space that lives on top of that pool.
Step 8: Choose “Two-Way Mirror” as the Resiliency Type
Now give the new storage space a name, assign a drive letter, and pick a file system. The most important setting here is Resiliency type. Choose Two-way mirror. This tells Windows to keep two copies of your data across the drives in the pool.
For many home users, a two-way mirror is the sweet spot. It protects against one drive failure and is far simpler than more advanced storage layouts. Keep in mind that usable capacity is reduced because your data is being duplicated. In other words, safety costs space. Just like parking closer to the entrance, but for hard drives.
Step 9: Format and Finish the Setup
Once you confirm the settings, Windows creates the mirrored volume and formats it for use. After the process completes, the new mirrored drive should appear in File Explorer like a normal drive. From there, you can start saving files to it, moving folders over, or using it as protected storage for work documents, family photos, and other files that would ruin your week if they vanished.
A practical example: if you create a mirrored storage space named DataVault and assign it drive letter M:, Windows will present it as one volume even though two physical drives are working behind the scenes.
Step 10: Test the Mirror and Monitor It
Do not stop at “it exists.” Copy several folders to the mirrored drive. Open files from it. Restart your PC. Go back into Storage Spaces and confirm the pool and storage space show a healthy status. Monitoring matters because the whole point of mirroring is to know when one drive has a problem before both of them decide to become decorative objects.
Make it a habit to check the health of your mirrored space once in a while, especially if your PC starts acting strangely or you hear unusual drive noises. If one drive fails, Windows should alert you, and you can replace the failed disk and repair the mirror.
What If You Want to Mirror the Windows Boot Drive?
Here is where things get spicy. If your real goal is to create a live mirrored copy of the drive that contains Windows itself, that is more advanced than setting up a mirrored data drive. Older Windows methods involving dynamic disks and mirrored volumes exist, but they are not the first choice for most home users because boot-drive mirroring can get complicated fast.
For most people, the better solution is to clone the boot drive when upgrading from an HDD to an SSD or moving to a larger drive. Cloning creates a bootable copy of the current drive, including Windows, apps, and settings. It is usually a one-time migration, not a permanent mirrored arrangement.
If you want to replace your system drive, the smarter workflow usually looks like this:
- Connect the new SSD or hard drive
- Use trusted cloning software or a vendor utility
- Copy the source disk to the destination disk
- Shut down the PC
- Swap the old drive for the new one internally
- Boot from the new drive and verify everything works
This approach is usually easier than trying to maintain a continuously mirrored Windows boot drive on a typical consumer PC. It is also the route many hardware vendors and Windows-focused tech guides recommend when the goal is migration rather than redundancy.
Common Mistakes to Avoid
Confusing a Mirror with a Backup
A mirrored drive helps with hardware failure, but it does not protect you from deleting a file on purpose, by accident, or in a moment of overconfidence. Delete it on one side, and the deletion gets mirrored too.
Using Mismatched Drives Without Planning
If you pair different capacities, your usable size may be limited by the smaller drive. If you pair drastically different speeds, performance may feel underwhelming.
Skipping Drive Health Checks
A mirror is only as trustworthy as the disks involved. If one drive is already unreliable, do not build your safety plan on top of it.
Trying to Mirror the Wrong Volume
If you need everyday file redundancy, use Storage Spaces. If you are replacing your C: drive, think cloning. Matching the method to the goal makes everything easier.
Final Thoughts
If you want a safer place for important files in Windows, mirroring a hard drive is one of the most practical upgrades you can make. A two-way mirror gives you redundancy without requiring enterprise hardware, a server closet, or a certification in dramatic cable management. With two good drives and the built-in Storage Spaces feature, most users can create a mirrored setup in a single sitting.
Just remember the golden rule: mirroring protects availability, while backups protect history. Use both, and your future self will be much less likely to yell at your current self.
Real-World Experiences: What Mirroring a Hard Drive in Windows Actually Feels Like
The funny thing about drive mirroring is that most people start caring about it right after a storage scare. Maybe Windows froze while opening family photos. Maybe an old hard drive started clicking like it was trying to communicate with ghosts. Maybe a work folder took forever to load, and suddenly the phrase “I should probably back this up” stopped being a suggestion and became a lifestyle. That is often how the mirroring journey begins: not with excitement, but with a mild panic and a browser full of tabs.
One of the most common experiences is initial confusion. You search for how to mirror a hard drive in Windows, and within five minutes you run into terms like RAID 1, Storage Spaces, dynamic disks, cloning, imaging, boot volumes, and resiliency. It feels like you asked how to change a light bulb and got handed a college textbook. The good news is that once you realize your actual goal, the process gets simpler. If you just want a safer place for files, Storage Spaces makes sense. If you want to move Windows to a new SSD, cloning makes sense. Half the battle is decoding the vocabulary.
Another very normal experience is underestimating how long “getting ready” takes. The actual creation of a mirrored space is not usually the hardest part. The real time sink is checking your cables, identifying the correct drives, moving existing files, and triple-checking that you are not about to erase the disk that still contains your tax records, vacation photos, or that novel you swear you are almost ready to finish. In storage projects, preparation is the main event wearing a fake mustache.
Then comes the oddly satisfying part: once the mirror is built, Windows shows it as one clean volume, and everything suddenly feels calmer. You copy files over, open them, and realize the setup is not flashy at all. That is the beauty of it. A good storage system is boring in the best possible way. It just works quietly in the background while you move on with your life.
People also learn an important emotional lesson the first time a mirrored setup warns them about a failed drive. The first alert can be alarming, but it is also proof the system is doing exactly what it should. Instead of total catastrophe, you get a manageable task: replace a drive, repair the mirror, and keep going. That difference is huge. It turns a disaster into maintenance.
In the end, the experience of mirroring a hard drive in Windows is less about fancy technology and more about peace of mind. You stop treating your files like they are living on borrowed time. And honestly, that feeling alone is worth a lot.