Table of Contents >> Show >> Hide
- Why a Hole Saw Deserves More Respect Than It Usually Gets
- What a Proper Hole Saw Video Should Cover Before the Tool Ever Starts
- What Good Tutorials Emphasize About Risk
- How to Tell Whether a Hole Saw Video Is Actually Worth Watching
- When a Hole Saw Job Should Probably Go to a Pro
- What Beginners Usually Get Wrong
- Hands-On Lessons and Real-World Experiences From Hole Saw Projects
- Final Thoughts
Some DIY videos make using a hole saw look like a five-second magic trick: line it up, squeeze the trigger, collect compliments, and move on with your life. Real life is usually less cinematic. In real projects, hole saws can bind, overheat, chip delicate surfaces, yank a drill off line, or turn a clean opening into a ragged little disaster with commitment issues. That is why a truly useful hole saw video should do more than show a fast cut. It should teach viewers what the tool is, why it can be risky, how to recognize safe setup, and when the smartest move is to stop and bring in a professional.
This article takes that safety-first approach. Instead of walking viewers through operational instructions, it explains what a proper hole saw video should cover before anyone even thinks about drilling. That includes material matching, tool limitations, heat management, personal protection, common mistakes, and the warning signs that separate a confident project from an expensive repair. If your audience is searching for “how to properly use a hole saw video,” chances are they do not just want action. They want reassurance, clarity, and a lot fewer reasons to patch drywall later.
Why a Hole Saw Deserves More Respect Than It Usually Gets
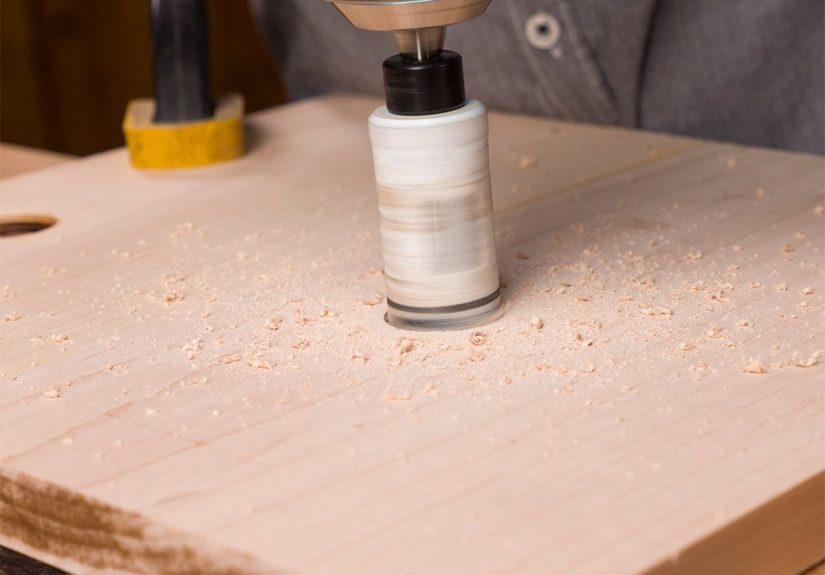
A hole saw is not just another drill bit with a fancy shape. It is a cylindrical cutter that removes a circular plug of material, often with a pilot bit and arbor attached. That setup sounds simple, but it creates several risks that good tutorials should never gloss over. The saw can catch. The workpiece can shift. The accessory can get hot enough to surprise anyone who assumes metal only becomes spicy in action movies.
A responsible video should explain that the biggest problems usually happen when people rush, choose the wrong accessory for the material, or assume that all surfaces behave like soft pine. Wood, plastic, sheet metal, tile, masonry-like products, and finished surfaces all react differently. A hole that is easy in one material can be a chip-prone nightmare in another. The audience needs to hear that before any sparks, dust, or dramatic thumbnail face enters the scene.
Good content also makes one thing very clear: “works on my scrap board” is not the same as “safe for a finished cabinet, shower wall, steel door, or live utility zone.” That distinction saves projects, money, and a surprising amount of emotional stability.
What a Proper Hole Saw Video Should Cover Before the Tool Ever Starts
1. The Right Cutter for the Right Material
A trustworthy video should begin with material compatibility, not with dramatic drilling footage. Viewers need to understand that different hole saw types are designed for different surfaces. Bi-metal options are commonly associated with general-purpose work such as wood, plastic, and some metal applications. Carbide-tipped options are often marketed for tougher or mixed materials. Diamond-grit options are typically associated with tile, glass, and stone-type surfaces where chipping and heat are major concerns.
That matters because many ruined projects start with the sentence, “I figured this one was close enough.” Close enough is great for pizza delivery. It is terrible for cutting openings in finished materials.
2. Tool Condition Matters More Than Internet Confidence
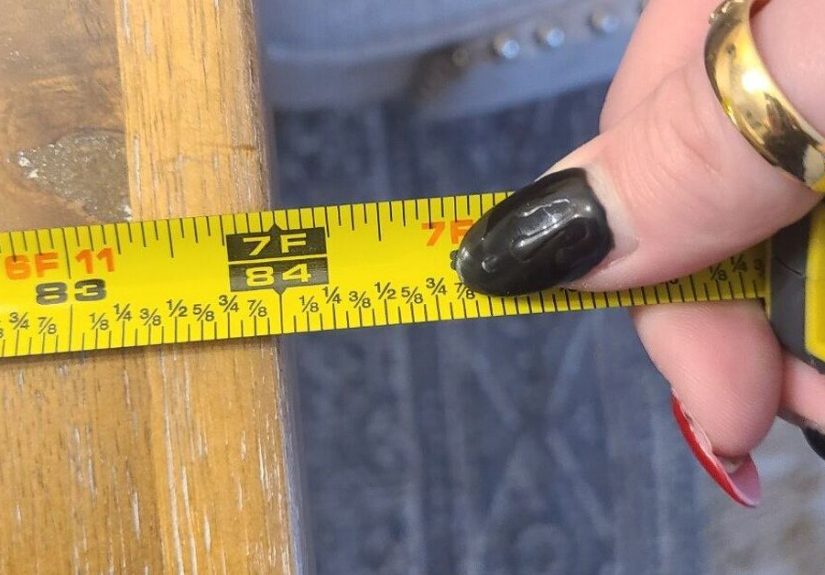
A proper video should remind viewers to check the condition of the hole saw, pilot bit, arbor, and drill before a project begins. Damaged teeth, wobble, poor fit, or a worn pilot bit can turn a clean opening into a wandering cut. If a tutorial never mentions tool inspection, it is giving viewers entertainment, not real guidance.
This is also where a quality presenter should point out the importance of following the drill and accessory manufacturer’s instructions. Different tools have different capacity limits, and those limits are not decorative suggestions. They exist because overload, stall, and kickback are all very real possibilities.
3. The Work Area Needs a Safety Check
Any credible hole saw video should spend time on the boring stuff, because the boring stuff prevents exciting accidents. That means eye protection, secure clothing, tied-back hair, stable footing, and a firmly secured workpiece. It also means thinking about what is behind the surface being cut. Hidden wires, plumbing, finished surfaces, insulation, and structural elements do not care whether the viewer watched twelve tutorial clips in a row.
If the planned opening is near electrical or plumbing lines, inside a wall, over finished flooring, on a ladder, or above shoulder height, the safest message is simple: slow down, reassess, and consider professional help.
What Good Tutorials Emphasize About Risk
Heat Is Not a Small Issue
One of the most overlooked realities in tool videos is heat buildup. A hole saw can become extremely hot, especially in tougher materials. A responsible video should warn viewers that friction, poor material matching, dull teeth, or extended cutting can shorten accessory life and increase risk. In some material categories, cooling methods or lubricants are part of manufacturer guidance. The point is not for a video to make everyone fearless. The point is to make everyone aware.
If a video treats heat as an afterthought, that is a red flag. So is any presenter who grabs the accessory right after cutting like they are starring in a superhero origin story.
Binding and Snagging Can Escalate Fast
Another big issue is binding. When a hole saw catches, it can twist the drill, yank hands off balance, scar the material, or stall the motor. Good videos explain this risk plainly and show viewers that control matters more than brute force. They also make it clear that if the tool starts acting unpredictably, the answer is not “lean harder and hope.” The answer is to stop, inspect, and rethink the setup.
Finished Surfaces Need Extra Caution
Tile, laminate, painted trim, veneered panels, and finished cabinet parts are less forgiving than rough framing lumber. A useful hole saw video should tell viewers that a finished surface can crack, splinter, or chip in an instant, and that product-specific instructions matter. If the material is expensive, visible, or hard to replace, that alone may justify handing the task to someone with specialized experience.
How to Tell Whether a Hole Saw Video Is Actually Worth Watching
Not all tutorials deserve your trust. Some are basically action montages with a sponsor code. A good video, by contrast, usually has a few clear signs of credibility.
It Shows Safety Gear Without Turning It Into a Costume
The presenter should look prepared, not reckless. Eye protection, appropriate clothing, and a controlled work area are signs that the creator respects the tool and the audience. That is a much better vibe than “I did this one-handed for the algorithm.”
It Names the Material Clearly
Reliable videos explain what they are cutting and why that matters. Wood is not tile. Plastic is not stainless steel. A tutorial that pretends one setup applies equally to everything is leaving out the part that ruins projects.
It Mentions Limits and Trade-Offs
Strong tutorials talk about what can go wrong. They mention heat, blowout, wandering, accessory wear, and cleanup. They also acknowledge when another tool or a professional installer may be the better choice. Honest limitations are a mark of useful content, not weakness.
It Avoids Viral “Hack” Energy
If the video seems more excited about speed than control, skip it. If it relies on mystery shortcuts, skip it faster. A reliable tutorial does not need stunt energy. It needs clarity, restraint, and enough realism to save viewers from copying a mistake with confidence.
When a Hole Saw Job Should Probably Go to a Pro
There is no shame in outsourcing the risky stuff. In fact, that is often the most professional decision a homeowner can make. Some jobs are simply less forgiving, especially when the material is costly or hidden systems are nearby.
- Cutting into tile, stone, or glass in a finished bathroom or kitchen
- Working near electrical wiring, plumbing, or gas lines
- Creating openings in exterior doors, metal doors, or finished entry hardware areas
- Making overhead cuts, ladder-based cuts, or awkward-position cuts
- Working on cabinetry, countertops, or other expensive visible surfaces
- Any project where the manufacturer requires specialized accessories, cooling methods, or exact procedures you are not trained to perform
A smart article and a smart video should both say the same thing here: the cost of hiring help is often lower than the cost of replacing broken tile, damaged trim, burned-out accessories, or a trip to urgent care that begins with, “So, I was following a really confident guy on the internet…”
What Beginners Usually Get Wrong
Beginners often believe the biggest challenge is making a circle. It is not. The real challenge is controlling variables. Many people underestimate the importance of workpiece stability, accessory condition, surface fragility, hidden obstacles, and heat. Others focus only on the visible cut and forget about everything around it: the finish, the backside, the supporting surface, the cleanup, and the possibility that the hole is in the wrong place by just enough to ruin the final fit.
Another common mistake is trusting a video that cuts away every inconvenient part. If a tutorial never addresses setup, dust, pauses, heat, or tool checks, it is probably editing out the very lessons a beginner most needs. Fast footage can be inspiring. It can also be a beautifully lit lie.
Hands-On Lessons and Real-World Experiences From Hole Saw Projects
People remember hole saw jobs because they tend to fall into two categories: “that went surprisingly well” and “that became a story I now tell with my teeth clenched.” In many real-world accounts, the difference is not talent. It is patience. The smooth jobs usually start with someone measuring carefully, double-checking the material, protecting the surface, and respecting the limits of the tool. The messy jobs usually begin with optimism and end with creative vocabulary.
One of the most common experiences involves finished wood or cabinetry. Someone sees a tutorial, assumes the process is quick, and only later realizes that a visible surface is less forgiving than a scrap board. The opening may technically be round, but the surrounding finish is scuffed, splintered, or chipped just enough to attract the eye forever. It becomes the kind of flaw that visitors never notice and the homeowner notices every single day.
Tile jobs create a different kind of stress. On camera, the cut may look controlled and clean. Off camera, people often discover that a hard, glossy, brittle surface leaves almost no room for improvisation. Even a small chip in the wrong place can turn a proud weekend project into a search for matching replacement tile that was discontinued three years ago, because of course it was. That is why experienced installers tend to sound calm but cautious. They know the margin for error is tiny, and the finish is usually the boss.
Metal projects bring another lesson: the tool may still be working while the operator is already losing the plot. Heat, vibration, and noise can build gradually, and that makes some users push harder instead of stepping back. In experience-based discussions, that is often the turning point. The drill starts to feel wrong, the setup gets less controlled, and the project shifts from careful work to a wrestling match. The smartest people in those stories are not the ones who “powered through.” They are the ones who stopped early, reset, and decided the project needed a better setup or a more experienced hand.
Another recurring theme is hole placement. Plenty of people learn the hard way that a clean hole in the wrong spot is still the wrong hole. It might miss the fitting by half an inch, land too close to an edge, interfere with trim, or expose more of the opening than planned. In other words, the tool can perform perfectly while the project still goes sideways. That is why the most seasoned DIYers talk so much about layout, marking, and thinking through the final installation before any cutting happens.
There are also success stories, and they all sound suspiciously responsible. The best results usually come from people who take time to understand the material, read the product guidance, watch more than one tutorial, and test their approach in a low-risk situation when possible. They protect the finish, organize the workspace, keep expectations realistic, and know when a contractor or specialist is worth every penny. Not flashy. Not viral. Just effective.
That may be the biggest lesson related to the topic “How to Properly Use a Hole Saw Video.” The most helpful video is not the one that makes the process look easy. It is the one that makes the risks visible, the decisions clearer, and the viewer less likely to confuse confidence with competence. That kind of video does not just earn clicks. It earns trust.
Final Thoughts
If your audience is searching for a hole saw video, they probably want more than a fast demonstration. They want to know what safe, competent work actually looks like. A strong article should help them recognize reliable instruction, understand material-specific risks, and appreciate why setup and judgment matter so much. The best tutorials are not reckless. They are calm, specific, and honest about limitations.
That is the angle worth publishing. Not “watch this spinny cylinder conquer all materials in twelve seconds,” but “here is how to tell whether a tutorial is safe, realistic, and worth trusting.” In the world of power tools, that is not boring. That is valuable.