Table of Contents >> Show >> Hide
- What Is the Highlight Cap Method?
- Before You Start: Safety and Prep
- Step-by-Step: How to Pull Hair Through a Highlight Cap
- Mixing and Applying the Lightener
- Rinsing, Toning, and Aftercare
- Common Mistakes to Avoid with a Highlight Cap
- Cap Highlights vs. Other Highlighting Techniques
- Real-World Experiences and Extra Tips for Using a Highlight Cap
- Final Thoughts: You Can Totally Do This (With a Plan)
If you’ve ever stared at your roots in the mirror and thought, “I could probably do this myself,” welcome to the club. Cap highlights are one of the most beginner-friendly ways to add brightness and dimension at homeespecially if you’re nervous about foil placement or freehand balayage. The key move in this whole process? Learning how to pull hair through a highlight cap properly so your color looks intentional, not like you lost a bet.
In this guide, we’ll walk through how to use a highlight cap step by step, what to watch out for, and how to avoid crispy, uneven “oops” blonde. We’ll also share real-world experiences and pro-style tips at the end so you can plan your DIY highlight session with confidence.
What Is the Highlight Cap Method?
The highlight cap methodsometimes called the “cap technique”uses a plastic cap covered in tiny perforated holes and a small hook (it looks a lot like a crochet hook) to pull strands of hair through. The hair that sticks out of the cap gets lightener applied; the hair underneath stays untouched, giving you a patterned highlight look.
This method is especially popular for:
- Fine to medium hair that’s shoulder length or shorter.
- People who want evenly spaced highlights without complicated foil placement.
- Those who want to control how dense or subtle their highlights are by choosing how many holes they pull through.
It’s not ideal for very long, very thick, or super curly hair, because pulling large amounts of hair through a cap can be uncomfortable and uneven. For those hair types, foils or balayage at a salon usually give better results.
Before You Start: Safety and Prep
Check Your Hair and Scalp
Before you even think about mixing bleach, do a quick health check on your hair and scalp:
- No open cuts, burns, or irritation. If your scalp feels sore, flaky, sunburned, or broken, postpone your highlight project.
- Be cautious with previously damaged hair. If your hair is already dry, stretchy, or breaking, bleaching will make it worse. Get a trim or conditioning treatments first.
- Do a patch test for allergy. Mix a tiny bit of the product and test it on your skin 48 hours before using it on your scalp. If you feel burning, itching, or see a rash, don’t use that product.
Gather Your Tools
Here’s what you’ll want within arm’s reach before you start pulling hair through the cap:
- A highlighting kit with cap and hook (often includes developer and lightener).
- Gloves (at least one pair; two pairs is even better).
- Tail comb for clean parting.
- Hair clips to keep things organized as you work.
- Old towel or color cape to protect your clothes.
- Petroleum jelly to protect your hairline and ears.
- Plastic bowl and brush for mixing and applying lightener (if not already included).
- Timer or phone alarmbleach + vibes is not a substitute for timing.
- Mirror (and a handheld or second mirror if you’re attempting the back of your head).
Prep Your Hair the Right Way
For most people, the best canvas for cap highlights is hair that hasn’t been washed for 24–48 hours. A little natural oil helps protect the scalp from irritation. Brush out any tangles and part your hair the way you usually wear it; this will influence where your highlights land.
Make sure your hair is completely dry. Wet hair + highlight cap = uneven pull-through and inconsistent lifting.
Step-by-Step: How to Pull Hair Through a Highlight Cap
Step 1: Put on the Cap Correctly
This is where a lot of DIY attempts go wrong. Take your time here.
- Comb your hair straight down and part it how you usually wear it (center, side part, etc.).
- Place the cap over your head, aligning any markings with your natural part if the cap has guidelines.
- Pull the cap snug so it’s sitting flat and smoothno bubbles or sagging.
- Tie or secure the strap under your chin so it doesn’t move around while you’re working.
The goal: the cap should feel snug but not painfully tight. If it shifts while you pull hair through, your pattern will become uneven.
Step 2: Choose Your Highlight Pattern
Highlight caps often have rows of holes and sometimes different zones marked for “light,” “medium,” or “heavy” highlighting. Think about your end goal:
- Soft, natural glow: Use every second or third hole, focusing mostly around the face and crown.
- Brighter, more noticeable highlights: Use most of the holes in the front and crown, fewer in the back.
- All-over dimension: Use nearly every hole across the head for a more global highlighted look.
If this is your first time, err on the side of fewer holes. You can always add more highlights next time; removing too many at once is not really an option.
Step 3: Start Pulling Hair Through the Cap
Now for the main event. This is where the hook comes in.
- Hold the hook correctly. Grip it like a pen, with the hook curve facing the direction you plan to pull the hair.
- Insert the hook at a slight angle. Slide it gently through a hole so the tip sits just underneath the cap, close to your scalp but not scraping it.
- Catch a small strand of hair. Scoop a thin sectionthink about the thickness of a toothpick or matchstick. Big chunks can turn into fat, stripey highlights.
- Pull the strand through slowly. Draw the hair out through the hole in one smooth motion. If it snags or feels painful, back up and try again.
- Check the size. The hair you pulled through should be thin and even. If it’s too thick, you can gently push some back through with the hook.
Work in a logical pattern: for example, start at the front hairline and move backward in rows. This helps you get even spacing and avoid random clusters or bald-looking patches.
Pro tip: Be extra gentle around the hairline. Short baby hairs are easy to over-pull and can look harsh if they’re too light compared with the rest of your hair.
Step 4: Evaluate Your Sections
Once you’ve pulled hair through all the holes you plan to use, pause and check your work:
- Look straight into the mirror and then tilt your head side to side.
- Check if both sides have roughly the same amount of hair pulled through.
- Use a handheld mirror or take a quick photo of the back of your head to see if it looks balanced.
If any area looks too dense, you can gently push a few strands back under the cap. If an area looks too bare, add a few more pieces by pulling through nearby holes.
Mixing and Applying the Lightener
Step 5: Mix According to Instructions (Don’t Freestyle)
Next, mix the lightener and developer exactly as the kit directions describe. At-home kits are formulated so the ratios are safe and effective as long as you follow them.
General guidelines many colorists recommend for at-home highlighting:
- Use the lowest volume developer that will still lift your hair to the desired shade.
- If you’re naturally light blonde to light brown, lower developer (like 10 or 20 volume in many kits) is usually plenty to brighten a couple of levels.
- Very dark or previously dyed hair can be tricky and more prone to brassinessthis is where a professional consultation is a smart idea.
Stir until you get a smooth, creamy consistencyno lumps. It should be thick enough to stay where you put it but not so thick that it’s hard to spread.
Step 6: Apply Lightener Only to the Pulled-Through Strands
With your gloves on, use your tint brush to apply lightener to the hair sticking out of the cap.
- Saturate each strand fully from root (just outside the cap) to tip.
- Use a gentle, patting motion so you don’t push product under the cap onto hair that’s meant to stay natural.
- Make sure there are no dry spots; uneven saturation = uneven color.
Work efficiently but not chaotically. Start where you want the brightest resultusually around the facebecause those strands will process longer and end up lighter.
Step 7: Time It (and Don’t Guess)
Once you’ve finished applying the lightener, start your timer according to the instructions in your kit. Typical processing times can range from about 20 to 45 minutes, depending on your starting color and desired level of lift.
About halfway through, scrape a little product off one test strand and check the color. If it’s still too dark or too warm, reapply the lightener on that strand and let it continue processingwithout going beyond the maximum time listed in the instructions.
Never “wing it” on timing with bleach. Over-processing is how you end up with mushy, fragile hair that snaps when you comb it.
Rinsing, Toning, and Aftercare
Step 8: Rinse with the Cap Still On
Most cap highlight instructions tell you to rinse with the cap still on. This helps remove the bulk of the lightener from the highlighted strands while keeping the rest of your hair protected.
- Lean your head back into the sink or shower.
- Rinse with lukewarm (not hot) water until it runs mostly clear.
- Gently squeeze the highlighted strands to help wash out the product.
Once you’ve rinsed thoroughly, carefully peel the cap off from back to front. This may feel a little tuggy, but it shouldn’t be painful.
Step 9: Shampoo, Condition, and Tone if Needed
After the cap is off, shampoo your hair to remove any remaining lightener. Many kits come with a post-color shampoo or conditioneruse it if provided.
If your highlights look a bit too yellow or brassy, you can:
- Use a purple shampoo to neutralize yellow tones.
- Apply a toner (following the exact instructions for timing and mixing).
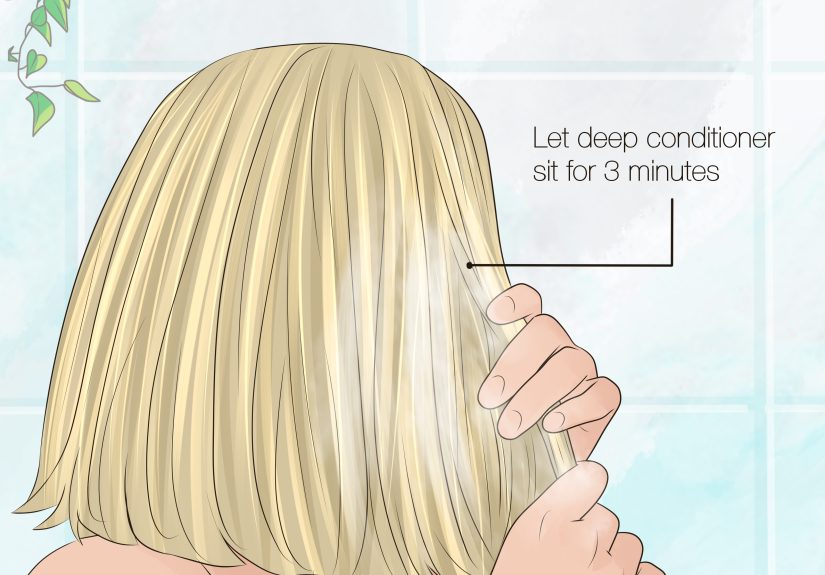
Follow up with a deep conditioner or hair mask to restore moisture. Bleach raises the cuticle layer of the hair, so anything you can do to smooth and hydrate afterward is a win.
Step 10: Maintain Your Newly Highlighted Hair
To help your cap highlights look salon-fresh for longer:
- Switch to a color-safe, sulfate-free shampoo and conditioner.
- Dial down the heat on your styling tools and use a heat protectant.
- Avoid washing your hair daily2–3 times a week is often enough.
- Wear a hat or use UV protection when spending lots of time in the sun.
Good aftercare protects the investment you just made in your hairand helps prevent that dry, fried look that gives DIY color a bad reputation.
Common Mistakes to Avoid with a Highlight Cap
- Pulling huge chunks of hair through each hole. This leads to thick, chunky stripes rather than soft, blended highlights.
- Not securing the cap tightly. If it shifts, your pattern can look random and patchy.
- Using very strong developer unnecessarily. Higher volume developers lift faster but are harsher; they increase the risk of damage and banding.
- Leaving the lightener on “until it looks right.” Always respect the maximum processing time.
- Highlighting very dark or black box-dyed hair at home. This often turns orange or uneven and is safer in professional hands.
Cap Highlights vs. Other Highlighting Techniques
Wondering if the highlight cap method is really right for you? Here’s a quick comparison:
Cap Highlights
- Great for even, all-over highlights and “classic” looks.
- Good for short to medium-length hair.
- More structured and consistentless room for “creative chaos.”
- Can be tricky or uncomfortable on very long or curly hair.
Foil Highlights
- Allow more precision and custom placement.
- Better for layered, long, or thick hair.
- Can create more contrast, like bold money pieces or high-contrast color.
- Usually best done by a professional unless you’re very experienced.
Balayage and Babylights
- Balayage is painted on by hand for soft, grown-in, sun-kissed ends.
- Babylights are super fine, delicate highlights that mimic natural childhood brightness.
- Both tend to require more technique and are typically salon services, though there are some at-home kits.
If you want a budget-friendly, structured, and relatively beginner-friendly option, the highlight cap method is still a classic for a reason.
Real-World Experiences and Extra Tips for Using a Highlight Cap
Even though cap highlights are beginner-friendly, they can still be… an adventure. Here are experience-based insights and scenarios that can help you avoid common frustrations.
Expect the First Time to Be Slower (and a Little Awkward)
If you’re doing this for the first time, it might take you much longer than the tutorial on the box suggests. Don’t panicthis is normal. Pulling hair through a cap is a repetitive, detailed task, and you’re working at odd angles, especially around the back of your head.
Many people find that:
- The front and sides go quicklythey’re easy to see and reach.
- The back of the head is slow and confusingusing a second mirror or filming yourself and checking the footage can help.
- By the time they finish, they’re already thinking, “Next time I’ll start in the back so I’m not exhausted by the time I get there.”
Recruit a Friend If Possible
There’s a reason many salon highlight services involve two people working at once. If you can convince a friend, sibling, or partner to help, the whole process becomes less stressful.
Your helper can:
- Pull hair through the back rows while you manage the front.
- Check for any missed spots or uneven density.
- Monitor timing and help rinse properly.
Bonus: you’ll both have a funny story and possibly a shared addiction to DIY hair color videos.
Don’t YankGentle Tension Is Everything
One of the biggest complaints people have the first time is that pulling hair through the cap can feel tuggy or uncomfortable. Often, this is because:
- They’re grabbing too much hair with each hook.
- The cap isn’t sitting flat and tight, so hair is catching under folds.
- They’re pulling too fast or straight out instead of using a small, rolling motion.
The solution: take smaller sections and pull more slowly. If a strand really doesn’t want to come through, release it and choose another. No highlight is worth giving yourself a sore scalp.
Overthinking the Pattern? Focus on the Front First
When you’re staring at a sea of tiny holes, it’s easy to overthink every decision. A good rule of thumb:
- Spend more time planning the front and crownthat’s what you (and everyone else) see most.
- In the back, aim for a soft, blended look rather than perfection. A little randomness actually looks natural.
If you’re nervous, try this pattern for a first-timer:
- Use every other hole around the hairline and part.
- Use every third hole in the midline and back.
- Skip one or two rows at the very nape if your hair is very dense.
Plan for Brass and Have a Backup
Even with perfect technique, you may get some warmthespecially if your starting color is darker than a light brown. It doesn’t mean you “failed”; it just means your hair pigment is doing what hair pigment does.
To handle this gracefully:
- Have a purple shampoo on hand for cool blonde results.
- If your highlights are very warm but not too light, you can embrace a more golden or honey blonde look instead of chasing icy tones right away.
- If you end up with uneven or very orange pieces, give your hair some recovery time, then consider a professional toner or corrective service rather than immediately bleaching again at home.
Give Your Hair a Recovery Routine
After cap highlights, many people notice that their hair feels a bit rougher or drier, especially at the ends. That’s normallightening always causes some structural change. What matters is what you do next:
- Use a bond-building or repairing mask once a week.
- Switch to gentle, color-safe products for daily care.
- Ease up on heat styling for a couple of weeks, or at least turn the temperature down and always use heat protectant.
With a bit of pampering, your hair can bounce back and your highlights will look shinier and more polished.
Final Thoughts: You Can Totally Do This (With a Plan)
Pulling hair through a highlight cap looks intimidating at firstthere’s a plastic cap, a tiny hook, and bleach involved. But once you break it down into steps, it’s a logical, repeatable process. Prep your hair and scalp, secure the cap properly, pull fine, even sections, follow the mixing and timing instructions, and treat your hair kindly afterward.
The reward is a brighter, more dimensional look without a salon bill, plus the very specific satisfaction of saying, “Yes, I did my own highlights and they actually turned out good.” With a calm approach, realistic expectations, and the tips above, your DIY cap highlights can look polishednot panicked.