Table of Contents >> Show >> Hide
- Before You Start: Know What “Remove” Really Means
- Quick Way #1: Delete a Single Comment from the Review Tab
- Quick Way #2: Right-Click the Comment or Use the Three-Dot Menu
- Quick Way #3: Delete All Comments in the Document at Once
- Quick Way #4: Use Document Inspector for a Final Cleanup
- What About Track Changes?
- Common Mistakes to Avoid
- Which Method Should You Choose?
- Final Thoughts
- Extra Experience and Practical Lessons from Real-World Word Cleanup
- SEO Tags
If you have ever opened a Microsoft Word document and felt personally attacked by a wall of comment bubbles in the margin, welcome to the club. Comments are helpful when you are collaborating, editing, proofreading, or politely telling a coworker that paragraph three “needs a little love.” But once the review is done, those comments can become digital clutter. Worse, if you send the file without cleaning it up, your draft may leave home wearing yesterday’s pajamas.
The good news is that removing comments in Microsoft Word is usually quick and painless. The slightly less fun news is that Word gives you several similar-looking options, and not all of them do the same thing. Hiding comments is not the same as deleting them. Resolving a thread is not the same as removing it. And “No Markup” can make you feel safe right up until you email a document and discover that Word had other plans.
In this guide, you will learn four quick ways to remove comments in Microsoft Word, when to use each method, and how to avoid the classic “I thought they were gone” mistake. We will also cover what to do if your document has comments and tracked changes, because those two features love showing up together like an overenthusiastic buddy cop duo.
Before You Start: Know What “Remove” Really Means
Before you start clicking buttons like you are defusing a bomb, it helps to know the difference between Word’s comment-related actions:
- Delete removes the comment from the document.
- Delete thread removes the full conversation, including replies.
- Resolve marks a comment as handled, but it does not truly delete it.
- Hide comments only changes what you see on screen.
- No Markup hides markup and comments visually, but it does not erase them from the file.
That last point matters a lot. If your goal is to prepare a polished file for a client, teacher, boss, publisher, or anyone whose opinion affects your blood pressure, you want the comments actually removed, not merely tucked behind a curtain.
A smart move is to save a copy of the document before removing anything. That way, you keep the feedback version for reference and create a clean version for sharing. Future you will appreciate this. Future you is surprisingly dramatic when a comment disappears forever.
Quick Way #1: Delete a Single Comment from the Review Tab
This is the classic method and the best option when you want to review comments one by one. It is tidy, intentional, and great for documents where some feedback has been handled but other comments still need attention.
How to do it
- Open your Word document.
- Click the comment you want to remove.
- Go to the Review tab.
- In the Comments section, click Delete.
That removes the selected comment. If you are working through a long document, you can use Previous and Next in the same Review area to move from one comment to another without hunting through the page like a confused detective.
Why this method works well
This is the best choice when:
- You want to keep some comments but remove others.
- You are cleaning up after a review round in stages.
- You want to confirm each note has been addressed before deleting it.
Think of this method as the “surgical” option. It is slower than bulk deletion, but it helps prevent accidental cleanup disasters.
Example
Say your editor left 18 comments in a blog draft. You fixed 12 of them, but six still require follow-up. Instead of deleting everything in one sweep, you can remove only the completed comments and leave the rest in place. Cleaner document, less chaos, zero guesswork.
Quick Way #2: Right-Click the Comment or Use the Three-Dot Menu
If you prefer speed and fewer trips to the ribbon, this method is your new best friend. In many Word versions, you can remove comments directly from the comment itself. In modern comment layouts, you may see a three-dot menu for more actions, including delete or resolve.
How to do it
- Select or hover over the comment.
- Right-click the comment, or click the three-dot menu.
- Choose Delete Comment or Delete Thread.
Depending on your version of Word, the wording may vary slightly. If the comment includes replies, Word may use Delete Thread instead of just Delete Comment. Same general idea: goodbye, comment conversation.
When this method is best
- You want the fastest way to delete one comment.
- You are already working in the margin and do not want to bounce back to the ribbon.
- You are using modern comments and need thread-specific controls.
This option feels quicker because your cursor stays close to the problem. No extra navigation. No wandering eyes. No clicking the wrong tab because Word suddenly decided to be “helpful.”
Delete vs. Resolve
Be careful here: the menu often includes Resolve as well as Delete. Resolving can be useful if you want to mark a conversation as finished while keeping a record. But if your goal is a clean final document, resolve is not enough by itself. Resolved comments may disappear from the main margin view, yet still remain in the file.
Quick Way #3: Delete All Comments in the Document at Once
If the review round is over and you are ready to wipe the slate clean, this is the fastest and most satisfying method. It is also the one that feels a little too powerful, like being handed the big red button in a control room.
How to do it
- Open the document.
- Go to the Review tab.
- Click the arrow under Delete.
- Select Delete All Comments in Document.
That removes every comment in one move. On Windows, Word also supports a keyboard path for deleting all comments: Alt + R, D, O. If you love shortcuts, this one is handy. If you press it accidentally, maybe inhale first and then check whether Undo is still available.
When to use it
- The document is fully approved.
- You are sending a final version to someone outside the review team.
- You do not need to keep comment history inside that copy of the file.
A smart habit: save a separate final copy
Instead of deleting all comments in your only version, create a duplicate file first. Name it something obvious, like:
- Project-Proposal-Reviewed.docx
- Project-Proposal-Final.docx
This small step can save you a giant headache later. Comments are useful when a question comes back and someone says, “Why did we cut that section again?” It is nice to have the answer waiting in the reviewed version instead of floating away into the digital afterlife.
Quick Way #4: Use Document Inspector for a Final Cleanup
If you want the most thorough option, use Document Inspector. This tool does more than remove comments. It helps find hidden data and personal information in a Word file before you share it. That can include comments, revisions, document properties, and other behind-the-scenes extras.
In other words, this is the “make sure nothing embarrassing survives” method.
How to do it
- Open the document.
- Click File.
- Select Info.
- Choose Check for Issues.
- Click Inspect Document.
- Run the inspection.
- Find the section for comments, revisions, or related hidden content.
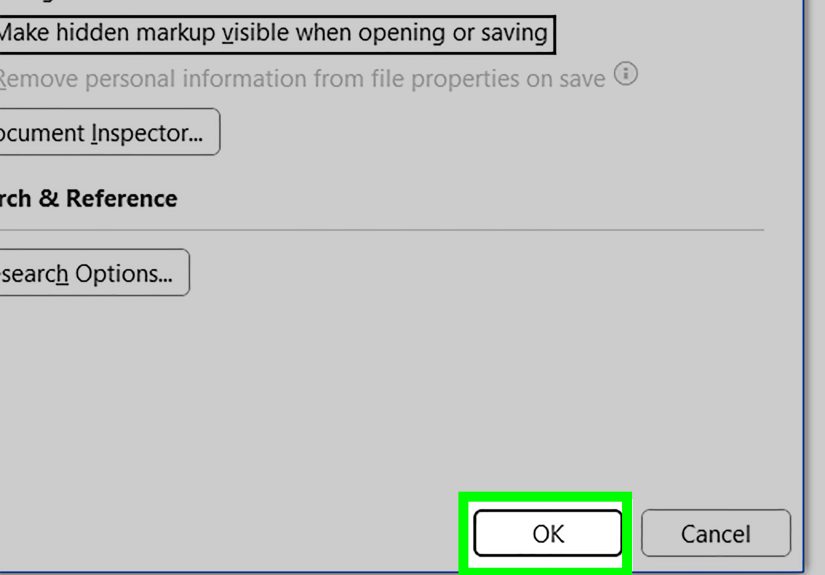
- Click Remove All.
Why Document Inspector is so useful
Document Inspector is great when you are publishing, submitting, or sharing a file professionally. It acts like a last-minute spot check before the document leaves your hands. Even if you already deleted comments manually, Inspector can help confirm there is nothing else hanging around in the background.
This is especially useful if the document passed through multiple reviewers, versions, or devices. Word files can accumulate little bits of history like a backpack full of receipts, mystery cables, and one pen that never works.
Best use cases
- Client deliverables
- School papers and dissertations
- Legal, HR, or internal business documents
- Articles or reports headed for publication
What About Track Changes?
This is where many people get tripped up. A document can have comments and tracked changes at the same time. Deleting comments does not remove tracked edits. And switching the display to No Markup only hides those edits temporarily.
If your file still contains tracked insertions, deletions, or formatting changes, you need to handle those separately. Go to the Review tab and Accept or Reject the changes. For a fully clean copy, many users do all of the following:
- Accept or reject tracked changes.
- Delete all comments.
- Turn Track Changes off.
- Save the file.
- Run Document Inspector for a final check.
That is the safer workflow when the document is headed out the door.
Common Mistakes to Avoid
1. Confusing “Resolve” with “Delete”
Resolve is great for collaboration. Delete is what you want for final cleanup.
2. Using “No Markup” and assuming you are done
No Markup changes the view, not necessarily the file contents. It is a disguise, not a cleanup crew.
3. Deleting comments before saving a review copy
Once they are gone, your handy discussion trail may vanish too. Save a separate reviewed version first.
4. Forgetting about replies
In threaded comments, deleting one comment may not always behave exactly the way you expect. If you want the whole conversation gone, use the thread deletion option.
5. Ignoring Document Inspector
If the file is sensitive, public, or important, Inspector is worth the extra 30 seconds.
Which Method Should You Choose?
Here is the simple version:
- Use the Review tab delete button when you want control and precision.
- Use right-click or the three-dot menu when you want speed for single comments or threads.
- Use Delete All Comments in Document when the review process is done.
- Use Document Inspector when you want a thorough final scrub before sharing.
If you are in a hurry, the delete-all option is the fastest. If you are in a professional setting where accuracy matters, the best combo is usually delete comments + review tracked changes + run Document Inspector.
Final Thoughts
Learning how to remove comments in Microsoft Word is one of those small skills that pays off far more than it should. It keeps documents cleaner, protects your privacy, and helps you look like the organized person you absolutely are, even if your Downloads folder tells a different story.
The best part is that Word gives you multiple ways to get the job done. Whether you want to delete a single comment, wipe out every note in one click, or do a full pre-sharing inspection, there is a method that fits your workflow.
So the next time a document looks like it hosted a neighborhood debate in the margins, do not panic. Open the Review tab, choose your favorite cleanup method, and send that file into the world looking sharp, polished, and gloriously comment-free.
Extra Experience and Practical Lessons from Real-World Word Cleanup
One of the most common real-life experiences with Word comments happens right before a deadline. You finish a report, proposal, school paper, or article, give it one last glance, see a clean page, and think, “Perfect.” Then someone opens the same file and suddenly the margins light up like a holiday parade. What happened? Usually, the file was set to a view that hid markup instead of removing it. That moment has taught countless Word users the same lesson: never trust a document just because it looks clean on your screen.
Another common experience comes from team collaboration. A manager leaves comments. Then a coworker replies to those comments. Then someone resolves a thread. Then another person adds new tracked changes. At this point, the document is less “final draft” and more “group chat wearing a blazer.” In these cases, deleting one note at a time can actually be the better choice because it forces you to review what has been addressed and what still needs a decision.
Writers and editors often learn the hard way that comments are not just decoration. They can carry context, reasoning, and editorial decisions that matter later. That is why experienced users often keep two files: one reviewed version with every comment and tracked change preserved, and one clean version for publishing or sharing. This habit sounds simple, but it can save hours of backtracking when somebody asks why a sentence changed or who requested a cut.
Students also run into trouble here. A professor, tutor, or classmate may review a paper in Word, and the student fixes the paper but forgets to remove the comments before submitting the final version. The result can be awkward, especially if those comments include blunt editing notes like “unclear,” “needs evidence,” or the devastatingly polite “consider rewriting entire section.” Running Document Inspector before submission is one of the easiest ways to avoid that situation.
In office settings, the biggest lesson is that comments and tracked changes are separate cleanup jobs. People often remove comments and assume they are done, only to discover that insertions, deletions, and formatting edits are still embedded in the document. Seasoned Word users eventually build a final-check routine: accept or reject changes, delete comments, turn off Track Changes, save a fresh copy, and inspect the file before sending. It is not glamorous, but neither is explaining to a client why they can see your internal debate about whether a paragraph was “too salesy.”
The most useful experience-based tip of all is this: when the document matters, do not rush the cleanup. Open the file again after saving. Check the Review tab. Make sure comments are truly gone. If the file is important, run Document Inspector. That extra minute can spare you embarrassment, confusion, or a long email chain that begins with “Quick question…” and immediately ruins your afternoon.