Table of Contents >> Show >> Hide
- Before You Start: What You Need
- How to Set Up a Soundboard: 14 Steps
- Step 1: Learn the Signal Flow Before You Plug Anything In
- Step 2: Choose a Smart Mixer Location
- Step 3: Turn Everything Down First
- Step 4: Place Your Main Speakers Correctly
- Step 5: Connect the Main Outputs to the PA
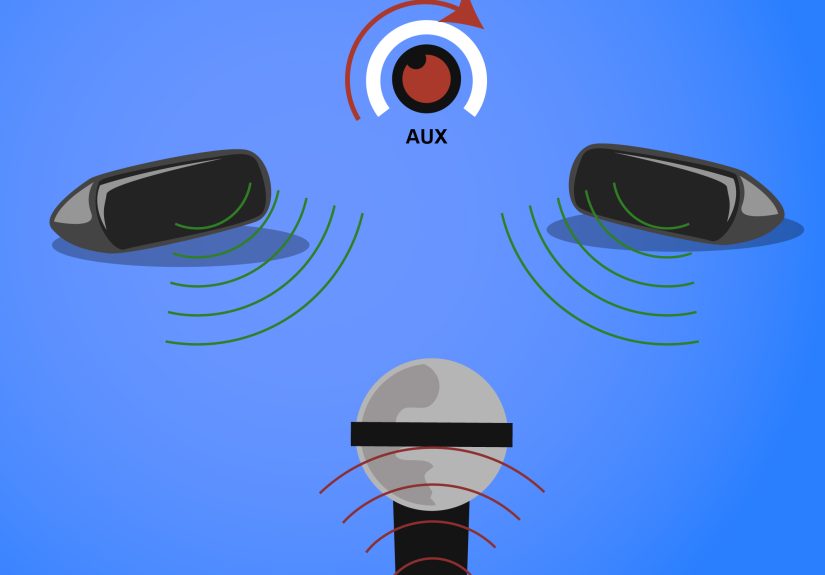
- Step 6: Connect Stage Monitors Through Aux Sends
- Step 7: Patch In Microphones, Instruments, and Playback Devices
- Step 8: Turn On Phantom Power Only When Needed
- Step 9: Power Up in the Right Order
- Step 10: Set Proper Gain on Every Channel
- Step 11: Build the Front-of-House Mix with Faders
- Step 12: Create Clear Monitor Mixes
- Step 13: Use EQ, High-Pass Filters, and Effects Wisely
- Step 14: Ring Out the System and Do a Real Soundcheck
- Common Soundboard Setup Mistakes to Avoid
- Final Thoughts
- Real-World Experiences: What Setting Up a Soundboard Actually Feels Like
- SEO Tags
Setting up a soundboard sounds intimidating until you realize it is really just organized problem-solving with knobs. Lots of knobs. Some friendly, some suspicious, and at least one that seems determined to create feedback at the worst possible moment. The good news is that learning how to set up a soundboard is absolutely doable, whether you are running audio for a small band, a church event, a school performance, a wedding, or a community hall full of people who all say, “Can you turn me up?” at the exact same time.
A soundboard, also called a mixer or mixing console, is the control center of a sound system. It takes in microphones, instruments, and playback sources, then sends those signals to main speakers, stage monitors, recording devices, and effects. If you set it up correctly, your mix sounds clear, balanced, and professional. If you rush it, your reward may be hum, distortion, dead channels, or a squeal dramatic enough to wake the ancestors.
This guide walks through 14 practical steps to set up a soundboard the right way. It is written for beginners, but it is grounded in real live-sound practice, so even intermediate users can tighten up their workflow. We will cover signal flow, gain staging, monitor mixes, EQ, effects, and soundcheck habits that make a huge difference in real rooms.
Before You Start: What You Need
Before touching a single fader, make sure you have the essentials: the mixer, powered speakers or passive speakers with amps, stage monitors if needed, microphones, DI boxes for instruments when appropriate, XLR and instrument cables, power cables, and a playback device for walk-in music or test audio. If your mixer is digital, it also helps to have the manual, your saved scenes, and a backup plan for network or tablet control. A flashlight is not glamorous, but it is the unofficial mascot of competent sound crews.
How to Set Up a Soundboard: 14 Steps
Step 1: Learn the Signal Flow Before You Plug Anything In
The fastest way to get confused is to start connecting gear before you understand where the signal is supposed to travel. Every mixer follows a basic path: input, preamp gain, EQ, aux sends, fader, main bus, output. Once you understand that path, the board starts feeling a lot less like a cockpit and more like a logical tool.
Take two minutes to identify the main outputs, monitor outputs, channel inputs, gain knobs, EQ section, mute buttons, aux sends, pan controls, faders, and master section. On a digital board, also locate routing, scenes, and metering pages. This tiny investment saves a ridiculous amount of panic later.
Step 2: Choose a Smart Mixer Location
If possible, place the soundboard where you can hear what the audience hears. That usually means front of house, centered or close to centered, instead of tucked off to the side near a wall or behind a decorative pillar that seems beautiful until it starts ruining your judgment. If you must mix from the side of the room, walk the room during soundcheck and listen from audience positions before trusting your settings.
You also want a stable table, safe cable paths, nearby power, and enough light to read labels. Good sound begins with boring decisions that prevent dumb problems.
Step 3: Turn Everything Down First
Before making connections, bring all channel gains, aux sends, speaker levels, and master outputs down. Mute channels if needed. This is one of the most important habits in live audio because it prevents loud pops, accidental blasts, and those deeply memorable moments when a microphone suddenly becomes the loudest object in the county.
Think of this as your reset position. Quiet first, then organized connections, then power, then levels.
Step 4: Place Your Main Speakers Correctly
Speaker placement matters more than many beginners expect. The main speakers should face the audience and sit in front of the microphones, not behind them. That single choice helps reduce feedback before you even touch EQ. Raise speakers high enough to project over the front rows instead of blasting knees and folding chairs.
If the room is boomy, be careful about corners and walls, which can exaggerate low frequencies. A muddy room is often not a “bad mixer” problem. It is a “the speakers are in the wrong place” problem wearing a fake mustache.
Step 5: Connect the Main Outputs to the PA
Now connect the mixer’s main left and right outputs to your powered speakers or to the power amplifier if you are using passive speakers. Use balanced cables whenever possible. Double-check left and right labeling, and confirm that the amplifier and speaker configuration are compatible if your system uses external power amps.
At this point, resist the urge to crank anything. We are building a clean signal chain, not auditioning for a thunderstorm.
Step 6: Connect Stage Monitors Through Aux Sends
Stage monitors are not just smaller main speakers. They serve a different purpose: helping performers hear what they need onstage. Connect monitor speakers to the mixer’s aux or monitor outputs. Each aux bus can feed a separate monitor mix, which is ideal when singers, guitarists, drummers, and keyboard players all want different things. Because of course they do.
If your board allows it, set monitor sends to pre-fader. That way, changes you make to the front-of-house mix do not wreck the musicians’ monitor balance. This is one of those small technical settings that prevents large emotional reactions onstage.
Step 7: Patch In Microphones, Instruments, and Playback Devices
Connect each microphone to its own channel with XLR cables. Plug line-level sources, keyboards, electronic drums, media players, and laptops into the appropriate line inputs or stereo channels. For bass, acoustic guitar, or keyboards over long cable runs, use DI boxes when needed to get a cleaner, more balanced signal.
Label channels if the mixer is not already labeled. Kick, snare, vocal 1, vocal 2, keys left, keys right, playback, pastor mic, podium mic, whatever applies to your event. This makes soundcheck faster and troubleshooting much easier when something goes silent and everyone stares at you like you personally unplugged reality.
Step 8: Turn On Phantom Power Only When Needed
Some microphones, especially condenser mics and many active DI boxes, require phantom power. Dynamic microphones generally do not. If your setup needs phantom power, engage it carefully and only after connections are made. On some boards phantom power is global, while on others it is per channel, so know your mixer.
This is not a button to press because it looks important. Use it when the equipment requires it, and leave it alone when it does not.
Step 9: Power Up in the Right Order
Once everything is connected and levels are down, power up the system in a safe order. A common approach is to turn on source devices and the mixer first, then amplifiers or powered speakers last. When shutting down, do the reverse: speakers and amps off first, mixer and sources afterward. This reduces pops and protects both speakers and ears.
Power sequencing is not glamorous, but neither is replacing damaged drivers because the system decided to impersonate an explosion.
Step 10: Set Proper Gain on Every Channel
This is where many mixes either become beautiful or become a swamp. Channel gain, also called trim or preamp gain, should be set so the source is strong and clean without clipping. Ask the performer to play or sing at full performance volume, not rehearsal whisper mode. Then raise the gain until the signal is healthy on the meter but not distorting.
Good gain staging gives you a better signal-to-noise ratio and makes the rest of the mix easier. Too little gain forces you to push faders too hard and brings up noise. Too much gain causes clipping, harshness, and general sadness. Get this step right and the whole board starts behaving.
Step 11: Build the Front-of-House Mix with Faders
Once gains are set, use the channel faders to build the main mix. Start with everything muted or low, then bring channels in one by one. Begin with the most important sources, usually vocals, then add rhythm section, melodic instruments, and playback as needed. Keep an eye on the main bus meters so you are not overdriving the outputs.
Your goal is balance, not maximum loudness. If one channel keeps disappearing, do not immediately grab the EQ like it owes you money. First check performance level, mic placement, monitor spill, and gain structure.
Step 12: Create Clear Monitor Mixes
Now work on monitors. Ask each performer what they actually need, not what would be “nice to have.” Good monitor mixing is about clarity and confidence, not stuffing every instrument into every wedge until the stage sounds like a blender full of cymbals.
Send vocals first, then the player’s own instrument, then only the essentials. Keep stage volume under control. Excessive monitor level increases feedback risk, muddies the room, and makes the front-of-house mix harder to manage. If possible, give each performer a separate monitor mix or group similar needs together.
Step 13: Use EQ, High-Pass Filters, and Effects Wisely
Start simple. Use a high-pass filter on vocals and many instruments that do not need deep low end. This cleans up rumble and reduces mud. Use channel EQ to make modest corrections rather than dramatic surgery, especially at first. If something sounds bad, ask whether the mic, source, or speaker placement is the real issue before twisting EQ into abstract art.
Reverb and delay can add polish, but too much will smear clarity. In small rooms, subtle effects usually win. In monitor mixes, be especially cautious. Performers usually need definition more than dramatic cathedral vibes.
Step 14: Ring Out the System and Do a Real Soundcheck
Before the event begins, do a proper soundcheck. Listen to the mains, then the monitors. Walk the room. Stand onstage. If feedback starts to appear, identify the offending microphone, speaker, or frequency. Sometimes the fix is physical positioning. Sometimes it is monitor level. Sometimes it is a surgical EQ cut. The point is to solve the actual cause instead of randomly punishing the entire mix.
Have each performer run at realistic volume. Check solos, backing vocals, playback tracks, spoken-word mics, and scene changes if applicable. If you are using a digital board, save your scene once the setup is stable. Future You will consider Present You a genius.
Common Soundboard Setup Mistakes to Avoid
Many beginner problems come from a few repeat offenders: putting speakers behind microphones, skipping gain staging, running monitor sends too hot, using too much low end in wedges, adding too much reverb, and trying to fix every problem with EQ instead of checking the source. Another classic mistake is soundchecking with performers playing quietly, then discovering during the actual event that their “full volume” was apparently hidden in another dimension.
Also, never underestimate labeling, cable management, and backup gear. A spare XLR cable has saved more shows than inspirational speeches ever will.
Final Thoughts
Learning how to set up a soundboard is a mix of technical skill, listening, and repetition. The mechanics matter: correct routing, gain staging, speaker placement, monitor setup, EQ, and soundcheck discipline. But the bigger lesson is that good audio is rarely about heroic last-second knob turning. It is about making smart choices early so the system works with you instead of against you.
Once you understand the 14 steps above, setting up a mixer stops feeling mysterious. It becomes a repeatable process. And that is when live sound gets fun. You stop fearing the board and start using it like the powerful tool it is. Also, you begin to sleep better knowing exactly which knob causes the squeal.
Real-World Experiences: What Setting Up a Soundboard Actually Feels Like
The first time many people set up a soundboard, they expect instant movie-magic results. In reality, it feels more like assembling a puzzle while someone taps a microphone and says, “Check, check, check,” eleven times in a row. One of the biggest lessons people learn from experience is that the room matters just as much as the board. A mixer can be perfectly capable, but if the speakers are crammed into corners, the vocals will still sound muddy and the low end will still get bloated. After a few setups, you stop blaming the mixer for everything and start respecting placement, coverage, and acoustics.
Another common experience is discovering that monitor mixes can make or break a performance. Beginners usually focus on the audience mix first, which is understandable. But after one singer complains that they cannot hear themselves and one guitarist asks for “just a little more me” six times, it becomes obvious that stage sound is part of the whole show. Experienced operators learn to keep monitor mixes simple, stable, and pre-fader. They also learn that louder is not always better. A cleaner, more focused wedge mix often helps performers more than a louder, messier one.
There is also the unforgettable lesson of gain staging. Almost everyone learns it the hard way at least once. Maybe the vocal mic is too quiet, so the fader gets pushed way up and the whole system starts hissing. Maybe a keyboard channel is clipping because the source output is blasting the preamp. Over time, you learn that proper gain is the foundation for everything else. When the input is clean and healthy, the faders behave better, the EQ works more naturally, and the overall mix sounds calmer and more polished.
Real-world setup also teaches patience. During a rushed event, it is tempting to skip the full soundcheck and assume things will sort themselves out. They usually do sort themselves out, but often in the most dramatic possible way. Someone’s wireless mic dies, a cable crackles, a playback track comes in hotter than expected, or a monitor begins flirting with feedback the second the room fills with people. The people who stay calm and methodical usually win. They mute, isolate, check routing, and solve one problem at a time instead of spinning five knobs and hoping for mercy.
Perhaps the best part of learning soundboard setup is that improvement is obvious. Each event teaches you something. You get faster at labeling channels, quicker at finding bad cables, better at hearing frequency buildup, and more confident asking performers for realistic check levels. Eventually, the board that once looked terrifying starts to feel familiar. You stop seeing hundreds of controls and start seeing options. That is the moment when setup becomes less about survival and more about craft. And honestly, that is a pretty great feeling.