Table of Contents >> Show >> Hide
- Why butter temperature is the secret behind “bakery-level” results
- What “softened butter” actually means (and how to test it)
- Choose your softening method by your deadline
- Method 1: The classic countertop soften (best quality, least drama)
- Method 2: Cube it (faster, still even)
- Method 3: Roll-and-flatten (the “pastry chef energy” method)
- Method 4: The warm-glass “butter dome” (quick, gentle heat)
- Method 5: The “hot water microwave” trick (smart use of residual heat)
- Method 6: Microwave in short bursts (true emergency mode)
- Method 7: Stand mixer “massage” (fast, but use with intention)
- Method 8: Grate it (fastest “soft feel,” best for mixingnot always for creaming)
- Butter texture changes depending on what you’re baking
- The two classic butter mistakes (and how to fix them)
- Kitchen reality check: why your butter softens differently than everyone else’s
- Food safety and quality: how long can butter sit out?
- Softened butter timing cheat sheet (use cues, not just minutes)
- Before you mix: a “professional-looking bake” checklist
- Extra experiences from the real world (the “I learned this the hard way” edition)
- Conclusion
- SEO Tags
There are two kinds of bakers: the ones who “planned ahead” and the ones who are currently staring at a rock-hard stick of butter like it personally
insulted their cookies. If you’re reading this, welcome to the second groupwe have snacks, and we have solutions.
Softened butter is one of those deceptively small steps that separates “homemade and charming” from “wait… did you buy these?” When butter is the right
temperature, it creams beautifully, mixes evenly, and helps your baked goods rise, brown, and hold their shape like they’ve got a résumé.
Why butter temperature is the secret behind “bakery-level” results
Butter is both an ingredient and a tool. At the right softness, it can trap air when beaten with sugar (the classic “creaming method”), which
helps cakes turn out lighter and cookies bake up with a tender bite instead of a dense, heavy chew. Too cold, and butter won’t blend smoothlyyour batter
can look curdled, your dough can stay streaky, and your finished bake can be uneven.
Too warm, though, is its own kind of chaos. Over-softened butter can’t hold air well, which can mean flatter cookies, greasy edges, and cakes that rise
poorly or bake with a tighter crumb. In other words: the difference between “professional” and “why is my muffin top doing that?” is often just a few
degrees.
What “softened butter” actually means (and how to test it)
“Room temperature” butter is usually cooler than most people think. Softened butter should be pliable but still coolable to hold its shape, not shiny
or oily. If you have an instant-read thermometer, you’re typically aiming for roughly 65–70°F for many baking tasks.
The 3-second finger test
Press your fingertip gently into the butter for about three seconds. You want a clean indent, but your finger shouldn’t slide in like it’s diving into a
warm pool. If butter smears instantly or looks glossy, it’s likely too warm.
The bend test (stick butter)
If you’re using stick butter, try bending it slightly. Properly softened butter will flex without snapping, but it shouldn’t droop like a noodle.
The “spreadability with structure” cue
Softened butter should spread with a butter knife without tearing bread to shreds, yet still look matte and structurednot melted, not greasy.
Choose your softening method by your deadline
The best method depends on two things: how much time you have and what you’re baking. For cakes and buttercream, you usually want evenly softened butter.
For some cookies, slightly cooler “plastic” butter (soft but not warm) can help control spread.
Method 1: The classic countertop soften (best quality, least drama)
Time: about 30–90 minutes (depends on your kitchen temperature and butter size)
Unwrap the butter, place it on a plate, and let it sit at room temperature. This is the most reliable way to soften butter evenly from the inside out.
If your kitchen is cool, it takes longer; if it’s warm, check it sooner.
- Best for: cakes, cupcakes, cookies, buttercreampretty much everything.
- Pro tip: Rotate the stick once halfway through so it warms evenly.
- Watch out: Don’t park it in direct sun or near the oven vent unless you enjoy surprise puddles.
Method 2: Cube it (faster, still even)
Time: about 10–25 minutes
Cut the butter into small cubes (think: 1/2-inch-ish). Spread them out on a plate so air can circulate. More surface area means faster softening with
minimal risk of melting.
- Best for: creaming in cakes, quick cookie dough, frosting in a pinch.
- Pro tip: If you’re making multiple batches, cube several sticks and keep extras chilledpull one plate at a time.
- Watch out: If your kitchen is hot, check at 8–10 minutes. Cubes can go from “perfect” to “glossy” quickly.
Method 3: Roll-and-flatten (the “pastry chef energy” method)
Time: about 10–15 minutes
Put the stick of butter into a zip-top bag (or between parchment sheets). Use a rolling pin to gently pound and roll it into a thin, even sheet. This
speeds softening by increasing surface area and is surprisingly controlled.
- Best for: fast softening for cookies, cakes, and even some pastry prep.
- Pro tip: Roll it into a rectangle. Even thickness = even softening = fewer “warm corners.”
- Watch out: If you go full superhero with the rolling pin, you can heat the butter with friction. Gentle is the vibe.
Method 4: The warm-glass “butter dome” (quick, gentle heat)
Time: about 5–10 minutes
Fill a heat-safe glass (or bowl) with hot water. Let it sit for a minute, then pour out the water, dry the glass, and place it upside down over the
butter (or over cubed butter). The trapped warmth softens butter gradually without blasting it.
- Best for: when you need softened butter soon but don’t trust your microwave.
- Pro tip: Cubing first makes this faster and more even.
- Watch out: If the glass is too hot, the outside of the butter can turn greasy before the center softens.
Method 5: The “hot water microwave” trick (smart use of residual heat)
Time: about 10–12 minutes
This method uses a warm, steamy microwave without microwaving the butter directly. Microwave a mug of water until it’s steaming hot. Carefully
remove the mug, place the butter (preferably cubed) inside the turned-off microwave, and close the door. The residual heat softens butter gently.
- Best for: people who want speed and even softening without melted spots.
- Pro tip: Use cubed butter on a plate for the most even result.
- Watch out: Don’t forget and reheat something else with the butter still in there. That’s how butter becomes “modern art.”
Method 6: Microwave in short bursts (true emergency mode)
Time: 10–40 seconds total (plus checking)
You can microwave butter, but it’s the most error-prone method because microwaves heat unevenly. If you must do it, use very low power (defrost
range, around 20–30% power) and short bursts. Rotate or flip the butter between bursts.
- Best for: when you need softened butter immediately and you’re willing to babysit it.
- Pro tip: Microwave cubes, not a whole stick. Cubes soften more evenly and reduce “melted edges + cold center.”
- Watch out: If any part melts, you’ve changed how it behaves in creamingespecially for cakes and cookies.
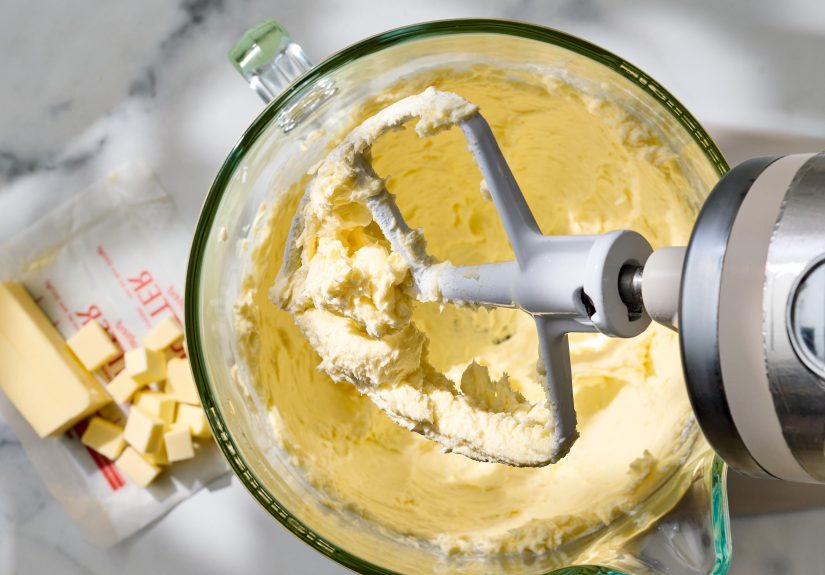
Method 7: Stand mixer “massage” (fast, but use with intention)
Time: about 1–3 minutes
Cut cold butter into chunks and beat briefly on low speed just to soften. This can work well for frostings and some batters, but it can also warm butter
unevenly or incorporate air differently than planned.
- Best for: buttercream or recipes where butter will be thoroughly creamed anyway.
- Pro tip: Keep the mixer on low at first, and stop as soon as the butter is pliable.
- Watch out: Overbeating can make butter too warm and too airy, which can change cookie spread and cake texture.
Method 8: Grate it (fastest “soft feel,” best for mixingnot always for creaming)
Time: 1–2 minutes
Grating cold butter creates thin shreds that warm quickly. It’s fantastic when you need butter to incorporate quickly (like quick doughs), but for
classic creaming you still want the butter to be uniformly pliablenot just thin.
- Best for: quick mixing, small batches, or when butter needs to disperse fast.
- Pro tip: Use a box grater with larger holes for less mess and faster shredding.
- Watch out: Your hands can warm the butterwork quickly, and chill the grater if your kitchen runs hot.
Butter texture changes depending on what you’re baking
For cakes and cupcakes
Cakes that use the creaming method usually want butter that’s properly softened and even. If butter is too cold, it won’t trap air well; if it’s too
warm, it won’t hold that air structure. Result: cakes that bake up flatter and denser than you hoped.
Professional cue: Your creamed butter and sugar should look lighter in color and fluffy, not glossy or loose.
For cookies
Cookie success is a balancing act. If butter is too warm, cookies can spread quickly and bake thin with oily edges. If it’s too cold, you may get uneven
mixing and thicker cookies with a tighter texture.
Professional cue: For many drop cookies, butter that’s soft but still cool (not warm) helps control spread while still mixing smoothly.
For buttercream frosting
Buttercream wants butter that’s soft enough to whip, but not so warm it turns greasy. If frosting looks shiny or loose, your butter may be too warm. If
it looks chunky, your butter may be too cool.
Professional cue: Frosting should look matte and stable, holding peaks without sliding off the spatula like it’s late for an
appointment.
The two classic butter mistakes (and how to fix them)
Mistake #1: Melted edges, cold center
This is the microwave problem: the outside turns glossy while the center stays stubborn. Melted butter behaves differentlyespecially for creamingso
the goal is to keep butter soft, not liquid.
Fix: If only the edges softened too much, chill the butter for 5–10 minutes, then let it sit briefly at room temperature to even out.
Mistake #2: “I left it out and now it’s basically lotion”
Warm kitchens can turn butter from “softened” into “oops” fast. Over-softened butter can cause spreading, greasy texture, and less lift in cakes.
Fix: Put the butter back in the fridge for 10–20 minutes, checking often. You want it to firm up slightlythink pliable, not firm.
If you already mixed it into batter, chilling the batter (especially for cookies) can help restore control.
Kitchen reality check: why your butter softens differently than everyone else’s
Your kitchen temperature matters more than the clock
A “30-minute soften” in a cool kitchen might be 60 minutes. In a warm kitchen, 30 minutes might be too long. Use tactile cues (finger test) instead of
relying only on time.
Butter shape matters
Sticks soften more predictably than thick blocks. Cubes soften faster than sticks. A flattened sheet softens fastest and most evenly.
Butter type matters
European-style butters often have higher butterfat, which can influence how quickly butter softens and how it behaves in certain recipes. It can be
amazing for flavor and texture, but it also means you should pay attention to softness so you don’t accidentally oversoften.
Salted vs. unsalted matters (mostly for storage)
Most bakers use unsalted butter for better control of salt levels in recipes. But for keeping butter out for short periods, salted butter often holds
quality longer than unsalted due to salt’s preservative effect. Either way, keep butter covered to protect it from light, odors, and “mystery fridge
vibes.”
Food safety and quality: how long can butter sit out?
Butter is relatively low in water compared with many dairy foods, which helps it resist rapid spoilage. Still, “safe” and “best quality” are not the
same thing. For the best flavor (and to avoid butter picking up odors), store most butter refrigerated and only soften what you need.
- General food safety rule: Don’t leave perishable foods out for more than two hours (one hour if it’s very hot).
- Butter-specific guidance varies: Some recommendations (including FoodKeeper guidance discussed by major cooking publications) suggest
butter can be left out briefly, but many brands emphasize shorter windows to preserve quality.
Practical “professional” approach: Soften butter for baking (30–60 minutes), use it, then refrigerate the rest. If you like keeping a
butter dish on the counter, keep it covered, keep it cool, and rotate it frequently.
Softened butter timing cheat sheet (use cues, not just minutes)
These ranges assume typical refrigerated butter and a moderate kitchen temperature. Adjust based on your home and your butter’s shape.
- Whole stick on counter: 30–90 minutes
- Cubed on counter: 10–25 minutes
- Flattened with rolling pin: 10–15 minutes
- Warm glass dome: 5–10 minutes
- Warm microwave cavity (hot water trick): ~10 minutes
- Microwave on low power (careful): 10–40 seconds total, in bursts
Before you mix: a “professional-looking bake” checklist
- Check the butter: pliable, cool, not greasy.
- Match ingredient temps: eggs and dairy closer to room temp help batters emulsify smoothly.
- Use the right method for the recipe: cakes want even softness; cookies often benefit from slightly cooler softness.
- Don’t rush creaming: give butter and sugar enough time to get fluffy and pale (without heating it).
- When in doubt, chill: if anything looks loose or shiny, a brief chill can save the batch.
Extra experiences from the real world (the “I learned this the hard way” edition)
The first time I tried to bake “professional” cookies for a get-together, I did what many well-meaning people do: I microwaved the butter until it felt
soft. I was proud. The butter was proud. Everything was prouduntil the cookies hit the oven and spread like they were trying to claim territory.
They tasted fine, but they looked like cookie-shaped puddles that had given up on boundaries.
That’s when the lightbulb went on: soft butter is not the same as warm butter. Warm butter feels easy, but it behaves like it already
started melting, which means it can’t hold structure the same way during mixing. After that, I started paying attention to how butter looks
and acts, not just how it feels.
One of the most useful habits I picked up was the “butter check” before I even measure flour. If I’m planning cookies that need a thicker shapelike
classic chocolate chip cookies with a chewy centerI aim for butter that dents with a finger but still feels cool. In summer, that might mean pulling
butter out, cubing it, and setting a timer for ten minutes, then checking every few minutes. In winter, I can leave a stick out longer without fear.
The goal isn’t a specific number of minutes; it’s a specific texture.
My favorite “busy baker” method became the rolling-pin trick. It feels a little ridiculous at firstlike you’re giving butter a spa treatment with
light percussionbut it works because it changes the butter’s shape without cooking it. I’ll put the stick in a zip-top bag, flatten it into a thin
sheet, then let it sit for a few minutes while I line pans and set up the mixer. By the time I’m ready, the butter is evenly pliable and behaves
beautifully in the bowl. Bonus: it’s weirdly satisfying, especially when you’re baking under deadline pressure.
Frosting taught me a different lesson: butter can be “soft” and still not be “right.” On a warm day, buttercream can turn shiny and slack fast, and at
first I thought I needed to whip longer. Nope. I needed cooler butter. Now, if the room is warm, I’ll soften the butter less than usual, whip
it, and only then let the frosting relax slightly. If it starts looking glossy, I’ll pause and chill the bowl for a few minutes. It’s the difference
between frosting that holds a clean swirl and frosting that slowly slides down the cupcake like it’s late for work.
The biggest confidence boost came when I started using the same “professional” mindset that bakeries use: control your variables. Butter temperature is
a variable you can control, and it affects everythingspread, lift, crumb, and even how cleanly your batter emulsifies. Once you get consistent about
it, you stop feeling like baking is random luck. Your cookies look more uniform, your cakes rise more evenly, and your frosting behaves in a way that
makes decorating feel fun instead of frantic.
So yes, you can absolutely bake on a whim and still get that polished, bakery-style finish. The trick is simple: treat butter like the foundation it
is. Soften it with intention, check it with a quick test, and choose the method that fits your recipenot just your impatience. (Although we respect
your impatience. We are it.)
Conclusion
Softening butter isn’t just a prep stepit’s a texture strategy. When butter is properly softened, it creams better, mixes more evenly, and helps your
baked goods hold their shape and structure like a pro. If you have time, the countertop method is the gold standard. If you don’t, cubing, rolling, or
using gentle trapped heat can get you to the same place without melting your chances of cookie greatness.
Next time a recipe calls for softened butter, don’t guesstest. A quick finger press and a little method-matching can turn everyday baking into
polished, professional results that look as good as they taste.