Table of Contents >> Show >> Hide
- Is a Vinyl Plank Bathtub Surround a Good Idea?
- Tools and Materials for a Vinyl Plank Tub Surround
- Step-by-Step: Easy Vinyl Plank Bathtub Surround Makeover
- Design Ideas for a Stylish Vinyl Plank Tub Surround
- Common Mistakes to Avoid
- Real-Life Experiences: What a Vinyl Plank Tub Surround Is Really Like
- Final Thoughts: Is a Vinyl Plank Tub Surround Right for You?
If your bathtub surround screams “builder basic circa 1998” every time you walk into the bathroom,
it might be time for a glow-up. The good news? You don’t have to demo the tub, learn how to tile,
or sell a kidney to afford marble. A vinyl plank bathtub surround makeover can give you a high-end,
custom look on a DIY budgetHometalk style.
Luxury vinyl planks (LVP) and wall-rated vinyl panels are water-resistant, come in tons of wood
and stone looks, and are surprisingly DIY-friendly for walls as well as floors. When you pair the
right planks with proper waterproofing and adhesive, you can safely use vinyl around bathtubs and
even in wet areas, as some manufacturers now offer complete systems designed specifically for
tub and shower surrounds.
In this guide, you’ll learn how to plan, prep, and install an easy vinyl plank bathtub surround
makeoverincluding pro-level waterproofing tips, design ideas, and real-world lessons from
DIYers who tried it. Grab your tape measure and your favorite podcast; your bath surround is
about to glow up.
Is a Vinyl Plank Bathtub Surround a Good Idea?
Before you start sticking planks on the wall, you need to know when vinyl works, when it doesn’t,
and what the fine print says.
Pros of a Vinyl Plank Tub Surround
-
Budget-friendly upgrade: Vinyl plank costs far less than stone or tile and usually
doesn’t require special tools like tile saws or grout floats. -
Water-resistant materials: High-quality waterproof or “wet-area rated” vinyl planks
are designed to handle splashes and humidity, which is why they’re common in bathrooms, kitchens,
and laundry rooms. -
Easy to clean: Vinyl planks don’t have grout lines, and most wipe clean with a damp
cloth and mild cleanerperfect for soap scum and shampoo overspray. -
Design flexibility: You can get wood, stone, concrete, or shiplap-style looks,
often with built-in faux “grout” lines or textures for extra realism. -
Lightweight and DIY-friendly: Compared to tile, vinyl is lighter and usually easier
to cut, which makes working over your head in a tub surround much less miserable.
Important Limits and Warnings
Here’s the not-so-fun part: you can’t just slap any random flooring plank on the shower wall and call
it good. Some flooring products are water-resistant on the surface but not designed for constant
water exposure or vertical installations. Some manufacturers and pros specifically warn that certain
LVP products shouldn’t be used in fully wet shower zones or may fail if water gets behind them.
Key things to check before you start:
-
Product rating: Look for planks or panels explicitly approved for use on walls in
wet areas, tub surrounds, or showers. Some systems combine waterproof membranes and adhesives that
are tested as a package for these conditions. -
Substrate condition: Behind any tub surround, building science guidelines call for
water-resistant backer like cement board or specialized waterproof board, not regular drywall.
Seams and transitions need to be sealed correctly so water has nowhere to sneak into the framing. -
Local building code: Your local code may have specific rules for wall coverings
in tub/shower areas and how water-resistant gypsum or other substrates can be used. Always check
your local code and manufacturer instructions.
Bottom line: Vinyl planks can be a great choice for a tub surround if you use a
wet-area-approved product, install it over a properly waterproofed substrate, and follow code
and manufacturer guidance. When in doubt, treat this like a tile project: waterproof first,
then add the pretty layer.
Tools and Materials for a Vinyl Plank Tub Surround
Exact materials will depend on your existing walls and the vinyl system you choose, but most projects
will need:
- Waterproof or wet-area-rated vinyl planks or wall panels
-
Compatible adhesive (polymer-based or manufacturer-specified adhesive for wet
environments) -
Backer board (cement board or waterproof wall board) if you’re rebuilding the
surround - Waterproofing membrane (liquid-applied or sheet) and mesh tape for seams
- Construction screws for backer board (if needed)
- Plastic or PVC trim pieces for edges and top caps
- Silicone caulk rated for bath/shower use
- Utility knife or vinyl cutter; fine-tooth saw for tricky cuts
- Level, tape measure, pencil, and straightedge
- Safety gear: eye protection, mask, gloves
If you’re going over an existing fiberglass or acrylic surround that’s in good shape and solidly
attached, you may be able to bond the vinyl directly to it with the right adhesive, but you still
must seal all transitions and penetrations carefully.
Step-by-Step: Easy Vinyl Plank Bathtub Surround Makeover
Step 1: Plan Your Layout and Pattern
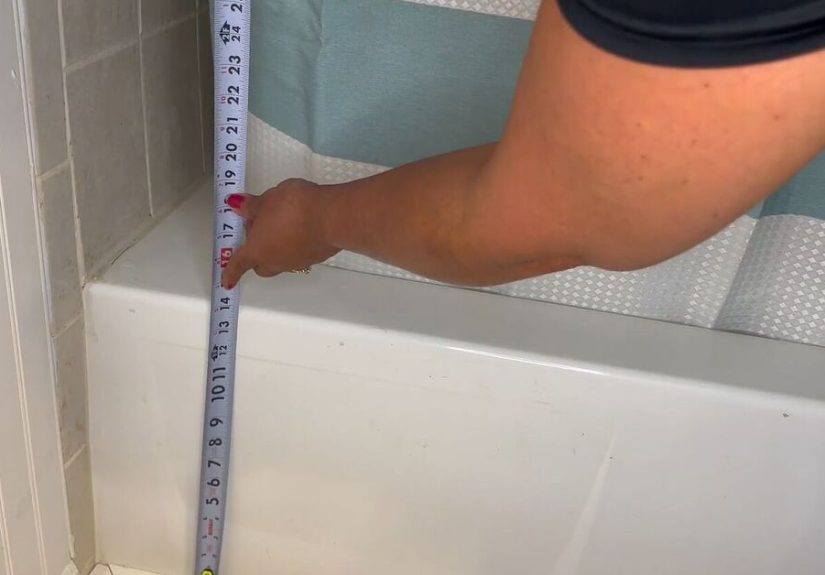
Start with a tape measure, not a tube of adhesive. Measure the width and height of each wall
around the tub. Note faucet locations, the shower head, niches, and any windows. Sketch the walls
on paper and lay out how many planks you’ll need in each row.
Most people prefer to:
- Start from the most visible wall (usually the back wall) and center the layout.
-
Avoid sliver pieces at the corners; try to keep cut planks at the edges at least one-third of a
full plank wide. - Stagger vertical seams like brickwork for a more natural look, especially with wood-look planks.
Take your time heregood layout planning makes your project look custom instead of “weekend regret.”
Step 2: Prep the Existing Surround
Your vinyl is only as good as what’s behind it. If your surround is soft, spongy, or shows signs of
mold or water damage, you may need to demo down to the studs, install proper backer board, and
waterproof it before moving on.
For solid, sound surfaces:
-
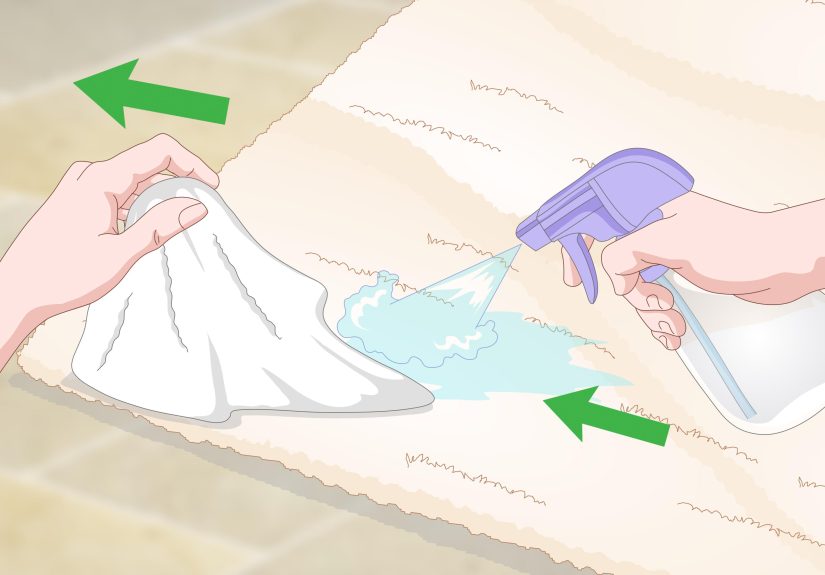
Clean thoroughly. Remove soap scum, oils, and mildew with a bathroom cleaner or
TSP substitute. Rinse well and let dry. -
Degloss and scuff. Glossy acrylic or tile should be scuff-sanded so the adhesive has
teeth. Use 80–120 grit sandpaper and wipe off dust. -
Repair and fill. Fill small chips or holes so the surface is flat. If you’re going
over tile, some installers recommend filling grout lines so they don’t telegraph through thin vinyl.
Protect the tub with a drop cloth or cardboard while you work. You’ll thank yourself later.
Step 3: Waterproof the Substrate
Even if your vinyl is waterproof on the surface, your walls still need a moisture strategy. Building
guides for tub and shower assemblies emphasize that cement board and other backers are water-tolerant,
not inherently waterproof, so a membrane or water-resistive barrier must be used either behind or
on top of the board.
Common options include:
-
Liquid waterproofing membrane: Rolled or brushed onto cement board, with mesh tape
at seams and corners. -
Sheet membrane systems: Applied over the substrate per manufacturer instructions,
often integrated with special drain and corner accessories. -
Full “LVT in wet area” systems: Some manufacturers offer packages combining
waterproofings, adhesives, and vinyl panels specifically for tub surrounds and showers.
Follow the dry time, number of coats, and reinforcement requirements closely. Think of this step
as putting a raincoat on your walls before you dress them up.
Step 4: Cut and Dry-Fit Your Planks
Once the substrate is waterproofed and dry, it’s time to cut your vinyl:
-
Transfer your layout. Mark your center line and plank positions on the wall where
helpful. -
Cut planks to length. Many vinyl planks score and snap with a utility knife;
for thicker products, a fine-tooth saw works better. -
Dry-fit rows. Hold planks up to the wall without adhesive to confirm your pattern
and verify that seams land where you want them. -
Cut around fixtures. Use paper templates for the faucet, tub spout, and shower arm.
Transfer those shapes onto planks and cut carefully.
Leave a small gap (often 1/8 inch, or per manufacturer’s instructions) at corners and where planks
meet the tub deck or ceiling, to allow for movement and to be later sealed with silicone.
Step 5: Adhere the Vinyl Planks
When you’re happy with your dry fit, get your adhesive ready and follow the directions like a recipe:
-
Check open time. Many wall adhesives specify how long you can leave adhesive exposed
before bonding materials. -
Apply adhesive. Use the recommended trowel or beads of construction adhesive in
patterns suited to wet-area installationsusually enough to cover, but not so much it creates
large voids that can trap water. -
Press and roll. Firmly press each plank to the wall, working from the center outward.
Use a rubber roller where possible to ensure full contact. -
Lock edges. If planks interlock, make sure joints are fully seated. Keep seams tight
but don’t force them so hard that you squeeze out adhesive behind the planks.
Work in manageable sections; adhesive that skins over won’t bond well. Use spacers along the tub and
corners to maintain consistent gaps for caulk.
Step 6: Trim, Caulk, and Seal the Edges
The difference between “Pinterest-worthy” and “why did I do this” is often in the finishing details.
-
Install trim. Snap or glue PVC or vinyl trim at outside corners and along the top
edge of the surround for a polished look and extra protection. Some DIYers also use small PVC
profiles at the tub edge to create a crisp line for caulk. -
Caulk transitions. Use a high-quality tub and tile silicone where vinyl meets the
tub, ceiling, and corners. This is your main defense against water sneaking behind the panels. -
Seal penetrations. Around the faucet, spout, and shower head escutcheons, use
silicone behind the trim and around any gaps.
Wipe excess caulk with a damp fingertip or caulk tool for a neat bead. Let everything cure fully
before running the shower or bath.
Step 7: Cleaning and Long-Term Care
Once your tub surround looks magazine-worthy, you’ll want it to stay that way:
-
Use gentle cleaners. Most vinyl prefers non-abrasive, mild cleaners and soft cloths
or sponges. Skip harsh solvents or scrub pads unless the manufacturer says they’re okay. -
Avoid steam tools. Cleaning experts warn that high-heat steam can damage adhesives
and potentially void warranties on vinyl plank and tile, especially where moisture can reach the
edges. Stick to traditional cleaning methods instead. -
Ventilate the bathroom. Run the bath fan during and after showers so humidity doesn’t
linger behind trim or in corners. -
Inspect annually. Check caulk lines for cracks and touch them up before water can
travel behind your new surround.
Design Ideas for a Stylish Vinyl Plank Tub Surround
Vinyl planks are basically big stickers with commitment issues: you can use them to create almost any
vibe you want.
-
Modern spa look: Choose wide, pale wood-look planks and run them horizontally for
a calming, Scandinavian feel. -
Stone-inspired luxury: Pick marble-look or slate-look vinyl panels for a high-end
feel without the fussy grout and cold surfaces of real stone. -
Faux shiplap: Narrow planks stacked horizontally with crisp white trim can mimic
shiplap for a cottage or farmhouse vibe. -
Feature wall: If you’re nervous about full-wet exposure, use vinyl planks on the
back wall of the tub (which may see less direct spray), and keep tile or factory acrylic on the
other two walls, depending on your layout and local code.
Don’t forget to coordinate finishes: match your trim color to your vanity or door casing so the
surround feels integrated, not like an afterthought.
Common Mistakes to Avoid
Learn from other people’s “well, that escalated quickly” projects:
-
Using non-rated flooring planks in the shower zone. If the manufacturer doesn’t
approve the product for walls or tub surrounds, especially in wet areas, don’t gamble. -
Skipping waterproofing. Even if your existing surround “looks fine,” unprotected
drywall or incorrect backer behind it can still be vulnerable to moisture long-term. -
Not sealing penetrations. Gaps behind faucet trim and around the tub deck are prime
spots for water intrusion. -
Trapping moisture. Building science guidance stresses that assemblies need a path
for incidental moisture to dry. Don’t create sealed pockets where water can’t escape. -
Ignoring movement gaps. Vinyl can expand and contract slightly; smashed-tight
planks with no perimeter gaps can buckle over time.
Real-Life Experiences: What a Vinyl Plank Tub Surround Is Really Like
Let’s talk about what happens after the photos are taken and the dust settles. Many DIYers who’ve
tackled vinyl plank tub surrounds report a few consistent themes: the project is very doable for a
confident beginner, the transformation is dramatic, and the details matter more than the heavy lifting.
One typical scenario: a homeowner with a dated almond-colored fiberglass surround and no desire to
demolish the bathroom. They cleaned and lightly sanded the existing walls, added a compatible
waterproofing system over cement board where they replaced damaged sections, and installed a
wet-rated vinyl panel product that locked together visually like tile but didn’t require grout.
The back wall became a faux-slab “marble” feature, while the side walls used a subtle, lighter pattern.
The install took most of a weekend:
- Friday night: remove old caulk, clean the surround, sand glossy surfaces.
- Saturday: repair soft spots, install new backer where needed, apply waterproofing membrane.
- Sunday: cut and install planks, add trim, and silicone all edges and penetrations.
The cost breakdown was roughly:
- Vinyl planks/panels: a few hundred dollars, depending on style and brand.
- Waterproofing materials and backer board: another hundred or two.
- Adhesives, caulk, and trim: relatively inexpensive but critical items.
The result? A bathroom that suddenly looked “designer” instead of “rental.” The faux stone walls
reflected light differently, the joints aligned cleanly behind the tub fixtures, and the trim made
everything look intentional. Friends didn’t believe it was vinyl until they tapped on it.
Over the first year, the homeowner noticed a few small realities:
-
Ventilation mattered. On days when the exhaust fan wasn’t used, more condensation
collected on the walls and caulk lines, making it obvious that humidity management was key. -
Regular wipe-downs helped. A quick towel wipe or squeegee after showering made
cleaning much easier and kept water from sitting at the tub lip. -
Caulk maintenance was non-negotiable. One small crack in a caulk bead at the back
corner was noticed early and re-caulked before it became a bigger issue.
Another DIY experience involved installing vinyl planks over an older tile surround. The tiles were
solid and not leaking, but the grout lines looked dingy even after cleaning. The homeowner:
- Thoroughly degreased and scrubbed the tile.
- Filled deeper grout joints and cracks to flatten the surface.
- Scuff-sanded the tile for better adhesion.
-
Used a manufacturer-recommended adhesive for vertical, wet-area installations and pressed tightly
interlocking vinyl panels over the existing tile.
Although going over tile saved demolition time, the homeowner noted that it was critical to know
the tile substrate was dry and sound. They checked for soft spots and moisture issues beforehand.
After installation, they added new PVC trim along the tub and at the outer edges, along with a fresh
bead of high-quality silicone. The transformation looked like a brand-new bathroom without ever
touching the tub.
Two big lessons most people share after doing a vinyl plank tub surround:
-
Follow the system, not just the look. The projects that hold up best long-term
use products designed to work togetherbacker board, waterproofing, adhesive, and planks that are
tested as a set. -
Be picky about moisture details. The pretty photos show the surfaces; the durability
comes from what you can’t see: sealed seams, thoughtful flashing, and a path for any stray moisture
to escape instead of stay trapped.
If you go into the project expecting to spend as much time on prep, waterproofing, and finishing as
on sticking planks to the wall, you’re likely to be very happy with the end result.
Final Thoughts: Is a Vinyl Plank Tub Surround Right for You?
A vinyl plank tub surround makeover is one of those projects that sits in the sweet spot between
“weekend DIY” and “serious home upgrade.” When you use wet-area-approved materials, respect the
waterproofing details, and take your time on layout and trim, you can transform a dated bathroom
into a modern, spa-like space at a fraction of the cost of a full tile install.
If you love the idea of a quick, stylish overhaul and you’re comfortable measuring, cutting, and
working carefully with adhesives and waterproofing, a vinyl plank tub surround can absolutely
be worth it. If your bathroom has existing moisture problems, structural issues, or very strict
local code requirements, you might want to consult a pro first or combine this project with a
deeper renovation.
Either way, you’ll never look at that boring fiberglass surround the same way again. Once you know
what’s possible with a stack of vinyl planks and a little planning, even the most basic bathroom can
feel like it belongs in a renovation show reveal.