Table of Contents >> Show >> Hide
- Before You Upload: Quick Checklist (So Nothing Weird Happens)
- Way 1: Upload Pictures to Facebook Using the Mobile App (iPhone & Android)
- Way 2: Upload Pictures to Facebook on a Computer (Windows or Mac)
- Where Are You Uploading To? (Feed vs. Album vs. Group vs. Page)
- Troubleshooting: When Facebook Won’t Upload Your Pictures
- Privacy & Etiquette: Post Smart, Not Sorry
- FAQ: Quick Answers About Uploading Pictures to Facebook
- Real-World Upload Stories & Lessons Learned (So You Don’t Rage-Click)
- The “Why Did It Post Only One Photo?” Moment
- The “Uploading…” Spinner That Lasts Longer Than Your Last Relationship
- The “My Photo Looks Great… Until Facebook Turns It Into Soup” Problem
- The “Oops, I Shared That Publicly” Heart Drop
- The “Group Album Confusion” (AKA: Where Did My Photos Go?)
- The “I Just Want to Share From My Computer, But the Photos Are on My Phone” Shuffle
- Conclusion
You took the photo. You edited the photo. You stared at the photo like it’s a Renaissance painting.
Now you just need to upload pictures to Facebook without accidentally posting your entire camera roll,
including that blurry screenshot of a coupon you’ll never use.
Good news: there are two easy ways to post photos on Facebookone from your phone (fastest),
and one from your computer (best for batches and albums). This guide walks you through both, plus the small-but-mighty
tips that keep your uploads crisp, private (when you want them to be), and drama-free.
Before You Upload: Quick Checklist (So Nothing Weird Happens)
- Pick the right destination: News Feed post, Story, Album, Group, or Page.
- Choose your audience: Public, Friends, Specific friends, or Only me.
- Know your goal: One “look at my dog” photo vs. 80 “look at my vacation” photos (album time).
- Use Wi-Fi for big batches: Uploading 200 photos over one bar of signal is an act of optimism.
Way 1: Upload Pictures to Facebook Using the Mobile App (iPhone & Android)
If your photos live on your phone (they do), this is the quickest way to upload photos to Facebook.
The app is built for “tap, post, done” energy.
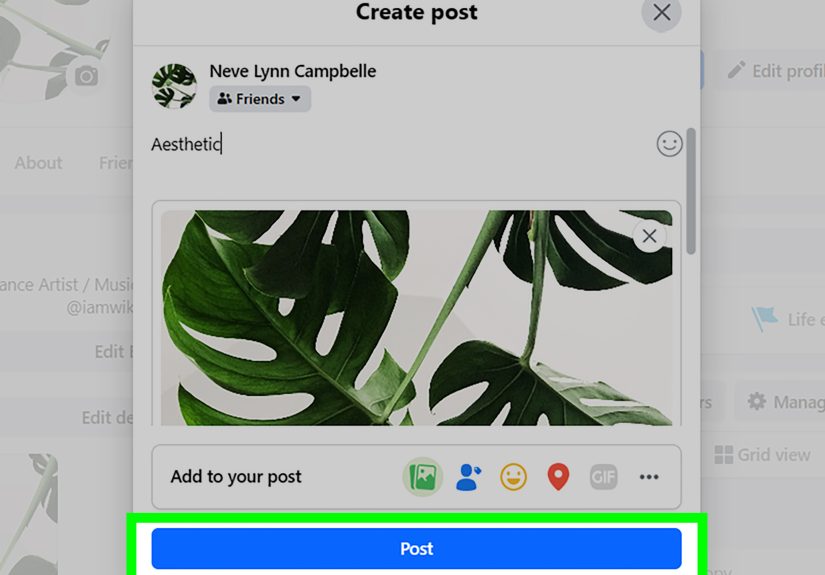
Option A: Post Photos to Your Feed (Classic)
- Open the Facebook app and go to your Feed or your profile.
- Tap Photo or tap the post box (often “What’s on your mind?”) and choose Photo/Video.
- Select one or multiple photos from your camera roll. (Yes, you can multi-selectFacebook won’t judge your photodump.)
- Tap Next (or similar), then add optional extras:
- Caption: Keep it short. Let the photo do the talking.
- Tag friends: Helpful, but don’t tag people mid-bite at brunch unless you enjoy chaos.
- Location: Great for travel posts; not great for “I am home alone” announcements.
- Choose your privacy setting/audience (Public, Friends, etc.).
- Tap Post.
Option B: Add Photos to an Album (Best for Multiple Pics)
Albums are the neat, organized sibling of the messy “here are 37 photos in one post” approach.
They’re ideal for events, trips, weddings, graduation partiesanything that deserves a little structure.
- Go to your profile in the app.
- Tap Photos, then Albums.
- Choose:
- Create Album to start fresh, or
- Open an existing album and tap Add Photos.
- Select photos, add an album title (if new), set the audience, then tap Post.
Option C: Upload Photos to a Facebook Story (For “Right Now” Vibes)
Stories are perfect for photos you want to share without making them a permanent part of your timeline
like your coffee art, your concert seat, or your “I tried to bake bread” documentary series.
- Tap Create Story (or the + near Stories).
- Select a photo from your camera roll (or take one in-app).
- Add text, stickers, or doodles (optional, but fun).
- Set Story privacy if prompted, then tap Share.
Mobile Pro Tips: Better Quality, Fewer Headaches
- Turn on HD uploads (if available): In Settings, look for a section like “Media” or “Videos and photos,”
then enable Upload HD for photos. - If the upload stalls: Switch to Wi-Fi, close/reopen the app, or try again with fewer photos at once.
- Watch your permissions: If Facebook can’t access your camera roll, it can’t upload your photos. (Rude, but fair.)
Way 2: Upload Pictures to Facebook on a Computer (Windows or Mac)
Uploading from a desktop or laptop is the best move when you want to:
upload multiple photos quickly, organize albums, or drag-and-drop like a responsible adult.
Option A: Upload Photos as a Post (Fast & Familiar)
- Go to Facebook in your browser and sign in.
- Click the post box near the top of your Feed or on your profile (the one that says something like “What’s on your mind?”).
- Click Photo/Video.
- Select one or multiple images from your computer, then click Open.
- Add a caption, tag people, choose your audience, then click Post.
Option B: Create an Album (Best for Big Uploads)
Albums are made for “here’s everything from my trip” moments. Plus, they keep your timeline from turning into
a flipbook that never ends.
- Go to your profile.
- Click Photos, then Albums.
- Click Create Album.
- Select the photos you want and confirm.
- Add details:
- Album title (e.g., “Chicago Weekend,” not “IMG_4021-4099”).
- Description (optional).
- Audience/privacy (important).
- Click Post (or Save, depending on what Facebook shows you).
Option C: Add Photos From Your Phone While Posting on Desktop (If You See It)
Sometimes Facebook lets you start a post on your computer and pull photos from your phone through a prompt
(often involving a notification to your mobile app). If you see an option like “Add photos from mobile,”
it can save you from emailing photos to yourself like it’s 2009.
Desktop Pro Tips: Cleaner Uploads
- Use drag-and-drop: If Facebook supports it in your browser, it’s faster than clicking through folders.
- Upload in smaller batches: If you’re posting 150 photos, try 30–50 at a time to avoid timeouts.
- Don’t over-edit first: Heavily edited images can sometimes fail to uploadif you get errors, try the original file.
Where Are You Uploading To? (Feed vs. Album vs. Group vs. Page)
“How do I post photos on Facebook?” is actually four questions wearing one trench coat. Here’s the quick guide:
Feed Post
Best for 1–10 photos and a quick caption. Great for everyday updates, family pics, and “my dog did something adorable” evidence.
Album
Best for lots of photos that belong togethervacations, holidays, birthdays, events. Also easiest to find later.
Group
Perfect when you’re sharing photos with a community (class reunion group, neighborhood group, hobby group).
Look for the Photo button inside the group’s “Write something…” box.
Page
Ideal for businesses, creators, and organizations. Upload photos the same way you would for a postjust make sure you’re
posting as the Page (not your personal profile).
Troubleshooting: When Facebook Won’t Upload Your Pictures
Sometimes Facebook gets moody. If your upload fails, try these fixes before you start negotiating with your Wi-Fi router.
Quick Fixes That Solve Most Problems
- Check your connection: Switch to Wi-Fi or move to a stronger signal.
- Try fewer photos: Upload 5–10 at a time instead of 50.
- Use the original file: If the edited version fails, upload the original and edit later.
- Restart the app/browser: Old-school, but it works.
- Update Facebook: Outdated apps can behave like toddlers.
If You’re on Mobile
- Clear app cache (where applicable): This can resolve stuck uploads and weird glitches.
- Check permissions: Facebook needs access to Photos to upload from your camera roll.
If You’re on Desktop
- Try another browser: If it fails in one, test another (Chrome, Edge, Safari, etc.).
- Disable extensions temporarily: Some privacy/ad blockers can interfere with upload widgets.
- Refresh and reattach: Remove the photo(s), refresh, then add them again.
Privacy & Etiquette: Post Smart, Not Sorry
Uploading photos is easy. Uploading photos without unintentionally broadcasting someone’s awkward moment to the world?
That’s an art form.
Choose the Right Audience Every Time
- Public is basically “hello, internet.” Use it intentionally.
- Friends is the default for most personal posts.
- Specific friends is perfect for family photos you don’t want your coworkers to discover at 2 a.m.
- Only me is great for testing or saving something you want to find later.
Tagging: Helpful, Not Hostile
- Tag people when it adds value (like a shared memory), not when it adds embarrassment.
- If it’s a group photo, consider asking firstespecially for kids, private events, or sensitive situations.
Location Sharing: Use With Intent
Geotags are fun for travel posts. They’re less fun when they reveal routines, schools, or exactly where you’re staying.
If you’re unsure, skip it or add it later.
FAQ: Quick Answers About Uploading Pictures to Facebook
Can I upload multiple photos to Facebook at once?
Yes. On mobile, select multiple images from your camera roll before posting. On desktop, you can select multiple files
in the file picker (and albums are especially good for batches).
Why do my photos look blurry after uploading?
Facebook may compress images. If you have the option, enable HD uploads in the app settings, use a strong connection,
and avoid repeatedly downloading/reuploading the same file (each round can lose quality).
Can I add photos to an existing album?
Yes. Open the album, choose Add Photos, select images, and post the update.
Can I change who sees my photos after posting?
Often, yesFacebook typically lets you adjust the audience on your posts (depending on the type of content and where it’s posted).
Real-World Upload Stories & Lessons Learned (So You Don’t Rage-Click)
You asked for “easy,” but real life always brings plot twists. Here are common experiences people run into when they try to
upload pictures to Facebookplus what actually helps.
The “Why Did It Post Only One Photo?” Moment
This usually happens when someone taps a single image, hits Post, and assumes Facebook will politely read their mind and include
the other 17 photos they were emotionally committed to sharing. On mobile, the trick is to select multiple photos before
you move to the caption screen. On desktop, you can multi-select in the file picker (or drag in multiple images if supported).
If you already posted just one, don’t panicmake a second post, or (even better) create an album and add the rest there so it looks
intentional, not like you got interrupted by a squirrel.
The “Uploading…” Spinner That Lasts Longer Than Your Last Relationship
Upload stalls are almost always a connection issue or a batch-size issue. People commonly try to upload huge photo sets on cellular
data in a place where the signal is doing its best impression of a whisper. The practical fix: switch to Wi-Fi, or reduce the batch.
Upload 10–25 photos, post, then do another batch. If it still stalls, restart the app. On desktop, try another browser or temporarily
disable extensions that might block upload dialogs. The key lesson: Facebook doesn’t reward bravery. It rewards smaller batches.
The “My Photo Looks Great… Until Facebook Turns It Into Soup” Problem
Compression is the silent villain of social media. People notice it most with detailed shotsnight photos, landscapes, text-heavy
images, or anything with fine patterns. A few habits help: enable HD uploads if your Facebook app offers it, avoid uploading the same
photo repeatedly, and try to post from a stable connection. Also, consider that Stories and Feed posts may render differently on
different screens. If you’re sharing something where clarity matters (like an event flyer), test it by posting to “Only me” first,
then adjust and repost publicly once it looks sharp.
The “Oops, I Shared That Publicly” Heart Drop
It happensespecially when you’re in a hurry and the audience selector is set to Public from a previous post.
A good habit is to glance at the audience icon every single time you post photos. If you’re sharing family pictures, kids, or anything
tied to your location, consider using Friends or a custom audience. People also learn the hard way that tagging can expand visibility
depending on settings. The practical move: pick your audience first, then tag thoughtfully. When in doubt, keep it smaller.
The “Group Album Confusion” (AKA: Where Did My Photos Go?)
Uploading to a Group can feel different from uploading to your profile. In many groups, photos appear both in the group feed and in
the group’s Photos sectionso if you don’t see them immediately, check the group’s Photos tab. Also, some groups have posting approval
turned on. That means your upload might be “pending” until an admin approves it. Lesson learned: if it’s a group, check the group rules
and look for a pending post notice before you assume Facebook ate your pictures.
The “I Just Want to Share From My Computer, But the Photos Are on My Phone” Shuffle
Plenty of people take photos on their phone but prefer writing captions on a full keyboard. The smooth approach is to upload using the
mobile app, orif Facebook offers ituse the desktop flow that lets you add photos from your mobile device via a prompt/notification.
If that option isn’t available, the simplest workaround is to move photos to your computer (cloud storage, AirDrop, USB, or email to yourself),
then upload as usual. The lesson: choose the path that reduces friction. You’re posting memories, not applying for a mortgage.