Table of Contents >> Show >> Hide
- What Is a DIY Self-Watering Tub?
- Why a Self-Watering Tub Works So Well for Seed Germination
- Materials You Need
- How to Build the DIY Self-Watering Tub
- How to Use the Tub During Germination
- How to Care for Seedlings After Germination
- Common Mistakes to Avoid
- Best Crops for a DIY Self-Watering Germination Setup
- Is a DIY Self-Watering Tub Better Than Regular Watering?
- Common Grower Experiences and Lessons Learned
- Final Thoughts
- SEO Tags
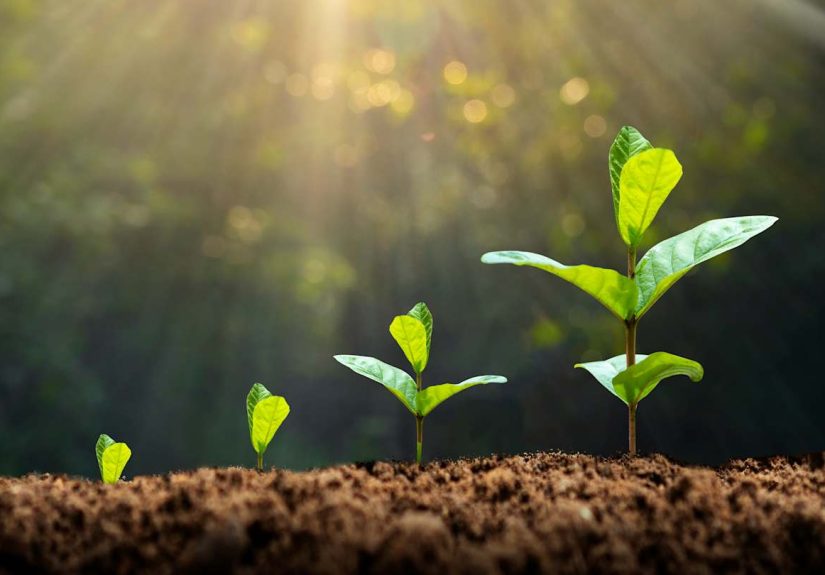
Starting seeds indoors sounds charming until day three, when your tray is either bone-dry, swampy, or somehow both. That is exactly why a DIY self-watering tub can feel like a small miracle. It helps keep seed-starting mix evenly moist, reduces the daily drama of top watering, and gives tiny seeds a more stable environment while they germinate. In other words, it does some of the babysitting without taking over the whole parenting job.
If you want stronger germination, fewer moisture swings, and a seed-starting setup that costs less than many store-bought systems, a homemade self-watering tub is worth your attention. The idea is simple: create a shallow water reservoir below your seed tray, then let a wick or capillary layer pull moisture upward as needed. Done right, it helps maintain the sweet spot seedlings love: moist, airy, and not drenched like a sponge that lost all sense of boundaries.
This guide walks through how to build one, how to use it correctly, and how to avoid the classic mistakes that turn “seed starting” into “experimental composting.”
What Is a DIY Self-Watering Tub?
A DIY self-watering tub is a homemade seed-starting setup that uses a container as a water reservoir beneath your seed trays or small pots. Instead of watering from the top every day, moisture moves upward through drainage holes and a wick, capillary mat, or absorbent layer. This bottom-up method helps keep the growing mix consistently moist during seed germination.
That consistency matters. Seeds need moisture to kick off germination, but they also need oxygen. If the mix stays too wet, seeds can rot and tender seedlings can run into damping-off problems. If it dries out repeatedly, germination becomes uneven or stalls completely. A self-watering tub helps reduce those extremes, which is why so many gardeners love the concept.
It is not hydroponics, and it is not a magic tub that frees you from all responsibility. You still need to monitor temperature, light, airflow, and seed depth. But it does make watering easier and more uniform, which is a huge win when you are starting tomatoes, peppers, herbs, lettuce, flowers, or any crop that appreciates steady moisture in the germination stage.
Why a Self-Watering Tub Works So Well for Seed Germination
1. It evens out moisture levels
Top watering can create wet pockets, dry corners, and the occasional mini-flood. A self-watering tub delivers moisture from below, helping the entire tray stay more uniformly damp. That leads to more even germination and fewer trays where half the cells pop up and the other half stare back at you in stubborn silence.
2. It reduces seed disturbance
Tiny seeds are not exactly known for their emotional resilience. A strong stream of water can displace them, bury them too deeply, or expose them on the surface. Bottom watering keeps the top layer calmer, which is especially helpful for fine seeds like lettuce, basil, snapdragon, or many flowers.
3. It can help limit wet foliage
Once seedlings emerge, keeping foliage drier is generally a good thing. Constant leaf wetness, poor airflow, and overly wet media can encourage fungal problems. A reservoir-style setup makes it easier to water the roots without splashing stems and leaves.
4. It saves time
Seed trays dry quickly under lights and warm indoor conditions. A self-watering tub slows the roller coaster. You still check daily, but you are less likely to miss the narrow window between “perfectly moist” and “desert simulation.”
Materials You Need
You do not need a fancy branded kit. A practical DIY self-watering tub can be built with simple supplies:
- A sturdy plastic storage tub or tote, preferably shallow to medium depth
- A watertight bottom section to hold the reservoir
- A tray, rack, egg-crate light diffuser, or perforated insert to sit above the water line
- Seed trays, cell packs, or small pots with drainage holes
- Capillary matting, cotton strips, felt, or another absorbent wick material
- Seed-starting mix, not dense garden soil
- Seeds
- Plant labels
- Humidity dome or loose plastic cover for pre-germination use
- Grow lights and a timer
If you want bonus points, add a small fan for airflow and a heat mat for warm-season crops. Tomatoes and peppers, for example, usually germinate faster with warm root-zone conditions than they do in a chilly room.
How to Build the DIY Self-Watering Tub
Step 1: Choose the right tub
Pick a tub that is large enough to hold your seed trays without wobbling, but not so huge that it becomes awkward to move. Opaque tubs are useful because they reduce light reaching standing water, which may help discourage algae. Clean the container well before using it.
Step 2: Create a support platform
The seed trays should sit above the water reservoir, not directly in a deep pool. Use an insert, rack, upside-down nursery pots, bricks, or a plastic grid to create a raised platform. You want a small air gap and a way for wick material to reach the water.
Step 3: Add the wick or capillary layer
Run strips of absorbent material from the tray area down into the reservoir, or line the support surface with capillary matting that can stay in contact with water below. The goal is simple: water moves up, growing mix drinks what it needs, and you look unreasonably pleased with yourself.
Step 4: Prepare the seed-starting mix
Pre-moisten the mix before filling containers. It should feel like a wrung-out sponge: evenly damp, not dripping, not dusty. This step matters because dry seed-starting media often repels water at first, and your self-watering setup will perform better if the mix begins evenly hydrated.
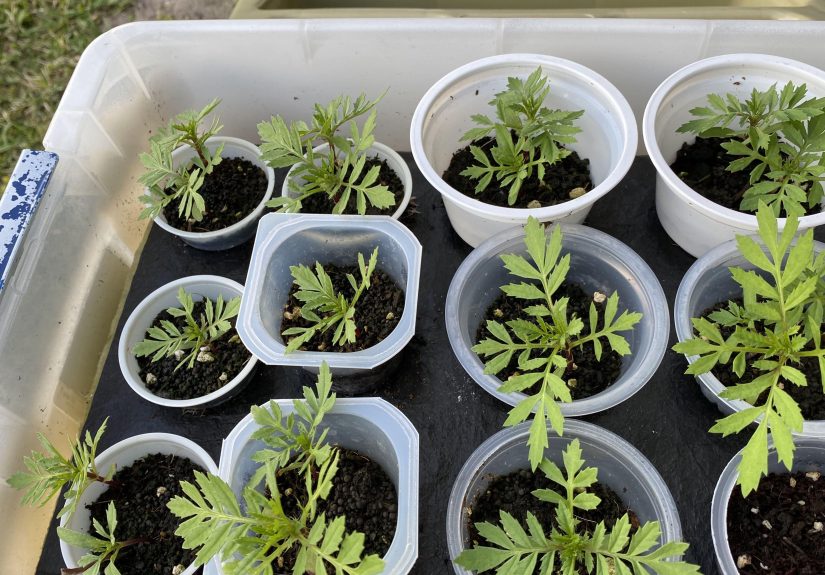
Step 5: Fill trays and sow seeds
Fill each cell or pot loosely, then level the surface without compacting it too much. Sow seeds at the depth recommended on the packet. As a general rule, many seeds are planted at a depth about two times their diameter, but some need light to germinate and should not be buried. Read the packet instead of freelancing.
Step 6: Cover for humidity
Use a clear dome or loose plastic cover until seeds sprout. This helps hold humidity near the surface and slows evaporation. The moment seedlings emerge in significant numbers, remove the cover so the tub does not turn into a fungal spa.
Step 7: Add water carefully
Pour water into the bottom reservoir, not onto the tray surface. Start shallow. You want the wick or mat damp, not the tray floating like a tiny ark. Check after an hour or two to confirm the media is pulling moisture upward.
How to Use the Tub During Germination
Keep the mix evenly moist, not soaked
This is the central rule. A DIY self-watering tub should maintain even moisture, but the reservoir should not be so deep that the mix stays waterlogged. Seeds need oxygen as much as they need water. If the setup never gets any air exchange in the root zone, germination can stall and disease pressure rises.
Match temperature to the crop
Most common vegetable and annual flower seeds germinate well in the roughly 65 to 75 degrees Fahrenheit range, while some warm-season crops appreciate more heat. If your room runs cold, a heat mat under the tub or beneath the trays can improve speed and uniformity. If the room is already warm, skip the extra heat and avoid cooking your seeds like very expensive sprinkles.
Do not obsess over light before sprouting, but be ready after
Before germination, light matters less for many seeds than temperature and moisture, though some seeds do require light to sprout. After emergence, however, good light becomes critical. Move seedlings immediately under grow lights and keep the lights close enough to prevent stretching without scorching the tops.
Label everything
This sounds obvious until you are staring at six identical trays of green loops and wondering whether you planted basil, zinnias, or some sort of optimistic mystery salad. Use labels from the beginning.
How to Care for Seedlings After Germination
Remove the humidity cover
As soon as most seeds in a tray have germinated, remove the dome. Seedlings need airflow. Leaving the cover on too long traps excessive humidity and encourages disease.
Adjust watering strategy
Continue using bottom moisture, but let the top of the mix dry slightly between refills. Not bone-dry, just not perpetually soggy. This helps roots get both water and oxygen. A self-watering tub should act like a steady support system, not a swamp simulator.
Provide enough light
Plan on roughly 12 to 16 hours of light daily for most seedlings, or a bit more depending on the crop and your setup. Keep lights close and adjustable as plants grow. Weak light is one of the fastest ways to get tall, floppy seedlings that look like they are applying for a role as noodles.
Feed lightly when true leaves appear
If your seed-starting mix does not contain fertilizer, begin feeding with a diluted liquid fertilizer once true leaves form. Use a light hand. Young seedlings do not need a bodybuilder meal plan; they need a gentle nutritional nudge.
Thin or pot up when needed
If several seedlings emerge in one cell, thin to the strongest plant unless the crop is usually grown in clumps. If roots outgrow the starter cells, transplant into larger pots before they become root-bound and grumpy.
Common Mistakes to Avoid
Filling the reservoir too high
If water constantly saturates the bottom half of the cells, the mix can stay too wet. Keep the reservoir shallow and refill based on observation, not optimism.
Using heavy garden soil
Garden soil is usually too dense for indoor seed germination. It drains poorly, compacts easily, and may introduce pathogens. Use a clean, loose seed-starting mix instead.
Leaving seedlings under a dome too long
Humidity is helpful before germination, but stale, wet air after emergence can invite damping-off. Remove the cover promptly and improve airflow.
Ignoring seed-specific instructions
Not all seeds want the same treatment. Some need warmth. Some prefer cooler conditions. Some need light to germinate. Some sprout fast, and others take their sweet time. The self-watering tub is a tool, not a substitute for reading the packet.
Starting seeds too early
One of the most common beginner mistakes is sowing too soon, then ending up with oversized transplants before outdoor conditions are ready. A healthy small transplant is better than a lanky indoor jungle staging a takeover in your spare room.
Best Crops for a DIY Self-Watering Germination Setup
This method works especially well for crops commonly started indoors, including:
- Tomatoes
- Peppers
- Eggplant
- Basil
- Lettuce
- Brassicas such as broccoli, cabbage, and kale
- Many annual flowers
It is less useful for crops that dislike transplanting, such as some root vegetables and certain cucurbits, unless you time them carefully and disturb roots as little as possible. Even then, direct sowing is often simpler for those crops.
Is a DIY Self-Watering Tub Better Than Regular Watering?
For many home gardeners, yes. The biggest advantage is consistency. Hand watering from above can work perfectly well when done carefully, but it takes more attention and is easier to get wrong. A self-watering tub offers a more forgiving moisture system, especially for people who are starting multiple trays under lights.
That said, it is not automatically better in every situation. If the tub is poorly built, overfilled, or never monitored, it can create the exact problems it is supposed to solve. The best results come when you combine the tub with proper seed-starting mix, correct temperatures, strong light, airflow, and reasonable restraint with water.
Common Grower Experiences and Lessons Learned
One of the most common experiences gardeners report with a DIY self-watering tub is surprise at how much more even their germination becomes. With top watering, one side of the tray often dries faster because of light, airflow, or room temperature. The corner nearest the grow light may warm up and dry out first, while another corner stays too wet. In a self-watering system, those differences usually shrink. Gardeners often notice that trays come up more uniformly, which makes the whole seed-starting process feel less like gambling and more like gardening.
Another frequent lesson is that “self-watering” does not mean “ignore it for a week and go live your life.” People often build the tub, fill the reservoir enthusiastically, and assume they have invented indoor agricultural independence. Then they come back to find soggy mix, algae, or a humidity dome still clinging to the tray long after germination. The better experience usually comes after a small mindset shift: the tub is not a replacement for observation. It is a moisture-management tool that works best when paired with daily check-ins.
Many growers also discover that pre-moistening the mix is a game changer. A surprising number of early frustrations come from starting with dry peat- or coir-based media that resists water. The tub can only wick effectively if the mix is ready to participate. Once gardeners begin with evenly damp media, the system behaves much more predictably.
There is also the unforgettable moment when seedlings emerge and start leaning dramatically toward any available light source. This is where many people learn that moisture was only half the battle. A beautifully built self-watering tub will not stop legginess if the light is weak or too far away. Gardeners who pair the tub with close, strong grow lights usually report sturdier stems and better transplants. Those who skip the lighting upgrade often end up with seedlings that look ambitious but structurally questionable.
Another shared experience is learning how little fertilizer seedlings need at first. New growers sometimes panic when cotyledons appear and immediately reach for strong plant food, as if the seedlings are late for a bodybuilding competition. In reality, gentle feeding after true leaves form is usually enough. The most successful growers tend to remember that young seedlings need consistency more than intensity.
Finally, many gardeners say the DIY self-watering tub makes seed starting more enjoyable because it lowers stress. Instead of hovering with a spray bottle three times a day or wondering whether a tray dried out while they were busy, they can focus on timing, crop selection, and transplant quality. That change matters. Gardening is supposed to be satisfying, not a moisture-related thriller. A well-used self-watering tub does not eliminate all mistakes, but it often turns seed starting from a fussy chore into a repeatable system you actually look forward to using each season.
Final Thoughts
A DIY self-watering tub for seed germination is one of those rare garden hacks that is both clever and genuinely useful. It helps keep seed-starting mix evenly moist, reduces disturbance from top watering, and gives seeds a more stable environment during the stage when they are most vulnerable. When paired with the right seed-starting mix, proper temperatures, solid lighting, and good airflow, it can improve both germination rates and seedling quality.
The real secret, though, is balance. The best self-watering seed-starting setup is not the wettest one or the most complicated one. It is the one that keeps the media consistently moist, still airy, and easy to monitor. Build it simply, use it thoughtfully, and your seedlings will have a much better shot at becoming strong transplants instead of cautionary tales.
And that, in gardening terms, is a very respectable victory.