Table of Contents >> Show >> Hide
- Fix #1: Create a “No-Shelter Zone” Around Your Home’s Exterior
- Fix #2: Seal Entry Points Like You’re Weatherproofing for a Blizzard
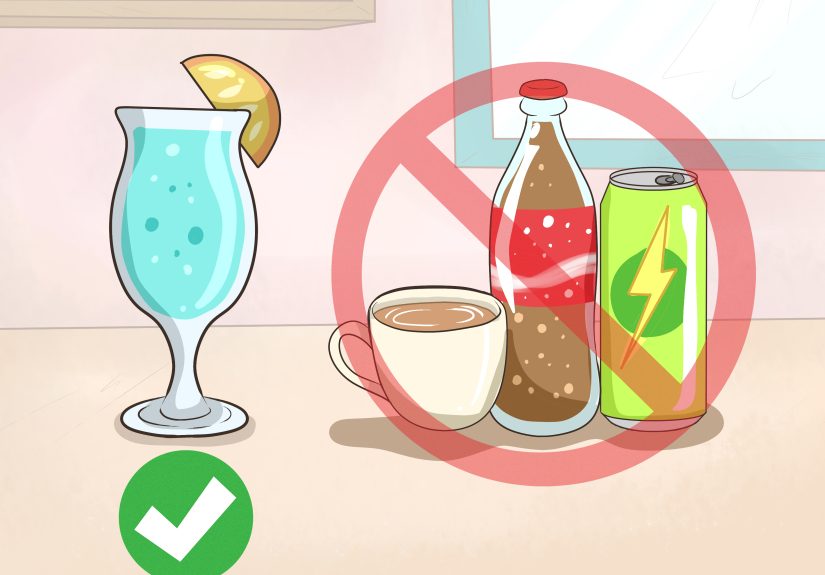
- Fix #3: Remove Food, Water, and “Free Housing” Indoors
- How to Tell When You Need a Pro (and When You Don’t)
- A Simple Fall Pest-Prevention Checklist (One Weekend Version)
- Real-World Experiences: What Fall Pest-Proofing Looks Like in Practice (and Why It Works)
- Experience #1: The Mystery Crunch in the Pantry
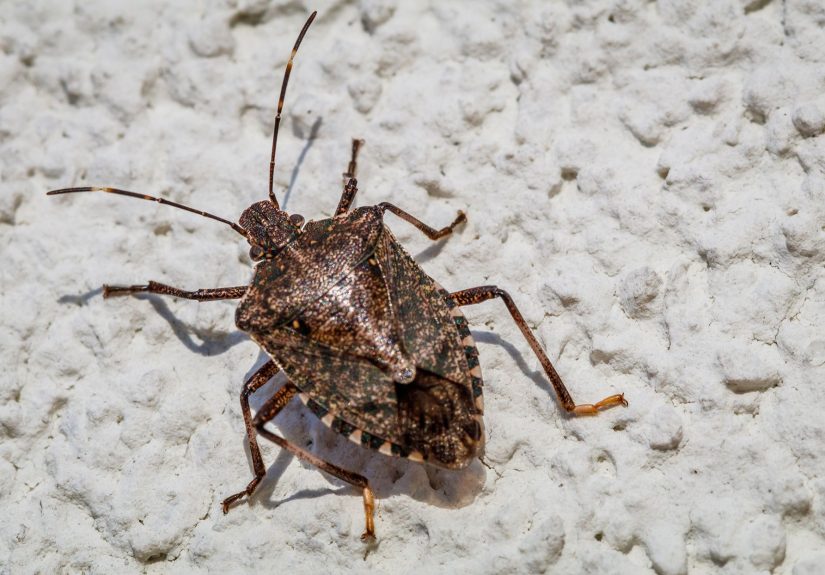
- Experience #2: The “Why Are There 12 Stink Bugs in Here?” Moment
- Experience #3: The Basement That “Smells Like Damp” (and Attracts Bugs)
- Experience #4: “We Sealed One Door and Suddenly the Ants Disappeared”
- Experience #5: The Garage That Became a Pest “Lobby”
- Conclusion
Fall is cozy. Fall is candles. Fall is that one cardigan you swear makes you look like the main character.
Fall is also… the season when bugs and rodents start house-hunting like they just got pre-approved.
As temperatures drop and days get shorter, many pests look for warmth, shelter, food, and wateraka your
home, your pantry, and that slow drip under the sink you’ve been “meaning to fix.”
The good news: you don’t need to turn your house into a sealed space capsule or wage chemical warfare.
Most pest problems shrink dramatically when you focus on prevention. Pest pros and university extension
experts generally agree on three big levers: remove the “welcome mat” outdoors, block the entrances, and
cut off the snacks and sips indoors.
Below are three expert-backed fixes that work together like a bouncer, a deadbolt, and a fridge with a lock.
Do these in early fall (or before your first real cold snap), and you’ll dramatically reduce surprise guests
from stink bugs and boxelder bugs to mice and cockroaches.
Fix #1: Create a “No-Shelter Zone” Around Your Home’s Exterior
If your home’s perimeter looks like a five-star resort for pestsleaf piles, stacked firewood, dense shrubs,
and random “I’ll deal with it later” clutterdon’t be shocked when they check in. Many insects and rodents
thrive in protected, undisturbed spots near foundations, garages, basements, and crawl spaces.
Start with the pest-friendly clutter (yes, even the cute stuff)
- Move wood piles away from the house. Store firewood up off the ground and several feet from exterior walls.
- Clear leaf piles and thick mulch near the foundation. Leaf litter is basically a blanket fort for pests.
- Declutter the “in-between” zones. Garages, sheds, crawl spaces, and basement window wells are favorite hiding spots.
- Keep compost and trash tidy. Use lidded bins and don’t let spilled pet food or bird seed hang out in the garage.
Trim, rake, and separate (distance is your friend)
Many “home invaders” don’t start indoorsthey start right outside your walls, then slip in through tiny
openings when the weather changes. Make the trip from “outside” to “inside” annoying.
- Trim shrubs back so they don’t touch siding. Aim for air space between plants and your home.
- Rake and remove leaves along the foundation, under decks, and around outdoor HVAC units.
- Reduce moisture-holding debris (damp cardboard, stacked boards, old planters, and that mystery tarp).
Why this works (the simple science)
Pests don’t love your home because it’s charming. They love it because it’s stable: fewer temperature swings,
less wind, more hiding spots, and sometimes easy access to food and water. Cleaning up the exterior removes
shelter and breeding/harborage areasand it forces pests to travel farther in the open, where they’re more
likely to give up or get eaten by natural predators.
Real-world example: Boxelder bugs often gather on sunny exterior walls in fall, then slip inside through cracks
and gaps. Reducing harborage and tightening up entry points can significantly cut down how many make it indoors.
Fix #2: Seal Entry Points Like You’re Weatherproofing for a Blizzard
Here’s the part that feels unfair: you can do everything “right” and still miss the one gap the size of a pencil
that becomes the VIP entrance for half the neighborhood. Exclusionblocking entryis one of the most effective
pest-prevention strategies across many species.
Do a quick “outside-in” inspection (and bring a flashlight)
Walk your exterior slowly. Pretend you are a very determined mouse with a tiny suitcase.
Look for gaps around:
- Door frames and thresholds
- Window frames, screens, and weep holes
- Utility penetrations (pipes, cables, HVAC lines)
- Foundation cracks and siding joints
- Garage doors (the “big door” is often the big problem)
- Vents and soffits
Know the “gap math” (it’s rude, but helpful)
Many insects can enter through incredibly small openings. Even a narrow gap under an exterior door can become
a nightly parade route. And rodents? They can squeeze through openings that look laughably small.
(If you’ve ever seen a mouse flatten itself like a furry little envelope, you know what I mean.)
- Doors: Add or replace door sweeps and adjust thresholds so you don’t see daylight under the door.
- Windows: Repair torn screens and make sure screens fit tightly in frames.
- Cracks and joints: Use high-quality caulk for small cracks and appropriate sealants for exterior gaps.
- Utility holes: Seal around pipes/cables; these are common “highways” into walls.
Use rodent-resistant materials where it matters
If you’re sealing a gap that rodents might exploit, soft materials alone may not hold up.
For larger holes or gnaw-prone areas, use more durable barriers (metal flashing, hardware cloth, or other
rodent-resistant approaches). The goal is to block access and keep it blocked.
Pro tip: Pay extra attention to where different building materials meet (brick to siding, fascia boards, roof lines,
and foundation transitions). These seams often shift with seasons and settling, creating micro-openings.
Don’t forget the garage (aka the pest airport)
Garages are full of cardboard, stored food, pet bowls, and hiding places. If your garage door doesn’t seal
well at the bottom and sides, pests can enter easilyand then wander into your home through the connecting door.
- Replace worn bottom seals and side weatherstripping on garage doors.
- Seal gaps around the garage’s exterior service door like you would a front door.
- Store food (including pet food and bird seed) in airtight, hard containers.
Fix #3: Remove Food, Water, and “Free Housing” Indoors
Even with great sealing, the occasional pest may still get in. What determines whether you see one lonely
wandereror a recurring cast of charactersis what they find inside.
In integrated pest management (IPM), prevention focuses heavily on removing the conditions pests need:
food, water, and shelter.
Step 1: Cut off the buffet (especially the invisible buffet)
Crumbs are tiny. To pests, crumbs are a catered event.
Kitchens and eating areas are the most important zones to keep clean and sealed.
- Store food in airtight containers (including cereal, flour, snacks, pet food, and bird seed).
- Wipe counters nightly and don’t forget appliance seams where crumbs love to hide.
- Vacuum or sweep under/around appliances (stoves and toasters are crumb dispensers in disguise).
- Use lidded trash cans and take out garbage regularlyespecially if you cook with lots of scraps.
Step 2: Fix moisture issues (because pests get thirsty, too)
Many fall and winter pests are drawn to moisture indoorsthink kitchens, bathrooms, basements, and laundry areas.
Even if your home is spotless, a damp basement corner can still feel like a spa retreat to certain insects.
- Repair leaky faucets and pipes.
- Use exhaust fans in bathrooms and kitchens.
- Run a dehumidifier in damp basements or humid rooms.
- Clean and maintain gutters and downspouts so water drains away from the foundation.
Step 3: Reduce indoor hiding spots (clutter is a five-star hotel)
Clutter gives pests places to hide, breed, and avoid detection. This is especially true in storage rooms,
basements, and behind furniture that never moves.
- Swap cardboard storage for plastic bins with tight lids.
- Keep stored items off the floor when possible.
- Declutter “quiet zones” like under-sink cabinets and utility rooms.
What about natural “repellents”?
Some scents and home remedies may discourage pests temporarily, but they rarely solve the root problem.
If you like peppermint or citrus for your own enjoyment, go for itjust don’t let a pleasant smell distract
you from the big three: exclusion, sanitation, and moisture control.
How to Tell When You Need a Pro (and When You Don’t)
Seeing one stink bug or spider doesn’t automatically mean your home is under siege.
But patterns matter. Consider calling a licensed pest professional if:
- You’re seeing the same pest repeatedly (especially in multiple rooms).
- There are signs of rodents (droppings, gnaw marks, nesting material, scratching sounds).
- There’s a persistent odor, staining near windows/walls, or insects emerging from hidden areas.
- You’ve sealed and cleaned, but activity stays high for weeks.
Professionals can help identify entry points you missed, confirm the pest species, and recommend targeted
control options that fit an IPM approach. If any pesticides are used, the safest route is always to follow
label directions exactly and consider professional applicationespecially around kids, pets, or sensitive
indoor environments.
A Simple Fall Pest-Prevention Checklist (One Weekend Version)
Saturday: Outside
- Remove leaf piles and debris along the foundation.
- Trim shrubs away from siding; clear window wells.
- Move firewood and clutter away from exterior walls.
- Inspect for gaps around doors, windows, and utilities.
Sunday: Inside
- Install/replace door sweeps and weatherstripping.
- Seal visible gaps under sinks and around pipe penetrations.
- Deep-clean crumbs near appliances and pantry zones.
- Fix leaks; run a dehumidifier if damp areas exist.
- Store food and pet food in airtight containers.
If you do nothing else, do one thing from each fix. A clear perimeter, tighter doors/windows,
and cleaner food storage will pay off fast.
Real-World Experiences: What Fall Pest-Proofing Looks Like in Practice (and Why It Works)
You can read a checklist and still wonder, “Okay, but what actually happens when I do this stuff?”
Here are a few realistic, experience-based scenarios homeowners commonly run intoplus what changes when they
apply the three fixes above. Think of these as the “before and after photos,” but for your baseboards.
Experience #1: The Mystery Crunch in the Pantry
A common fall storyline goes like this: someone hears a faint rustle at night, then finds a few suspicious crumbs
in the pantry that they definitely did not leave behind (unless the dog learned to open granola barsagain).
The first impulse is traps or panic. The better move is to zoom out. When food is stored in thin packaging,
and there’s a tiny gap where plumbing enters under the sink, you’ve unintentionally created a snack bar with
a back entrance. Homeowners who switch to airtight containers and seal those utility gaps often report that
the “repeat visits” slow down quickly. It’s not magicit’s logistics. No food smell, fewer crumbs, fewer reasons to stay.
Experience #2: The “Why Are There 12 Stink Bugs in Here?” Moment
Stink bugs and other fall invaders (like boxelder bugs or Asian lady beetles) can show up suddenly on warm
afternoons, especially near sunny windows. People often say it feels randomuntil they notice the pattern:
bugs cluster on the sunniest exterior wall, then appear indoors near that same side of the house.
Homeowners who focus on Fix #1 (clearing leaves and outdoor hiding spots) and Fix #2 (sealing cracks and improving
screens and door seals) often see a dramatic reduction. The “one-off” bugs may still happen, but the indoor
swarm effect becomes much less likely when the building envelope is tighter.
Experience #3: The Basement That “Smells Like Damp” (and Attracts Bugs)
Many people don’t connect humidity to pests until they see roaches, silverfish, or other moisture-loving insects
in basements and bathrooms. In fall, when homes are closed up and ventilation changes, dampness can become more
noticeable. Homeowners who fix small leaks, improve ventilation, and run a dehumidifier often describe two wins:
the space feels more comfortable, and pest sightings drop. Moisture is a universal attractantremove it, and you
remove a key reason pests choose your house over the neighbor’s.
Experience #4: “We Sealed One Door and Suddenly the Ants Disappeared”
Ant problems can seem like a mystery until you watch their route. Many homeowners find that ants are entering
through a barely visible crack near a door frame, a window corner, or where a utility line meets the wall.
After sealing that routeand pairing it with better food storagethe ant trail often stops. The important lesson
people learn here: surface sprays don’t fix the highway. Blocking the highway does.
Experience #5: The Garage That Became a Pest “Lobby”
Garages are a classic weak link. They’re full of hiding places, and the door seals wear out over time.
Homeowners who replace the bottom seal, reduce clutter, and move pet food into sealed containers often report
fewer insects inside the garageand fewer creepy-crawly surprises in the connecting hallway.
When the garage stops acting like an all-you-can-hide-and-snack buffet, the rest of the house benefits.
The takeaway from these experiences is simple: prevention works because it changes the environment. Pests can’t
easily enter, can’t easily hide, and can’t easily find food or water. You’re not “fighting nature”you’re just
making your home the least convenient option on the block. And pests, like most of us, tend to choose the
easiest path.
Conclusion
Keeping pests out of your house this fall isn’t about doing one dramatic thingit’s about stacking small,
practical changes that make a big difference. Clear the clutter and debris near your home, seal and screen
the entry points, and eliminate indoor food and moisture sources. Do that, and you’ll spend more time enjoying
fall and less time negotiating with a stink bug on your window like it pays rent.