Table of Contents >> Show >> Hide
- Why Clear Wine Bottles Are Perfect for Outdoor Sculpture
- Pick Your Look: 4 Reliable Painting Approaches
- Materials and Tools Checklist
- How to Paint Clear Wine Bottles for Outdoor Sculptures (9 Steps)
- Step 1: De-label like you mean it
- Step 2: Degrease the glass (yes, even if it looks clean)
- Step 3: Lightly scuff glossy surfaces
- Step 4: Decide what stays unpainted, then mask it
- Step 5: Prime (especially for exterior paint)
- Step 6: Apply color in thin coats (the no-drip rule)
- Step 7: Cure fully (dry-to-touch is not the same as “ready for outdoors”)
- Step 8: Seal with a UV-resistant clear coat
- Step 9: Assemble your sculpture (and plan for water)
- Weatherproofing Tips That Actually Matter
- Outdoor Sculpture Ideas Using Painted Clear Wine Bottles
- Troubleshooting: When Bottles Misbehave
- Care and Maintenance for Outdoor Bottle Art
- Experience Notes: What Painting Clear Wine Bottles Outdoors Usually Feels Like (and What You Learn)
- Conclusion
Clear wine bottles are basically the “blank canvases” of the garden-art world: free (or close to it), beautifully shaped,
and just transparent enough to make sunlight do the heavy lifting. The only problem? Outdoors is a tough audience.
UV rays fade color, rain tests every weak spot, and one curious squirrel can turn a wobbly sculpture into modern art
titled Gravity Wins Again.
This guide walks you through painting clear wine bottles for outdoor sculptures so your work looks intentionalnot “mysteriously peeling.”
You’ll learn which paint approaches hold up best, how to prep slick glass so paint actually sticks, and how to seal, mount,
and maintain your bottles so they can survive seasons of weather and compliments from neighbors.
Why Clear Wine Bottles Are Perfect for Outdoor Sculpture
Clear glass plays well with light. Even when you paint it, you can choose finishes that glow, shimmer, or soften sunlight
rather than blocking it. Clear bottles also give you options: paint the outside for bold color, tint the inside for a glassy
“stained” look, frost it for a beachy vibe, or combine techniques for gradients and patterns.
Pick Your Look: 4 Reliable Painting Approaches
1) Opaque exterior color (the “classic bottle art” look)
If you want solid, vibrant color that reads from across the yard, use an outdoor-rated spray paint (often enamel or acrylic)
on the outside of the bottle. This is the fastest method and great for bottle trees, fence toppers, and bold sculptural clusters.
The trade-off: exterior paint can scratch if bottles rub against metal spikes or each other.
2) Transparent stained-glass vibe (color that still lets light through)
For a luminous effect, choose transparent glass colorants (like stained-glass effect sprays or translucent paints).
You’ll get jewel-toned bottles that glow in sunlightexactly what many outdoor bottle sculptures are trying to do.
This is especially nice if your sculpture is backlit by morning or late-afternoon sun.
3) Frosted or sea-glass finish (soft, coastal, “found on a beach” energy)
A frosted finish hides minor imperfections and makes even mismatched bottles look cohesive. It’s also forgiving for beginners:
light coats build an even haze, and small drips aren’t as obvious as they are on glossy paint.
4) Inside-out color (the secret weapon for outdoor durability)
If you want color that’s protected from scratches, tint or paint the inside of the bottle. The outside stays glass-smooth,
and the color is less likely to chip from contact with metal supports. This approach can be a little messier to apply, but it’s
fantastic for sculptures where bottles slide onto rods or spikes.
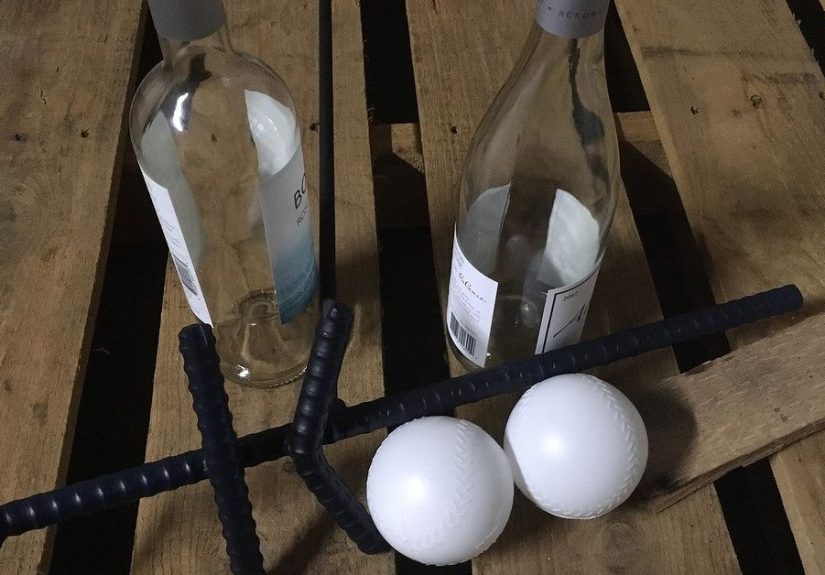
Materials and Tools Checklist
- Clear wine bottles (remove labels; check for chips and cracks)
- Dish soap + warm water
- Adhesive remover (optional, for stubborn label glue)
- Isopropyl alcohol and lint-free cloths
- Disposable gloves (to keep skin oils off the glass)
- Fine sandpaper (around 400–600 grit) or a scuff pad
- Painter’s tape (masking patterns, necks, or “windows”)
- Bonding primer suitable for slick surfaces (recommended for exterior paint)
- Outdoor-rated spray paint (enamel/acrylic) or glass paint system of your choice
- UV-resistant clear coat (exterior)
- Cardboard drop sheets or a spray station setup
- Respirator or mask rated for paint fumes + eye protection
- Mounting hardware (metal rods/spikes, rebar, wire, clamps, or a bottle-tree frame)
How to Paint Clear Wine Bottles for Outdoor Sculptures (9 Steps)
Step 1: De-label like you mean it
Soak bottles in warm, soapy water to loosen paper labels. For sticky residue, use an adhesive remover or a paste of baking soda and oil.
Scrape gently (no need to gouge the glass like you’re excavating fossils). Rinse well and dry completely.
Step 2: Degrease the glass (yes, even if it looks clean)
Glass holds invisible oils from hands, cooking fumes, and life in general. Wipe the entire bottle with isopropyl alcohol.
Wear gloves after this point so you don’t reapply finger oils where paint needs to bond.
Step 3: Lightly scuff glossy surfaces
Paint sticks better when it has something to grab. Lightly scuff the bottle with fine sandpaper or a scuff padjust enough to dull the shine.
You’re not trying to carve your initials into it; a gentle “tooth” is the goal. Wipe dust off with a clean cloth.
Step 4: Decide what stays unpainted, then mask it
Mask bottle threads (where caps go), the base (if it needs to sit flat), or create patterns with tape.
For bottle trees, many people leave the neck unpainted so bottles slide onto spikes more smoothlyyour call.
Step 5: Prime (especially for exterior paint)
If you’re painting the outside, a bonding primer dramatically improves adhesion on slick glass.
Apply light, even coats rather than one heavy coat that drips. Let primer dry per the product label.
If you’re painting the inside, primer is usually unnecessary.
Step 6: Apply color in thin coats (the no-drip rule)
Spray paint loves two things: patience and motion. Hold the can a short distance from the bottle, keep it moving,
and apply multiple thin coats rather than trying to “finish” in one pass. Rotate the bottle as you spray so coverage stays even.
- Pro move: Put bottles on cardboard so you can rotate them without touching wet paint.
- Pro move #2: Start spraying off the bottle, sweep across, and stop spraying after you pass the edge.
- Pro move #3: Let coats flash off (dry slightly) before adding the next to avoid sagging.
Step 7: Cure fully (dry-to-touch is not the same as “ready for outdoors”)
A bottle can feel dry but still be soft underneath. Let paint cure according to the labeloften at least a full day for durability.
If you rush this step and seal too soon, you can trap solvents and end up with cloudy clear coat or a finish that stays tacky.
Step 8: Seal with a UV-resistant clear coat
Outdoors, UV is the silent villain. A UV-resistant clear coat helps slow fading and adds moisture resistance.
Apply it in light coats, just like paint. Choose the sheen you want (matte looks modern; gloss makes color pop).
Step 9: Assemble your sculpture (and plan for water)
Outdoor sculptures need two practical details: stability and drainage.
If a bottle can trap water, it can grow algae, breed mosquitoes, or crack in freezing temperatures.
- Angle bottles slightly downward on spikes so rain runs out.
- If bottles sit upright, consider discreet drainage holes in the mounting surface or design an “open bottom” placement.
- Anchor tall structures in concrete or a heavy base so wind doesn’t redecorate your yard at 2 a.m.
Weatherproofing Tips That Actually Matter
Choose the right paint system for the job
Not all paint is outdoor paint, and not all outdoor paint loves glass. Look for labels that mention multi-surface use and exterior durability.
If your sculpture gets full sun, prioritize UV resistance (both in color and in clear coat).
Paint inside when bottles will slide on metal rods
If your design involves repeated contactbottles sliding onto spikes, rubbing in windinside tinting reduces scratching.
You can still frost or detail the outside later, but keeping the main color inside is a durability cheat code.
Avoid “thick paint confidence”
Thick coats look great for about 40 seconds. Then gravity shows up, smirking, and turns your bottle into a drip sculpture.
Thin coats win every time: smoother finish, fewer runs, better curing, and stronger adhesion.
Outdoor Sculpture Ideas Using Painted Clear Wine Bottles
1) The classic bottle tree (with a color theme)
Choose a paletteocean blues, citrus colors, sunset ombréand paint bottles accordingly. Mix finishes (frosted + transparent) so the tree
sparkles in different light. If you want “museum neat,” keep all bottles the same shape. If you want “folk art charisma,” mix them.
2) Fence-top bottle finials
Mount short metal spikes or caps on fence posts and slide bottles over them. Paint bottles in alternating colors for a patterned border.
Bonus: it looks like your fence is wearing fancy hats.
3) Hanging bottle chandelier sculpture
Use wire and a sturdy frame (like a metal ring) to suspend bottles at different heights. Transparent color looks incredible here because
sun passes through bottles and throws tinted shadows on the ground.
4) Solar-light bottle lanterns
Pair bottles with outdoor solar stakes or small solar puck lights. Frosted paint diffuses light beautifully so the bottle glows softly at night.
Keep openings accessible so you can replace lights or clean inside.
5) Bottle “flower” stakes
Cut-resistant designs use whole bottles: mount bottles horizontally or at angles on a metal stem so they resemble oversized petals.
A gradient paint job makes these look intentionally designed rather than “I had bottles and optimism.”
6) Sculptural bottle cluster in a planter bed
Group bottles in threes or fives with varying heights. Paint them as a set (same hue, different translucency).
Add stones or metal elements between them for contrast. This is great if you want impact without building a full frame.
Troubleshooting: When Bottles Misbehave
Paint is peeling or scratching easily
- Likely cause: surface oils, no scuffing, or no bonding primer.
- Fix: strip loose paint, degrease with alcohol, lightly scuff, prime, repaint in thin coats.
Runs and drips
- Likely cause: heavy coat, spraying too close, or painting in high humidity.
- Fix: let it dry, sand the drip smooth, then respray lightly.
Cloudy or “blushed” clear coat
- Likely cause: spraying in humidity or sealing before paint cured.
- Fix: allow longer cure time; recoat under better conditions if the product allows.
Finish looks dull and dusty
- Likely cause: spraying too far away so paint dries midair.
- Fix: slightly reduce distance, keep the can moving, and apply lighter passes.
Care and Maintenance for Outdoor Bottle Art
Outdoor sculptures last longer with small seasonal check-ins. Once or twice a year, gently wash bottles with mild soap and water,
check for loose mounts, and touch up chips before they spread. If your area gets freezing winters and your sculpture traps water,
consider removing bottles and storing them until spring. Your future self will thank youand so will your bottles.
Experience Notes: What Painting Clear Wine Bottles Outdoors Usually Feels Like (and What You Learn)
The first “real” experience most people have with painting clear wine bottles for outdoor sculptures is discovering that glass is both
glamorous and stubborn. It looks clean when it isn’t, it feels smooth when it needs texture, and it has absolutely no interest in helping paint stick.
That’s why the prep stepsdegreasing, gloves, and light scuffingfeel boring but end up being the difference between a sculpture that lasts and a
sculpture that flakes dramatically after the first rain like it’s auditioning for a soap opera.
Another common experience: you think you need one “good coat,” and then you meet the drip. The drip is not your friend. It forms right when you
decide you’re done, slides slowly down the bottle like it’s sightseeing, and hardens into a ridge that catches sunlight forever. People who do this
more than once tend to switch to a rhythm: light pass, rotate, light pass, rotate, then walk away for a minute so the coating can settle.
It’s oddly satisfying once you accept that thin coats are faster than fixing thick-coat mistakes.
Outdoor projects also teach you that conditions matter more than you expect. A bottle that paints perfectly on a mild day can turn hazy or rough in
high humidity or chilly temperatures. The “experience” is learning to treat the weather like a teammate: paint when it’s comfortable outside,
keep bottles shaded from direct blazing sun while they dry, and avoid sealing too early. If you ever get a cloudy clear coat, you’ll remember that
patience isn’t just a virtueit’s a finishing technique.
If you build bottle trees or sculptures where bottles slide onto rods, you’ll probably notice wear points first: the neck where glass meets metal,
and any spot where bottles clink in the wind. That’s when inside tinting starts to feel like a clever trick. When the color lives inside the bottle,
the outside remains glass-hard and resists scratching. Many DIYers end up combining methods: tint inside for the main color, then add a frosted
exterior mist for diffusion and a UV-resistant clear coat where appropriate. The result looks layered, expensive, andbest of allless fragile.
The final experience is the one nobody puts on the supply list: composition. When bottles are scattered randomly, the sculpture can look accidental.
When bottles are grouped with intentthree heights, one palette, repeated shapesthe same materials suddenly look designed. A simple trick that often
works: pick one “lead” color (like cobalt, amber, or seafoam), then add one supporting neutral (frosted clear, soft white, or pale gray) and one
surprise accent (a single bright bottle here and there). In sunlight, your eye reads the sculpture as a whole rather than as a collection of bottles
that happened to survive recycling day.
If you take anything from the typical experience of painting clear wine bottles for outdoor sculptures, let it be this:
outdoor durability is mostly prep and protection, not secret talent. Clean like a scientist, spray like a patient person,
seal like you want your color to still exist next summer, and mount like the wind is personally offended by your art.
Do that, and your bottles won’t just look goodthey’ll keep looking good long after the last compliment from the neighbor who swore they “don’t even like yard art.”
Conclusion
Painting clear wine bottles for outdoor sculptures is equal parts craft and strategy: choose a paint approach that matches your design,
prep glass so paint bonds, build color in thin coats, and protect your work with a UV-resistant clear coat. Then assemble your sculpture with
stability and drainage in mind so weather can’t undo your weekend masterpiece. With the right process, clear bottles turn into durable, light-catching
outdoor art that looks intentional, charming, and (best of all) still beautiful after the season changes.