Table of Contents >> Show >> Hide
- Why a Shiplap Headboard Is the Perfect DIY Bedroom Upgrade
- Planning the Headboard: Measure, Dream, and Sketch
- Materials and Tools You’ll Likely Need
- Building the Frame: The Backbone of Your Headboard
- Adding the Shiplap: From Plywood Scraps to Farmhouse Charm
- Finishing Touches: Sanding, Painting, and Styling
- Installation: Lean It, Attach It, or Mount It
- Styling Your DIY Shiplap Headboard
- Real-World Lessons We Learned in the Garage
- Extra Experiences and Tips From the Garage Workshop (500+ Words)
- Conclusion: A Custom Headboard Without a Custom Price
If you’ve ever stared at a sad, naked mattress and thought, “One day I’ll buy a real headboard,” this project is for you. Instead of waiting for a sale, a miracle, or an inheritance, we walked out to the garage, stared at our random pile of lumber and leftover plywood, and decided to turn it into a DIY shiplap headboard. No designer budget, no fancy tools requiredjust scraps, a weekend, and a willingness to get a little dusty.
In this guide, you’ll learn how to build a shiplap headboard using materials you probably already have on hand, or can pick up cheaply at a home center. We’ll walk through planning, building, finishing, and styling, plus share real-world tips from DIYers who’ve made similar shiplap headboards using garage scraps, budget lumber, and a lot of creativity.
Why a Shiplap Headboard Is the Perfect DIY Bedroom Upgrade
Shiplap has become a staple in modern farmhouse and cozy cottage design because it gives you clean lines, subtle texture, and tons of character without screaming for attention. A shiplap headboard combines all that charm with a project that’s manageable even for beginners.
Budget-friendly and scrap-friendly
Many DIYers build shiplap headboards for under $100 using basic pine boards, plywood strips, or MDF instead of pricey pre-milled shiplap. Some, like the popular “garage scrap” tutorials, use leftover plywood ripped into planks and nailed to a simple 2×4 frame. That means you can often:
- Use old plywood sheets cut into strips instead of buying new boards.
- Frame the headboard with 2x4s or other random studs you already have.
- Mix and match leftover trim pieces to create a custom frame or ledge.
Big style with a small footprint
Unlike bulky store-bought bed frames, a DIY shiplap headboard can either stand just behind the bed or mount directly to the wall. That makes it perfect for small guest rooms, apartments, or awkward layouts where floor space is precious. You get a strong design focal point without giving up room for nightstands, storage, or walking space.
Beginner-friendly tools and skills
Most shiplap headboard builds rely on basic tools: a saw (miter, circular, or even a jigsaw), a drill or screwdriver, a hammer or nail gun, a level, and a tape measure. If you can measure, cut straight-ish lines, and drive screws, you can pull this off. The repetitive nature of installing planks actually makes it a great “first real carpentry” project.
Planning the Headboard: Measure, Dream, and Sketch
Before you start cutting up the lumber pile, spend a few minutes planning. This is where you decide how dramatic, tall, and wide you want your shiplap masterpiece to be.
Step 1: Measure the bed and wall
Start with the size of your mattress:
- Twin: about 38 inches wide
- Full: about 54 inches wide
- Queen: about 60 inches wide
- King: about 76 inches wide
Many DIYers like the headboard to extend a few inches wider than the mattress and bedding so it visually frames the bed. For example, a queen bed might pair nicely with a headboard that’s 66–72 inches wide. If you’re going for that “statement wall” look, you can go even wider to stretch between nightstands or fill most of the wall width.
Step 2: Choose the height and style
A simple, low-profile headboard might be around 48 inches tall, while a more dramatic version could run 72–84 inches, almost like a mini feature wall. Taller shiplap headboards look especially good in rooms with 8–9 foot ceilings, and they make your bed feel like it belongs in a boutique hotel.
Decide whether you want:
- Uniform rows of shiplap for a clean, modern feel.
- Staggered joints (like a brick pattern) for a more rustic, “we definitely built this ourselves and we’re proud of it” vibe.
- A frame or top ledge made from scraps of trim or 2x lumber for extra dimension.
Step 3: Shop your garage first
This is the fun part. Instead of driving straight to the lumber aisle, go shopping in your own garage or shed. Look for:
- Leftover sheets of plywood you can rip into 5–8 inch “planks.”
- Random 1×4, 1×6, or 1×8 boards from old projects.
- 2x4s for framing the headboard.
- Trim pieces or 1x2s for a border.
- Half-used cans of paint or stain that can give everything a cohesive finish.
You might be surprised by how little you actually need to buy. Many people can build the entire structure out of scraps and only spend money on screws, nails, or a new quart of paint.
Materials and Tools You’ll Likely Need
Your exact materials will depend on what you already have, but here’s a typical “garage-based” shiplap headboard supply list:
Common materials
- Plywood sheets cut into planks (or leftover shiplap, MDF, or boards).
- 2x4s for the outer frame and any vertical supports.
- Wood screws and/or finishing nails.
- Wood glue (optional but helpful for extra strength).
- Paint or stain and a clear protective finish.
- Wood filler and caulk for gaps, nail holes, and seams.
- French cleats or mounting brackets if you plan to hang the headboard on the wall.
Basic tools
- Miter saw, circular saw, or jigsaw for cutting planks.
- Drill or driver for screws.
- Hammer or nail gun.
- Level, tape measure, and pencil.
- Stud finder (if wall-mounting).
- Sanding block or power sander.
Building the Frame: The Backbone of Your Headboard
Think of the frame as a simple wooden picture frame that your shiplap boards will attach to. It keeps everything square, solid, and easy to move.
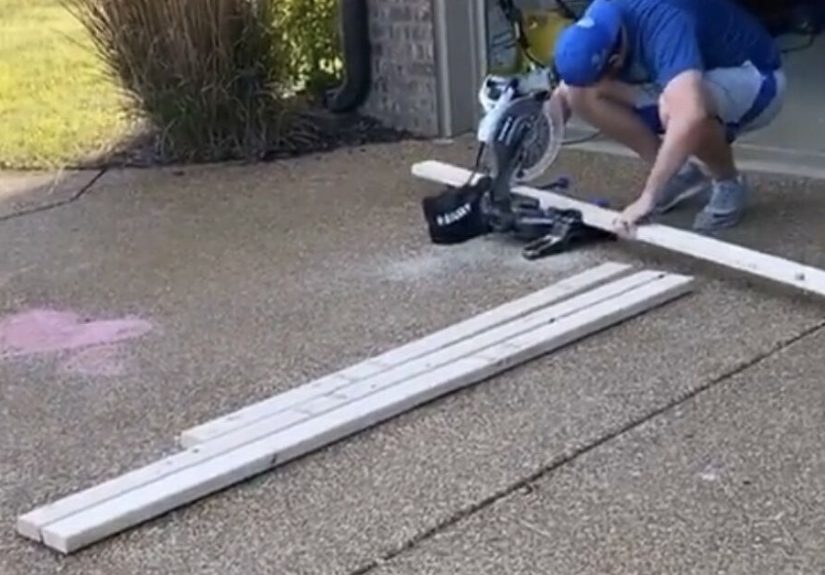
Step 1: Cut the frame pieces
Cut two vertical 2x4s to match your desired height and two horizontal 2x4s for the top and bottom width. If your headboard is quite wide or tall, consider adding one or two vertical supports in the middle to keep the panel from flexing or bowing over time.
Step 2: Assemble the rectangle
Lay the 2x4s on a flat surface and assemble them into a rectangle using screws and wood glue. Check for square by measuring the diagonalsyou want them to be the same length. If they’re off, gently tap the longer corner inward until things even up.
Step 3: Add center supports
For a headboard that’s six feet wide, placing vertical supports roughly 24 inches in from each side gives you solid nailing points for your shiplap boards. Screw these supports into the top and bottom frame pieces.
Adding the Shiplap: From Plywood Scraps to Farmhouse Charm
Once your frame is built, it’s time to create the shiplap look. Traditional shiplap boards have a rabbeted edge that overlaps, but for a DIY headboard, you can mimic the look with simple planks and small gaps between them.
Option 1: Real or faux “shiplap” boards
If you already have leftover shiplap boards, consider yourself lucky and install them in rows across your frame. If not, cut strips of plywood (5–6 inches high works well) and lightly sand the edges. You can use tile spacers, a scrap of cardboard, or a paint stirrer to create consistent gaps between the boards as you install them.
Step-by-step installation
- Start at the top. Lay your first plank along the top of the frame, making sure it’s level. Attach it with nails or screws into the 2x4s behind it.
- Work down row by row. Use spacers to maintain even gaps between planks. Alternate board lengths for a staggered look, or keep them all the same for a cleaner style.
- Hit the supports. Whenever possible, drive fasteners where the planks cross a frame or middle support, so everything feels solid.
- Check for bowing. If longer planks start to bow in the middle, add a discreet nail into a center support or use a clamp while you attach them.
Don’t worry if you can see nail heads. On a rustic shiplap headboard, those little dots of metal actually add character. You can fill them for a smoother look, but many DIYers leave them visible on purpose.
Finishing Touches: Sanding, Painting, and Styling
Step 1: Sand and prep
Give all visible surfaces a light sanding to knock down splinters and rough edgesespecially if you’re working with construction-grade plywood. Wipe off dust with a damp cloth. If your wood has knots or deep grain and you’re planning to paint it white or a light color, consider using a stain-blocking primer to prevent tannins from bleeding through.
Step 2: Paint or stain
This is where your DIY shiplap headboard transforms from “stack of boards” to “actual furniture.” A few popular looks include:
- Crisp white for a classic farmhouse feel.
- Soft greige or warm taupe for a more modern, minimal look.
- Medium or dark stain for cozy, cabin-inspired vibes.
Use a brush and roller, or a paint sprayer if you have one, to apply two coats of paint or stain plus sealer. Let everything dry completely before moving the headboard indoors.
Step 3: Add a frame or top ledge (optional)
If you found random 1x2s or trim pieces in your garage, use them to frame around the shiplap panel. A simple border hides raw edges, and a slightly deeper top piece can work like a narrow shelf for art, greenery, or a small reading light.
Installation: Lean It, Attach It, or Mount It
Option 1: Free-standing and leaning
The fastest method is to set the headboard between the bed and the wall and let the weight of the bed hold it in place. This works best with taller, heavier headboards where tipping isn’t a concern. If you have little kids, pets, or just want extra peace of mind, use brackets or French cleats to secure it.
Option 2: Attach to a metal bed frame
Most metal bed frames have pre-drilled holes for a headboard. You can add vertical legs to your shiplap frame and bolt them to the frame, or use adapter brackets to bridge the gap between the wood and metal. This route makes the whole bed feel like one solid piece.
Option 3: Wall-mounted headboard
For small rooms, wall-mounting is both practical and sleek. French cleats or heavy-duty wall brackets allow you to secure the headboard directly to the studs while keeping it just off the floor. This gives you a “floating” headboard that’s easy to vacuum under and adjust if you ever change bed frames.
Styling Your DIY Shiplap Headboard
Once the sawdust has settled and the paint has dried, the fun really beginsstyling your new bedroom focal point.
Layered bedding and texture
Shiplap is naturally simple, which makes it a great backdrop for layered bedding. Think stacked pillows, chunky knit throws, and a mix of solid and patterned linens. If your headboard is white or light neutral, try earthy tonescamel, blush, sagefor a cozy, modern farmhouse feel.
Wall decor and lighting
Hang a simple wreath, framed art, or a horizontal mirror above the headboard to draw the eye up. On either side of the bed, consider wall sconces or plug-in lamps to free up space on your nightstands. The vertical lines of shiplap pair beautifully with soft, warm lighting.
Small-room tricks
In tight spaces, a tall shiplap headboard makes the room feel more intentional and designed. Keep decor simple and let the headboard act as the main feature. Light paint colors, mirrors, and streamlined nightstands help the room feel open rather than crowded.
Real-World Lessons We Learned in the Garage
A project rarely goes perfectly from start to finish, and that’s half the fun. Here are some of the lessons that tend to show up when you’re building a DIY shiplap headboard with whatever you find in the garage.
1. “Close enough” really is close enough
We’re all aiming for crisp lines and perfectly even gaps, but wood has its own personality. Plywood bows, boards warp a little, and gaps aren’t always exactly the same. Don’t panic. Once the headboard is painted, styled, and covered with pillows, those tiny imperfections read as charm, not failure.
2. Leftover supplies save real money
Using leftover plywood instead of buying new shiplap boards can cut your material cost dramatically. Reusing trim and 2x4s, or combining partial cans of paint in similar shades, keeps the budget low and the project satisfying. There’s something especially satisfying about turning “junk pile” pieces into a polished centerpiece.
3. Dry fit before you commit
Before nailing down your first row of planks, dry fit a few boards to see how the joints, gaps, and overall size look behind the bed. It’s much easier to tweak the design at this stage than to redo everything after painting.
4. Safety and comfort still matter
Even though you’re working with scraps, treat the build like real furniture. Sand away sharp edges, secure the headboard so it can’t tip, and use studs or strong brackets if you mount it to the wall. Your headboard should look rustic, not behave dangerously.
Extra Experiences and Tips From the Garage Workshop (500+ Words)
Every DIY shiplap headboard has its own story, and the “we used what we had in the garage” version tends to be the most memorable. Here are some extended, real-life style experiences and tips that can help you get better resultsand enjoy the process more.
Embrace the “use what you have” design challenge
When you commit to using mostly what you already own, the project becomes part build, part puzzle. You might discover that you only have shorter scraps of plywood, which pushes you toward a staggered, brick-like layout. Or maybe your leftover boards are different widths, so you create a more eclectic pattern. These decisions give your headboard a one-of-a-kind look you’d never get straight off a showroom floor.
One clever trick is to sort your wood into “hero pieces” and “background pieces.” Hero pieces are knotty, full of texture, or interestingly grained; background pieces are plainer. Use the hero pieces where they’ll be most visiblenear the center or eye leveland tuck the quieter boards near the bottom or behind pillows.
Dealing with mismatched lumber and warped boards
Garage lumber is rarely straight, square, or consistent. Instead of fighting that reality, work with it:
- Minor warping: Clamp one end of a board to the frame, then gently bend and nail as you go along the length. The other boards will help keep it in line.
- Big gaps: If gaps feel too large, you can fill them partially with caulk for a semi-smooth look, or lean into them and call it “extra rustic.”
- Different thicknesses: Slightly uneven depths can actually add dimension. Just avoid large steps that could catch pillows or feel uncomfortable if you lean back.
Color choices that hide imperfections
Light paint colors, like soft white or pale greige, are very forgiving. They reflect light, blur small dents, and make the shiplap lines the star instead of every tiny flaw. If your boards are a mix of species or have lots of patched areas, paint is usually a better choice than stain.
That said, if your scraps include nice pine or cedar boards, a light stain plus a clear matte topcoat can highlight the natural variation and turn the headboard into a warm, wood-forward feature. Just test your color on offcuts firststain looks different on every type of wood.
Time-saving hacks we’d use again
- Pre-sand before assembly: It’s easier to quickly sand planks on a workbench than to reach awkwardly over a fully assembled piece.
- Pre-finish edges: If your planks will be visible along the sides, brush paint or stain on the edges before installation. Touch-ups later are much simpler.
- Batch your cuts: Measure once, set a stop on your saw, and cut multiple boards to the same length in a row. It keeps your lines consistent and saves time.
Living with a DIY shiplap headboard
Once your headboard is in place, you’ll quickly realize how much it changes the entire room. The bed suddenly looks “finished,” even if the rest of the room is a work in progress. Guests notice it immediately, and you get the quiet satisfaction of saying, “Oh, that? We just built it from stuff in the garage.”
Maintenance is simple: dust it occasionally, wipe off smudges with a damp cloth, and, if it’s painted, touch up any scuffs with leftover paint. If you ever change your style, you can repaint it in a completely different color or even add a new trim detail without rebuilding the whole thing.
Best of all, a DIY shiplap headboard is a gateway project. Once you realize you can transform a bedroom with a few boards and an afternoon of effort, you start eyeing other spaces: maybe that blank hallway, the entryway, or even the ceiling. The confidence you gain from one successful build lasts far beyond the weekend.
Conclusion: A Custom Headboard Without a Custom Price
Building a DIY shiplap headboard from what you already have in the garage is equal parts creativity, problem-solving, and sawdust therapy. Instead of hunting endlessly for the “perfect” store-bought piece, you get to design something that fits your bed, your wall, your budget, and your style.
With a simple 2×4 frame, a stack of scrap planks or plywood, and a bit of paint, you can create a headboard that looks intentionally designed, not accidentally cobbled together. It’s sturdy, stylish, and surprisingly forgivingno need for expert carpentry skills or high-end tools.
So the next time your guest bed or primary bedroom looks unfinished, don’t rush to the furniture store. Open the garage door, see what you’ve got to work with, and let your inner DIYer take over. That humble pile of boards might just be your new favorite piece of furniture in the whole house.