Table of Contents >> Show >> Hide
- The Story Behind the Up-cycled Table Top Chalkboard
- Why Turn a Table Top into a Chalkboard?
- Step-by-Step: How to Upcycle a Table Top into a Chalkboard
- Design and Styling Ideas for Your Table Top Chalkboard
- Pro Tips and Common Mistakes to Avoid
- Real-Life Experiences with Up-cycled Table Top Chalkboards
- Conclusion
There’s something deeply satisfying about rescuing a beat-up piece of furniture and giving it
a second life. That’s exactly what happens in the classic “up-cycled table top to chalkboard”
makeover: a damaged, nearly useless table becomes a statement-making chalkboard you can hang,
lean, or use for everyday notes. Inspired by a beloved project shared on Remodelaholic, this
guide walks you through how to turn an old tabletop into a stylish chalkboard you’ll actually
use.
Whether you picked up a bargain at an estate sale, dragged a forgotten coffee table out of
the garage, or inherited a piece with great bones but bad damage, this project proves that
“beyond repair” doesn’t have to mean “beyond hope.” With wood glue, a bit of sanding, and
chalkboard paint, you can transform junk into functional wall art.
The Story Behind the Up-cycled Table Top Chalkboard
From Estate Sale Reject to Showpiece
The inspiration project began at an estate sale, where a vintage mahogany pedestal table with
a leather-covered pie crust edge looked like it had seen far better days. The legs were broken
or missing, the leather top was grimy, and the wood was dry and split along the edge. It was
the kind of piece most people would walk past or leave for the trash truck.
Instead, a savvy DIYer saw potential. For just a few coins, the table came homepedestal,
broken legs, and all. Once the base was removed, the real hero of the story emerged: a solid,
beautifully shaped table top with a charming curved edge that would make a perfect frame for a
large chalkboard. The table couldn’t be saved as a table, but it could absolutely be
repurposed.
Repairing and Refreshing the Wood
Upcycling starts with stabilizing what you already have. On the original project, the split
edge was glued and clamped to pull the crack tight. Once the glue cured, the edge was
sanded smooth and refreshed with stain to revive the rich mahogany tone. The table top
immediately looked less like trash and more like a vintage frame waiting for its close-up.
The leather insert on top was a different story. It was stained, brittle, and impossible to
clean. Instead of trying to paint over it, the leather was removed entirely, revealing a raw
wood panel underneathexactly what you want for a durable, long-lasting chalkboard surface.
Transforming the Surface into a Chalkboard
Once the leather was gone, the raw wood was sanded and primed according to the manufacturer’s
instructions for chalkboard paint. Skipping primer is tempting, but bare wood will drink up
paint unevenly and can leave you with a rough, patchy finish.
Several coats of chalkboard paint were brushed on, with full drying time between each coat.
After the surface cured, it was “seasoned” by rubbing it with the side of a piece of chalk
and then erasing it. This step helps prevent “ghosting,” where the first thing you write stays
faintly visible forever.
To finish the makeover, a hanging wire system was attached to the back of the heavy tabletop.
Proper anchors and screws were used so the chalkboard could be safely displayed on the wall
without worrying about its weight.
Why Turn a Table Top into a Chalkboard?
Turning an old table top into a chalkboard isn’t just cleverit’s practical. Here’s why this
project is so popular among DIY lovers and home decorators:
-
Sustainability: You keep a large, bulky item out of the landfill and give
it a longer life. -
Character: Vintage table tops often have beautiful edges, shapes, and
wood grain that make your finished chalkboard look custom and high-end. -
Functionality: A big chalkboard is endlessly usefulfor grocery lists,
weekly menus, family schedules, party signage, or seasonal quotes. -
Budget: You’re using what you already have (or what you can find cheaply)
plus a small amount of paint and supplies.
Step-by-Step: How to Upcycle a Table Top into a Chalkboard
What You’ll Need
- Old table top (solid wood is ideal; veneer can work if in good shape)
- Wood glue and clamps (for splits or loose joints)
- Wood filler (to patch holes or deep gouges)
- Medium- and fine-grit sandpaper (around 120–220 grit)
- Primer suitable for wood (or bonding primer for laminate)
- Chalkboard paint (brush-on or roll-on)
- Paintbrushes and/or small foam roller
- Drop cloths and painter’s tape
- Hanging hardware (D-rings and heavy-duty wire) or mounting screws
- Chalk (for seasoning the finished surface)
1. Inspect and Prep the Table Top
Start by checking the table top for structural problems. Look for deep cracks, loose joints,
or warped areas. Minor damage is fine; major structural issues may make the piece unsafe to
hang.
Clean the surface thoroughly with a mild cleaner and let it dry. If the top is laminate, you
may need a special adhesion or surface-prep product before priming so that paint will bond
correctly, instead of peeling off later.
2. Repair, Fill, and Sand
If you see splits along the edge or across the surface, use wood glue to bond them. Clamp
the pieces together while the glue dries. For missing chunks or deep gouges, apply wood
filler, let it dry completely, and sand it flush with the surface.
Next, sand the entire chalkboard area. Use medium-grit sandpaper first to remove old finish,
shine, or residue. Follow with a finer grit to smooth everything out. Always sand with the
grain of the wood to avoid visible scratches. Wipe away all dust with a tack cloth or damp
rag before moving on.
3. Prime for Paint
Primer is your insurance policy for a smooth, durable chalkboard. Apply an even coat of
primer over the area where you’ll use chalkboard paint. For bare wood, a simple stain-blocking
primer works well; for laminate or glossy finishes, use a bonding primer designed to help
paint adhere.
Let the primer dry thoroughly. If the grain has raised a bit, lightly sand again with
fine-grit sandpaper and wipe away dust. A smooth surface now means a better writing surface
later.
4. Paint and Cure the Chalkboard Surface
Stir the chalkboard paint well before using it. Apply the first coat with a brush or small
foam roller in one consistent direction. Allow it to dry according to the instructions on the
can.
Apply a second coat, this time brushing or rolling perpendicular to the first strokes. This
crosshatch technique helps you avoid visible lines and creates a more uniform writing
surface. Some products may recommend a third coatif so, follow that guidance.
Once the final coat is on, let the chalkboard cure for at least 24–48 hours, or as directed
by the manufacturer. This is the “no touching, no writing, no stacking anything on top of it”
stage. The paint needs time to harden and become truly usable.
5. Season and Finish the Chalkboard
After curing, season the chalkboard by rubbing the entire surface with the side of a piece of
chalk. Cover it evenly with chalk dust, then wipe it off with a dry cloth or soft eraser.
This step helps prevent ghost images of your first few drawings or notes.
Now you can add hanging hardware. For heavy table tops, use two D-rings screwed into the
back frame and connect them with a strong wire. Make sure the screws are too short to poke
through to the front. Alternatively, you can attach a French cleat system for extra support.
Design and Styling Ideas for Your Table Top Chalkboard
Once your up-cycled table top chalkboard is ready, the fun really begins. Here are a few ways
to put it to work in your home:
-
Kitchen menu board: Write the weekly menu, grocery list, or meal prep
notes where everyone can see them. -
Entryway message center: Use it as a catch-all space for reminders,
inspirational quotes, or “don’t forget your keys” notes. -
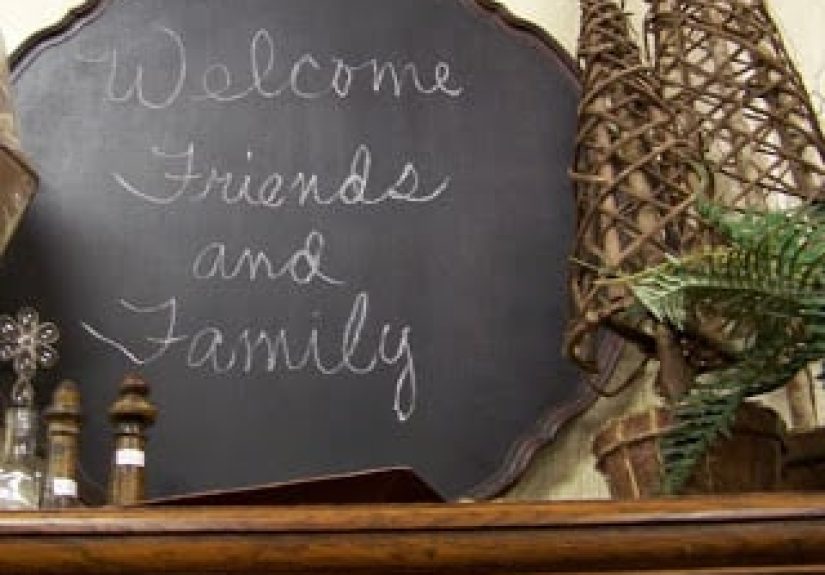
Party or event sign: For birthday parties, baby showers, or holiday
dinners, your chalkboard can welcome guests or label a buffet. -
Kids’ art wall: Hang it low enough for little artists to doodle freely
without sacrificing your walls. -
Seasonal décor backdrop: Switch up your lettering and doodles for each
seasonpumpkins in fall, snowflakes in winter, flowers in spring, and so on.
Pro Tips and Common Mistakes to Avoid
Don’t Skip Surface Prep
The biggest mistake DIYers make is rushing into painting without proper prep. If you don’t
clean and sand well, chalkboard paint may peel, chip, or look streaky. Take the extra time to
prepfuture you will be grateful.
Choose the Right Paint and Tools
Not all chalkboard paints are created equal. Use a high-quality product meant for
furniture-level wear, not just temporary craft projects. A foam roller often lays down a
smoother finish than a standard bristle brush, especially on larger surfaces.
Respect the Cure Time
Writing on the chalkboard before it has fully cured can permanently etch your first marks
into the paint. It’s tempting to test it early, but waiting the full recommended time will
give you a surface that erases cleanly and lasts longer.
Season Before You Use
Seasoning may feel like an optional, old-fashioned step, but it significantly reduces
ghosting and uneven wear. One good seasoning session at the beginning can extend the life of
your chalkboard and keep it looking fresh.
Use the Right Cleaning Method
Most chalkboard surfaces clean up best with a barely damp cloth or specialized chalkboard
eraser. Avoid harsh cleaners, which can strip or cloud the finish. For stubborn build-up,
you can lightly wipe with a damp cloth and then let the surface dry completely before
writing again.
Real-Life Experiences with Up-cycled Table Top Chalkboards
One of the fun things about this project is how differently it turns out for every DIYer. The
basic steps are the samerepair, prime, paintbut the starting table, the finish you choose,
and how you use the chalkboard all shape the final result.
Many people start with thrift store coffee tables or dining tables whose bases are wobbly or
broken. The tops, however, are often solid and full of character. Cutting away a damaged base
and keeping the top lets you preserve the piece’s best feature in a completely new form.
Some DIYers even add decorative molding around the edges to enhance that “framed artwork”
look, especially when the table top itself is plain.
Another common experience is discovering just how forgiving chalkboard paint can be. Maybe
the first coat looks streaky, or a repaired area seems slightly different in texture. Often,
an extra coat or two of paint and a careful sanding between layers will even things out. The
matte black (or dark green, or navy) finish tends to conceal minor imperfections and pulls
the entire piece together visually.
Of course, not every chalkboard table top is perfect on the first try. Some DIYers realize
after the fact that the paint they chose doesn’t erase as cleanly as they’d hoped, or that
they didn’t wait long enough before writing on it. In these cases, the fix is usually the
same: sand lightly, add another coat or two of paint, let it cure fully, and then re-season
the surface. It’s a good reminder that refinishing projects are rarely “one and done”they’re
more like experiments you can refine over time.
People also learn quickly how they prefer to use their new chalkboards. In kitchens, large
up-cycled table tops often become family command centers. Parents write the weekly schedule
across the surface, kids add notes or doodles in the corners, and everyone knows where to
look for reminders. For entertainers, the chalkboard becomes a permanent party prop: a
welcome sign by the front door one week, a bar menu the next, and a dessert table label the
week after.
Another popular setup is turning a table top chalkboard into a rotating décor piece. Instead
of hanging it in one permanent spot, some people lean it on a buffet, mantel, or console
table and change the text with the seasons. A favorite quote in January, a spring brunch menu
in April, a “back to school” checklist in August, and a holiday greeting in Decemberall on
the same upcycled board.
The most valuable shared experience, though, is the mindset shift that happens. Once you’ve
successfully turned one “lost cause” piece of furniture into something fresh and useful, you
start looking at everything differently. An old door becomes a headboard, a broken chair
becomes a plant stand, and that scratched coffee table looks suspiciously like the next
chalkboard project waiting to happen.
In the end, an up-cycled table top chalkboard isn’t just a décor project. It’s a small,
everyday reminder that with a bit of creativity, patience, and paint, you can turn mistakes,
damage, and neglect into something beautiful and functional again.
Conclusion
Upcycling a table top into a chalkboard combines the best parts of DIY: creativity,
frugality, and a satisfying transformation. You rescue a damaged piece from the trash, give
it new purpose, and gain a versatile chalkboard you can customize endlessly. With proper
prep, quality chalkboard paint, and a little patience during curing and seasoning, your
finished piece will be as practical as it is stylish.