Table of Contents >> Show >> Hide
- Why Swiffer Containers Make Surprisingly Great Storage Bins
- Before You Start: Safety and Cleaning (Not the Fun Part, but the Necessary Part)
- The Great “Srorage” Hack: Turn Swiffer Containers into a Labeled Micro-Organizer System
- Smart Variations That Make This Hack Even Better
- Where This Works Best (and Where It Doesn’t)
- Troubleshooting: Common Annoyances and Easy Fixes
- Make It Feel Like a System (Not a Pile of Containers)
- Extra: of Real-World “Experience” Tips People Learn After Trying This Hack
- Conclusion
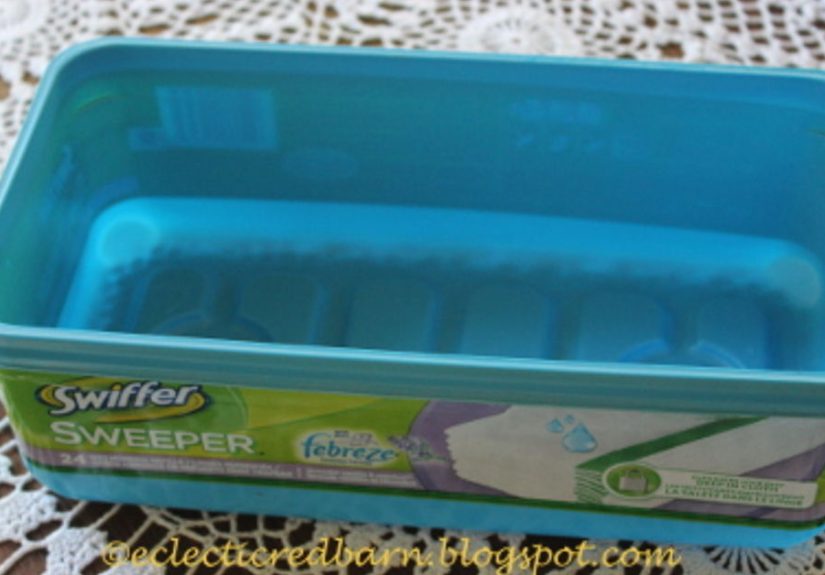
You know that oddly satisfying moment when you finish a pack of Swiffer refills and you’re left holding a sturdy plastic box that’s way too good to toss?
It’s not flimsy packaging. It’s basically a tiny storage bin wearing a disposable costume.
This is the kind of “accidental container” that begs for a second life: it stacks, it has a lid, it’s the perfect “not too big, not too small” size,
and it already survived life in your cleaning closetso it’s not afraid of a little chaos.
In this guide, you’ll learn a practical, good-looking storage hack that turns empty Swiffer containers into labeled mini-bins you’ll actually use.
We’ll cover cleaning and prep (important), a few smart variations, where these containers shine the most, and how to make the whole thing feel intentional
not like your home is run by a raccoon with a glue gun.
Why Swiffer Containers Make Surprisingly Great Storage Bins
They’re built to protect what’s inside
Swiffer refill boxes are designed to keep cloths from drying out or getting crushed. Translation: they’re sturdy, tight-fitting, and naturally “organizer-shaped.”
That’s a rare combo in the wild world of packaging.
They stack like they’ve been training for it
Many refill containers have flat-ish tops and stable bottoms, so they behave well in a linen closet, under a sink, or on pantry shelves.
If your storage method is “pile and pray,” these are here to upgrade you to “stack and relax.”
They’re easy to label (and re-label)
Plastic + flat sides = label-friendly. Even if you change your mind later (we all do), you can peel and replace labels without starting from scratch.
Before You Start: Safety and Cleaning (Not the Fun Part, but the Necessary Part)
Even if the container only held dry refills, it likely lived near cleaning products. Give it a proper clean before you repurpose it for household storage.
And one important rule: don’t use these for food storage. Keep them for non-food items like tools, supplies, accessories, and small household gear.
Step 1: Wash
- Remove any remaining wipes/refills and toss or recycle them according to your local rules.
- Wash the container with warm water and dish soap. Use a bottle brush or old toothbrush for corners.
- Rinse well and let it air dry completely (trapped moisture is the sworn enemy of organized calm).
Step 2: De-sticker (optional, but it looks nicer)
If you want the container to look less like it came straight from the cleaning aisle, remove the label and sticky residue. A few gentle approaches:
- Warm water + dish soap: soak and rub. Often enough for paper labels.
- Heat: a hairdryer can soften adhesives so labels peel cleanly.
- Oil or rubbing alcohol: helps lift stubborn stickiness (test a small spot first).
- Baking soda paste: mild abrasion for the final “why is it still sticky?” phase.
Step 3: Sanitize only when you need to
For everyday organizing, washing is typically enough. If someone in the house has been sick or the container was exposed to grime,
sanitize with an appropriate product and follow label directions. Always ventilate and never mix cleaning chemicals.
The Great “Srorage” Hack: Turn Swiffer Containers into a Labeled Micro-Organizer System
Here’s the core idea: treat each empty Swiffer container like a modular drawer. Give it a purpose, a label, and a home.
Then create a small “system” instead of a single random bin.
What you’ll need
- Empty Swiffer containers (one is good, three is better, five is basically a lifestyle)
- Dish soap, warm water, microfiber cloth
- Label maker or masking tape + marker
- Optional: adhesive Velcro dots, small bins/dividers, chalk paint or spray paint (plastic-safe), washi tape
Step-by-step build
1) Choose a storage “zone” first
Don’t upcycle blindly. Pick a zone that naturally produces small loose items. Great starter zones:
bathroom, under-sink cabinet, laundry area, entryway drop zone, or pantry.
2) Assign each container a job
The secret to making this look organized (instead of “I hoarded containers”) is giving each box a single category.
Think “one label, one mission.”
Category ideas that actually work:
- Bathroom: razors, travel-size toiletries, hair ties, cotton rounds, extra toothbrush heads, mini first-aid
- Laundry: stain sticks, sewing kit, dryer sheets, mesh bags, missing socks (a temporary holding cell)
- Kitchen/pantry: chip clips, tea bags, condiment packets, birthday candles, twist ties, rubber bands
- Entryway: keys, dog waste bags, sunglasses, spare change, tape measure
- DIY/craft: glue sticks, paint brushes, sandpaper, command strips, batteries (sorted by size)
3) Add quick dividers (optional, but chef’s kiss)
If you want “drawer-like” behavior, add small dividers inside. You can repurpose:
- Small cardboard strips (taped down)
- Mini plastic cups or sauce cups (for non-food use)
- Old makeup compacts or small tins as sub-bins
4) Make it look intentional
You have two styling paths:
- Clean + minimal: remove labels, keep the plastic as-is, add a neat printed label.
- Upcycled-cute: paint the outside (plastic-safe), add a strip of washi tape, and label on top and front.
Pro tip: label on the front for shelves and on the top for stacked storage. That way you can identify it
without playing “guess what’s in the box” every time.
5) Give the system a “parking spot”
The hack works best when these bins live where you naturally need them. Examples:
- On a shelf: stack them like small drawers.
- In a deep cabinet: line them up like pull-out bins.
- Inside a larger basket: one basket becomes a “kit” holding multiple labeled mini-boxes.
- On a wall (advanced): add heavy-duty Velcro strips to the back and mount lightweight supply bins.
Smart Variations That Make This Hack Even Better
Variation 1: The “Grab-and-Go Kit”
Use one container as a themed kit: a “nail kit” (clippers, file, cuticle oil), a “sewing kit” (thread, needles, buttons),
or a “quick-clean kit” (microfiber cloths, small brush, gloves). Put it where you’ll use it, and suddenly you’re the kind of person
who looks prepared on purpose.
Variation 2: The “Two-Label Trick” for families
If multiple people use the same zone, put a label on each side: one descriptive (“Hair Stuff”) and one specific (“Bobby pins + ties”).
It’s surprisingly helpful for kids/partners/roommates who don’t speak fluent “organizer brain.”
Variation 3: The “See-Through Window” (for the truly committed)
If your container isn’t transparent enough, you can cut a small rectangle “window” in the front and tape a piece of clear plastic
(from other packaging) behind it. This is optional, but it’s a fun way to get that “store-bought bin” vibe without the store-bought price.
Use caution with cutting tools and smooth edges with sandpaper.
Where This Works Best (and Where It Doesn’t)
Best places
- Under-sink cabinets: small categories, frequent grabbing, easy labeling
- Closets: stacked bins stop small items from migrating into the void
- Pantry overflow shelves: packets, clips, candles, seasonal smalls
- Garage or utility shelf: gloves, screws, tape, wall hooks
Skip these uses
- Food storage: not worth the risk or confusion
- Very heavy items: the lid and plastic can warp under weight
- High-heat areas: avoid spots near ovens/heaters where plastic could deform
Troubleshooting: Common Annoyances and Easy Fixes
“My labels won’t stick.”
Wipe the container with rubbing alcohol and let it dry before labeling. Oils from hands and leftover adhesive residue can prevent sticking.
For a low-drama option, use masking tape + marker and call it a day.
“They slide around on the shelf.”
Add a non-slip shelf liner under them, or stick two small rubber bumpers on the bottom.
Suddenly your tidy stacks won’t avalanche when you grab one box.
“It still looks like packaging.”
Paint it, wrap it in contact paper, or tuck the whole set into a larger basket. The visual “container makeover” is often the difference
between “organized” and “organized-ish.”
Make It Feel Like a System (Not a Pile of Containers)
The magic isn’t the plastic boxit’s the repeatable pattern:
- Group similar items (small categories win).
- Assign each group a container (one bin, one job).
- Label clearly (front + top if stacked).
- Store close to where you use it (reduce the “I’ll put it away later” lie).
- Do a 60-second reset once a week (toss trash, return strays).
If you do those five steps, you don’t just upcycleyou create a tiny, sustainable organizing habit that keeps your space calmer for longer.
Extra: of Real-World “Experience” Tips People Learn After Trying This Hack
When people first try this Swiffer-container storage hack, the initial reaction is usually: “Why didn’t I do this sooner?”
The second reactionafter a week of living with itis even better: “Oh wow, I’m actually maintaining it.”
That’s the difference between a cute DIY and a hack that sticks.
One common experience is underestimating the power of a label. Without a label, a container becomes a “temporary dump spot”
(and temporary has a way of turning into permanent). With a label, it becomes a decision-maker. People report that even a simple
handwritten label reduces clutter because it removes the daily debate of “Where does this go?” Your brain loves fewer decisions,
and your counters love fewer random objects.
Another frequent lesson: smaller categories beat bigger ones. A container labeled “Bathroom Stuff” becomes a junk drawer in disguise.
But containers labeled “Razors,” “Travel Toiletries,” and “Hair Ties” stay organized because the boundaries are clear.
In practice, the most successful setups are the ones where you can open a container and immediately understand what belongs there
no rummaging, no sighing, no dramatic monologue.
People also tend to discover the “visibility rule.” If you can’t see what you have, you’ll buy it again.
That’s why transparent-ish containers or top labels are so helpful. A surprising number of households end up with duplicate scissors,
duplicate tape, duplicate tweezersbecause the originals are hiding in a drawer under a mystery pile.
With these upcycled bins, you’re more likely to notice, “Oh, we already have three mini screwdrivers and zero common sense.”
A practical tip that comes up often is how much placement matters. If the bins live too far from where the items are used,
people stop using them. For example, a container for hair ties works best in the bathroom vanity or near a mirrornot in a hallway closet.
The most “successful” experiences happen when the bins are parked where hands naturally reach.
In other words: convenience is the maintenance plan.
Finally, there’s the surprisingly emotional win: repurposing something you used to throw away can make your home feel more thoughtful.
It’s a small, satisfying reminder that organizing doesn’t have to be expensive, perfect, or Pinterest-polished to be effective.
When people keep this system going, it’s usually because it feels low-pressure: the containers were free, the setup was simple,
and the payoff is daily. That’s the sweet spotwhere your home gets easier to live in, and you get to feel just a tiny bit smug
every time you open a cabinet and everything is exactly where it belongs.
Conclusion
Upcycling Swiffer containers into a “micro-organizer” system is one of those rare hacks that’s equal parts practical, budget-friendly,
and oddly satisfying. Clean them, label them, assign each one a job, and store them where you actually use the items.
You’ll reduce clutter, cut down on duplicates, and get a tidy little storage winwithout buying another set of matching bins you’ll
someday donate in a fit of “new year, new me” optimism.