Table of Contents >> Show >> Hide
- Why Tin Can Lids Work So Well for a Table Top Cover Up
- Pick the Right Lids Before You Get Glue-Happy
- Supplies You Will Probably Need
- Choose a Look Before You Start
- How to Make an Upcycled Tin Can Lid Table Top Cover Up
- Best Places to Use This Table Top Idea
- Mistakes to Avoid
- Creative Styling Ideas
- Is It Worth the Effort?
- Experiences With an Upcycled Tin Can Lid Table Top Cover Up
- Conclusion
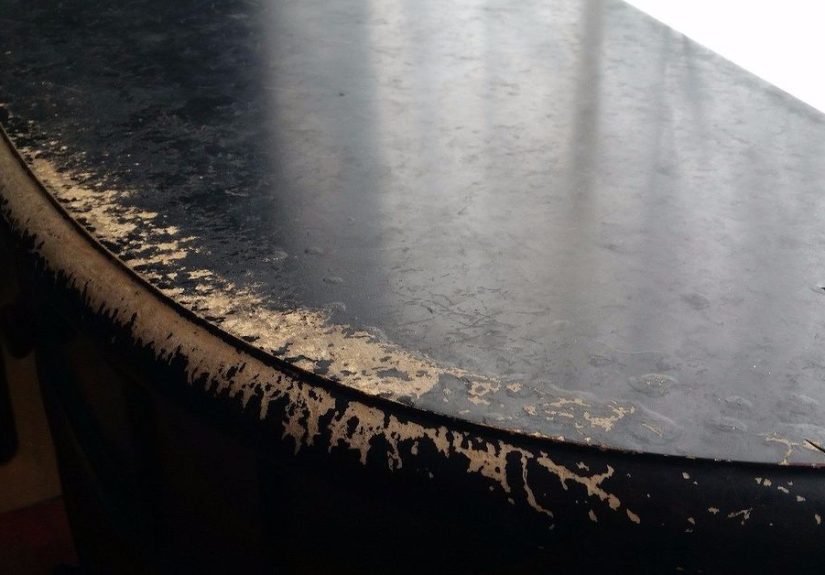
If your table has seen better days, welcome to the club. Maybe it has a mystery water ring the size of Texas. Maybe the finish is scratched. Maybe it is technically “rustic,” but only because everyone is being polite. Whatever the case, an upcycled tin can lid table top cover up is a clever, budget-friendly way to disguise a tired surface and turn it into something that actually looks intentional.
This project takes one of the easiest materials to overlook, the humble tin can lid, and gives it a second life as home decor. With the right prep, layout, and finish, those little metal circles can become a striking tabletop design that feels somewhere between vintage flea-market find and crafty genius. It is part table makeover, part recycling win, and part “Wait, you made that from soup can lids?”
Best of all, this idea is flexible. You can go farmhouse, industrial, cottagecore, retro, or full-on “my craft cabinet exploded and somehow it worked.” Whether you are covering a side table, patio plant stand, kids’ art table, or thrift-store rescue, this project delivers character without demanding a giant budget.
Why Tin Can Lids Work So Well for a Table Top Cover Up
Tin can lids are small, flat, lightweight, and easy to arrange into repeating patterns. That makes them surprisingly useful for a DIY table cover. Unlike random scrap materials that fight you every step of the way, lids already come in neat circular shapes that can be lined up in rows, clustered like a mosaic, or mixed in different sizes for a more artistic look.
They also bring texture. A plain tabletop can look lifeless, but metal lids add dimension, shadow, and shine. Even if you paint over them, the subtle raised edges create visual interest that a flat coat of paint simply cannot fake. If you leave some of the original metal exposed, the result can look charmingly industrial. If you decoupage over them with paper or fabric, they turn into mini art pieces that just happen to live on your table.
And then there is the obvious bonus: you are reusing something that would otherwise head straight for the recycling bin. That means less waste, less spending, and more bragging rights.
Pick the Right Lids Before You Get Glue-Happy
Not every lid deserves a glamorous second act. If you want your recycled can lid project to last, start by sorting the good pieces from the ones that look like they lost a fight.
Use lids that are:
- Clean and fully dry
- Only lightly worn or gently bent
- Free from active rust
- Mostly smooth around the edges
- Similar in thickness if you want a uniform surface
Skip lids that are:
- Deeply dented or warped
- Sharp enough to snag skin or fabric
- Coated in grime, sticky residue, or food odors
- Rusting so badly they resemble archaeological finds
A quick sorting session saves a lot of frustration later. Think of it as casting a movie. Not every lid is right for the starring role.
Supplies You Will Probably Need
You do not need a giant workshop for this project, but a few reliable materials will make the difference between “adorably handmade” and “why is my table shedding metal circles?”
- Tin can lids in assorted or matching sizes
- A table or a removable tabletop cover board
- Dish soap or degreaser
- Fine-grit sandpaper
- Metal primer
- Spray paint or craft paint formulated for metal
- Strong adhesive such as epoxy, construction adhesive, or a heavy-duty craft glue
- Decoupage medium if you want to add paper designs
- Clear topcoat, sealer, or resin finish
- Optional filler for gaps, such as grout or lightweight spackle
- Protective pads for the bottom if you are making a removable cover piece
If your existing table is badly damaged, consider creating the lid design on a cut-to-size board that sits on top of the table rather than gluing directly onto the furniture. That way, your table top cover up stays removable and easier to repair or replace later.
Choose a Look Before You Start
The beauty of an upcycled table decor project is that you can steer the style in completely different directions using the same basic material.
1. Vintage Market Look
Paint the lids in soft whites, faded blues, sage green, or antique bronze. Sand the edges lightly after painting to reveal hints of metal. This works beautifully on plant stands, porch tables, and cottage-style furniture.
2. Bold Graphic Pattern
Use black, white, gold, or navy for a modern look. Arrange the lids in clean rows or concentric circles. Suddenly your thrifted side table looks like it belongs in a boutique instead of a garage sale.
3. Decoupage Mosaic
Cover lid tops with scrapbook paper, book pages, wrapping paper, maps, floral napkins, or vintage-style labels. Seal everything with a durable finish for a one-of-a-kind surface that looks layered and intentional.
How to Make an Upcycled Tin Can Lid Table Top Cover Up
Step 1: Clean Everything Thoroughly
Wash the lids with warm, soapy water and let them dry completely. If they still feel greasy, wipe them down with a degreaser. Craft projects and oily residue go together about as well as glitter and carpet. Clean surfaces help primer, paint, and adhesive stick better.
Step 2: Smooth the Edges and Scuff the Surface
Use fine-grit sandpaper to lightly scuff the tops and remove any rough spots. You are not trying to sand them into oblivion. You just want to dull the slick finish enough to help primer and paint grip the metal. If any edges feel sharp, file or sand them down before moving on.
Step 3: Prime the Lids
A primer made for metal is worth the extra step. It improves adhesion, helps color coats go on more evenly, and gives the project a better chance of surviving real life. If you are painting lids a lighter color, primer is especially useful because it keeps the metal from showing through unevenly.
Step 4: Paint in Thin Coats
Spray paint is often the easiest option for a clean finish on metal lids, but brush-on paint can work too if it is suitable for metal surfaces. Thin coats are your friend. Thick paint may pool around the edges, take forever to dry, and leave you with a finish that looks more “accident” than “art.” Let each coat dry properly before adding the next.
Step 5: Lay Out Your Design First
Before you attach anything, place the lids on the tabletop and experiment with spacing and pattern. This dry-fit step matters more than people think. It helps you catch awkward gaps, uneven edges, and the one lid that somehow ruins the vibe of the whole table just by existing.
You can arrange lids edge-to-edge for dense coverage or leave small gaps between them for a more mosaic-style layout. If you want the design centered, start from the middle and build outward. If you want a grid, begin at one straight edge and work across.
Step 6: Glue Them Down Securely
Apply adhesive according to the product directions and press each lid into place. Work in sections so the glue does not set before you are ready. If the tabletop will get daily use, choose an adhesive that bonds strongly to both metal and your table surface.
If you are making a removable tabletop panel, glue the lids onto the board first, then add felt pads or thin cork underneath so the finished piece sits neatly on the furniture.
Step 7: Fill Gaps if You Want a More Unified Surface
This step is optional, but it can make the table look more finished. A small amount of grout or lightweight filler between lids creates a tiled look. If you prefer seeing the original tabletop peek through, skip it. Either choice can look great. The secret is making it look deliberate.
Step 8: Seal the Surface
This is the step that takes your project from cute craft to usable furniture. A clear sealer or topcoat helps protect paint, paper, and metal from scratches and moisture. For a decorative indoor table, a clear acrylic or furniture topcoat may be enough. For a more durable or glossy finish, some DIYers use resin to create a glass-like surface over the design.
Whatever finish you choose, let it cure fully before using the table. “Dry to the touch” and “ready for everyday abuse” are not the same thing, no matter how impatient you feel.
Best Places to Use This Table Top Idea
An upcycled tin can lid table top cover up works best on smaller tables where the detail can really shine. Good candidates include:
- Side tables in living rooms or bedrooms
- Patio accent tables
- Plant stands
- Craft room tables
- Kids’ activity tables
- Thrift-store end tables that need cosmetic help
- Removable tabletop covers for seasonal decor
It is especially smart for pieces that are visually worn but still structurally solid. This project is a cover-up, not a magic spell. If the table wobbles like it is auditioning for a disaster movie, fix that first.
Mistakes to Avoid
The quickest way to sabotage this DIY table makeover is to rush the prep. Dirty metal, skipped primer, heavy paint coats, weak glue, and zero cure time are the usual culprits behind peeling, chipping, or shifting lids.
Another common mistake is using too many design ideas at once. Pick a color palette or theme and commit to it. A little contrast is charming. Twelve competing patterns can make the table look like it lost a bet.
Also, remember that texture matters. If you want a smooth place to set drinks, add a sealing finish that levels the surface more effectively. If you prefer the raised, tactile look of each lid, embrace the texture and style the table accordingly with trays, books, candles, or plants.
Creative Styling Ideas
Once the table is finished, style it in a way that highlights its new personality. A vintage-inspired lid mosaic pairs beautifully with old books, ceramic planters, and brass candlesticks. A black-and-gold version looks fantastic with modern decor and clean-lined accessories. A floral decoupage design works well in sunrooms, craft spaces, or reading nooks.
You can also make the project seasonal. Try warm metallic tones for fall, snowy whites and silvers for winter, pastels for spring, or bright citrus colors for summer. If your tabletop cover is removable, you can switch the mood without repainting the whole table every time your decor personality changes.
Is It Worth the Effort?
Absolutely, if you enjoy projects that blend practicality with personality. This is not the fastest makeover on Earth, and no one should pretend otherwise. You will clean, sand, paint, arrange, second-guess your layout, and probably get at least one lid stuck to the wrong finger. But the payoff is big. You end up with a table that looks custom, costs very little, and starts conversations the minute someone notices what it is made from.
That is the magic of good upcycling. It does not just save money. It gives ordinary materials a story, and it gives your home something that feels more personal than anything you could toss into an online cart at 1:12 a.m.
Experiences With an Upcycled Tin Can Lid Table Top Cover Up
One of the most interesting things about this kind of project is how different it feels once it moves from “craft idea” to “actual furniture in your home.” At first, an upcycled tin can lid table top cover up can sound like one of those Pinterest plans that is adorable in theory and chaotic in practice. But once people try it, the experience is usually more satisfying than expected.
A lot of DIYers say the real surprise is how customizable the project becomes. What starts as a simple mission to cover scratches on an old side table often turns into a full design exercise. Some people discover they love arranging the lids like a puzzle. Others get pulled into the painting stage and suddenly care deeply about whether the finish should be satin brass or weathered green. It becomes less about hiding damage and more about creating a piece that feels unmistakably theirs.
There is also something oddly relaxing about the repetition. Cleaning lids, lining them up, shifting them an inch to the left, standing back, and trying again can be tedious, but in a peaceful way. It is the kind of hands-on project that slows your brain down. You are not staring at a screen. You are making tiny design decisions with real materials, and that can feel refreshing.
Of course, there are lessons learned along the way. People often realize quickly that patience matters more than talent. The lid layout that looked “good enough” at 2 p.m. somehow looks crooked at 2:07. The paint that seemed dry enough is definitely not dry enough. The table everyone wanted finished by dinner may still be curing while the family asks if the kitchen table is the new coffee table. In other words, this project rewards calm people and creates calm people by force.
Once the piece is done, the compliments tend to be immediate. Guests usually do a double take when they realize the tabletop is made from can lids. It feels familiar and unexpected at the same time. That reaction is part of the fun. Upcycled furniture has a built-in conversation starter quality that mass-produced decor simply cannot match.
Another common experience is pride. Not the loud, chest-thumping kind. More the quiet satisfaction of walking past a table every day and thinking, “I saved that.” A worn, forgettable piece of furniture becomes something artistic and useful. That emotional upgrade matters. It can make a room feel warmer because it contains something made with attention instead of bought in a hurry.
Many people also find that the finished table changes how they look at other household items. After turning tin can lids into decor, it becomes much harder to throw away a jar lid, old tray, or leftover scrap wood without wondering what else it could become. That is the sneaky side effect of a good recycled decor idea: it trains your eye to see possibility where you used to see clutter.
In daily use, the project tends to work best when expectations are realistic. A lid-covered tabletop is decorative, textured, and charming. It is not pretending to be a luxury stone slab. But with a good finish and thoughtful styling, it can absolutely become one of the most memorable pieces in the room. And honestly, that is more fun than another plain table trying very hard to be invisible.
Conclusion
An upcycled tin can lid table top cover up is proof that a clever makeover does not need expensive materials to make a strong impression. With proper prep, a clear design plan, and a durable finish, discarded metal lids can become a stylish DIY tabletop makeover that hides wear, adds texture, and gives old furniture a fresh identity.
If you have been waiting for a sign to rescue that scratched-up little table in the corner, this is it. Save the lids, grab the primer, and give your furniture a second chance. Worst case, you make something delightfully weird. Best case, you make something beautiful and unforgettable.