Table of Contents >> Show >> Hide
- Why Orchids Stop Blooming
- Way 1: Give Your Orchid Bright Indirect Light and a Nighttime Temperature Drop
- Way 2: Water and Feed Properly Without Drowning the Roots
- Way 3: Manage the Orchid After Blooming So It Can Rebloom
- Common Mistakes That Keep Orchids From Blooming
- A Simple Orchid Blooming Plan
- Experience Notes: What Actually Helps Orchids Bloom at Home
- Conclusion
Orchids have a talent for making perfectly reasonable people question their life choices. One month, your plant is a glamorous supermarket celebrity covered in elegant flowers. A few weeks later, it is a pot of leaves, roots, and judgment. You water it. You move it. You whisper encouragement. Still, nothing. Not one bloom. Not even a tiny flower spike to reward your emotional investment.
The good news is that most indoor orchids, especially the popular Phalaenopsis or moth orchid, are not impossible divas. They simply need the right signals before they agree to bloom again. In nature, orchids respond to shifts in light, temperature, moisture, and growth cycles. At home, the trick is to recreate those cues without overdoing it. More fertilizer is not always better. More water is often worse. More panic is never useful, although admittedly very available.
This guide breaks orchid reblooming into three practical methods: giving your orchid the right light and temperature, watering and feeding it correctly, and managing the plant after flowering so it has enough energy to bloom again. These are simple steps, but they work best when done consistently. Think of orchid care less like a magic spell and more like a polite long-term negotiation.
Why Orchids Stop Blooming
Before we talk about how to get orchids to bloom, it helps to understand why they stop. Orchids are not designed to flower nonstop forever. A bloom cycle takes energy. After flowers fade, the plant often shifts into a recovery and growth phase. During this time, it may produce new leaves, roots, or a fresh flower spike later in the season.
Many healthy orchids are simply between bloom cycles. If the leaves are firm, the roots are plump, and the crown is not rotting, your orchid may not be sick at all. It may just be taking a botanical coffee break.
However, an orchid that refuses to bloom for a year or more usually lacks one or more key conditions. The most common problems include insufficient light, no nighttime temperature drop, poor watering habits, weak roots, old potting mix, or too much nitrogen fertilizer. The plant may look green and alive but still not have enough energy or environmental motivation to produce flowers.
Way 1: Give Your Orchid Bright Indirect Light and a Nighttime Temperature Drop
If your orchid has beautiful leaves but no flowers, light is the first thing to check. Many orchids survive in low light, but surviving is not the same as blooming. A Phalaenopsis orchid can tolerate indoor conditions better than many flowering plants, yet it still needs bright, indirect light to produce enough energy for reblooming.
Find the Right Window
An east-facing window is often ideal because it provides gentle morning sun without the harsh afternoon blast. A south- or west-facing window can also work if the orchid is protected by a sheer curtain or placed a few feet away from direct rays. Direct midday sun can scorch leaves, leaving pale, crispy patches that look like your plant lost an argument with a toaster.
A quick leaf check can tell you a lot. Healthy orchid leaves are usually medium green. Very dark green leaves may suggest too little light. Yellow-green leaves can mean the plant is getting stronger light, which may be fine if the leaves are not burning. Reddish or sun-scorched patches mean the light is too intense.
Use Artificial Light If Needed
If your home is dark, especially during winter, a grow light can help. Place the orchid under bright, full-spectrum light for about 12 to 14 hours a day, keeping enough distance so the leaves do not heat up. This is especially useful in apartments, rooms with shaded windows, or homes where the best natural light belongs to a cat who refuses to share.
Trigger Blooming With Cooler Nights
Light gives the orchid energy, but temperature change often gives it the signal to bloom. Many Phalaenopsis orchids respond well to a nighttime temperature drop of about 10 to 15 degrees Fahrenheit for several weeks. For example, if daytime temperatures are around 72 to 78 degrees Fahrenheit, nighttime temperatures around 60 to 65 degrees may help encourage a new flower spike.
You do not need to refrigerate your orchid or place it in a dramatic survival situation. Simply moving it closer to a cool window at night in fall or early winter may be enough. Avoid cold drafts, freezing glass, heating vents, fireplaces, and exterior doors that turn your living room into a weather experiment.
After a few weeks of bright indirect light and slightly cooler nights, look near the base of the leaves for a new spike. A flower spike often looks like a small green mitten or pointed shoot, while roots tend to have rounded tips. If you see one, congratulations: your orchid has entered its “fine, I’ll perform” era.
Way 2: Water and Feed Properly Without Drowning the Roots
Watering is where many orchid dreams go to retire. Most common indoor orchids do not grow in regular soil. Many are epiphytes, meaning their roots naturally cling to trees and absorb moisture from air, rain, and organic debris. In a pot, those roots need moisture, but they also need air. Constant sogginess can suffocate roots and lead to rot.
Water When the Potting Mix Is Nearly Dry
For Phalaenopsis orchids, watering about once a week is a common starting point, but your home’s conditions matter more than the calendar. A plant in a warm, bright room may dry quickly. One in a cool, dim room may stay wet much longer.
To check, lift the pot. A dry pot feels light; a wet pot feels heavier. You can also touch the bark mix or insert a wooden skewer for a few minutes. If it comes out damp, wait. If it comes out mostly dry, water.
When you water, use room-temperature water and let it run thoroughly through the potting mix until it drains from the bottom. Then let the pot drain completely. Never leave the orchid sitting in standing water. Decorative cachepots are lovely, but they can secretly become root-swamp apartments if you forget to empty them.
Avoid Crown Rot
The crown is the central point where the leaves meet. Water trapped there can cause rot, especially if the plant stays cool overnight. Water the potting mix rather than pouring water into the crown. If water does collect between the leaves, dab it out gently with a paper towel.
This small habit can save an orchid. Many plants that “mysteriously died” were not cursed; they just had water sitting in the wrong place for too long.
Feed Lightly During Active Growth
Orchids benefit from fertilizer, but they do not want to be force-fed like someone’s aunt at Thanksgiving. A balanced orchid fertilizer diluted to half or quarter strength is usually safer than a strong dose. Many growers follow the “weakly, weekly” idea: fertilize lightly during active growth, then flush the pot with plain water regularly to prevent salt buildup.
When your orchid is producing new leaves and roots, light feeding can help it store energy for future blooms. During cooler, darker months or when the plant is resting, reduce fertilizer. Overfertilizing can produce lots of leafy growth at the expense of flowers, which is impressive only if your goal is to raise a salad with roots.
Do Not Forget Humidity and Air Movement
Indoor air can be dry, especially with heating or air conditioning. Orchids generally appreciate moderate humidity. A humidity tray can help: place pebbles in a tray, add water below the top of the pebbles, and set the orchid pot on top so it is above the water, not soaking in it.
Bathrooms and kitchens can also work well if they provide bright indirect light. However, humidity without airflow can invite fungal problems. Good orchid care is about balance: moist air, not stagnant air; hydrated roots, not wet feet.
Way 3: Manage the Orchid After Blooming So It Can Rebloom
What you do after the flowers fade has a big effect on future blooming. Once the last flower drops, resist the urge to declare the plant finished and banish it to a dark corner. This is the moment when your orchid begins preparing for its next performance.
Decide Whether to Cut the Flower Spike
For Phalaenopsis orchids, you have two common options after blooming. If the spike is brown, dry, or shriveled, cut it near the base using clean, sterilized scissors. A dead spike will not rebloom, and removing it helps the plant focus on roots and leaves.
If the spike is still green and healthy, you can cut it above a node, which may encourage a side branch and more flowers. This can work, but it may also use energy that the plant could have spent building strength for a fuller bloom later. If your orchid is small, weak, or has poor roots, cutting the spike down near the base is usually the better long-term choice.
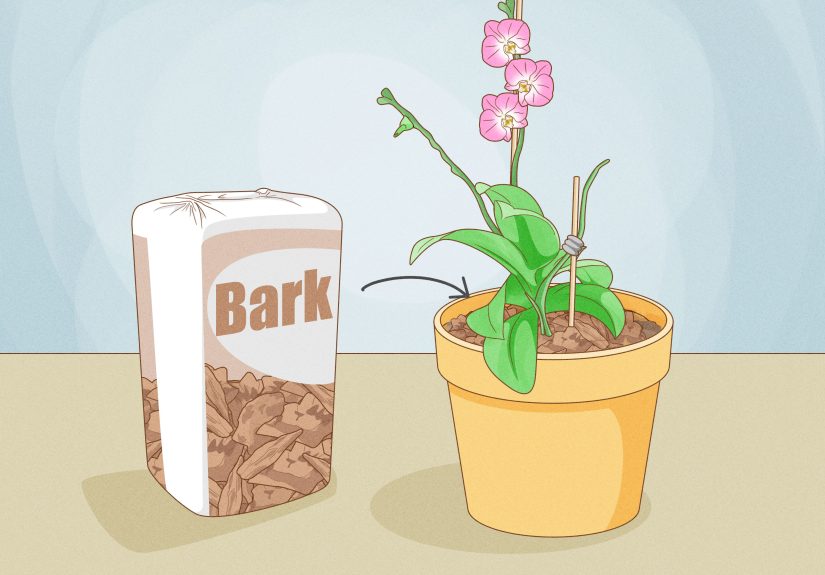
Repot When the Mix Breaks Down
Old orchid bark eventually decomposes. When that happens, it holds too much moisture and reduces airflow around the roots. Your orchid may stay wet for too long, roots may rot, and blooming may slow down or stop.
Most Phalaenopsis orchids benefit from repotting every one to two years, ideally after blooming and when new growth begins. Use a fresh orchid mix, usually bark-based, not regular potting soil. Choose a pot with excellent drainage. Clear plastic pots are helpful because they let you inspect the roots and moisture level.
Healthy roots are usually firm and green, silvery, or white depending on moisture. Rotten roots are mushy, brown, or hollow. During repotting, trim dead roots with sterilized scissors, then place the plant in fresh mix. Do not bury the crown. Orchids enjoy drama, but not burial.
Give the Plant a Rest Period
After blooming, your orchid may need several months to recover. During this time, keep it in bright indirect light, water carefully, and feed lightly when it is actively growing. Do not expect instant flowers. A healthy Phalaenopsis often reblooms once or twice a year, though timing varies by plant, environment, and care routine.
The goal is not to force blooms at any cost. The goal is to grow a strong plant that has enough stored energy to flower naturally. Strong roots and leaves are the backstage crew. Without them, the floral performance gets canceled.
Common Mistakes That Keep Orchids From Blooming
Keeping the Orchid Too Far From Light
An orchid on a coffee table may look beautiful, but it may not receive enough light to rebloom. It is fine to display a blooming orchid in a lower-light spot for a short time. After flowering, move it back to a brighter location so it can recharge.
Watering on a Strict Schedule
“Every Saturday” sounds organized, but orchids do not read calendars. Check the potting mix instead. Water when the plant is nearly dry, not because your phone reminder has spoken.
Using Ice Cubes
Ice cube watering is popular because it feels easy, but orchids are tropical plants, and cold water can stress roots. Room-temperature water that drains thoroughly through the pot is a better long-term habit.
Fertilizing Too Much
If a little fertilizer helps, a lot should help more, right? Unfortunately, plants did not sign that contract. Too much fertilizer can damage roots and cause salt buildup. Dilute fertilizer and flush the potting mix regularly.
Ignoring the Roots
Leaves are easy to notice, but roots tell the real story. If the roots are dead or rotting, blooms are unlikely. Healthy roots are the foundation of orchid reblooming.
A Simple Orchid Blooming Plan
Here is a practical routine for a typical Phalaenopsis orchid after its flowers fade:
- Move it to bright indirect light, preferably near an east-facing window.
- Water only when the potting mix is nearly dry.
- Let water drain completely and never leave the pot sitting in water.
- Feed lightly with diluted orchid fertilizer during active growth.
- Provide a slight nighttime temperature drop for several weeks to encourage a spike.
- Repot after blooming if the bark is old, soggy, or broken down.
- Be patient; reblooming can take months.
This routine is simple, but it covers the main needs: energy from light, a bloom trigger from cooler nights, healthy roots from proper watering, and long-term strength from feeding and repotting.
Experience Notes: What Actually Helps Orchids Bloom at Home
In real homes, orchid care is rarely as perfect as a greenhouse chart. Windows face the wrong direction. Air conditioners blast one corner of the room. Someone forgets to empty the decorative pot. A well-meaning family member waters the orchid because “it looked lonely.” The plant survives all of this with quiet dignity, then refuses to bloom until conditions improve.
One of the most useful lessons is that orchids respond better to observation than to strict rules. For example, two orchids in the same home may need different watering schedules. The orchid in a clear plastic pot near a bright window may dry in five days. Another orchid in a ceramic pot across the room may stay damp for almost two weeks. Treating both the same can lead to one thirsty plant and one rotting plant. The better habit is to lift the pot, check the roots, and look at the bark before watering.
Another practical experience is that moving an orchid just a few feet can change everything. A plant that sits on a dining table may stay alive for months without blooming. Move it near an east-facing window, and suddenly it begins producing new roots and leaves. Later, with cooler nights, a flower spike appears. This is why many people think their orchid “randomly” bloomed, when the plant was actually responding to improved light and temperature.
Patience also matters more than most beginners expect. After the flowers fall, it is tempting to assume the orchid has failed. But a resting orchid is not a dead orchid. If new leaves or roots appear, the plant is working. It is building the energy needed for the next bloom cycle. Cutting off every green spike, repotting too often, or constantly changing locations can interrupt that progress. Orchids like consistency. They are not fans of being enrolled in a new care experiment every Tuesday.
One common success strategy is to create a seasonal rhythm. In spring and summer, give the orchid bright indirect light, careful watering, and light fertilizer as it grows leaves and roots. In fall, allow cooler nighttime temperatures near a safe window. In winter, reduce feeding if growth slows, but keep the plant bright and avoid overwatering. This rhythm mimics natural cues without making orchid care complicated.
It also helps to accept that not every bloom cycle will look like the day the orchid came from the store. Commercial orchids are grown in controlled conditions that encourage picture-perfect spikes. At home, a rebloom may have fewer flowers, a shorter spike, or a slightly different schedule. That still counts as success. A reblooming orchid on a windowsill is not trying to win a flower show; it is proving that your care routine is working.
The biggest personal takeaway is this: orchids bloom when they are healthy enough and signaled properly. Bright indirect light gives them energy. Cooler nights nudge them toward flowering. Smart watering protects the roots. Light fertilizer supports growth. Fresh potting mix keeps air around the roots. None of these steps is dramatic, but together they turn a stubborn green plant into a blooming one.
Conclusion
Getting orchids to bloom is not about secret tricks or expensive products. It is about understanding what the plant needs before it flowers. Start with bright indirect light, then add a gentle nighttime temperature drop to encourage a new spike. Water deeply but only when the mix is nearly dry, and feed lightly during active growth. After blooming, prune wisely, repot when needed, and give the orchid time to rebuild energy.
Once you stop treating orchids like mysterious luxury objects and start treating them like living plants with specific habits, reblooming becomes much less intimidating. Your orchid may not bloom on your exact schedule, because apparently plants do not respect editorial calendars. But with the right care, it can reward you with fresh flowers again and again.
Note: This article is intended for general home-gardening education. Care needs may vary depending on orchid type, indoor climate, potting medium, and seasonal conditions.