Table of Contents >> Show >> Hide
- When You Actually Have a Good Case
- How to Get an Uber Cancellation Charge Waived: 12 Steps
- Step 1: Check Whether It Was a Real Fee or Just a Temporary Hold
- Step 2: Look at the Timeline Before You Do Anything Else
- Step 3: Take Screenshots Like a Responsible Detective
- Step 4: Compare Your Situation to Uber’s Own Rules
- Step 5: Use the Correct In-App Help Path
- Step 6: Choose the Best Reason, Not the First Reason
- Step 7: Write a Short, Specific Explanation
- Step 8: Mention Evidence That Supports Your Side
- Step 9: Watch for the Response Type: Refund, Credit, or Nothing
- Step 10: Escalate Politely if the First Answer Misses the Point
- Step 11: Keep Your Deadlines in Mind
- Step 12: Escalate Outside Uber Only if the Charge Still Looks Wrong
- Common Reasons Riders Successfully Get a Cancellation Charge Waived
- Mistakes That Hurt Your Chances
- Example Scenarios
- Final Thoughts
- Experiences and Real-World Lessons From Riders
- SEO Tags
Few things are more annoying than paying for a ride you never took. You open the Uber app, see a cancellation charge, and suddenly your peaceful afternoon turns into a tiny courtroom drama where you are the plaintiff, the defendant, and the person muttering, “Seriously?” at your phone.
The good news: an Uber cancellation fee is not always the final word. If the charge was triggered by a late driver, a driver who never really headed toward you, a pickup issue outside your control, or a plain old app mix-up, you may have a solid shot at getting that fee waived or refunded. The trick is to act quickly, use the right path in the app, and explain your case like a calm adult instead of a keyboard flamethrower.
This guide walks you through 12 practical steps to challenge an Uber cancellation fee, improve your odds of success, and know when to escalate. We will also cover common mistakes, example situations, and real-life style experiences that show how these disputes usually play out.
When You Actually Have a Good Case
Before you march into battle, make sure you have a reason stronger than “I changed my mind and now I miss my money.” In general, you have a better chance of getting an Uber cancellation charge waived when:
- The driver was significantly later than the original ETA.
- The driver did not make reasonable progress toward the pickup point.
- The driver told you to cancel.
- The app showed confusing or incorrect trip details.
- You were charged a fee that looks more like a temporary authorization or duplicate charge than a real fee.
- The pickup pin or route data clearly shows the situation was not your fault.
In other words, if the cancellation was caused by the driver, the app, or a billing error, you are not just hoping for mercy. You are making a legit Uber refund request.
How to Get an Uber Cancellation Charge Waived: 12 Steps
Step 1: Check Whether It Was a Real Fee or Just a Temporary Hold
Start by making sure the charge is actually a cancellation fee. Sometimes riders see a pending charge and assume Uber has already grabbed the money like a cartoon villain with a money bag. Not always.
Open your trip history, tap the canceled ride, and view the receipt. If the fee is real, it should appear clearly in the trip details. If the trip was canceled and what you see is only a temporary authorization, it may disappear on its own after a few business days. This simple check can save you from filing a dramatic complaint against a charge that was never permanent in the first place.
Step 2: Look at the Timeline Before You Do Anything Else
Timing matters. Pull up the canceled trip and review the order of events:
- When were you matched?
- What was the original ETA?
- Did the driver stall, circle, or head the wrong direction?
- How long did you wait before canceling?
- Did the driver arrive at the pin or somewhere completely unhelpful?
The stronger your timeline, the stronger your case. “My driver was expected at 5:12 p.m., but by 5:21 p.m. the car had moved away from me and was still two miles out” is much better than “This was weird and bad.” Precision wins.
Step 3: Take Screenshots Like a Responsible Detective
Before the trip data changes or the details get fuzzy in your memory, screenshot everything useful:
- The driver’s location on the map
- The updated ETA
- Any messages from the driver
- The cancellation receipt
- The pickup pin if it appears wrong
If the driver messaged something like, “Please cancel, I can’t come,” screenshot that immediately. That message can be the difference between a quick refund and a support reply that feels like it was written by a polite toaster.
Step 4: Compare Your Situation to Uber’s Own Rules
This step is where your argument grows a backbone. Uber’s cancellation policies vary by market and ride type, but riders often have a better dispute case when the driver is running well behind the original ETA or does not make enough progress toward pickup.
That means your goal is not simply to say, “I don’t like this charge.” Your goal is to show, “This charge appears inconsistent with the conditions Uber itself describes.” That sounds much stronger because it is.
For example, if the driver’s ETA stretched far beyond what the app first showed, or the car stopped making meaningful progress, your claim fits neatly into the kind of exception riders commonly use to dispute an Uber cancellation fee by mistake.
Step 5: Use the Correct In-App Help Path
Do not fire off a random complaint through some unrelated menu and hope it reaches the right team. Go through the trip-specific support route inside Uber:
- Open the app.
- Go to Your Trips or Activity.
- Select the canceled ride.
- Open Help or Trip Issues and Refunds.
- Choose the option to review or dispute the cancellation fee.
This matters because support categories often determine how fast the system routes your case. Using the correct path helps your request land where actual billing review happens, instead of wandering the app like a tourist without cell service.
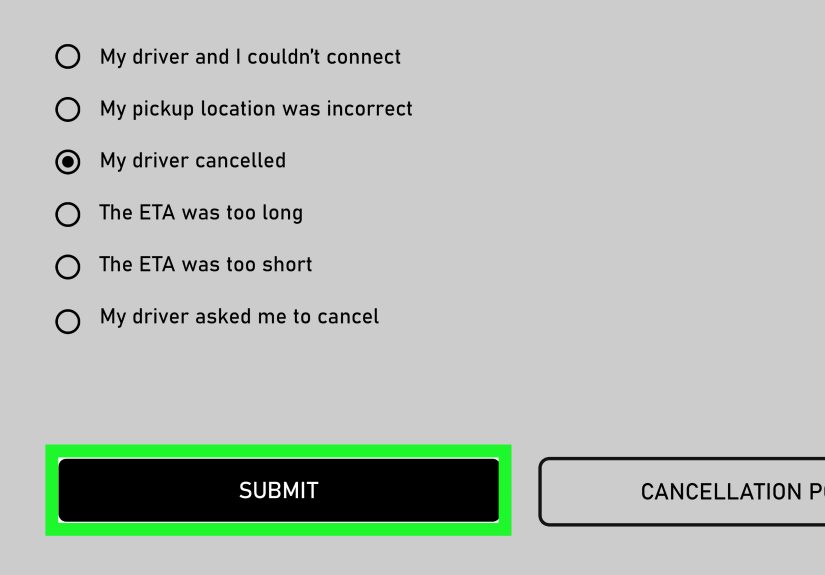
Step 6: Choose the Best Reason, Not the First Reason
Many riders rush this part. Slow down. Pick the reason that most closely matches what happened. The wrong category can turn a strong complaint into a weak one.
If your driver canceled, say that. If your driver was late, say that. If the car did not make progress, say that. If you were charged even though the issue was caused by the driver, make that crystal clear.
Support teams are busy. Your job is to make their decision easy. The best dispute is the one that requires the least amount of imagination from the person reviewing it.
Step 7: Write a Short, Specific Explanation
Keep your message calm, factual, and easy to verify. Here is a strong template:
I was charged a cancellation fee for this ride, but the driver was significantly later than the original ETA and was not making progress toward my pickup location. I canceled only because the ride was no longer arriving as expected. Please review and waive this cancellation charge. I have screenshots if needed.
Notice what this does well:
- It states the problem clearly.
- It explains why you canceled.
- It avoids unnecessary drama.
- It signals that you have evidence.
What you should not write is a 900-word emotional novel with seven exclamation points and a side quest about how this ruined your smoothie schedule.
Step 8: Mention Evidence That Supports Your Side
Even if the app does not ask for attachments right away, mention what you have:
- Screenshots of the driver’s location
- Messages asking you to cancel
- ETA changes
- Proof you were at the pickup point
This tells support that your request is not a random attempt to dodge a fee. It is a documented billing problem. And documented billing problems tend to receive more serious attention than “Trust me, bro” disputes.
Step 9: Watch for the Response Type: Refund, Credit, or Nothing
After you submit the claim, pay attention to what Uber actually offers. In many cases, support may issue a refund, an account credit, or a denial. Read the response carefully instead of speed-scrolling past it in annoyance.
If you receive a credit but believe the fee was clearly charged in error, reply and politely ask whether the amount can be returned to the original payment method. If the matter qualifies under Uber’s refund policy, the company states that eligible refunds generally return to the original payment method, although timing can depend on your bank.
Step 10: Escalate Politely if the First Answer Misses the Point
Sometimes the first support reply looks suspiciously like it was selected from a giant menu of canned responses. That does not mean you are done. It means you need a cleaner follow-up.
Try something like this:
Thanks for the response. I would like this reviewed again because my issue was not that I changed my mind. The driver was late and not making progress toward the pickup location, which is why I canceled. Please recheck the trip data and the cancellation charge.
Polite persistence works better than rage. You are more likely to get help by sounding organized and reasonable than by typing in all caps like your keyboard is on fire.
Step 11: Keep Your Deadlines in Mind
Do not let the issue sit for weeks while you think about maybe possibly doing something later. Uber’s rider refund policy says requests should be submitted within 30 days of the issue. The longer you wait, the harder it becomes to recover screenshots, remember details, and convince anyone that the matter is urgent.
File the in-app dispute quickly. If you are later forced to escalate to your card issuer, timing matters there too. Billing-error dispute rights under U.S. credit card rules also come with deadlines, so do not treat this like a hobby project for Future You.
Step 12: Escalate Outside Uber Only if the Charge Still Looks Wrong
If Uber denies the request and the charge still appears improper, you may consider disputing it with your credit card issuer. This is not your first move. It is your backup move.
Before you do that, gather:
- The trip receipt
- Your screenshots
- Your message history with Uber
- The date you first saw the charge
- A short written summary of why the fee was incorrect
Then contact the card issuer promptly and follow its billing-error process. If the charge is truly unsupported, a card dispute may help. But use this step carefully and honestly. The goal is to correct a real billing problem, not to turn every mildly annoying fee into a federal case.
Common Reasons Riders Successfully Get a Cancellation Charge Waived
- Driver delay: The original ETA slipped badly, making the ride unreasonable to wait for.
- No real progress: The driver stayed parked, drove away, or circled without approaching the pickup.
- Driver asked rider to cancel: This is one of the strongest situations to document.
- Pickup mismatch: The app pin or location data created a problem you could not fix in time.
- App confusion or duplicate-looking billing: The charge may not be what it first appears to be.
Mistakes That Hurt Your Chances
Writing too much and saying too little
Support does not need a screenplay. It needs a clear reason.
Admitting you canceled for convenience
If you canceled because you suddenly wanted tacos first, that is probably not a winning refund angle.
Waiting too long
Late complaints are weaker complaints. Evidence fades. Memory gets fuzzy. Screenshots disappear into the digital void.
Using the wrong support category
Routing matters. Start with the canceled trip itself and use the Trip Issues and Refunds flow.
Example Scenarios
Scenario 1: You request an UberX at 8:05 a.m. The app says the driver will arrive in 4 minutes. Ten minutes later, the driver is farther away than when you booked. You cancel and get charged. That is a solid case to request a waiver.
Scenario 2: The driver messages, “Can’t make it, please cancel.” You cancel and the fee lands on your account like an unwanted souvenir. Screenshot the message and dispute immediately.
Scenario 3: You see a charge after a canceled trip, but the receipt does not clearly show a cancellation fee. It may be a temporary authorization. Wait a short period, monitor your bank, and dispute only if it posts as an actual charge.
Final Thoughts
If you want to know how to get an Uber cancellation charge waived, the answer is not magic. It is method. Check the receipt, gather proof, use the right help path, explain the problem clearly, and escalate only when the facts support you. Most of the time, the difference between “refund approved” and “request denied” is not luck. It is whether you made the reviewer’s job easy.
So yes, keep your cool. Keep your screenshots. Keep your facts straight. And maybe keep a little humor too, because nothing says modern adulthood like disputing an $8 fee while standing on a sidewalk wondering how transportation became this emotionally complex.
Experiences and Real-World Lessons From Riders
One of the most common experiences riders describe is the “moving target” problem. The app shows a driver arriving in three or four minutes, so the rider commits and waits. Then the car sits in one place, takes a scenic tour of three unrelated blocks, or mysteriously begins drifting in the opposite direction like it has suddenly remembered another life goal. The rider cancels because the trip is no longer realistic, and then the fee appears. In those situations, riders who document the ETA changes and driver location often have the best results. Not because support enjoys spreadsheets of sidewalk misery, but because the trip data tells a coherent story.
Another common experience is the “driver asked me to cancel” moment. This one usually comes with a message that sounds harmless enough: “Traffic is bad, can you cancel?” or “I can’t get to you, please cancel.” It is tempting to hit cancel and move on with your day, especially if you are late already. But riders who get a fee afterward often realize that this tiny decision matters. If the driver initiated the problem, the rider should document that message and submit it through the trip support flow. In many cases, a calm explanation that the driver requested the cancellation makes the dispute much stronger.
Then there is the pickup-pin disaster, a classic of the genre. You are standing exactly where a normal human would stand, but the app pin decides your soul now lives somewhere behind a locked gate, inside a parking garage, or on a road that should only exist in video games. The driver cannot find you, you cannot reach the car, and suddenly everyone is living in separate realities. Riders in this situation often do best when they explain the pickup mismatch clearly and mention that they were available and ready. If the issue came from confusing location data rather than rider delay, the review may go more favorably.
There are also riders who panic when they see a charge and assume the worst, only to discover it was a temporary card authorization or a pending charge that later disappeared. That experience teaches an important lesson: do not confuse “I see a number” with “I have been permanently charged.” Checking the trip receipt first can save time, frustration, and a completely unnecessary feud with customer support.
Perhaps the biggest real-world lesson is this: the riders who succeed most often are not always the angriest. They are usually the clearest. They say what happened, when it happened, why they canceled, and what evidence supports the request. They do not write like they are auditioning for a courtroom drama. They write like someone who knows the trip data will back them up. That tone matters more than people think. Calm, specific, and factual tends to travel further than dramatic, vague, and all-caps. In the kingdom of billing disputes, screenshots are the crown jewels, and clarity is the sword.