Table of Contents >> Show >> Hide
- Why Diode Identification Matters
- Step 1: Know What a Simple Diode Usually Looks Like
- Step 2: Find the Stripe or Band
- Step 3: Match the Physical Part to the Schematic Symbol
- Step 4: Read Any Part Number or Body Marking
- Step 5: Use a Multimeter to Confirm Polarity
- Step 6: Check Whether the Circuit Is Fooling You
- Step 7: Decide What Type of Simple Diode You Probably Have
- Common Mistakes When Identifying Diodes
- Practical Example: Identifying a Mystery Axial Diode
- Final Thoughts
- Real-World Experiences and Lessons From Identifying Diodes
- SEO Tags
If you have ever stared at a tiny black cylinder with a mysterious stripe and thought, “Congratulations, little bean, you could be anything,” this guide is for you. Identifying a simple diode is not magic, and it does not require a lab coat, dramatic background music, or a PhD in tiny black parts. It does require a few reliable habits: look for markings, understand polarity, test with a multimeter, and know when the diode is lying to you because the rest of the circuit is getting involved.
In this article, you will learn exactly how to identify a simple diode in seven practical steps. We will cover what the body markings mean, how to find the anode and cathode, how to read common clues on glass, axial, and small surface-mount parts, and how to confirm your guess with a digital multimeter. You will also see when a diode is probably a standard silicon rectifier, when it might be a Schottky or Zener, and when the smartest move is to stop guessing and check the datasheet.
If your toolbox currently contains one multimeter, three mystery parts, and a very optimistic attitude, you are already halfway there.
Why Diode Identification Matters
Diodes are simple components, but they are not forgiving when installed backward or substituted carelessly. A diode only wants current to move one way. Put it in the wrong direction and the circuit may fail, protection may disappear, or the component may overheat and let out that unforgettable “electronics were harmed in the making of this project” smell.
Correct diode identification helps with troubleshooting, circuit repair, hobby projects, salvaged boards, and learning basic electronics. It also saves time. Instead of randomly swapping parts and hoping for a miracle, you can work like a calm, competent human being who understands what the stripe means.
Step 1: Know What a Simple Diode Usually Looks Like
Before you identify a diode, you need to know whether the part in front of you is probably a diode at all. A simple diode is often a two-terminal component in one of these packages:
- Axial leaded diode: a small cylindrical body with a wire lead coming out of each end.
- Glass diode: a tiny glass-bodied cylinder, often amber or clear, also with two leads.
- Surface-mount diode: a very small rectangular package with metal terminations on both ends.
Most basic rectifier and signal diodes do not look flashy. They usually appear in black, dark gray, or glass packages and often have one obvious band or stripe at one end. That band is your first big clue, and yes, diode designers were kind enough to leave you a breadcrumb trail.
Step 2: Find the Stripe or Band
The fastest way to identify a simple diode is to look for the stripe, band, or line on the body. On many standard diodes, that band marks the cathode. The opposite end is the anode.
This matters because diode polarity is everything. If you are looking at a common axial diode such as a 1N400x rectifier or a small signal diode, the banded end is typically the cathode. Many manufacturer datasheets say this very directly: “color band denotes cathode end” or “cathode indicated by band.” In other words, the stripe is not decoration. It is the component politely introducing itself.
Quick memory trick
Band = cathode. If you remember nothing else from this section, remember that.
There are exceptions with specialized devices, arrays, and unusual packages, but for simple everyday diodes, the band is the first thing you should trust. If no band is visible, move to the next steps rather than guessing.
Step 3: Match the Physical Part to the Schematic Symbol
Once you know which end is the cathode, connect that to the schematic symbol in your head. The diode symbol has a bar on one side, and that bar corresponds to the cathode. On the physical diode, the stripe usually marks that same side.
This is one of the easiest ways to avoid reversed installation. If the schematic shows the bar on the right, then the striped end of the physical diode should face the right when you place it in the circuit.
Beginners often mix up anode and cathode because the words sound like they were invented to make electronics class more dramatic. Here is the plain-English version:
- Anode: the side current enters during forward bias.
- Cathode: the side marked by the stripe on most simple diodes.
If you can align the stripe on the part with the bar on the symbol, you are doing real electronics now, not interpretive electronics.
Step 4: Read Any Part Number or Body Marking
If the diode has printed text, numbers, or short codes on the body, use them. A part number can tell you whether the diode is a general rectifier, fast recovery diode, small signal diode, Zener diode, or Schottky diode.
Common examples
- 1N4001 to 1N4007: common silicon rectifier diodes.
- 1N4148: common small signal switching diode.
- 1N5817 to 1N5819: common Schottky rectifier diodes.
- 1N47xx series: often Zener diodes, depending on the exact number.
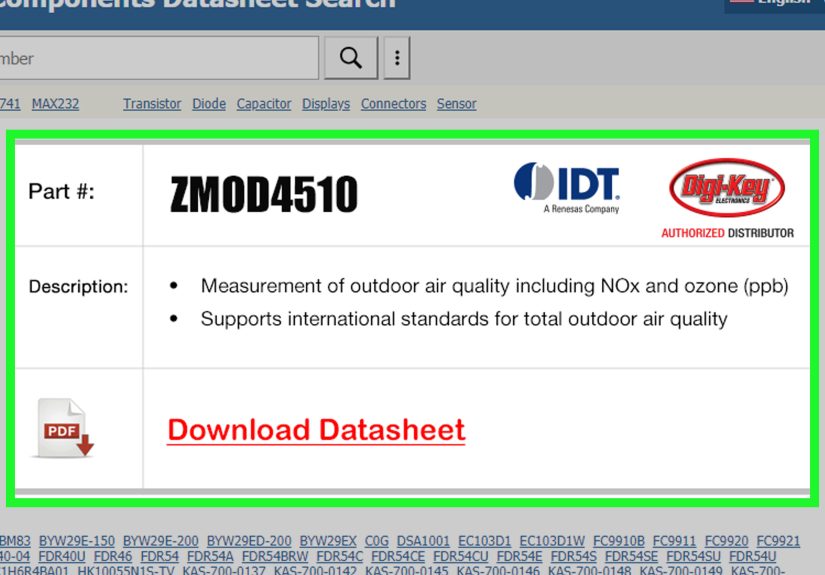
If the print is readable, search the part number in a distributor catalog or datasheet library. That usually reveals the package, polarity marking, voltage rating, current rating, and typical application. This is the difference between saying, “I think it’s a diode,” and saying, “This is a 1N4148 small-signal silicon diode and I am no longer guessing.”
On very small surface-mount diodes, you may only see a short alphanumeric top mark rather than a full part number. In that case, identification gets trickier, but the same rule applies: use the code plus package style, and confirm it with a datasheet or component database whenever possible.
Step 5: Use a Multimeter to Confirm Polarity
If the marking is worn off or you do not trust what you are seeing, use a digital multimeter in diode test mode. This is one of the best ways to identify the anode and cathode on a simple diode.
How to do it
- Turn off power to the circuit.
- Discharge capacitors if the diode is still in equipment.
- Set the multimeter to diode test mode.
- Place the red probe on one end of the diode and the black probe on the other.
- Read the display.
If the diode is forward-biased, the meter usually shows a voltage drop. If the probes are reversed, the meter often shows OL or open loop. That tells you which way the diode wants to conduct.
What the result means
- Reading appears in one direction only: the diode is likely good, and the red probe is on the anode while the black probe is on the cathode.
- OL in both directions: the diode may be open or damaged.
- Very low reading in both directions: the diode may be shorted.
For many silicon diodes, a good forward reading is often around 0.5 V to 0.8 V. Germanium diodes are often lower, around 0.2 V to 0.3 V. Schottky diodes are also lower than typical silicon parts, often in the rough neighborhood of 0.2 V to 0.5 V depending on type and test conditions.
That means the multimeter does double duty: it helps you identify both the polarity and the likely family of diode you are holding.
Step 6: Check Whether the Circuit Is Fooling You
Here is where many people get tripped up. Testing a diode in circuit can give misleading readings because other components create alternate current paths. In plain English, the diode might be innocent, but the rest of the board is answering for it.
If you test a diode on a populated circuit board and get a weird result, do not rush to judgment. Parallel resistors, semiconductors, or neighboring paths can affect the reading. A forward-bias reading might still look normal, while the reverse reading may not show a clean OL because current is sneaking through other parts of the circuit.
Best practice
For the most reliable identification, test the diode out of circuit or lift one lead if possible. That isolates the device and gives you a cleaner result.
This single habit saves a shocking amount of time. Not literal shock, hopefully. Just time.
Step 7: Decide What Type of Simple Diode You Probably Have
Once you have identified the terminals and measured the forward drop, you can make a smart guess about the type of simple diode.
Standard silicon diode
Usually marked with a cathode stripe and often shows a forward drop around 0.6 V to 0.8 V. Common in rectification and general-purpose polarity protection.
Schottky diode
Often has a lower forward drop, commonly around 0.2 V to 0.5 V. Used when low voltage loss and fast switching matter.
Zener diode
May look physically similar to a regular diode and often still has a cathode band. In forward-bias diode mode, it can behave like a normal diode. The difference shows up when it is reverse-biased near its Zener voltage. If you suspect a diode is Zener, the part number is the easiest clue.
Small-signal switching diode
Often smaller, sometimes glass-bodied, used for signal routing and switching rather than heavy current handling.
You do not always need perfect identification on the first try. In repair work, the goal is often to determine whether the part is a standard rectifier, fast diode, Schottky, or Zener. That narrows replacement options and makes the next step much easier.
Common Mistakes When Identifying Diodes
- Confusing a diode with a resistor: resistors use color bands across the whole body, while diodes usually use a single polarity band near one end.
- Assuming every black cylindrical part is the same: package similarity does not mean identical function.
- Ignoring body codes: a printed number can save you from a completely wrong replacement.
- Testing in-circuit and trusting the result too much: surrounding components can distort readings.
- Forgetting safety: powered equipment and charged capacitors are not interested in your learning journey.
Practical Example: Identifying a Mystery Axial Diode
Imagine you find a black axial component with a silver band on one end and faded text that appears to read “1N4007.” Here is how you would identify it:
- You confirm it has two leads, so it is likely a diode or similar two-terminal part.
- You see a band on one end, so that end is likely the cathode.
- You compare it to the diode symbol and know the striped end matches the symbol’s bar.
- You read the body marking and suspect it is a 1N4007 rectifier diode.
- You check it with a multimeter and get about 0.65 V one way and OL the other way.
- You conclude it is a good silicon rectifier diode with the banded end as the cathode.
That is not just identification. That is a full detective story with a satisfying ending.
Final Thoughts
Identifying a simple diode gets much easier once you stop treating it like a mystery object and start treating it like a component with a few predictable clues. The band tells you polarity. The symbol tells you orientation. The body marking tells you what family it belongs to. The multimeter confirms whether your guess is correct.
So the next time a little striped part rolls onto your workbench looking suspiciously anonymous, you do not need to panic. Follow the seven steps, check the clues, verify with your meter, and let the datasheet settle any remaining argument. Electronics may be full of tiny parts, but diode identification does not have to be a tiny nightmare.
Real-World Experiences and Lessons From Identifying Diodes
One of the funniest things about learning diodes is how often people think they are struggling with advanced electronics when they are actually fighting a very ordinary stripe. A lot of beginners spend more time doubting themselves than testing the part. They flip the diode three times, look at the circuit board from a new angle, squint like that will unlock secret engineering powers, and then finally realize the band was visible the whole time. If that sounds familiar, good news: you are learning exactly the way countless hobbyists and technicians have learned.
In repair work, diode identification usually becomes important during stressful moments. Maybe a power supply is dead. Maybe a board has a burnt component. Maybe a salvaged circuit has parts with half the markings rubbed off. In those cases, the smartest technicians tend to stay boring in the best possible way. They do not make heroic guesses. They follow a routine. First, inspect the body. Second, note the cathode marking. Third, compare the part to the board silkscreen and symbol. Fourth, check the reading with a multimeter. Routine wins.
Another common experience is discovering that the diode itself was fine, but the measurement setup was bad. This happens all the time with in-circuit testing. Someone measures a diode on a board, gets a confusing reading in both directions, and assumes the part is defective. Then they lift one lead or remove the diode entirely, test it again, and suddenly it behaves perfectly. That moment is frustrating, but it is also useful. It teaches a lesson that sticks: components do not live alone, and the rest of the circuit can absolutely mess with your reading.
People also learn very quickly that part numbers matter more than appearance. Two diodes can look nearly identical and behave very differently in a circuit. One may be a standard rectifier, while the other is a Schottky chosen for low forward voltage. One may be a Zener designed for voltage regulation. One may be a fast-switching signal diode. On the bench, they may all look like variations of “small dark cylinder with opinions,” but electrically they are not interchangeable. The habit of reading the marking before replacing the part is one of those small skills that separates random tinkering from reliable troubleshooting.
There is also a confidence shift that happens after a few successful identifications. At first, a diode seems cryptic. Later, it feels obvious. You start seeing the stripe instantly. You recognize common packages more quickly. You know that a forward drop around 0.6 V suggests a normal silicon junction, while a lower drop hints at a Schottky or germanium device. That confidence does not come from memorizing everything. It comes from repeating the same simple process until it feels natural.
And perhaps the most relatable experience of all: once you learn how to identify a simple diode properly, you begin noticing how many past mistakes were caused by rushing. Reversed installation, bad substitutions, misread bands, sloppy in-circuit measurements, and mystery parts tossed in a drawer without labels all come back to haunt people later. The nice part is that diode identification is one of those skills where a little patience pays off immediately. Slow down for one minute, and you can save yourself an hour of confusion. That is a fantastic trade in electronics, and honestly, in life too.