Table of Contents >> Show >> Hide
- Before You Start: Is Granite Countertop Installation a DIY Job?
- Tools and Materials Needed
- Step 1: Plan the Layout and Choose the Right Granite
- Step 2: Measure the Countertop Area Carefully
- Step 3: Remove the Old Countertops
- Step 4: Level and Secure the Base Cabinets
- Step 5: Make or Review the Template
- Step 6: Dry Fit the Granite Slabs
- Step 7: Apply Adhesive and Set the Granite
- Step 8: Join and Level the Seams
- Step 9: Install the Sink, Faucet, and Backsplash
- Step 10: Seal the Granite Surface
- Step 11: Clean Up and Care for Your New Countertops
- Common Granite Countertop Installation Mistakes to Avoid
- Professional Installation vs. DIY Granite Countertops
- Field-Tested Experiences and Practical Lessons from Granite Countertop Installation
- Conclusion
Granite countertops can make a kitchen feel instantly more polished, durable, and expensivein the best possible way, not in the “I just checked my remodel budget and need to sit down” way. Known for natural beauty, heat resistance, and long-term performance, granite remains one of the most popular countertop materials for homeowners who want a surface that looks elegant but can still handle real life: coffee rings, dinner prep, homework piles, and that one family member who insists on chopping lemons directly on the counter.
That said, learning how to install granite countertops is not the same as hanging a picture frame. Granite is heavy, unforgiving, and difficult to cut once fabricated. A successful installation depends on careful measurements, level cabinets, safe handling, precise dry fitting, strong seams, proper adhesive, and final sealing. Many homeowners hire professional countertop installers for fabrication and placement, especially for large kitchens, islands, undermount sinks, or complicated seams. However, understanding the full installation process helps you plan smarter, communicate better with contractors, and avoid costly mistakes.
This guide breaks the process into 11 practical steps, from planning and measuring to sealing and post-installation care. Whether you are preparing for a DIY granite countertop installation or simply want to know what your installer should be doing, these steps will help you protect your investment and keep your kitchen from turning into a stone-age disaster zone.
Before You Start: Is Granite Countertop Installation a DIY Job?
Granite countertop installation can be DIY-friendly only in limited situations, such as small bathroom vanities, short straight sections, pre-cut slabs, or modular granite pieces. For full kitchen slabs, professional help is strongly recommended. Granite slabs can weigh hundreds of pounds, and a small mistake during handling may crack the stone, damage cabinets, or injure someone. Unlike laminate or butcher block, granite cannot be easily trimmed with basic household tools.
The safest approach is often a hybrid one: homeowners handle demolition, cabinet preparation, plumbing disconnection, cleanup, and sealing, while professionals handle templating, fabrication, transport, seam work, and final placement. Think of it like making a fancy cake: you can absolutely help, but you probably do not want to carry the three-tier wedding cake across a parking lot in flip-flops.
Tools and Materials Needed
The exact tools depend on whether you are installing pre-fabricated granite or working with a fabricator. In general, you may need a tape measure, level, straightedge, shims, clamps, plywood support if required, construction adhesive or silicone adhesive, color-matched epoxy for seams, caulk gun, painter’s tape, denatured alcohol, microfiber cloths, granite sealer, safety glasses, gloves, dust mask or respirator for cleanup, and several strong helpers or professional suction-cup lifters.
If any cutting, grinding, drilling, or polishing is required, do not treat it casually. Stone dust can contain respirable crystalline silica, which is hazardous when inhaled. Cutting should be performed using proper wet-cutting methods, ventilation, and approved respiratory protection. In most cases, fabrication should be done off-site by a qualified stone shop.
Step 1: Plan the Layout and Choose the Right Granite
The first step in installing granite countertops is choosing a slab that fits your design, lifestyle, and budget. Granite comes in many colors and patterns, from subtle whites and grays to dramatic blacks, greens, golds, and deep blues. Since granite is a natural stone, every slab is unique. That is part of the charmand part of the challenge. The sample you loved in the showroom may look different from the full slab, so inspect the actual stone whenever possible.
Look closely at veining, mineral deposits, color movement, and pattern direction. If your kitchen has a large island or multiple countertop sections, ask how the fabricator will match the pattern at seams. A good seam layout should balance appearance, slab size, structural support, and practical handling. Avoid placing seams in highly visible or heavily used areas when possible, such as directly in front of the sink or cooktop.
Plan for Sinks, Cooktops, and Overhangs
Before ordering granite, decide where sinks, faucets, soap dispensers, outlets, cooktops, and appliances will sit. Overhangs also need planning. Standard countertop overhangs are often around 1 to 1.5 inches at cabinet fronts, while seating areas may need deeper overhangs with brackets, corbels, or steel supports. Unsupported stone overhangs can crack if they extend too far, especially if someone leans on them during a party while explaining their fantasy football strategy.
Step 2: Measure the Countertop Area Carefully
Accurate measurement is the foundation of granite countertop installation. Measure the length and depth of each cabinet run, appliance opening, island, peninsula, and backsplash area. Include overhangs, finished edges, sink cutouts, cooktop cutouts, and any exposed side panels. Measure walls in several places because kitchens are rarely perfectly square. Older homes, in particular, have walls that seem to have been designed by someone using a sleepy ruler.
Create a simple sketch of your kitchen layout and label every measurement. Mark the location of appliances, corners, seams, finished edges, and plumbing. If you are working with a fabricator, they will usually make a professional template after your cabinets are installed and secured. Do not template before cabinets are level and permanently in place because even a small movement can make the finished granite fit poorly.
Double-Check Appliance Clearances
Dishwashers, ranges, refrigerators, and slide-in appliances must have enough clearance after the granite is installed. Confirm that cabinet heights, appliance openings, and countertop thickness work together. Standard kitchen countertop height is commonly around 36 inches from the finished floor, but the final height depends on cabinet height, countertop thickness, and flooring.
Step 3: Remove the Old Countertops
Before new granite can go in, the old countertops must come out. Start by clearing everything from the counters and nearby cabinets. Disconnect plumbing under the sink, shut off water valves, remove the garbage disposal if needed, and disconnect appliances that interfere with countertop removal. If electrical connections are involved, call a licensed electrician. Countertop installation is exciting; accidental sparks are less charming.
Remove caulk along the backsplash, walls, and sink edges. Then locate screws or brackets that secure the old countertop to the cabinets. Laminate counters are often screwed from underneath, while tile counters may require more demolition. Work slowly to avoid damaging cabinets, drywall, or plumbing. If the old countertop is heavy, remove it in sections and have helpers available.
Inspect for Hidden Damage
Once the old countertop is removed, inspect cabinets for water damage, mold, loose framing, cracked corners, or weak sink bases. Granite needs a strong, stable foundation. If the cabinet box around the sink is swollen, soft, or warped, repair it before moving forward. Installing granite over damaged cabinets is like putting a tuxedo on a folding chair: impressive for three seconds, then questionable.
Step 4: Level and Secure the Base Cabinets
Granite countertops must sit on cabinets that are level, plumb, square, and firmly attached. Use a long level across the cabinet tops from side to side and front to back. Check adjacent cabinets for height differences and use shims where needed. Cabinets should not rock, shift, or separate when pushed. Secure loose cabinets to wall studs and fasten adjoining cabinets together through the face frames or stiles.
This step is critical because granite does not flex like laminate. If the cabinets are uneven, the slab may rock, create visible gaps, stress seams, or crack over time. Take your time here. Level cabinets are not glamorous, but neither is explaining to guests why your brand-new countertop has a dramatic fault line that is not part of the natural stone pattern.
Add Support Where Needed
Some granite installations require plywood support, especially with thinner slabs, frameless cabinets, or areas spanning gaps such as dishwashers. Other installations with thicker 3-centimeter stone may not need full plywood decking, depending on the fabricator’s recommendation and cabinet construction. Always follow the stone supplier’s guidelines. Add brackets, corbels, or hidden steel supports for large overhangs, bar seating, or unsupported corners.
Step 5: Make or Review the Template
A countertop template is a full-size pattern or digital measurement file used to fabricate the granite. Professional installers often use laser templating tools for accuracy, while traditional methods may use cardboard, wood strips, or plastic templates. The template should show walls, cabinet edges, appliance openings, sink cutouts, cooktop cutouts, faucet holes, overhangs, seams, and finished edges.
Review the template carefully before fabrication begins. Confirm sink reveal style, faucet placement, backsplash height, edge profile, corner radius, and seam locations. Once granite is cut and polished, changes become expensive quickly. This is the moment to ask questions, not after the slab arrives and everyone is standing around pretending the faucet hole in the wrong place is “probably fine.”
Step 6: Dry Fit the Granite Slabs
Dry fitting means placing the granite on the cabinets without permanently bonding it. This allows you to check fit, alignment, overhangs, seams, wall gaps, and appliance clearances before adhesive is applied. For large slabs, this step should be done by trained installers using proper lifting equipment and enough people to control the stone safely.
During the dry fit, check that the slab sits flat and does not rock. Make sure seams meet tightly and edges line up evenly. Look for gaps along the wall, especially in older homes where walls may bow. Small wall gaps can often be covered with backsplash or caulk, but large gaps may require adjustment. Never force granite into place. Stone is strong, but it is not in the mood to be bullied.
Check the Sink and Cooktop Openings
Place the sink, cooktop, or appliance template near the cutout to confirm the fit. Undermount sinks require careful support, sealing, and clip placement. Cooktops need manufacturer-specified clearances. If a cutout is slightly wrong, let the fabricator handle corrections with proper tools and dust-control methods.
Step 7: Apply Adhesive and Set the Granite
Once the dry fit looks right, lift the slab carefully and apply adhesive according to the installer’s method and manufacturer recommendations. Many granite countertop installations use dabs of silicone adhesive or construction adhesive along the cabinet tops. The goal is to secure the stone without creating excessive high spots that prevent the slab from sitting level.
Lower the granite slowly and evenly into place. Check the overhang at the front and exposed sides. Use shims only where necessary and only in a way that does not create stress points. The slab should be supported evenly across the cabinet base. Wipe away excess adhesive before it cures.
Step 8: Join and Level the Seams
If your countertop has more than one granite piece, seams must be joined carefully. Installers typically use color-matched epoxy or resin to bond the seam and make it as discreet as possible. Seam setters or clamps may be used to pull the pieces together and align the surfaces so both sides sit flush.
A good granite seam should be narrow, level, and color blended, though it may not disappear completely. Natural stone patterns can make seams more or less noticeable depending on veining and color variation. Avoid placing heavy appliances or applying pressure near seams until the adhesive has cured.
Clean the Seam Area
Before epoxy is applied, the seam area should be clean and dry. Dust, oil, or moisture can weaken the bond or affect the appearance. After the seam is filled and tightened, excess epoxy should be removed carefully without scratching the stone.
Step 9: Install the Sink, Faucet, and Backsplash
After the countertop is secured, install the sink and faucet. Drop-in sinks are set into the cutout from above, while undermount sinks attach beneath the stone using clips, brackets, adhesive, and sealant. Undermount sinks must be supported properly because the weight of a sink full of water and dishes is not something you want hanging by wishful thinking.
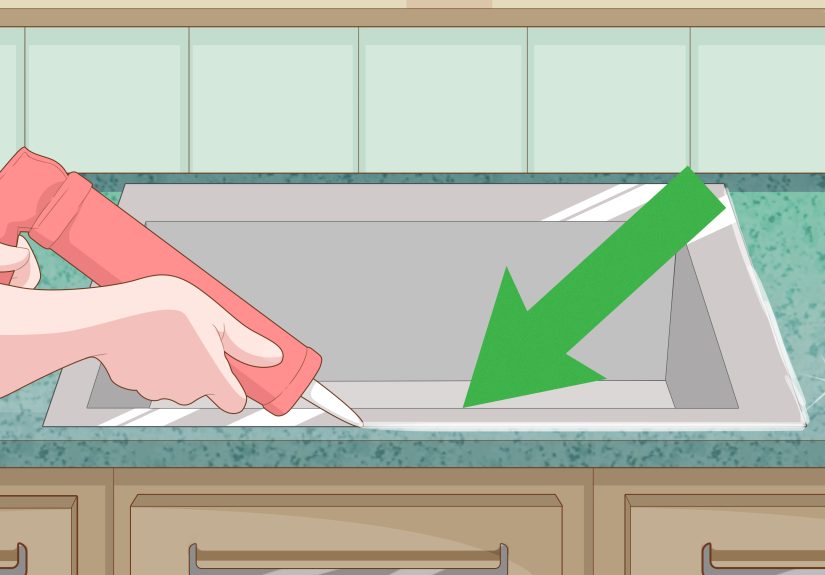
Apply a continuous bead of silicone sealant where needed to prevent water from entering the cabinet below. Install the faucet, soap dispenser, air gap, or filtered water tap through the pre-drilled holes. Reconnect plumbing only after sealants have had enough time to cure according to the product instructions.
If your design includes a granite backsplash, dry fit it first, then secure it with adhesive. Caulk the joint where the backsplash meets the countertop and where it meets the wall. Use a neat, smooth bead for a clean finish.
Step 10: Seal the Granite Surface
Granite is durable, but many varieties are porous enough to benefit from sealing. A penetrating stone sealer helps reduce staining from oil, wine, coffee, sauces, and other kitchen villains. Before sealing, clean the countertop with a stone-safe cleaner or denatured alcohol recommended by your installer. Let the surface dry completely.
Apply granite sealer evenly according to the product directions. Allow it to absorb, wipe off excess, and let it cure. Do not assume more sealer is always better. Over-application can leave a hazy film. After curing, test the surface by placing a few drops of water on the stone. If the water beads, the seal is working. If it darkens the stone quickly, another application may be needed.
How Often Should Granite Be Resealed?
Resealing frequency depends on the granite type, finish, sealer quality, and kitchen use. Some countertops need resealing every year, while others can go longer. The water-drop test is a simple way to check. If water absorbs instead of beading, it is time to reseal.
Step 11: Clean Up and Care for Your New Countertops
After installation, clean the granite with a soft cloth and a pH-neutral stone cleaner. Avoid harsh chemicals, bleach, abrasive powders, vinegar, and acidic cleaners. Granite may be tough, but the sealer can break down if treated like a chemistry experiment. Use cutting boards, wipe spills quickly, and place trivets under very hot cookware to protect the finish and sealant.
Inspect seams, caulk lines, sink edges, and backsplash joints after the first few days. If you notice gaps, movement, or water intrusion, address it immediately. Proper maintenance will help granite countertops look beautiful for many years.
Common Granite Countertop Installation Mistakes to Avoid
Measuring Before Cabinets Are Final
Templating too early is one of the most expensive mistakes. Cabinets must be installed, leveled, secured, and finished before final measurements are taken. Even a small cabinet shift can ruin the fit.
Ignoring Cabinet Support
Granite needs a stable base. Weak cabinets, unsupported dishwasher spans, and oversized overhangs can lead to cracks. Add proper structural support before the slab goes in.
Trying to Cut Granite Indoors Without Proper Equipment
Granite cutting produces dust and requires specialized tools. Dry cutting stone indoors is unsafe and messy. Leave fabrication to professionals with wet-cutting systems and dust controls.
Skipping the Dry Fit
Adhesive should never touch the cabinets until the slab has been checked for fit, alignment, seams, and overhang. Dry fitting is your final chance to catch problems.
Using the Wrong Cleaner
Acidic cleaners can dull the finish and weaken sealers. Use stone-safe products and soft cloths. Granite does not need spa treatment, but it does appreciate not being scrubbed with vinegar and regret.
Professional Installation vs. DIY Granite Countertops
DIY granite countertop installation may save labor costs, but the risks are significant. Professional installers bring experience, lifting equipment, seam tools, adhesives, polishing methods, and insurance. They also understand how to handle sink cutouts, cooktop openings, uneven walls, and heavy slabs without turning your remodel into an expensive puzzle.
For small projects, such as a bathroom vanity, DIY may be realistic with pre-cut granite and careful preparation. For kitchens, islands, waterfall edges, large slabs, or undermount sinks, professional installation is usually the smarter choice. Even if you are handy, granite is not forgiving. Wood can be sanded. Paint can be touched up. Granite, once cracked, tends to hold a grudge.
Field-Tested Experiences and Practical Lessons from Granite Countertop Installation
One of the biggest lessons homeowners learn during granite countertop installation is that preparation matters more than muscle. Yes, granite is heavy, and yes, you need strong people to move it. But strength alone does not create a clean installation. The real success comes from the quiet, less glamorous steps: checking cabinet level, confirming appliance clearances, reviewing the template, protecting floors, and making sure everyone knows the path from the truck to the kitchen.
A practical example is the dishwasher opening. Many homeowners focus on the sink and forget that the dishwasher needs to slide in and out for future repairs. If the granite is installed too low, or if support strips block the opening, a simple appliance replacement later can become a mini-remodel. Before installation day, confirm the dishwasher height, side clearance, and access to the water and electrical connections. Future you will send present you a thank-you note.
Another real-world lesson involves seams. In a showroom, it is easy to imagine one perfect, endless sheet of granite flowing across the entire kitchen. In reality, slab size, doorway access, cabinet layout, and stone pattern often require seams. The goal is not always to eliminate seams; it is to place them wisely. A seam near a sink may be exposed to more moisture. A seam across dramatic veining may be more visible. A seam in a low-traffic corner may practically disappear. Ask your fabricator to explain seam placement before cutting begins.
Homeowners also underestimate how much space installers need. Granite slabs are awkward, not just heavy. Clear a wide path through doors, hallways, and stairs. Remove rugs, move furniture, secure pets, and protect walls where tight turns are likely. A curious dog, a narrow hallway, and a 400-pound stone slab are not a sitcom setup anyone needs.
Another experience-based tip is to schedule plumbing carefully. Do not plan a dinner party for the same evening your countertop is installed. Sink clips, adhesives, caulk, and sealers may need curing time before plumbing is reconnected or the sink is used. It is better to expect a short kitchen downtime than to rush the process and create leaks under your brand-new stone.
Lighting is also worth considering. Granite can look different under showroom lights, daylight, and warm kitchen bulbs. Before approving a slab, view it from multiple angles and, if possible, near lighting similar to your kitchen. Busy patterns can hide crumbs and seams, while solid dark granite may show dust, fingerprints, or water spots more easily. Neither is wrong; it simply depends on how much daily maintenance you prefer.
Finally, treat sealing as routine care, not a one-time ceremony. Granite is durable, but it is still natural stone. Wipe spills quickly, especially oil, wine, citrus, and tomato sauce. Use cutting boards and trivets. Clean with stone-safe products. With these habits, granite countertops can stay beautiful for decades, aging gracefully instead of looking like they survived a cooking show hosted by chaos.
Conclusion
Installing granite countertops is a rewarding upgrade, but it demands careful planning, precise measurements, strong cabinet support, safe handling, and proper finishing. The 11 stepsplanning, measuring, removing old counters, leveling cabinets, templating, dry fitting, setting the slabs, joining seams, installing sinks and backsplash, sealing, and maintaining the surfacework together to create a countertop that is both beautiful and durable.
If you are confident, experienced, and working with a small pre-cut piece, DIY may be possible. For full kitchens, large islands, complex seams, or undermount sinks, hiring professional granite countertop installers is usually the safest and most cost-effective choice. Granite is an investment, and a good installation protects that investment for years. Done right, your countertops will not just hold groceries, coffee mugs, and late-night snacksthey will become one of the strongest design features in your home.
Note: This article is for educational planning purposes. Always follow local building codes, product instructions, stone fabricator recommendations, and safety rules. For large slabs, structural concerns, plumbing, electrical work, or any cutting and polishing, hire qualified professionals.