Table of Contents >> Show >> Hide
- Why Propagate Rose of Sharon from Cuttings?
- What You Will Need
- How to Propagate Rose of Sharon Cuttings: 15 Steps
- Step 1: Choose the right season
- Step 2: Pick a healthy parent plant
- Step 3: Sanitize your cutting tools
- Step 4: Select the right stem
- Step 5: Cut a 4- to 6-inch section
- Step 6: Remove lower leaves and any buds
- Step 7: Trim large top leaves if needed
- Step 8: Prepare your rooting medium first
- Step 9: Dip the base in rooting hormone
- Step 10: Insert the cutting into the potting mix
- Step 11: Create a humid environment
- Step 12: Place it in bright, indirect light
- Step 13: Keep the medium moist, not soggy
- Step 14: Watch for roots and new growth
- Step 15: Pot up and harden off before planting outside
- Aftercare Tips for Newly Rooted Cuttings
- Common Mistakes to Avoid
- Can You Root Rose of Sharon in Water?
- When to Move Your New Plants into the Garden
- Real-World Experiences and Lessons Gardeners Often Learn the Hard Way
- Conclusion
Learning how to propagate Rose of Sharon cuttings is one of those gardening skills that makes you feel suspiciously powerful. One healthy shrub in the yard, and suddenly you are plotting an entire hedge like a person who has discovered a legal cloning machine. The good news is that Rose of Sharon, also known as Hibiscus syriacus, is one of those generous shrubs that does not act overly dramatic when you try to make more of it. With the right timing, a clean cut, a moist rooting mix, and a little patience, you can turn a few stems into brand-new plants.
This method is especially useful if you want an exact copy of a favorite plant. Maybe your existing shrub has flower color you love, a compact habit, or sentimental value because it came from a relative’s garden. Growing from cuttings preserves those traits much more reliably than growing from seed. It also helps if your variety is low-seed or sterile and does not scatter volunteer seedlings all over the yard like tiny botanical confetti.
Why Propagate Rose of Sharon from Cuttings?
Rose of Sharon propagation from cuttings is popular because it is simple, affordable, and practical. Instead of buying several new shrubs, you can start with material you already have. It is also a smart way to multiply a plant that performs well in your yard. If a certain shrub handles your heat, soil, and summer mood swings beautifully, making more of that same plant is just good garden strategy.
For most home gardeners, the easiest route is taking softwood or firm new-growth cuttings in late spring to midsummer. Hardwood cuttings can work too, but this guide focuses on the beginner-friendly method that gives you a solid balance of speed and success.
What You Will Need
- Healthy Rose of Sharon shrub
- Sharp, clean pruners or scissors
- Small nursery pots or cell trays with drainage holes
- Moist soilless rooting mix, such as peat and sand, peat and perlite, or another airy propagation blend
- Rooting hormone powder or gel
- Clear plastic bag, dome, or loose plastic cover
- Plant labels
- Bright, indirect light and a little patience
How to Propagate Rose of Sharon Cuttings: 15 Steps
-
Step 1: Choose the right season
The best time to propagate Rose of Sharon cuttings is late spring through midsummer, when the plant is actively growing and the stems are still flexible but no longer super soft. You want growth that is young enough to root well but mature enough not to collapse at the first sign of inconvenience.
-
Step 2: Pick a healthy parent plant
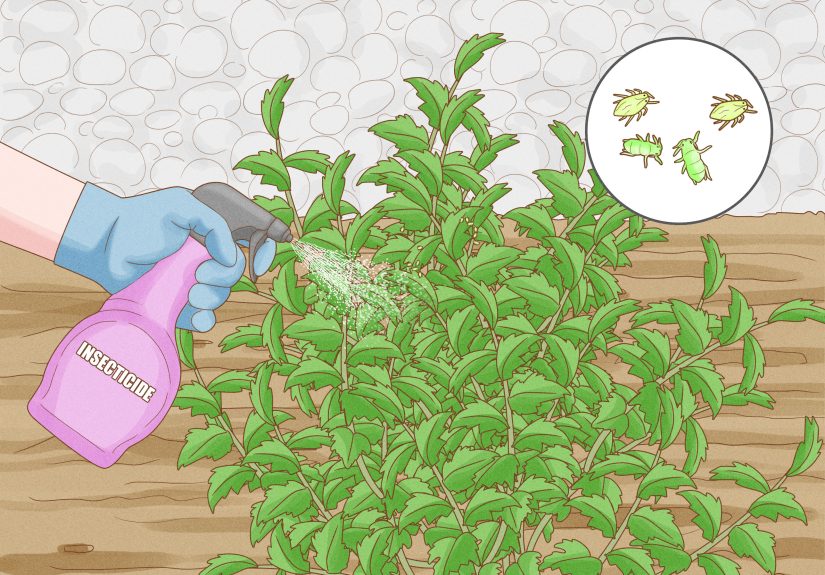
Choose a vigorous shrub with no obvious signs of pests, disease, or stress. Skip stems with yellowing leaves, weak growth, or insect damage. The cutting will only be as promising as the stem you start with, so now is not the moment for charity work.
-
Step 3: Sanitize your cutting tools
Before making any cuts, clean your pruners or scissors. A quick wipe with rubbing alcohol or another disinfecting method helps reduce the chance of spreading disease. Clean tools are one of those boring details that turn out to matter a lot.
-
Step 4: Select the right stem
Look for firm new growth about the thickness of a pencil or slightly smaller. A cutting that is too tender may wilt fast, while a stem that is too woody can be slower to root. Aim for a non-flowering shoot if possible, because blooming stems are busy spending energy on flowers instead of roots.
-
Step 5: Cut a 4- to 6-inch section
Take a cutting about 4 to 6 inches long, making the cut just below a leaf node. Nodes are the little points where leaves attach to the stem, and they are prime real estate for root formation. If you are unsure, look for the place where the stem seems to have tiny joints or bumps.
-
Step 6: Remove lower leaves and any buds
Strip the leaves from the lower half of the cutting. If there are flower buds or blooms, remove those too. This may feel rude, but flowers are energy hogs. You want the cutting focused on building roots, not trying to throw a tiny garden party in a pot.
-
Step 7: Trim large top leaves if needed
If the remaining top leaves are large, cut them in half. This reduces moisture loss while still allowing the cutting to photosynthesize. Think of it as putting the plant on a practical budget. It can keep operating, just with fewer overhead costs.
-
Step 8: Prepare your rooting medium first
Fill small pots or trays with a moist, well-draining rooting mix before the cuttings go in. A soilless mix works better than heavy garden soil because it holds moisture without becoming dense and soggy. The medium should feel evenly damp, not muddy enough to qualify as a swamp.
-
Step 9: Dip the base in rooting hormone
Rooting hormone is not absolutely mandatory, but it can improve your odds and encourage stronger root development. Dip the cut end into the hormone, then tap off the excess. More is not better here. You are helping the cutting, not breading it for frying.
-
Step 10: Insert the cutting into the potting mix
Use a pencil or dibber to make a hole, then insert the cutting so the lower nodes are buried. Firm the mix gently around the stem so it stands upright. Planting it this way helps avoid scraping off the rooting hormone while giving the cutting good contact with the medium.
-
Step 11: Create a humid environment
Cover the pot loosely with a clear plastic bag or place it under a humidity dome. This helps the cutting stay hydrated while it has no roots of its own. Keep the plastic from pressing directly on the leaves if possible. A couple of sticks or plant labels can prop it up like a tiny greenhouse with ambition.
-
Step 12: Place it in bright, indirect light
Put the cuttings in a warm spot with bright, indirect light. Avoid harsh direct sun, which can overheat the cutting and turn your propagation project into a botanical toast situation. A bright porch, shaded outdoor area, or sunny window with filtered light works well.
-
Step 13: Keep the medium moist, not soggy
Check the pots regularly and keep the rooting mix lightly moist. Do not let it dry out, but do not drench it either. Overwatering is one of the fastest ways to invite rot, mold, and general disappointment. The goal is consistent moisture with good airflow.
-
Step 14: Watch for roots and new growth
Rose of Sharon cuttings usually begin rooting in several weeks, though some take longer. New leaves are a good sign, but the best test is a gentle tug. If the cutting resists slightly, roots are likely forming. Do not yank like you are starting a lawn mower. This is a polite test, not a strength challenge.
-
Step 15: Pot up and harden off before planting outside
Once roots are established, move the cutting into a larger container with quality potting mix. Let it grow stronger before transplanting into the garden. If it has been indoors or under cover, harden it off gradually by exposing it to outdoor conditions over several days. Then plant it in a spot with full sun to partial shade and well-drained soil.
Aftercare Tips for Newly Rooted Cuttings
Once your Rose of Sharon cuttings have rooted, the next phase is less glamorous but just as important. Keep young plants evenly watered while they establish. Do not rush to fertilize heavily. A mild, balanced feeding after the plant starts active new growth is plenty. Too much fertilizer too soon can stress tender roots and push weak top growth.
Because Rose of Sharon blooms on current season growth, mature plants can be pruned in early spring. That is helpful later, but for a newly rooted cutting, the goal is simpler: keep it healthy, keep it growing steadily, and do not expect it to turn into a privacy screen by next Tuesday.
Common Mistakes to Avoid
Using stems with flowers
Flowering stems look productive, but they are often poor candidates for rooting. Remove buds and blooms so the cutting can spend its limited energy where it counts.
Letting the medium dry out
Cuttings have no functioning root system yet, so even a brief dry spell can set them back. Check moisture often, especially in warm weather.
Keeping the cutting too wet
Moist does not mean soggy. Waterlogged conditions invite rot fast. Use a light propagation mix and containers with drainage holes.
Putting cuttings in hot direct sun
Bright indirect light is ideal. Too much sun can wilt or scorch the cutting before roots ever get going.
Expecting every cutting to succeed
Even experienced gardeners lose a few. Take several cuttings instead of pinning all your hopes on one heroic stem. Plants, like people, can be unpredictable.
Can You Root Rose of Sharon in Water?
Yes, some gardeners do root cuttings in water, and it can work as a simple experiment if you want to watch roots develop. Still, many home gardeners find that starting cuttings in a moist soilless medium makes transplanting easier and reduces the shock of moving from water roots to soil roots. If you try water rooting, keep the water fresh and pot up the cutting once the roots are well formed.
When to Move Your New Plants into the Garden
If your cutting roots in summer, it is often best to let it continue growing in a container until it is stronger. In colder climates, that may mean overwintering it in a protected area and planting it out the following spring. In warmer regions, a sturdy, well-rooted young plant may go into the ground sooner as long as you stay on top of watering. The main idea is to avoid sending a tiny new shrub into battle before it has armor.
Real-World Experiences and Lessons Gardeners Often Learn the Hard Way
One of the most common experiences with Rose of Sharon propagation is discovering that success is less about magic and more about timing. Gardeners often assume any stem will do, then wonder why a soft floppy tip melts into mush or a woody old branch sits there doing absolutely nothing. The sweet spot is that firm young growth that still feels alive and flexible. Once you use the right kind of cutting, the whole process suddenly seems much less mysterious and much more doable.
Another lesson people learn quickly is that humidity matters more than they expected. A fresh cutting can look perfect on day one, slightly offended on day two, and fully dramatic on day three if the air is too dry. That is why a plastic cover or humidity dome makes such a difference. It creates a gentler environment while the cutting figures out how to grow roots. Gardeners who skip this step often end up learning the hard way that leaves lose moisture much faster than rootless stems can replace it.
There is also the emotional roller coaster of the “gentle tug test.” For a few weeks, the cutting can look unchanged, which makes people assume nothing is happening. Then one day, there is a bit of resistance when you tug lightly, and suddenly the project feels like a triumph worthy of dramatic background music. Rooting does not always look exciting from the outside. Often, the biggest action is happening where you cannot see it.
Many gardeners also discover that Rose of Sharon cuttings are a great way to preserve a specific favorite plant. Maybe the original shrub came from a grandparent’s yard, or maybe it has an unusually beautiful flower color that you do not want to lose. Taking cuttings turns gardening into something a little more personal. You are not just making another shrub. You are continuing a plant story. That is one reason pass-along plants remain so beloved. They carry memories right along with their roots.
There is usually at least one failure in the first batch, and honestly, that is normal. One cutting rots, another dries out, and one mysterious overachiever roots like it was born for fame. The useful experience here is learning not to take that personally. Propagation rewards repetition. Gardeners who succeed consistently are rarely the ones who never fail. They are the ones who stick several cuttings, adjust their method, and try again.
Finally, people often underestimate how satisfying it feels to plant out a rooted cutting months later. What started as a little clipped stem becomes a real shrub with leaves, branches, and a future. It is an oddly joyful process, part science project, part patience exercise, part garden thriftiness. And once you get one Rose of Sharon cutting to root, you will probably look at the parent shrub differently. Not as one plant, but as a whole nursery waiting to happen.
Conclusion
If you want a practical, low-cost way to multiply a favorite flowering shrub, learning how to propagate Rose of Sharon cuttings is absolutely worth it. Start with healthy new growth, use a moist airy rooting mix, keep humidity high, and resist the urge to fuss too much. With the right setup, you can turn a few simple stems into strong young plants ready for pots, gifting, or future spots in the garden. Not bad for a project that begins with a pair of pruners and a little optimism.