Table of Contents >> Show >> Hide
- Before You Start: Figure Out What Type of Toilet Seat You Have
- Tools You May Need
- How to Remove a Standard Toilet Seat
- How to Remove a Top-Mount or Top-Fix Toilet Seat
- How to Remove a Quick-Release or Lift-Off Toilet Seat
- How to Remove a Soft-Close Seat
- How to Remove a Bidet Seat or Electronic Toilet Seat
- What to Do If the Bolts Are Rusted, Spinning, or Stuck
- Mistakes to Avoid
- When It’s Smarter to Replace the Seat Entirely
- What the Experience Is Really Like: of Honest Toilet Seat Reality
- Final Thoughts
Removing a toilet seat sounds like one of those jobs that should take about two minutes and exactly zero emotional damage. Then you flip open the hinge cap, peer into a tiny crevice, and discover that your “simple” project has been engineered like a secret vault. Plastic bolts, metal nuts, top-mount hardware, quick-release hinges, hidden fasteners, bidet connectionssuddenly you’re not changing a toilet seat, you’re auditioning for a low-budget plumbing thriller.
The good news is that nearly every toilet seat comes off the same basic way: find the fasteners, loosen them, lift the seat, clean the area, and try not to say anything dramatic in the bathroom. The tricky part is that different seat types hide their hardware in different places. Some loosen from underneath. Some unscrew from the top. Some lift off with push buttons. And some older seats cling to life with the stubborn confidence of a sitcom villain.
This guide walks through how to remove a toilet seat safely, quickly, and with minimal porcelain-related stresswhether you’re dealing with a basic builder-grade seat, a soft-close model, a quick-release seat, a top-fix seat, or an electronic bidet seat that looks smarter than your first laptop.
Before You Start: Figure Out What Type of Toilet Seat You Have
Before you grab a screwdriver and go full DIY cowboy, take 30 seconds to identify the seat style. That tiny bit of detective work can save you a lot of twisting, yanking, and muttering.
1. Standard bottom-mount seat
This is the most common type. You’ll usually see two bolt caps at the back of the seat. Under the bowl, there are nuts holding the bolts in place. To remove it, you typically pop open the caps, hold the nut underneath, and unscrew from above.
2. Top-mount or top-fix seat
These are common on modern toilets where access underneath is awkward or blocked. The hardware is designed to tightenand loosenfrom the top. If you can’t comfortably reach the underside of the bowl, there’s a good chance this is what you’re dealing with.
3. Quick-release or lift-off seat
This type is built for easy cleaning. Some models have buttons near the hinges; others have a release tab or a lift-off motion. Press, slide, or lift correctly, and the seat comes off without fully removing the mounting hardware.
4. Soft-close seat
Soft-close describes how the lid shuts, not necessarily how the seat is mounted. A soft-close seat may still be bottom-mount, top-mount, or quick-release. Think of “soft-close” as a feature, not a removal method.
5. Bidet or electronic seat
If the seat has a power cord, water hose, side control panel, or remote, treat it like a regular toilet seat with extra rules. You may need to unplug it, shut off the water supply, drain the line, and release the seat from a mounting plate.
Tools You May Need
Not every job needs every tool, but it helps to have the usual suspects nearby:
- Flathead screwdriver
- Phillips screwdriver
- Adjustable wrench or pliers
- Deep socket wrench for older metal nuts
- Nitrile or rubber gloves
- Cleaning spray and rag
- Penetrating oil for stubborn hardware
- Putty knife and small hacksaw for badly corroded bolts
- Towel for kneeling and preserving your dignity
One important reminder: do not overtighten or aggressively pry against the porcelain. Toilet bowls are sturdy, but they are not impressed by brute force.
How to Remove a Standard Toilet Seat
If your seat has visible caps over the hinges and accessible nuts under the bowl, this is the classic version.
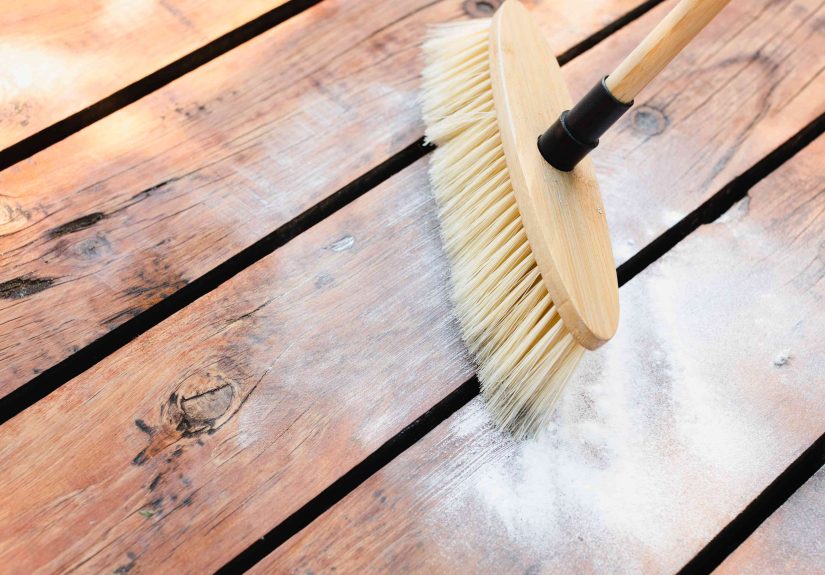
Step 1: Clean first
Yes, really. Give the seat and the area around the hinges a quick cleaning before you start. It makes the job less gross and helps you actually see the hardware instead of excavating it like an archaeological site.
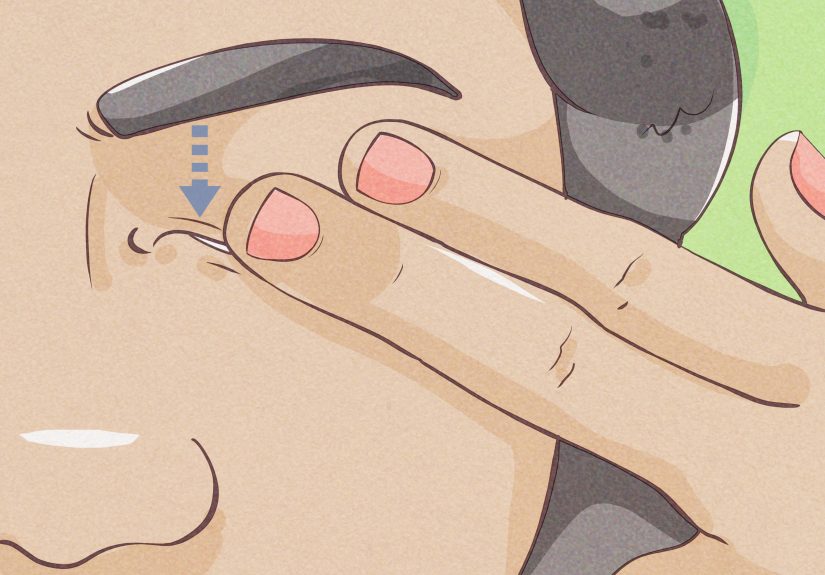
Step 2: Open the hinge caps
At the back of the toilet seat, you’ll usually find two plastic covers. Pop them open with your fingers or use a flathead screwdriver gently if they’re stubborn. Underneath, you should see the bolt heads.
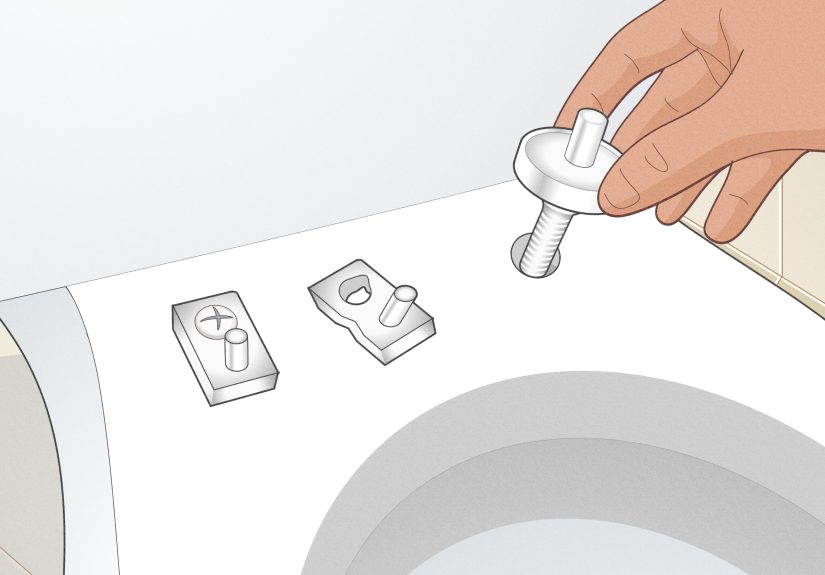
Step 3: Hold the nut underneath
Reach under the rear rim of the bowl and feel for the nuts. Many plastic nuts can be loosened by hand. If not, use pliers or an adjustable wrench. While you hold the nut steady, turn the screw or bolt from the top with a screwdriver.
Step 4: Remove both bolts
Once the nuts loosen, remove the bolts and lift the seat straight up. If washers come off too, set them aside so nothing drops behind the toilet and disappears into the shadow realm.
Step 5: Clean the exposed area
With the seat gone, you’ll probably find a charming ring of grime around the mounting holes. Clean it thoroughly before installing a new seat. This is the part no one puts on social media, but it’s arguably the most satisfying step.
How to Remove a Top-Mount or Top-Fix Toilet Seat
Top-mount seats are designed so you can work from above, which is wonderful news if the underside of the bowl is hard to reach. The hardware often includes rubber bushings or anchors that sit in the bowl holes and tighten from the top.
To remove one, flip open the hinge covers and look for the screw heads. Use a screwdriver to loosen them from above. As the screws back out, the anchors or bushings below will release. Lift the seat away once both sides are free.
If the hinge assembly feels like it’s locked into place, don’t force it sideways. Loosen the screws all the way first. On many top-mount models, the hinge rotates or lifts once the tension is gone.
This style is especially common on sleeker toilets with less room underneath, so if you’ve been trying to access the nuts from below and finding nothing helpful, stop wrestling the bowl and check the top again.
How to Remove a Quick-Release or Lift-Off Toilet Seat
This is the seat type that makes you feel like modern life occasionally gets something right.
Quick-release seats are designed to detach for cleaning without removing the whole mounting system every time. Look closely near the hinges. You may see:
- Two push buttons on either side of the hinge
- A center release button
- A tab underneath the hinge area
- A straight upward lift-off design
Press the buttons or release tab while lifting the seat. On some models, the seat slides forward first, then lifts off. On others, it pops directly upward. If it doesn’t move easily, don’t assume you need more muscle. You probably need a different motion.
Once the seat is removed, you can decide whether you also want to remove the mounting posts. If yes, flip open the hinge covers and unscrew the hardware from the top or bottom depending on the model.
Quick-release seats are especially handy if your real goal is deep cleaning rather than full replacement. They come off fast, go back on fast, and save you from doing acrobatics behind the bowl every time the hinges get grimy.
How to Remove a Soft-Close Seat
Here’s the mildly confusing part: a soft-close seat is not removed in a special “soft-close way.” It just has hinges that lower the lid slowly. Removal depends on whether the seat is standard, top-mount, or quick-release.
So if your seat closes like it has trust issues and fear of loud noises, that’s nicebut it doesn’t tell you how it’s attached. Check the hinges, identify the mount style, and remove it using the matching method.
How to Remove a Bidet Seat or Electronic Toilet Seat
This is the only category where you should absolutely slow down and read the manufacturer’s instructions if you still have them. Bidet seats and electronic washlet-style seats often mount to a base plate and connect to both water and power.
Step 1: Unplug the unit
If the seat has a power cord, unplug it first. No one wants a bathroom project with bonus electricity.
Step 2: Shut off the water supply
Turn off the toilet’s supply valve. Some bidet seats share the toilet’s water line through a T-valve, so you may need to drain pressure by flushing the toilet.
Step 3: Disconnect the hose if needed
Depending on the model, you may need to disconnect the water line from the seat or from the junction valve. Keep a towel handy because even well-behaved plumbing enjoys one last dramatic drip.
Step 4: Release the seat from the base plate
Many electronic seats have a release button or detach button near the side or rear. Press it and slide the seat forward to remove it. After the seat comes off, you can remove the mounting plate by unscrewing the bolts.
If your bidet seat does not budge, do not tug on the cord, hose, or side panel. Those are accessories, not handles.
What to Do If the Bolts Are Rusted, Spinning, or Stuck
Ah yes, the part of the project where the toilet seat decides it has lived here forever and intends to die here.
Try penetrating oil first
If you’re dealing with metal hardware, apply a small amount of penetrating oil to the nut and bolt. Let it sit for several minutes, then try again with a screwdriver on top and pliers or a socket underneath.
Hold the nut more securely
Sometimes the issue is not corrosion but spinning. If the bolt turns but nothing loosens, the nut below isn’t being held firmly enough. Switch from fingers to pliers, an adjustable wrench, or a deep socket.
Use a basin wrench or socket in tight spaces
Toilet undersides are not famous for generous hand clearance. A basin wrench or deep socket can help you reach nuts tucked into awkward spots without inventing new wrist joints.
Cut the bolt if necessary
If the hardware is truly fused, cutting may be faster than fighting. Protect the porcelain first with duct tape and a putty knife, then use a small hacksaw to carefully cut through the bolt or hinge assembly. Once cut, tap or pull the remaining hardware out gently.
This is not the glamorous option, but it is often the correct oneespecially with old brass or corroded metal bolts that have officially stopped negotiating.
Mistakes to Avoid
- Don’t force the seat upward before the hardware is fully released.
- Don’t over-pry hinge caps so hard that you snap them or chip porcelain.
- Don’t ignore the mount style; top-fix and quick-release seats fool a lot of people.
- Don’t forget water and power when removing a bidet or electronic seat.
- Don’t overtighten new hardware later on. Secure is good; porcelain-cracking enthusiasm is not.
When It’s Smarter to Replace the Seat Entirely
If the seat is cracked, stained, wobbly, or outfitted with hardware that looks like it survived several administrations, replacement is usually the better move. Most new seats are easier to install than old ones are to remove, and many now include corrosion-resistant plastic hardware, soft-close hinges, quick-release features, or top-down installation.
If you’re buying a new seat after removal, measure first. Most bowls are round or elongated, and many replacement seats use a standard bolt spacing of about 5.5 inches. A few newer or specialty bowls may vary, so it’s worth confirming before bringing home a seat that fits your bathroom only in spirit.
What the Experience Is Really Like: of Honest Toilet Seat Reality
In theory, removing a toilet seat is one of the simplest maintenance jobs in a house. In reality, it often becomes a tiny master class in patience, body positioning, and learning not to trust plastic caps that look decorative but are actually hiding the whole operation. If you’ve never done it before, the first surprise is how many toilet seats don’t obviously reveal how they come off. You expect two bolts and a quick twist. Instead, you get mystery hinges, hidden fasteners, and a growing suspicion that your toilet seat was installed by a magician.
A very common experience is the “everything looked normal until I reached under the bowl” moment. That’s when you discover the underside is cramped, dusty, and apparently designed for a hand much smaller than your own. A plastic wing nut may come off in seconds, which feels fantastic. But an older metal nut? That thing may have fused itself in place with years of humidity and bathroom air. Suddenly you’re on the floor with pliers, a flashlight, and the posture of someone looking for a contact lens in a submarine.
Another typical experience is realizing your seat is not standard at all. You keep trying to loosen something from below, but there’s nothing useful to grab. That’s usually when you’re dealing with a top-mount design, and the removal method is sitting right there under the hinge covers the whole time. Once people figure that out, the job goes from “Why is this impossible?” to “Oh, come on, it was on top the entire time?” Toilet seats have a special gift for teaching humility.
Quick-release seats create a different kind of confusion. Homeowners often assume the seat is stuck because it doesn’t unscrew like the old one. Then someone notices a little button, presses it, and the seat lifts right off like a polite spaceship dock separating from its station. That moment is deeply satisfying. It also makes you mildly annoyed at every older toilet seat you’ve ever scrubbed around by hand.
Then there’s the bidet or electronic seat experience, which tends to begin with confidence and end with a reminder that this is no longer just plastic and bolts. The power cord, the water line, the side controlssuddenly the project feels less like swapping a seat and more like carefully uninstalling a tiny appliance that happens to live on your toilet. The smartest homeowners pause, unplug it, shut off the valve, lay down a towel, and move methodically. The less patient ones usually get surprised by a dribble of water and a brief lesson in why preparation matters.
And finally, there is the classic old-seat removal story: one side loosens right away, the other side fights like it pays rent. That uneven resistance is almost part of the ritual. But once the seat finally lifts away and you clean the area underneath, there’s a weirdly rewarding sense of completion. The toilet looks fresher, the seat sits better, and the bathroom somehow feels more respectable. It’s not glamorous, but it’s one of those small home tasks that delivers an outsized feeling of victory. You came, you saw, you defeated the bathroom hardware. Not bad for a Tuesday.
Final Thoughts
If you know where the fasteners are and what kind of seat you’re dealing with, removing a toilet seat is usually an easy DIY project. Standard seats come off with a screwdriver and a wrench. Top-mount seats loosen from above. Quick-release seats often detach in seconds. Bidet seats need a little more caution, especially around water and power. And rusted hardware? That’s less a removal process and more a negotiation, but even that can be solved with the right tools and a calm approach.
So yes, your toilet seat may currently seem determined to remain part of the porcelain forever. But with the right method, it will come off. Every type does. Some are just more dramatic about it.